• Steel Soldiers now has a few new forums, read more about it at: New Munitions Forums!

  • Microsoft MSN, Live, Hotmail, Outlook email users may not be receiving emails. We are working to resolve this issue. Please add support@steelsoldiers.com to your trusted contacts.

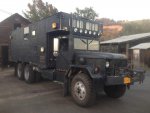
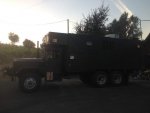
M46A2C Brutus lives on

TB58

Member
289
2
18
Location
Fayetteville, Nc
The good -
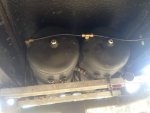
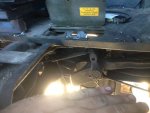
Got the air tanks relocated. This is the new location in-between the frame rails just in front of the tow pintle. far more protected than their previous location.
IMG_0649.jpg
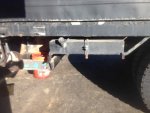
Originally the air tanks were mounted under this fuel tank. The tank and the mounting bracket in front of it will be removed tomorrow. There was a generator mounted here before. The generator died and I didn't feel it necessary with the solar on the roof. I plan to put some under bed tool boxes in the empty space.
IMG_0650.jpg
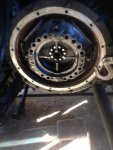
The new clutch and pressure plate waiting on a transmission to compete them.
IMG_0651.jpg
The not so good -
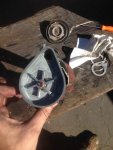
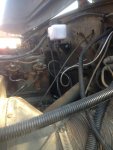
I found a small leak on the master cylinder so I pulled it to see if it was worth rebuilding. The inside of the bore has some corrosion and pitting. If I were to hone it rebuilding would be worthwhile, going the lazy route and am replacing it.
IMG_0652.jpg
 

tommys2patrick

Well-known member
705
298
63
Location
Livermore, Colorado
This is good thread, good pictures and explanations. Thanks for posting up. Hope your looming deadline still works for your travel plans. will be rooting for a safe and trouble free trip. Keep up the good work!
 

TB58

Member
289
2
18
Location
Fayetteville, Nc
Thanks tommy, Still hoping the transmission shows on time.

yesterday....
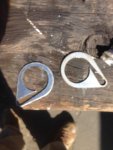
When I bought the truck the in tank fuel pump was bypassed and had an external 24 volt pump coming out of the drain in the bottom of the tank. This is the pump that failed in Canada. On a whim I hooked up the in tank pump just to see what it would do. Sure enough I hear it going to town in there, but no fuel coming out. Dropped the tank and pulled the pump and found this
IMG_0654.jpgIMG_0653.jpg
Turns out the pump is an impeller that uses the shims in the left picture to channel the fuel up the feed tube. I can't remember if I found 3 or 4 of the shims in the bottom f the tank, also found the lower cover. It is pressed into place, no positive attachment.
IMG_0658.jpg
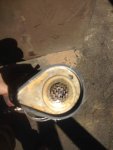
used a chisel to stake the cover in place. Hopefully it will stay in there this time. Because I am paranoid I cleaned up the plumbing for the external pump and put in some valves. Now when the internal pump fails I just have to flip two valves and move the plug and I'm back on the road.

Had a bit of a distraction. A small fire started just south of us. Cal fire was awesome. Within 15-20 minutes they had a spotter, OV-10 Broncho, and two bombers, S-2 Tracker, and a Huey on station. Huey dropped off a strike team and started running Bambi buckets. Also had quite a showing of ground units. They had it all but out within an hour or so. Totaled 10 acres.

IMG_0661.jpgIMG_0666.jpg
Got all the junk off the left frame rail and found an interesting sight. Turns out at some point Brutus was tan. I had thought all of these water treatment trucks had been removed from inventory by the time tan was the cool color in the Army. I do know that It was registered the first time in '92. Having a heck of a time finding the under bed boxes I want, so for now I will have a huge empty spot on my drivers side.
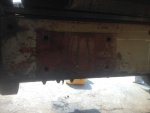
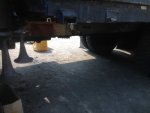
IMG_0667.jpgIMG_0668.jpg

Today I swapped out the lube in all of my gear boxes. some nasty oil but no scary chunks. Did a bunch of small things to clean up wiring and such. My step dad is building a box that will mount behind the fuel tank. This box will be for all my fluids, it will fit two 5 gal buckets plus a few smaller jugs. The door will also have a latch on it so I can secure the steps for the living area. This will allow me to keep them mounted while driving. Though it sucks not having the transmission yet, it is giving us plenty of time to take care of a whole lot of other things that will make things go down the road better.
 

TB58

Member
289
2
18
Location
Fayetteville, Nc
sigo, hadn't thought about it being from the Marines. I haven't found any evidence of other desert colors. The layers are red primer, dark green, tan, white/orange and a top coat of black.

Forgot to mention, a few days ago when I pulled the master cylinder I decided to pull the air pack to see what kind of shape it was in. When I removed it a whole lot (maybe a pint) of fluid came out of the vent line hole. I'm pretty sure this wasn't supposed to happen so I got a replacement. Thought about rebuilding it but I am quickly running out of time so went for expedience.

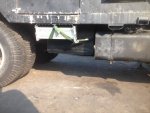
Today finished a few projects. My step dad built a box to go behind the fuel tank to hold all my oils. It will hold two 5 gal buckets plus a few misc other bottles. We also relocated the mount for the steps going into the back so now they fold up and tuck under the truck. Phone died so I couldn't get a picture of it folded up.
IMG_0676.jpg
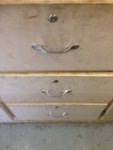
Also put some latches on the drawers inside. Will be nice to be able to drive without them coming open.
IMG_0675.jpg
also started going through all the grease points but ran out of grease so will have to get more tomorrow. The master cylinder will be here tomorrow so I should be able to get that in and bled. Not sure where the transmission is, but should find out in the morning.
 

TB58

Member
289
2
18
Location
Fayetteville, Nc
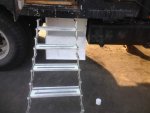
Here is a picture of the box closed up with my ladder folded ready for the road.
IMG_0677.jpg

Got the brakes all done today. Man they feel so much better now. The master cylinder when in with a remote reservoir kit. To be honest bleeding brakes is probably the job that I despise more than about anything. Until this morning I had planned to do the old pump the brakes and bleed. I had to go into town this morning for a few other things and I saw a half gallon weed sprayer for under 9 dollars. I grabbed it thinking worst case I would be out 9 bucks. Best decision I made so far. So freaking easy to bleed the system with pressure. The hose on the sprayer fit perfectly onto the barb that came with the remote reservoir kit. took about a half hour to bleed everything. It was also convenient that the fluid in the truck was amber and the new fluid was purple. A whole lot of water and crud came out of the system. I flushed about two quarts through it until everything coming out was clean and no bubbles. The pedal feels so much better than it did before, nice and firm and the vent sounds like it should. Here is where I mounted the reservoir.
IMG_0679.jpg

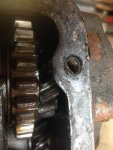
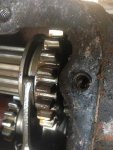
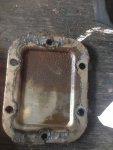
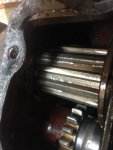
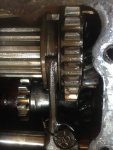
We will be going down to Haward in the morning to pick up the transmission. We were getting everything ready for the install tomorrow and got to talking about the PTO. We decided we should look into it since it has been on two transmissions that failed. the gear that meshes with the reverse idler gear was in good shape, but when spinning the output shaft it made an unpleasant sound. We pulled the outer cover and found lots of corrosion and piting. Also can see the metal shavings packed into the groves in the 4th picture. below are the pictures. This PTO will not be reinstalled until it has been rebuilt. Sure hope I don't need the winch driving across 80.
IMG_0681.jpgIMG_0680.jpgIMG_0684.jpgIMG_0683.jpgIMG_0682.jpg
 

TB58

Member
289
2
18
Location
Fayetteville, Nc
having to wait on the transmission kinda turned out to be a good thing. It pushed us to do a lot of projects we would have otherwise pushed off till later. The ladder came from an RV shop up in Alaska. It is meant for a drop in camper for a pickup bed. they make them in a bunch of different heights. Now that I don't have to remove and install it all the time it is really convenient.
 

rustystud

Well-known member
9,298
3,072
113
Location
Woodinville, Washington
where would you put the relief valve on them?
If you perform the retrofit of adding a zerk fitting to the trunnion cap, you can install the relief valve where the old zerk fitting went on the bottom of the trunnion. I did this after I blew out my oil seals by over pumping in the grease ! :doh:
 

TB58

Member
289
2
18
Location
Fayetteville, Nc
Its Alive.....
Got the transmission today, had to chase it all over northern California but we ended up with it a day before the scheduled delivery date. Got it installed and everything buttoned up. Took it for a short test run this evening and everything seems to be in order. Will do a longer run tomorrow.

IMG_0688.jpgIMG_0687.jpg

When we picked up the transmission my pessimism flared up. I noticed the bell housing mating surface was covered in corrosion. My first thought was that the though it was sold as rebuilt, it had been done so long ago that the whole thing had corroded and would no longer be any good.
IMG_0686.jpgIMG_0685.jpg
When we got it home I immediately pulled the top cover and was greeted by a nice coating of preserving oil and bright shiny gears. A little scrubbing and the corrosion was gone. The install went scarily smooth. With everything mounted and attached I finished greasing the rear half of the truck. Then the moment we had been waiting for, I started it up, running great, no weird noises and transmission felt great on the test drive.

We might be adjusting the fuel tomorrow. The adjustment screw with the two jamb nuts has at least half an inch of threads showing. When I am pulling a hill boost will go up to about 15psi and EGT will shoot past 1100 quickly. My thermocouple is installed after the turbo so I try to keep the temp below 1000. This is a guess at a good limit on my part. From what I have read 1200 pre turbo is an ok momentary temp so I go with 1000 after turbo. going up a grade I will have to let off throttle until it is almost at the idle position to keep the temps manageable. From what I have read it sounds like if I reduce the fuel it will allow me to hold higher throttle position longer while keeping temps lower. Not sure if I am understanding correctly. There isn't much smoke unless I really get on it, or I have bad fuel, at idle I can see a very fine amount if I have the right back drop.
 

TB58

Member
289
2
18
Location
Fayetteville, Nc
Well lots of stuff to work on. Was getting ready to head up to Va to visit my brother and his family. Going through my prerun checks, went to check the tire pressures. One of my inner duals nolonger has a valve stem. Found a place intown that will fix that for me tomorrow.

Got my empty and full weights. This thing is a fat pig. There is no way this thing was under its gross weight with all the filtration equipment in the back. Empty weight with everything not bolted down removed was just over 22,000lbs. It seems to me that this box probably should have been put on a 5ton. Probably explains my continued problems with hub seals.
 

TB58

Member
289
2
18
Location
Fayetteville, Nc
Makes me wonder how heavy this thing was with the filtration equipment and water treatment chemicals loaded up. No way it was within its max gross weight. Possibly why there are so few around.

I would like to drop a few thousand pounds off of his back. Some rough beer math, i figure there is about 1200 lbs of lumber used to frame out the back. Add in a few hundred pounds of appliances, maybe another 200 in solar and batteries, the another few for random stuff. I think if I were to gut the living area I might be able to get him down to right at 20,000lbs. That is a very high starting point and a whole lot of work. Closed cell foam insulation would be around 250lbs, then go as minimal on interior walls, cabnets and counters.

I removed about 3200lbs of my stuff to get the empty weight. I would say large chunk of that was tools and oils. Food and water were a close second, canned food is heavy, as is 25 gal of water. The rest is clothes, army junk, and a few odds and ends.

Short of bobbing a few feet off the end of the box I really dont see a way to drop about 5000lbs out of this rig to give me a nice buffer between loaded and max weights.
 
Top
AdBlock Detected

We get it, advertisements are annoying!

Sure, ad-blocking software does a great job at blocking ads, but it also blocks useful features of our website like our supporting vendors. Their ads help keep Steel Soldiers going. Please consider disabling your ad blockers for the site. Thanks!

I've Disabled AdBlock
No Thanks