• Steel Soldiers now has a few new forums, read more about it at: New Munitions Forums!

  • Microsoft MSN, Live, Hotmail, Outlook email users may not be receiving emails. We are working to resolve this issue. Please add support@steelsoldiers.com to your trusted contacts.

M51A2 hydraulic power steering problem ross hydrapower

73m819

Rock = older than dirt , GA. MAFIA , Dirty
Steel Soldiers Supporter
In Memorial
12,195
327
0
Location
gainesville, ga.
In reality, the control valve actuator rides in a grove that goes all the war around the steering shaft, the worm gear/shaft moves a TINY bit as you try to steer, that is why there is a thrust washer on each end of the worm gear in the gear box. this TINY movement is what activates the actuator for the valve. The movement is maybe 1/8" at the most, real easy to miss if your not looking for it.

You need to jack the front up, set the wheels straight, CLEAN the grove in the steering shaft, turning the shaft as you do, ANY crap in it WILL affect the steering, once clean, center up the wheels, move the steering wheel back and forth (DO NOT move the wheels) to get any load off the worm gear, center up the steering wheel, install the valve, as you turn the wheel moving the wheels, you will see the shaft move a TINY bit, adjust till the shaft moves the actuator same distance. This can be done with the engine off.
 
Last edited:

Robo McDuff

In memorial Ron - 73M819
Steel Soldiers Supporter
2,892
1,520
113
Location
Czech Republic
Did not have time to do some work yet (taking care of my sick grandson), will be Sunday.

The TM did needed some deciphering here and I am trying to avoid doing something stupid and maybe messing things up, so just a quick check if you don't mind.

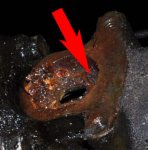
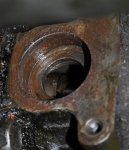
Below is the earlier pic of the mess on the control housing.

control valve assembly 008c2-ps.jpg

The arrow points at a ridge; it looks that it goes around this oval hole through which the actuating lever sticks to reach the cam on the steering shaft. Are these the plain washer X and rubber washer W in Swiss' exploded view?

This cleaning I need to do very carefully not to get more mess into the control housing and also not to damage those washers, if that's what they are. If removed after cleaning, there might be enough room to clean the cam grove and surroundings without taking the control housing off. Like it is now, I don't have enough room to get into the control house to clean it.

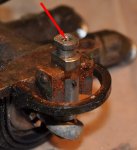
The underside of the actuating lever, the side moving through the grove, has a hole in it, about 3 mm deep, with some grease in it. Should there be a pin in that hole which actually goes through the grove or is it just a grease reservoir?

control valve assembly 023c-ps.jpg

Did I already say thanks for the help and info? Without the people from this site I would not have come so far. :not worthy: :beer:
 
Last edited:

73m819

Rock = older than dirt , GA. MAFIA , Dirty
Steel Soldiers Supporter
In Memorial
12,195
327
0
Location
gainesville, ga.
In the first pic, take those TWO out, one is like a seal, the other is a washer, things will work without them if they are trashed, they HAVE to come out to clean the grove

In the second pic, that hole is just there, no pin goes there, would not hurt to put some thick grease in the grove, would not need a lot, don't want to load up the pin and break it.

pm me your email, if you need some pics out of the G744 book (first 39 series parts book BEFORE TM.), I can have my wife take and send to you

As rusty as that valve, it would not hurt to replace it, then clean the old one and keek as a spare.
 
Last edited:

Robo McDuff

In memorial Ron - 73M819
Steel Soldiers Supporter
2,892
1,520
113
Location
Czech Republic
Actually, its only the area around the control housing that is rusty, inside the control valve unit things look very nice to me. If I had the $$ and lived in the Netherlands or the US, I would replace the whole steering unit in one go including gear box and steering shaft. However, I haven't and I don't.
If I can get this cleaned out and cleaned up - sealed properly, it has to do for the moment. The first high expense priority is the brake system. Redo mc and airpack, maybe dual the system.

The only shop I found in continental Europe who has such things both NOS and used is Reomie in the Netherlands. Used means coming off surplus trucks and laying around for a long time, so I would have to replace all seals to begin with. But the big killing thing is shipping costs. Seals and small units are OK if you are not in a hurry, but things between 5-100 lbs or very bulky are very expensive. Somewhere early spring I might go to the Netherlands with some jeep guys and come back with a car full of stuff so the $ 350 fuel costs outweighs shipping costs.
 

Robo McDuff

In memorial Ron - 73M819
Steel Soldiers Supporter
2,892
1,520
113
Location
Czech Republic
Took an hour off and checked on the truck.

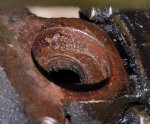
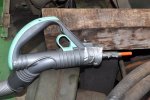
Took another picture of the mess and then made a nice contraption on our vacuum cleaner to reach those awkward places to clean the area before taking out the two washers. Seeing it the first time, you would not think anything can be taken out of there.

control valve assembly 039c_resize.jpg control valve assembly 041c_resize.jpg control valve assembly 045c_resize.jpg

At right the rubber ring and the washer. Not really ok but cleanable and with some grease probably better than nothing when reinstalling everything.

So per instructions I cleaned the area as good as possible with a vacuum cleaner, then after taking the washers out cleaned also with the vacuum cleaner the specks that had dropped down while cleaning and removing the cover and the washers.

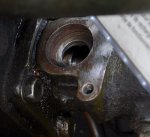
Below the control house after the washers are out. You can see the specks of rust laying on the grove, but it all seemed to have come from above. Vacuumed it away.

control valve assembly 048c_resize.jpg

After that, we marked the steering wheel and wheel positions carefully, and cleaned the grove. Soldier 1 using a medium large screwdriver with some soft cloths around the tip and keeping it in the grove, soldier 2 very slowly turning the steering wheel. No dirt, only a bit dark oily stuff on the cloth.

Checking everything, it looks that only the area under the actuating lever cover is rusted and a mess, the control house and the valve assembly internals look OK.

One problem. When turning the steering wheel to the right, about a quarter turn or less way from straight ahead, there is a "clack" sound and feeling that somethings jumps over a ridge or something like that (like cracking a knuckle in your finger). The feeling and sound is each time at the same position of the steering wheel. We did not have time to find out exactly where it is coming from but it certainly does not come from the steering wheel bearings or steering shaft cam. Almost laying with my ear on the steering gear I also did not had the feeling it came from there, more somewhere on the right front wheel.

That's it for today
 

Robo McDuff

In memorial Ron - 73M819
Steel Soldiers Supporter
2,892
1,520
113
Location
Czech Republic
I found a good larger company specialized in hydraulic stuff. Showed them the valve assembly and the guy there saw no reason to scrap it. He actually had the seals on stock and, very big surprise, even the hose connectors. The seals came to a dollar and twelve cents for all three seals (two seals and one rubber packing). :jumpin:

He put them on the spool and I tried to see if the spool fitted. Seeing the clumsiness, he quickly took the stuff out of my hands and very carefully but securly put the spool back into the sleeve and housing, never steel touching steel. Fits perfectly, I will leave it at that.

I did not have the old hoses with me but I can go back there tomorrow if needed and they will make the hoses based on the old ones. Will set me back $ 14 per hose, 10 inch long including new connectors. He thought the elbows were OK and, since they were not leaking, do not need to be replaced; the new connector will close secure enough on the old elbow.

They probably can provide seals for the brake system also, apart from very strange forms.

So I am going to put everything back again this weekend. Some detailed questions or planned strategies which the TM ....20 and ...34-2-2 do not address.

  1. What is the best way to preserve the electrolytic and otherwise cleaned parts, especially the actuating lever and the arms holding it. Some zinc primer and paint, or rustoleum primer and top coat, or just a lot of grease or WD 40?
  2. The control house holding the cam of the steering shaft looked completely clean and dry inside. When putting the actuating lever back into the cam, should I supply some oil or grease on the cam first?
  3. I will put back the ring washer and rubber washer to keep dirt out of the control house. I will put some grease on it to keep it nice together and keep water away.
  4. The seal holding the cover for the actuating lever seems in one piece but clearly did not work good enough. Nobody here has such a seal. I was thinking to apply some liquid sealing on both sides of the rubber sealing once everything has been lined out and is working good. Any better idea I can apply here in the Czech Republic?
  5. The steering gear box oil has been replaced already but I will loosen the adjustment nut a fraction to see if it helps make the steering better. I had problems before tightening it, but maybe I overdid it.
 

Robo McDuff

In memorial Ron - 73M819
Steel Soldiers Supporter
2,892
1,520
113
Location
Czech Republic
Did a day of shopping and I think/hope I got everything. Tomorrow everything has to be put back and work since the truck has to move 15 feet to make room for some wood for burning.

I took the two old hoses connecting the valve assembly to the power cylinder and had new ones made. 10 minutes work, facsinating to see, $ 24 including all connectors.

Also bought
- a square meter of sealing-gasket paper 3 mm, as eventuality for the steering gear box. $ 3
- good liquid gasket sealant, to use around the actuating lever cover and maybe one the paper $ 17.
- the washer for around the actuating lever where it goes into the control housing.
- two small honing stones for on a drilling machine $ 2.5
- a special head for our grease pump so it will fit the US-type grease nipples. $ 2

Cleaned the last bits of the valve assembly, used the honing stones to clean the hole for the pin in the actuating lever. When dissembled, it was stuck and did not move freely, now the lever can cartwheel around the pin. Everything is clean and ready to be assembled. When collecting the hoses from the truck for comparison, I did not have time to do anything (and I had clean clothes) but I did check the cracking finger knuckle sound. Definitely the steering gear box. I will loosen the adjustment nut a 1/4 turn, if that does not help I will open the gear box AFTER we moved the truck.

I forgot. A few days ago the Dot 5 was delivered, 0.7 liter so I can at least fill the MC and try find the leak and hopefully maneuver with the truck with working brakes.
 
Last edited:
Robo McDuff

In memorial Ron - 73M819
Steel Soldiers Supporter
2,892
1,520
113
Location
Czech Republic
Re-assembled the control valve assembly

Put the steering back together again today.

Before doing anything I loosened the steering gear box adjusting nut a quarter turn. The pronounced clack is less, but I have a lot of free play in the steering wheel. Still the left turns goes hesitant, right goes smooth.

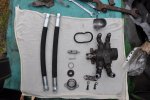
PS-reassemble_11_resize.JPG PS-reassemble_07c_resize.jpg

On left the stuff ready to re-assembly. On right the cleaned control house with cam. Cleaned the last bits there as well.

I did not paint anything. I put a lot of grease on the parts "sticking out", that is, the actuating lever and its turning point, pin etc, the old rubber washer and new plain washer. Also filled the hole on the end of the lever with grease and put grease there around as well, to help things run smooth and stop immediate rusting again.

Had some problems getting the lever into the grove, in the end I put the four screws hand-tights in and just moved the steering wheel a bit and wriggled with the lever. The biggest pita was getting the screws back in; not much room to get a grip on them or a smart tool in there.

We tried without engine: the movement is really very short, about 2 mm each way.


:???: start your engines :???: .... will it work or.... turned several times full left - full right etc etc and topped up the oil repeatedly to get air out. From the beginning, right turn I can do with the palm of my hand. Even without wheels on, left turn, that is from full right to full left, is like you are pulling something over a washboard.

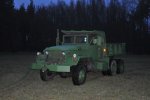
Put the tires back, adding brake fluid ..nic.. needs more time. So I made a few careful circles over the meadow and drove the truck back to its new location (5 meters to the side and with its nose the opposite direction). Got the chance to make a few new pics of the truck.


truck no background_01_resize.JPG


While driving:
1) Steering right is smooth, steering left is a washboard and needs both hands but now is doable. I think its both the adjusting nut and the cleaning of the control valve assembly that helped. However, it still is NOT OK aua aua aua

The washboard: that feels more like a toothed wheel not going smoothly over a cam than a problem of the hydraulics itself (power cylinder or control valve)?? Like going right it pushes itself good into the grove - cam but left is lifted a bit and does not grip permanently.

2) when driving slowly, like with less than 1100 rpm, power steering does not give much help. Is that normal or is the pump not delivering enough power? I don't have a measure tool ready yet so I don't know what the delivered power range is.
 

73m819

Rock = older than dirt , GA. MAFIA , Dirty
Steel Soldiers Supporter
In Memorial
12,195
327
0
Location
gainesville, ga.
I hate to say it but you need to remove the gear case cover and check the worm and follower, make sure the gear case IS NOT full of water and the worm or follower is not rusted, put your hand on the slector shaft (the shaft that does the steering) where it comes out of the gear box before you pull the cover see if you feel the wash board, could also be a bad bearing in the steering column or box
 

Robo McDuff

In memorial Ron - 73M819
Steel Soldiers Supporter
2,892
1,520
113
Location
Czech Republic
GA Rally update on steering

GA Rally update.

Drove around a few blocks on the meadow with the truck. Free play is acceptable, one side turning OK but not great, other side turning really still feels like washboard. I tried to get off the steering wheel with a heavy duty puller but only managed to put some more cracks in the plastic (or whatever it is). I also tried to remove the entire steering shaft, but even after loosing all screws, could not get any movement in it.

Probably the bearings are shot and/or some of the cogwheels in the steering house.

1) are the bearings standard even today or special and need to be bought at the rally?

2) steering gear including house and all units would be too expensive and too heavy to take back, but maybe the cogwheels alone?
 
Last edited:
Robo McDuff

In memorial Ron - 73M819
Steel Soldiers Supporter
2,892
1,520
113
Location
Czech Republic
The thread includes a lot of good advice, so I will continue here rather than start a new thread.

Most important remark: reread your own threads BEFORE you start work again, can help and at least makes you feel less stupid.

Since 2014, the truck has not moved much, and the last two years not at all.When it stopped, steering was better but still not ok. Now, we needed two people to get the steering wheel turned for a left turn, and even then it does not work good. Right turn is heavy at low speed but still ok.

I found out that I forgot to put the cover back that seals the lever between valve and steering shaft. Did not look very rusted though, thanks to a lot of grease everywhere. So my idea was that the bad steering MUST be centered around the valve. Took it out again, went back to the hydraulic mechanics, and they said that this piece of equipment was definitely ok, look elsewhere, especially the "power cylinder".

1) Anybody ever redid the power cylinder?

2) On the steering shaft worm section (this little box at the end of the steering shaft, there is a square bolt. What is that for?
 

Robo McDuff

In memorial Ron - 73M819
Steel Soldiers Supporter
2,892
1,520
113
Location
Czech Republic
As starting remark, the system is not leaking oil anywhere, so all outside seals seem to be ok.

Started to take down the rest of the steering assembly following TM ...20 and especially TM ..34-2-2, pages 70 to around 150.

IMG_0524c_resize.jpg

"Drain the steering gear box". Did anybody ever manage that without spilling oil onto the frame (or his cloths)?

IMG_0523c_resize.jpg

Well, it definitely is a Ross Hydrapower HP70. The cover was sealed with some blueish liquid seal; the previous owner has messed around with the steering as well.


IMG_0525_resize.JPG IMG_0526c_resize.jpg

Trying to look inside, it looked nice and well-oiled to me. However, looking at the pics I made with my phone without knowing what I photographed, I noticed some weird things when downloading and inspecting them. Looking at the inside part of the Pittman lever, this weld is how the lever is connected to the pittman ax?

In the pic at right, I see some debris on the "floor" in the lowest part of the gear box. I will check tomorrow what it is and where it is coming from. Also some damage on the edges of the groove. Is that normal wear?

My hydraulics repair man suggested that the power cylinder probably is the culprit or at least faulty as well. Ron, rereading your comments, is it possible to take the power cylinder off without removing the entire steering box and without removing the pittman?


And I did something incredible stupid.
:oops: aua :rules: :cookoo:

I made sure to line up everything and note positions of steering wheel and wheels etc etc. And then, working alone, after taking the gearbox cover off, without thinking I turned the steering wheel to "feel" if it now turned smoother. So the pittman jumped outside the lower groove.

aua


The wheels were at a complete full left turn when this happened, and as said, I noticed where the steering wheel was before I started turning. I think I got the pittman back in the proper groove after returning the wheel to its noted position, but I probably should realign everything from zero to be sure. The pic on the left shows the position of the pittman with the wheels max left turn


Another question, about the steering shaft. I looked at the different pictures in the TMs and am still not sure.

From the pics, it looks there are two or three separate parts that are connected, not one long shaft. Correct?

1) From steering wheel to BEFORE the valve and selector worm house (as I call it, the box under the valve assembly)
2) the selector worm house and/or
3) the lower large groove inside the steering gearbox

Any reason to take these parts apart given my problem description, can there be something rotten?
 

Robo McDuff

In memorial Ron - 73M819
Steel Soldiers Supporter
2,892
1,520
113
Location
Czech Republic
You know those days that everything just goes perfect, everything falls into its place straight away? ...

Well, this was not one of them

aua

IMG_0541c.jpg

Some of the pieces and slivers of steel I took from the steering gearbox. The lager piece at left looks like a part of a bearing or seal cover about 1/2 inch diameter, or something like that. Don't like that very much.

Thanks to TM 34-2-2, I figured out how everything connects. On location, things were a bit different though. I managed to get the steering shaft free from the box, and the power cylinder loose. Both showed some slight rust sheen in places that should be spotless. However, I cannot take off the power cylinder with the gearbox in place, not enough space between the box and the firewall.

Trying to remove the pitmann arm so I could turn the gearbox around the top front bolt, giving enough wiggle room to take the power cylinder off that way. Tried two pulling devices, even managed to start bending the biggest one, but no dice, pitmann did not come free. Hitting the arm to "scare it free" did not help either. WD40 several times over the last days also not. So I left the arm, but tried to free the three bolts keeping the gearbox to the bracket. No dice there either. I stopped before rounding the bolts,need better fitting wrench.

Decided to call it an early day (5 PM afternoon) before I destroy something or do something stupid. Now waiting for my son to come home and to work this weekend, so we can use the acetylene burner and work together to get everything free.
 

Robo McDuff

In memorial Ron - 73M819
Steel Soldiers Supporter
2,892
1,520
113
Location
Czech Republic
Next step done.

We did not manage yet to remove the steering wheel from the steering shaft or the Pittman arm from its shaft. Did loosened all the bolts so at least I could turn the gear box and take off the power cylinder casing. To my big surprise (and disappointment) I did not see any clear indications that this was our culprit. I know, we are talking very small measurements and only a slight error can cause all this, but still. There are no external leaks, so it has to be internal. The inside of the cylinder looked ok, the piston and bushing assemblies also looked on first inspection ok; that is, no signs of clear cracks, water or rust etc.


IMG_0575_resize.JPG IMG_0574c_resize.jpg IMG_0564c_resize.jpg


Took another picture of the cam. With Rustystud's warning from earlier this year in mind, we will inspect everything again very carefully, but completely happy with what I see I am not. The metal debris under the cam ( see also previous post) was from before I started hitting the Pittman arm.

IMG_0567c_resize.jpg


In the end, I removed the upper drag link so we at least can get the gearbox inside the workshop for further inspection and work. Have to wait for soldier B to get the thing out and inside; its bl**dy heavy.

Also managed to take the entire steering wheel including shaft out through the cabin.

Checked how freely the wheel turned in the shaft: bingo!
I expected something like a freewheeling wheel of a bicycle. I had to use both hands, it definitely goes way to hard, like if you tighten the nuts on that bicycle wheel too much or your car brakes are not free completely.

Question: can that be the result of trying too hard to get the steering wheel of the shaft? Any way to loosen this?


Just to the side. don't you really love the TMs?

Take off x bolts and remove equipment. Task done.
It should read
Prepare for some tough time, scratched knuckles, and make sure nobody with sensitive ears is around to hear you swearing.
Then get down on your back in the mud, get cramps everywhere because of the "ease of access" and take one hour to get three of the four bolts out and give up for the day on number four.
In this case bolts for the gearbox and the master cylinder, especially the one top driver side.
 

Robo McDuff

In memorial Ron - 73M819
Steel Soldiers Supporter
2,892
1,520
113
Location
Czech Republic
Got the steering gear box out and inspected.


IMG_0591c_resize.jpg IMG_0600c_resize.jpg

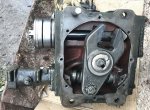
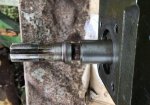
At left, the box looking inside. The housing for the spline is still attached. At right the housing removed and detail of the splines of the steering shaft. Everything moves very smooth, without obstruction, buttt .....


IMG_0592yellowc_resize.jpg IMG_0603c2_resize.jpg

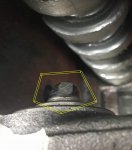
The stud assembly on the Pittman lever that fits in the cam groove was worn down one-sided quite a bit. See the yellow part in the larger pic and the detail at right. This should be a conical stud. The rest of the conical part has what I would call normal and acceptable wear, but this section is completely flat.

Question now, is this the result of us trying to turn a bad functioning power steering, or is this what is causing the bad steering. Answer probably is YES. Maybe too tight or loose adjustment screw gave the Pittman shaft too much or not enough play, resulting in extra wear, resulting in bad steering, resulting in extreme wear.

Theory: once I tightened the original too much free play, the already present wear on this section increased to the point where turning the steering wheel left did no longer resulted in moving the cam in that direction and hence not opening the valve for power assist.

Question: can this really be the cause of all problems?

We can try repair it or try getting a new part or a good one from a scrapped box

I found a nice movie on the functioning of the Ross Hydrapower. Explains it very clear.
 

rustystud

Well-known member
9,298
3,074
113
Location
Woodinville, Washington
It looks like you had a loose of lubrication which caused extreme wear. You compounded the problem by tightening the sector shaft adjustment. I've seen this happen before. With all the small particles of metal floating around your gear, I'm sure there is not much salvageable by now.
 

Robo McDuff

In memorial Ron - 73M819
Steel Soldiers Supporter
2,892
1,520
113
Location
Czech Republic
I did not drive this truck more than 75 miles (less than 100 km) between 2010 and 2012, when I made it street legal. Since 2012, I drove with it about 1 (ONE) miles in the meadows. Probably most of the wear had already occurred before I got the truck. I changed the oil shortly after I got the truck, did not think I was loosing oil in this system afterwards.

The sector shaft was extreme lose when I got the truck. I adjusted the sector shaft because you could move it freely and I had a lot of free play.

Edit: Found this remark from 2011 of what we did back in another thread, put it here to keep things together, and cleaned up the text.


.........

Already last year, we had tried to tighten the adjustment nut without any success on the free play. Today, we took off the front wheels, and kept turning the steer first without engine and later with engine running. More and more free play!?

We kept playing and messing and then I finally noticed that when pulled very hard, it was possible to pull the Pittman arm outward about 3 mm (0.1 inch?). Still, adjustment did not work. Then we just moved the Pittman arm in and out and then with one person hanging on it (pulling it outward) the other one adjusted the nut much deeper, till the arm finally had only a fraction of play. It looked like the entire free play was at least significantly less.

This may be a problem of just everything beeing stuck in old grease etc. Keep playing and turning and adjusting for a while to see if that works. But one person alone just by hand trying to adjust the nut softly againt the pitman arm did NOT work.
It might have been too tight but don't think so. Anyway, I did drive a bit over ONE mile since then, so I could not have causes this wear (I think). The previous owners already had changed "a gear", probably the cam shaft. So they had problems with it also, and probably never got it worked out.

Seeing the video and a remark in another thread, is it possible that the steering shaft was too deep into the housing? My steering shaft is very tight into the shaft tube. When trying to get the steering wheel off, I think I even worsened it. Maybe that resulted in the shaft being too far on the cam shaft splines?
 
Last edited:
Robo McDuff

In memorial Ron - 73M819
Steel Soldiers Supporter
2,892
1,520
113
Location
Czech Republic
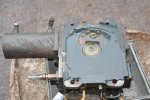
Got a new used Ross steering gear. On the truck, it moved very smooth. About a month ago, some idiots loosened the return hose (return to oil reservoir) on the control valve assembly and left it open, so it got rusted a bit inside. When back in the Czech Republic, and taking off the steering shaft including the control house, I noticed some gueish material coming out, like very heavy syrup.

new steering box 01_resize.JPG

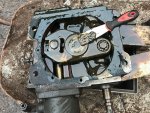
Since I have the thing free anyway, decided to take it apart, laying flat, to make sure I noticed all water, amounts etc. I expected several thinks, but not this:


new steering box 03_resize.JPG

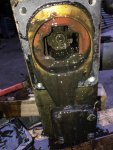
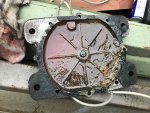
The whole box was filled to the brim with heavy syrupy oil. I don't think it is supposed to be soo full. When I drained it, a lot of gue came out as well, and in the end from the two end sections, some water as well. In total half a cup or so.


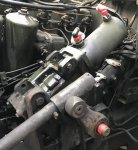
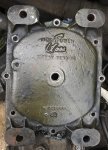
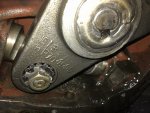
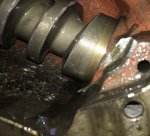
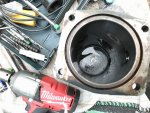
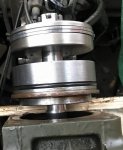
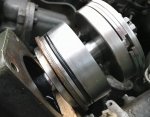
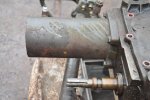
.IMG_0815c_resize.jpgIMG_0823_resize.jpgIMG_0819_resize.JPGIMG_0825_resize.JPG

It this the effect of a leaking power cylinder? I don't see how you can get it so full otherwise.
When I brought it back inside the shed, it went with the power cylinder down, and clear oil came out of that.

How to clean this before reassembling?

I did not take the power cylinder off yet. Probably wise to do it as well and check for damage and leakage.

Any comment on this finding and how to proceed from here is welcome.
 
Last edited:
Top
AdBlock Detected

We get it, advertisements are annoying!

Sure, ad-blocking software does a great job at blocking ads, but it also blocks useful features of our website like our supporting vendors. Their ads help keep Steel Soldiers going. Please consider disabling your ad blockers for the site. Thanks!

I've Disabled AdBlock
No Thanks