• Steel Soldiers now has a few new forums, read more about it at: New Munitions Forums!

  • Microsoft MSN, Live, Hotmail, Outlook email users may not be receiving emails. We are working to resolve this issue. Please add support@steelsoldiers.com to your trusted contacts.

M809-series 33si Alternator Install

MyothersanM1

19K M1 Armor Crewman
Steel Soldiers Supporter
1,958
427
68
Location
Culver City, CA
I picked up a Delco-Remy 33si alternator, Cummins p/n 3400698, to replace the OEM alternator on my M818. My existing alternator was not failing, but I wanted to be ahead of that game. I have also followed some installs on both M809 and M939-series trucks with the NHC250. I liked the results. Special thanks to member Brutacus as his install was my model to follow.
https://www.steelsoldiers.com/threads/alternator-over-voltage.191655/ Starting at Post #7.

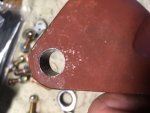
I ordered a second engine block alternator bracket that is supplied on the M809-series trucks, p/n11644677. For front to back adjustment, I had the block mounting holes slotted 3/4" forward. The 33si alternator has 1/2" mounting holes, so the corresponding holes on the bracket were drilled accordingly.
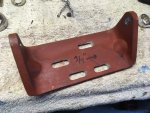
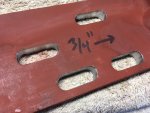
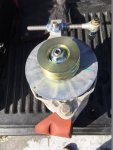
IMG_5949.jpgIMG_5950.jpgIMG_5952.jpg


For proper fitting of the shorter mounting wings in the longer OEM bracket, I used:
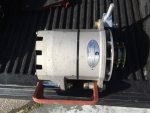
  • Front mounting: One 1/2"-13 X 2 1/2" Gr. 8 bolt, three Gr. 8 1/2" washers, one 1/2"-13 Gr. 8 locknut
  • Rear mounting: One 1/2"-13 X 4 1/2" Gr. 8 bolt, four Gr. 8 1/2" washers, one 2" long unthreaded steel spacer, one 1/2"-13 Gr. 8 locknut
IMG_6223.jpg

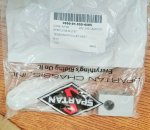
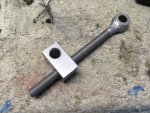
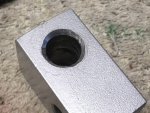
For the adjusting bracket, I used a Spartan Alternator Adjustment Rod Bolt, p/n 0101-AA3-029. One hole on the mounting block is 3/8" and the alternator upper mounting wing is 1/2"-13 threaded hole. So, I drilled the 3/8" hole out to 1/2"
Adjustment Rod 001.jpgAdjustment Rod 002.jpgIMG_5953.jpgIMG_5954.jpgIMG_6224.jpg

The slotted engine block mounting bracket attaches the same as the original except now you have some lateral movement to align the fan hub and alternator pulleys.
I used for bracket attachment:
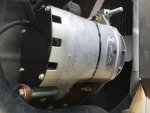
  • four 3/8"-16 x 1 1/8" Gr. 8 bolts
  • four Gr. 8 3/8" lock washers
  • two Gr. 8 flat washers (in conjunction with the lower radiator hose support/guard)

IMG_6227.jpg
 
Last edited:

MyothersanM1

19K M1 Armor Crewman
Steel Soldiers Supporter
1,958
427
68
Location
Culver City, CA
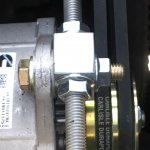
With the engine bracket and alternator installed, I turned to the adjusting rod.
The adjusting rod is attached to the alternator with a 1/2"-13 x 2 1/2" Gr. 8 bolt and Gr. 8 washer. The top wing is threaded, so inserted and tightened this bolt from back to front.
A 1/2"-13 serrated flange locknut is used to secure the mounting block. The mounting bock has a wide and a narrow dimension. I installed the narrow dimension on the alternator.

IMG_6233.jpg

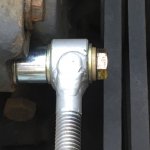
The fan hub mounting has approximately 3/4" of standoff from the eye end of the adjusting rod. I used a 3/4"OD for 3/8" Screw 5/8" spacer plus two 3/8" Gr. 8 washer to span the standoff.
The eye is also 1/2" in diameter with fan hub mounting hole being 3/8". I reduced this hole size with a 1/2"OD x 3/8"ID drill bushing.
Its all mounted up to the fan hub with a 3/8"-16 x 2 1/2" Gr. 8 bolt, washer and lock washer.

IMG_6236.jpg

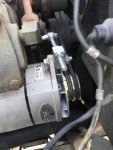
All mounted up and ready for service. Just roll the existing size belts on to the new pulley. There is no need to change the size. This adjusting rod is fantastic! It makes adjusting belt easy and painless. Just turn the inner nut outward to get the right tension then lock it down with the outer. This is the second best, next to a more reliable and powerful alternator, upgrade in this project. I used two more 1/2"-13 serrated flange locknuts for the adjusting and jam nuts.

IMG_6230.jpgIMG_6231.jpg

All that is required at this point is to simply attach the positive and ground (optional) cables.
 
Last edited:

Brutacus

Active member
Steel Soldiers Supporter
242
208
43
Location
Marion, AR.
Special thanks to member Brutacus as his install was my model to follow.
https://www.steelsoldiers.com/threads/alternator-over-voltage.191655/ Starting at Post #7.

Thankx for the acknowledgment, and this Great write up. I know this will help others with M809 trucks make there alternator upgrade go smoother. I do like the adjustment rod over the slotted arm. It really is fantastic by comparison. Did you have to put new/different size belts on like many others who changed their alternator over, or did you retain your original/same size belts. I found I didn't have too because the adjustment rod allowed me to swing out further than the old slotted arm. One criticism I have on this 33si alternator is that the positive cable mount is exposed when compared to the original military alternator. My remedy was getting an old GM alternator positive (red) dust boot to cover the connection. I found one on ebay for $2. I'm sure one could be found cheaper at any local junk yard.
 

MyothersanM1

19K M1 Armor Crewman
Steel Soldiers Supporter
1,958
427
68
Location
Culver City, CA
Thankx for the acknowledgment, and this Great write up. I know this will help others with M809 trucks make there alternator upgrade go smoother.
Your welcome! Thank you or the tips!

Did you have to put new/different size belts on like many others who changed their alternator over, or did you retain your original/same size belts
I used the same belts. That's one reason why I liked your install is because it eliminates that tedious step.

One criticism I have on this 33si alternator is that the positive cable mount is exposed when compared to the original military alternator.
Yeah, I am not too hip with that exposed positive cable post either. I'll probably do something similar.
 
Top