• Steel Soldiers now has a few new forums, read more about it at: New Munitions Forums!

  • Microsoft MSN, Live, Hotmail, Outlook email users may not be receiving emails. We are working to resolve this issue. Please add support@steelsoldiers.com to your trusted contacts.

M818 gets a 7(6+1)-Speed

MyothersanM1

19K M1 Armor Crewman
Steel Soldiers Supporter
1,958
427
68
Location
Culver City, CA
Preface: I started this project last year in early January. Due to some design changes and funding issues, it is technically not finished yet as of this posting. The last step, making the winch operational again is still in its final stages.

I have researched viable alternatives to the Spicer 6453 5-speed transmission including a different model of the same series, regearing the OEM, a fuller 6-speed (FSO8406A/6406A). I really was not interested in anymore top end speed but was that of better use of each range and less RPM loss between shifts. I decided against all of them for a multitude of reasons and almost just abandoned the thought of ever having a more “drivable” transmission.

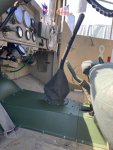
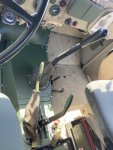
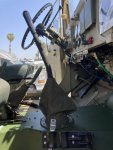
I then discovered and researched the Spicer (Tremec/TTC) ESO66-7B 7-speed transmission. The transmission offered closer ratios, a slightly better overdrive (.74 vs .78), and uses same push-type clutch release fork. It’s spec’d out per TTC for 65,000 lbs. GVW, 185 – 250 hp, 660 lbs./ft of torque which is adequate for an NHC250 equipped M818. See specs under the attached .pdf.
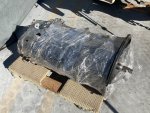
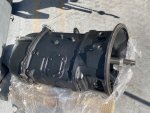
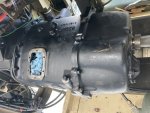
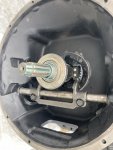
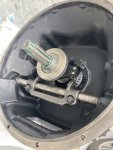
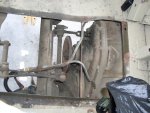
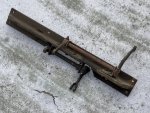
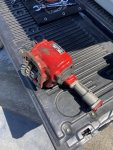
IMG_7906.jpg IMG_7907.jpg IMG_8112.jpg


This install covers an M818 but should be similar to M813 and M814 variants. My truck has modifications, i.e., air brake valves and tubing, that most do not, but I will touch on how I dealt with them. As for other truck variants, the accessory equipment may require additional or alternate modifications. The manual parking brake and all associated parts and hardware will be removed as my truck is now equipped with s-cam spring brakes. I am not making any attempt at modifying that brake system for this project.

Now, for the drawbacks.

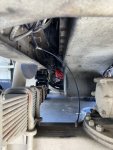
  • The OEM Spicer is 29.75” in length from clutch hosing versus 36.875” on the 7-speed. This requires rearward movement of the transfer case of at least 7 1/8”, the crossmember just rearward of the transfer case and the transfer case/PTO shift lever trunnion bracket in order to clear the transmission case. The midships driveshaft has to be shortened and the front axle lengthened.
  • There is no compatible companion flange for the 7-speed, but there is a half round end yoke. This is not a big deal as it only requires changing the jackshaft’s front u-joint to half round bearing cups only on one axis.
  • The shift tower is not forward mounted as it is on the 6453. Some sheet metal work to the front cab tunnel will need to be performed to accommodate the rearward shift tower on the 7-speed.
  • The 7-speed has no air poppet valve to select forward or reverse for the transfer sprag. This will be solved with the addition of a 24VDC air directional control valve electrically operated through the transmission reverse switch.
  • The stemmed front bearing cover for use with push type clutches is only available for 1 ½” input shafts for this transmission. So, a clutch disc with a 1 ½” hub and a new/modified release bearing assembly is in order.
  • The OEM PTO is not compatible with the 7-speed transmission. The drive gears do not match up and the PTO input gear cannot be changed (or at least I was not able to find) to a suitable gear. I have found a compatible alternative that retains the forward/revers mechanical drive feature. However, it does require a two-piece driveshaft to negotiate the distance from the PTO, around the bell housing and to the winch input shaft.
 

Attachments

Last edited:

MyothersanM1

19K M1 Armor Crewman
Steel Soldiers Supporter
1,958
427
68
Location
Culver City, CA
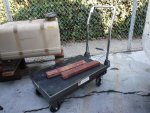
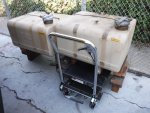
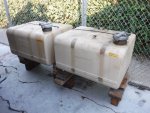
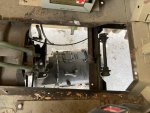
The first hurdle in this project was to remove the fuel tanks, their mounting brackets, front and midships driveshafts, jackshaft and the transfer case. These are pretty straight forward tasks and are covered in the TM. If you haven’t done it before, be forewarned that that transfer case is a beast! A lift table and some wood cribbing make removing full fuel tanks quick and simple.

DSCF7015.JPG DSCF7013.JPG DSCF7014.JPG DSCF7009.JPG DSCF7012.JPG DSCF7011.JPG

Once all that was removed, I was able to have wide open work areas on either side of the frame. This is necessary as a multitude of bolts and rivets will need to be removed in order to relocate the transfer case brackets and crossmember.

DSCF7005.JPG DSCF7006.JPG DSCF7002.JPG DSCF7003.JPG
 
Last edited:

MyothersanM1

19K M1 Armor Crewman
Steel Soldiers Supporter
1,958
427
68
Location
Culver City, CA
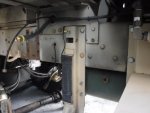
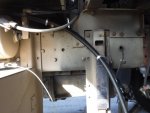
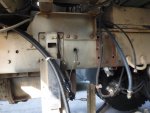
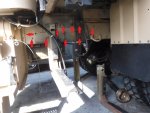
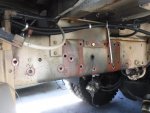
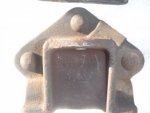
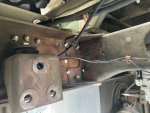
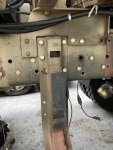
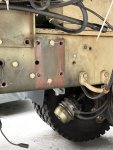
The left-side transfer case brackets require the removal of four rivets and two bolts (one on the rear toolbox/air tank bracket and one on the forward fuel tank bracket). My photo shows my custom installed M915 battery box frame bracket. The forward-most bolt is hidden behind the bracket.

The right-side transfer case bracket requires three rivets to be removed.

DSCF7001.JPG DSCF7018.JPG

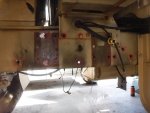
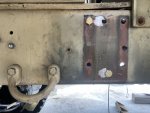
The crossmember is secured on either side with three rivets and two bolts. The bolts pass through the spare tire rack supports.

DSCF7007.JPG DSCF7017.JPG

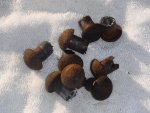
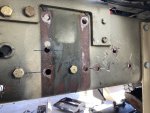
My son and I removed the rivets by cutting a cross in the heads down to the frame surface with an angle grinder with cut-off wheel. Then using a long stroke air hammer with flat tip chisel, we cut the heads off down to the frame. Starting with a dimple, the rivets were drilled out to 3/8” at about 3/8” depth. With the pointed tip, we air hammered the rivets out. All came out fairly easily except one that needed a little more drilling and coaxing with the air hammer. The right-side bracket fell off the frame with all three rivets still in it. I dealt with those on the workbench.


DSCF7019.JPG DSCF7021.JPG DSCF7020.JPG
 
Last edited:

MyothersanM1

19K M1 Armor Crewman
Steel Soldiers Supporter
1,958
427
68
Location
Culver City, CA
Transfer case bracket relocation:

The transfer case brackets were moved back a full 8”. I came to the measurement as follows:

The ESO66 is exactly 35” in length from the clutch housing mounting face to where the end yoke washer seats on the output shaft. The end yoke adds 1.875” from the washer seal face to u-joint centerline to the length for a total of 36.875”. The 6453 measures 27.875” from the clutch housing mounting face to the companion flange. Adding 1.875”, flange yoke length flange to centerline, the total length is 29.75”.

(ESO66) 36.875” – (6453) 29.75” = 7.125”.

I ran into a bolt hole alignment issue with the single transfer case bracket on the right side of the frame. If I added .875” to make the rearward movement a full 8” this would eliminate the issue. I will touch on jackshaft length issues in a later paragraph.

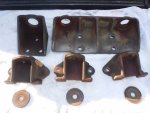
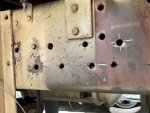
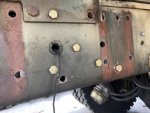
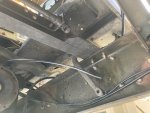
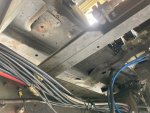
Air brake valves, fittings and tubing were cut/rerouted to allow the crossmember to be moved back to accommodate the new location for the rear left side transfer case bracket. All three brackets new locations were measured, marked, and drilled out to ½” diameter. All brackets were reattached with ½”-13 grade 8 bolts and locknuts. The crossmember was then pushed as far forward until it was flush against the rear left side transfer case bracket. Four ½” holes were drilled in the crossmember on each side for the rear fuel tank bracket bolts to pass through plus three additional on the right and three on the left where the original rivets attached the crossmember to the frame.

Left:
IMG_7915.jpg IMG_7943.jpg IMG_7920.jpg IMG_7940.jpg IMG_7941.jpg IMG_7991.jpg

Right:
IMG_7910.jpg IMG_7912.jpg IMG_7913.jpg IMG_7942.jpg
 
Last edited:

MyothersanM1

19K M1 Armor Crewman
Steel Soldiers Supporter
1,958
427
68
Location
Culver City, CA
The forward fuel tank brackets each had minor modifications in order to accommodate the new transfer case mounting locations…

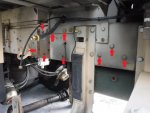
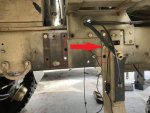
Right: The original lower left bracket mounting hole (red circle) is now behind the transfer case bracket, so for ease of future maintenance I decided to no longer use it. The hole was re-drilled higher to align with the top center mounting hole of the right-side transfer case mounting hole.

IMG_7939.jpg IMG_7911.jpg IMG_7938.jpg

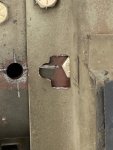
Left: Original bolt holes were all reused. A notch was cut on the left edge to accommodate the rear most bolt head on the forward left side transfer case mount. A side note: My fuel level sending units are outfitted with grounding wires to these brackets. One bolt on each bracket was fitted with inner and outer star washers to improve continuity to the frame.

IMG_7969.jpg IMG_7970.jpg IMG_7971.jpg

The fuel tanks and rear mounting brackets were left off at this point for easier access to underneath the truck.
 
Last edited:

MyothersanM1

19K M1 Armor Crewman
Steel Soldiers Supporter
1,958
427
68
Location
Culver City, CA
Clutch Release Bearing:

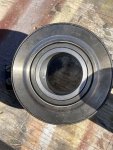
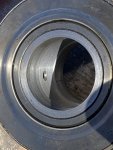
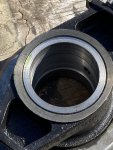
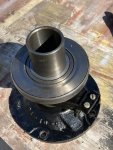
The 5-speed transmission was removed along with the clutch pressure plate and disc. The new transmission only comes in a 1 ½” input shaft for a push type clutch. This is limited by the input shaft bearing cover only available in a 1 ½” stem cap. So, the OEM 1 ¾” hub clutch disc must be replaced. I contacted Automotive Friction Material, Inc. out of Birmingham, AL. These guys new exactly what I needed as they are very familiar with the M39 and M809-series trucks. They custom built the same six-button clutch disc with a 1 ½” hub. The new disc and the pressure plate were reinstalled.


I removed the clutch release fork, shaft and lever from the 5-speed. I fit the whole assembly into the new transmission. The clutch housing is slightly wider at the shaft pivot point and the release fork would not align on center of the input shaft. The clutch pedal linkage lever width would not allow the shaft to be inserted any farther into the clutch housing. I removed the lever and had a local automotive machine shop remove 3/16” of material on the inside of the lever. This would now allow the release fork to center up.

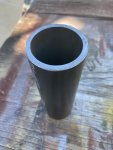
I ended up having the OEM clutch release bearing sleeve modified. I ordered some 2.25" OD x 0.188" Wall x 1.875" ID Carbon Steel Round Tube A513-Type 5 DOM form Onlinemetals.com to be used as a new sleeve. I took it to my same trusty machine shop where they cut the tube, drilled grease holes, pressed it into the bearing sleeve and reamed it out to slide perfectly over the front bearing stem cap OD.


IMG_8049.jpg IMG_8050.jpg IMG_8064.jpg IMG_8060.jpg IMG_8061.jpg IMG_8062.jpg IMG_8063.jpg

The release bearing fork sits slightly lower but is still operational.

IMG_8066.jpg IMG_8067.jpg
 
Last edited:

MyothersanM1

19K M1 Armor Crewman
Steel Soldiers Supporter
1,958
427
68
Location
Culver City, CA
Shift linkage bracket relocation:

Located about equidistant between the transmission and transfer case is the T-shaped bracket spanning the frame width that supports the intermediate pivot points for both the transfer case and PTO shift linkages. This bracket must be moved back to clear the top of the new transmission case. In addition, the clevis rod linkages must be modified by lengthening them. The bracket was only moved back the original 7 1/8”. There was no need to go back any farther with this bracket.

IMG-7992(1).jpg IMG_7968.jpg

I marked the original location of the bracket on the frame and removed it from the frame. I measured back 7 1/8” from the original location and marked the frame. Using c-clamps, the bracket was clamped inverted the inside frame rails. Using an angle head drill and a 3/8” bit, the four mounting holes were marked on the underside of the frame rails. The bracket was removed then the new holes drilled out. The bracket was remounted in its new location.

IMG_7992.jpg IMG_7989.jpg IMG_7990.jpg

The clevis rod linkages were modified using existing and new parts. The new lower transfer case rod was made from the original lower PTO rod. All other rods were made from new clevises and ½”-20 grade 8 all-thread. I did not install the PTO upper linkage as I later decided to go with an air shift set up for that. More on that later.

Transfer shift linkage modifications:

Upper transfer case: 9 1/4” (OEM) +7 1/8” = 16 3/8”

Lower transfer case: 5 1/4” (OEM) +7/8” = 6 1/8
 
Last edited:

MyothersanM1

19K M1 Armor Crewman
Steel Soldiers Supporter
1,958
427
68
Location
Culver City, CA
Midships Driveshaft:

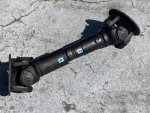
The midships driveshaft was cut down 8” and rebalanced at a local driveshaft shop. I reinstalled the driveshaft with all new grade 8 hardware and two new 1710-series u-joints. You will notice the absence of original parking brake drum and actuation hardware.


IMG_2458.JPG IMG_2461.JPG IMG_2459.JPG IMG_2460.JPG

IMG_8173.jpg IMG_8174.jpg IMG_8175.jpg IMG_8176.jpg
 
Last edited:

MyothersanM1

19K M1 Armor Crewman
Steel Soldiers Supporter
1,958
427
68
Location
Culver City, CA
Spare Tire/Toolbox Rack:

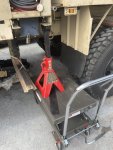
Before the transfer case is reinstalled, the spare tire/toolbox rack must be lifted to a higher position. The bottom forward edge of the rack will interfere with the top of the transfer case in its new position. The fix is simple, but you will need a lifting device to jack up the rack slightly in order to shim. The shims are ½” square washers that are ¼” thick.

After unbolting the rack from the frame brackets, I raised the rack with a 1000lb. lift table and a 12-ton jack stand. Using six washers each (1 ½”, more than I would eventually need), the four mounting points would be temporarily shimmed and bolted while the transfer case was being moved back into the new position.

IMG_7986.jpg

At this point, the transfer case was reinstalled per the TM including new nuts, bolts and rubber mounts.

Once the transfer case was situated, again, using the lift table and jack stand I removed the temporary shimming. I lowered the rack where it was just clear the top of the transfer case. I then adjusted to the nearest thickness of washers/shims which ended up being three on each mounting point. All was fastened together with new grade 8 ½”-13 x 2” bolts and locknuts.

IMG_7988.jpg IMG_7994.jpg IMG_7995.jpg IMG_7996.jpg

McMaster-Carr part no. 91128A120: Black-Oxide Steel Square Washer for 1/2" Screw Size, 0.562" ID
 
Last edited:

MyothersanM1

19K M1 Armor Crewman
Steel Soldiers Supporter
1,958
427
68
Location
Culver City, CA
I installed the new 7-speed transmission. Due to its longer length, using a transmission jack in addition to a chain hoist makes the job much easier. I wired the clutch release fork lever up to avoid having the release bearing becoming disengaged from the release fork during installation. I connected the clutch release linkage. The clevis rod required a bit of adjustment to get the clutch free play into spec. The shift tower assembly was also installed at this time.

Jackshaft modifications:

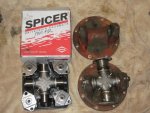
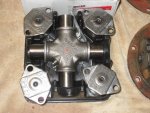
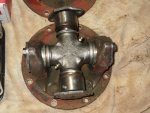
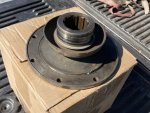
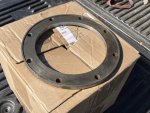
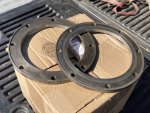
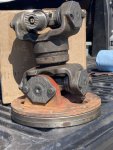
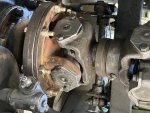
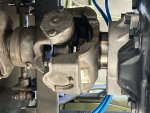
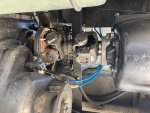
The jackshaft was modified with two new 1610 series u-joints and elimination of the forward flange yoke replacing it with half round bearing cups on the u-joint to be attached to the new end yoke on the transmission. The original slip yoke and yoke shaft were retained. I had an old companion flange ring cut off its hub and a male pilot machined in at a local automotive machines shop. I had two made for safe measure.

IMG_8166.jpg IMG_8167.jpg IMG_8168.jpg

This ring is used as a spacer between the rear flange yoke and transfer case input companion flange. The jackshaft is installed on the transmission output half-round yoke first then on the transfer case using the spacer ring. You cannot do it the opposite way as the slip yoke will not compress enough for the half-round bearing cups to slip past their mounting location on the output yoke. Now, the upper transfer case shift linkage is installed and adjusted if necessary.
New 3/8" grade 8 bolts and lock nuts were used on the transfer case companion flange.
IMG_8177.jpg IMG_8182.jpg IMG_8179.jpg IMG_8178.jpg

Jackshaft modification parts:

Half round end yoke: Spicer 5-4-5321-1

Half round u-joint kit: Spicer 5-674X

Full round u-joint kit: Spicer 5-279X
 
Last edited:

MyothersanM1

19K M1 Armor Crewman
Steel Soldiers Supporter
1,958
427
68
Location
Culver City, CA
The original forward/reverse PTO is not compatible with the new transmission. I had planned to install an M939-series hydraulic system for the winch. I ran into design issues particularly with the hydraulic motor mounting. The motor would have to be mounted farther back in the frame as it will not clear an M809-series front crossmember. I scrapped that plan and decided to research keeping the system strictly mechanical. I will touch on this later.

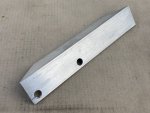
By this point, I had made some modifications to the PTO/transfer case shift lever mounting point so the PTO lever would clear the transmission rear case. You will notice a piece of aluminum I-beam installed on the modified cab floor reinforcement channel. Even though this plan was scrapped, I retained the I-beam section to keep the channel's integrity. The transfer case lever, in its original location does not hit the transmission case, so it was retained there. The I-beam does not interfere with cab tunnel fitment.

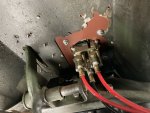
Sprag Directional Control Valve

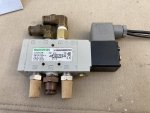
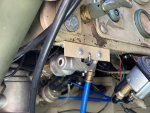
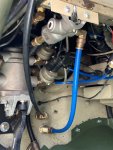
To overcome the loss off the air poppet valve, I employed a 24VDC electrical air directional control valve plumbed to a Bendix TW-1 air control valve. Power for the directional switch is pigtailed from the brake light line circuit. My truck was previously equipped with a reverse light circuit that actuates through the old poppet valve. So, I just tapped into the hot side of that wiring which is the brake light circuit. The TW-1 switch is mounted to the dashboard under the instrument cluster just right of the fuel primer and is plumbed directly into the 120psi air supply (wet tank). It is used to cut and release pressure from the directional control valve rendering the sprag cylinder to neutral.

IMG_8262.jpg IMG_8874.jpg IMG_8875.jpg IMG_8877.jpg

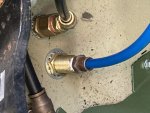
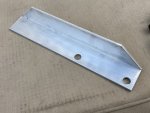
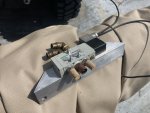
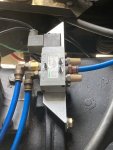
The directional valve was mounted with 4-40 machine screws and lock nuts to 1 ½” x 1/8” aluminum angle then mounted offset toward the driver’s side. The angle is drilled and bolted onto the transmission clutch housing using the housing’s two top bolts. The directional valve lies flat in its install state with its supply port forward and two delivery ports rearward. It's grounded to the I-beam I mentioned previously. Supply pressure from the TW-1 switch comes in from the firewall via a bulkhead fitting into the cab. The delivery ports are plumbed as such…

IMG_8263.jpg IMG_8264.jpg IMG_8269.jpg IMG_8270.jpg IMG_8271.jpg

Port 2: to rear port (forward) on sprag (de-clutching) cylinder

Port 4: to front port (reverse) on sprag (de-clutching) cylinder

In order for the valve to be energized, one of the four “ON” positions (B.O. DRIVE, B.O. MARKER, STOP LIGHT or SER. DRIVE) of the three-lever light switch must be selected.

Sprag air control valve: McMaster-Carr part no. 6425K13

Reverse Light Switch:

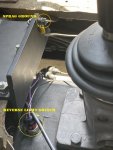
The new transmission was supplied with a reverse light switch, but no connector/pigtail. The switch was, after closer inspection, a Ford part. I was able to track down the connector/pigtail at a local auto parts store. I had previously wired up a reverse light/back-up alarm circuit that worked through the original air poppet valve reverse signal using an air switch. I just modified the existing wiring to work with the new switch. See the photo above...
 
Last edited:

MyothersanM1

19K M1 Armor Crewman
Steel Soldiers Supporter
1,958
427
68
Location
Culver City, CA
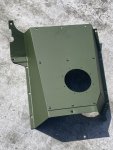
Forward Cab Tunnel Modification:

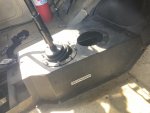
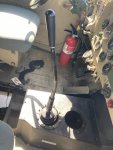
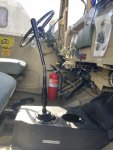
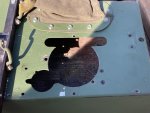
The new shift tower sits farther back on the 7-speed. The existing forward cab tunnel can be use by cutting a new 5” hole straight farther back as the two towers are on the same axis. I marked centerlines of the new shift to rear on rear cab tunnel and on the floorboard the right. Using a square, I found what I thought was the center of the new shift tower. I was off a little too far forward and to the right. No big deal, as I still had to plate over the existing hole with sheet metal. I would correct this when I cut the hole in the new sheet metal plating.

IMG_8170.jpg IMG_8171.jpg IMG_8172.jpg

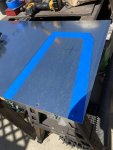
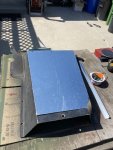
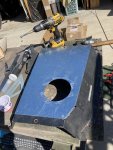
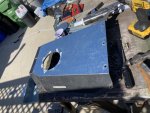
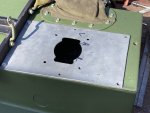
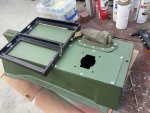
Using 24” x 48” x 0.071 galvanized sheet metal, I cut a plate to completely cover the top of the forward tunnel with the exception of a rear 1” strip. Clamped in place, a new properly located shift tower hole was cut through the new plating thus correcting previously cut hole in the tunnel. Pilot holes were drilled for sheet metal crews. I used six No. 10 stainless steel flanged hex sheet metal screws to secure the rear and midline of the plate to the tunnel. The forward portion would use the existing tunnel bolts through and through. The whole new modified tunnel assembly was painted a fresh coat of 383 green.

IMG_8234.jpg IMG_8235.jpg IMG_8236.jpg IMG_8237.jpg IMG_8238.jpg IMG_8268.jpg


24” x 48” x 0.071 galvanized sheet metal: McMaster-Carr 8943K18

Sheet metal screws: McMaster-Carr 91675A353
 
Last edited:

MyothersanM1

19K M1 Armor Crewman
Steel Soldiers Supporter
1,958
427
68
Location
Culver City, CA
Gear Shift Lever:

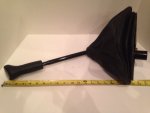
I found a Spicer shift lever on eBay that had the adapter collar compatible with the stub lever in the shift tower. However, it was bit longer and had a tighter angle than I needed. At the machine shop, I had it cut down in length to 18” and rethreaded at the tip to ½”-13. I also had them bend it out to an approximate shallower 165° angle.

7 Speed Shift Lever 002.jpg 7 Speed Shift Lever 003.jpg 7 Speed Shift Lever 004.jpg IMG_8169.jpg
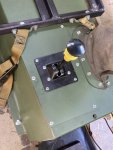
I topped the lever with a phenolic plastic tapered style machine/lever handle. I am not a fan of shift lever balls and I like the straight clean look of the tapered handle. The lever is sheathed in a neoprene foam tubing not really for any practical purpose but more for cool factor.

I use a canvas shift lever boot, so holes were also drilled for the boot half-round flange plates. The same sheet metal screws were used to attach the boot.

IMG_8273.jpg IMG_8274.jpg IMG_8275.jpg

It is interesting to note that when I first test drove the truck, the shift lever was popping out of 7th gear. I found that some slight readjustment of the canvas boot remedied this issue. The canvas boot was binding between the bellows of the inner rubber shift tower boot.
 
Last edited:

MyothersanM1

19K M1 Armor Crewman
Steel Soldiers Supporter
1,958
427
68
Location
Culver City, CA
PTO:

As mentioned before, the OEM forward/reverse PTO is not compatible with this transmission. There are two reasons; (1) the drive gear is different and (2) the mounting on the new transmission is deeper. I was actually ramped up to do a hydraulic set-up ala an M939-series truck. However, the winch motor proved to be a more difficult mounting proposition. The M809-series front crossmember sits to low for a normal M939-series OEM type mounting.

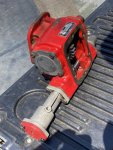
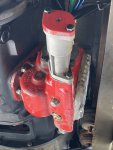
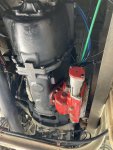
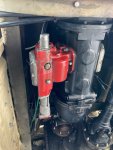
I researched alternative PTO choices. My searching landed me with the Parker/Chelsea 340 and 352-series. Both are forward/reverse and can be configured with their output shafts facing forward. I chose the 340-series for two reasons; (1) a higher torque rating and (2) the output shaft sits slightly farther out away from the transmission.

I found a good used 340-series (340XFAHX-A5XD), but it needed to be reconfigured for my exact use. I had to flip the output shaft to a forward operating configuration and replace the input gear to properly mesh with the transmission drive gear. These were very simple tasks and also gave me the opportunity to give the PTO a little cleaning.

IMG_9207.jpg IMG_9208.jpg

I reused the mounting studs from my 5-speed transmission. The new PTO was mounted up using the required .010” and .020” shims checking for proper gear lash. After mounting the new transmission was finally filled with a approximately three gallons of Lucas 50W Synthentic Transmission Oil. I checked for leaks an all was good.

IMG_9213.jpg IMG_9212.jpg IMG_9211.jpg IMG_9206.jpg

PTO (reconfigure into): Parker/Chelsea 340XFFNX-G4XD

Input Gear: 5-P-931
 

Attachments

Last edited:

MyothersanM1

19K M1 Armor Crewman
Steel Soldiers Supporter
1,958
427
68
Location
Culver City, CA
PTO Operation:

The new PTO was equipped with an air shift but can also be lever shifted. I chose to use air shift rather than have to reconfigure all the lever shift linkage.


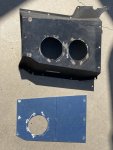
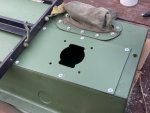
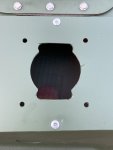
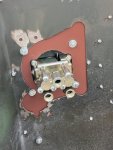
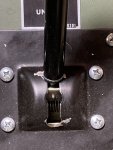
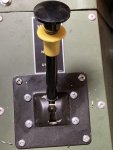
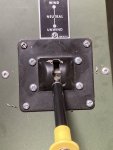
A 4-way 3-position (neutral, forward, reverse) Air Valve was installed by custom cutting a hole in rear cab tunnel just to the right of the OEM shift lever. I originally installed then removed a two-position valve to operate the PTO for the abandoned hydraulic operation. That, plus the OEM shift lever slot, is why the cut holes took on their interesting shapes. I used a piece of the same sheet metal to plate over the forward tunnel to dress up the underlying hole cuttings. I custom cut a hole the three-position valve would fit nicely into. The plate was pop-riveted onto the tunnel then painted 383 green to match. The valve was attached with screws, nuts and lock washers.

IMG_9215.jpg IMG_9214.jpg IMG_9218.jpg IMG_9219.jpg IMG_9217.jpg IMG_9223.jpg IMG_9220.jpg

The valve was also modified so it would lock into the forward and reverse positions.

IMG_9225.jpg IMG_9226.jpg IMG_9227.jpg

Air Valve: Buyers Products BAV040
 
Last edited:

MyothersanM1

19K M1 Armor Crewman
Steel Soldiers Supporter
1,958
427
68
Location
Culver City, CA
PTO Operation (continued):

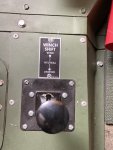
I installed the Winch Operation Plate just forward of the valve with 1/8" pop rivets.

IMG_9224.jpg IMG_9229.jpg IMG_9228.jpg

I plumbed the air supply from the wet tank. The forward and reverse air lines were connected with slack. Once the winch drive shaft is hooked up, I can determine which line goes to which fitting for wind and unwind.

IMG_9231.jpg IMG_9230.jpg

Winch Operation Plate: 10910301
 
Last edited:
MyothersanM1

19K M1 Armor Crewman
Steel Soldiers Supporter
1,958
427
68
Location
Culver City, CA
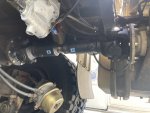
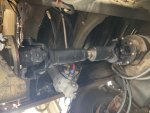
PTO Shaft:

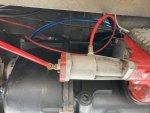
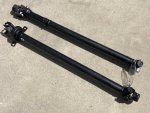
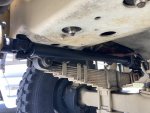
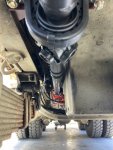
The span from u-joint centerline to u-joint center is 76 ¼”. An original one-piece drive shaft from the PTO to the winch input shaft will not work. The OEM transmission and PTO put that input shaft farther out toward the right frame. The new transmission is narrower at the bottom in the area of the PTO mounting hole and the new PTO input shaft is not as far from the transmission case. The driveshaft cannot make it past the bell housing without hitting it. So, a two-piece driveshaft with a center bearing was necessary to negotiate the distance.

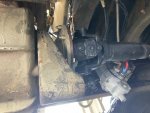
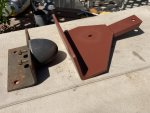
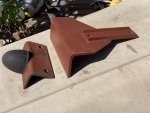
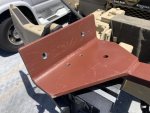
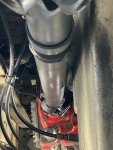
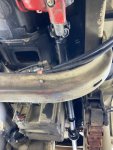
After much thought, I came up with a plan to fabricate a cantilever bracket that mounts right where the right front leaf spring bumper stop reinforcement bracket sits. The u-joint centerline on the winch input shaft to the center of the bumper stop is approximately 32 ½”. I decided to push the location of the center bearing centerline back to 34”. That would set the center front yoke farther back to create a slightly tighter angle on the rear driveshaft section creating more side clearance. Using some steel angle and channel, I designed the bracket having it welded up by a neighbor of mine. ½” bolt holes were marked and drilled on the channel on the new bracket for the center bearing. I would wait on drilling the frame and bumper stop holes until I could fit the driveshaft into the truck.

IMG_0252.jpg IMG_0253.jpg

I took all my measurements and had a two-piece drive shaft made up. I had the driveshaft designed around 2” X .120 wall DOM tubing, Spicer 1.181” I.D. center bearing, and 1310-series u-joints. I also chose to use half-round yokes on the PTO output shaft and the center from yoke. Half-round yokes would facilitate installation and removal of the rear driveshaft section.

IMG_0254.jpg

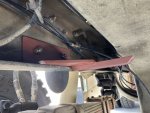
I attached the forward driveshaft section to the winch input shaft securing it in place with the shear pin. I temporarily bolted the center bearing to the newly fabricated frame bracket. Clamping the bracket in place against the frame, I located the two ½” frame bolt and two 5/16” bumper stop holes. Removing the bracket all four holes were drilled out and deburred.

IMG_0257.jpg

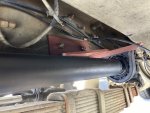
The bracket was attached into the frame with new ½” X 1 ½” grade 8 bolts and lock nuts. The bumper stop was reattached with 5/16” lock nuts. The center bearing was attached to the channel on the bracket also with ½” X 1 ½” grade 8 bolts and lock nuts.

IMG_0258.jpg IMG_0259.jpg IMG_0260.jpg

I fit the rear driveshaft section into the half-round yokes. The clearances are tight around the bell housing but tolerable. I t was better for clearance to attach the slip yoke end to the center front yoke. Straps and u-bolts were all secured in place on their respective yokes.

IMG_0261.jpg IMG_0262.jpg IMG_0263.jpg

Angle: Low-Carbon Steel 90 Degree Angle, 5/16" Wall Thickness, 6" x 3-1/2" Outside Size
McMaster-Carr 6983N28
Channel: Low-Carbon Steel U-Channel, 1/4" Base Thickness, 5/8" High x 2" Wide Outside Size
McMaster-Carr 77779T41
Center bearing: Spicer 211590-1X
 
Last edited:
MyothersanM1

19K M1 Armor Crewman
Steel Soldiers Supporter
1,958
427
68
Location
Culver City, CA
PTO Air Valve Plumbing:
Starting up the truck, I let the air build. I engaged the PTO valve to WIND and checked for smooth rotation. Opening the vent fitting above the bull gear on the winch, I could see the gear was rotating in the WIND direction. This verified the air plumbing from the valve to the PTO air cylinder was correct. I also checked UNWIND direction.

The air tubing was cut to length and dressed up. The valve plumbing as installed is as follows:
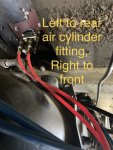
Left side valve fitting to the rear fitting
Right side valve fitting to the front fitting


IMG_0265.jpg IMG_0264.jpg

After a year and a half, I can finally call this project complete.
 
Last edited:
Top
AdBlock Detected

We get it, advertisements are annoying!

Sure, ad-blocking software does a great job at blocking ads, but it also blocks useful features of our website like our supporting vendors. Their ads help keep Steel Soldiers going. Please consider disabling your ad blockers for the site. Thanks!

I've Disabled AdBlock
No Thanks