• Steel Soldiers now has a few new forums, read more about it at: New Munitions Forums!

  • Microsoft MSN, Live, Hotmail, Outlook email users may not be receiving emails. We are working to resolve this issue. Please add support@steelsoldiers.com to your trusted contacts.

M929A2 Rear Axle Questions.

Vermonster

Member
Steel Soldiers Supporter
32
39
18
Location
Guilford, Vt.
In another thread I talked about my wheel stud issue. At the time of the incident, I got the wheel off and the Brake Drum came off in my hands easy. Got New Studs and Wheels Seals as I thought about replacing the Brake Shoes if nessecery. I'd had a leaking wheel seal and figured they were soaked in gear oil. I had to Beat the Hub off with a Big Hammer, but the Axle Stub is clean with no burrs, bad spots, or decolorization, and the Bearings are fine. I don't get why it came apart so hard. I've done numerous brakes and wheel bearings on civilian trucks and trailers and never seen this kind of arrangement. Two Inner Wheel Seals, A Fill Plug at the Outboard End of the Axle, nor this Plastic Gizmo inside the Hub. How does all this work? According to the TM I saw it reads to inspect, clean, and Repack these wheel bearings once a year with GAA. Don't they run in GO? Maybe I was reading the Wrong TM, IDK. What's the point of Two Inner Wheel Seals, a Hole in the Axle, these Different Ports below the Bearings, and an Outter Fill Plug? Aren't the Bearings all lubricated from the Differential? I'll be the first to admit I know very little about these trucks, and just want to know how things are supposed to work to prevent further breakdowns.

Upon inspection, there is plenty of life left in the shoes. I degreased them, and pressure washed the whole unit. Reinstalled all the Wheel Studs. I think.... One of The Outter Wheel Seals was installed incorrectly as the were Both pointing in the same direction with the flat solid side down. The Inner Wheel Seal is a no brainer. I reinstalled the bearings "Dry" with just a light coating of Lucus Oil Stabilizer. The Hub went on easily only to a point, where there wasn't enough room on the Axle Treads to get the Lock Nut On and I had to Beat The Hub on with a hammer to gain threads for the lock nut. The TM calls for approx 50' lbs torque for the Axle Nut while spinning. I did all that and the Hub turns freely even after beating it in place. I don't understand all that either. I never had to beat a Hub off, or back On an Axle.

Now the Brake Drum won't go back on. I didn't change any adjustments on the Shoes. Of course the Adjusters are semi froze up, (Gonna try and find New Ones), and mess with it some more today. Only thing I can think of is soaking the shoes with Degreaser and then Blasting with my Pressure Washer made the Linings "Swell" some, and even that doesn't completely make sense either.

I think this whole set up is kinda stupid, but there must have been a reason for it. Any insight to my dilemma will be greatly appreciated. I want to learn and do this thing up right. Thanks.
 

cbrTodd

Well-known member
Steel Soldiers Supporter
270
483
63
Location
Indianapolis, Indiana
The two internal seals that straddle the hole in the hub are to allow the air for the central tire inflation system to pass through. The inner wheel bearing doesn't get oil from the differential because of them, so it has to be greased.

For forces being higher than normal, I do remember that I had to use a pry bar to get that inner seal to come off the axle, and I did have to use the axle nut to push the new one on. But nothing I would have wanted to use a hammer for. The only time I used the BFH in the process was for getting the brake drum to release from the hub.
 

Vermonster

Member
Steel Soldiers Supporter
32
39
18
Location
Guilford, Vt.
The two internal seals that straddle the hole in the hub are to allow the air for the central tire inflation system to pass through. The inner wheel bearing doesn't get oil from the differential because of them, so it has to be greased.

For forces being higher than normal, I do remember that I had to use a pry bar to get that inner seal to come off the axle, and I did have to use the axle nut to push the new one on. But nothing I would have wanted to use a hammer for. The only time I used the BFH in the process was for getting the brake drum to release from the hub.
Thanks. So that Inner Bearing needs to be Greased. OK. I can pull the hub back off, remove the Inner Seal and Pack the Bearing. Hopefully without distroying the seal. I tapped the old one out with a small hammer and brass punch. Drove the new in the same way. (Central Tire Inflation System) So thats what all the Plumbing is. Kinda figured as much, but not familiar with how it all works, (Stated I'm as Green as it gets). When the wheel came off it cleaned all the unit off the Rim and my tire went flat. This System on the Front Drive Axle on both sides is disconnected and valve stems are plugged. This one may end up that way too.
 

Vermonster

Member
Steel Soldiers Supporter
32
39
18
Location
Guilford, Vt.
Seems the Inner Wheel Seal is what was causing all the Restriction. As before, I had to beat the Hub off with a hammer. This time the New Seal stayed on the axle and the Hub came right off in my hands. I emery clothed the axle surface where the Seal sets, put the bearing in and installed it in the Hub and slid the thing on. It only went so far.... Never saw one fit that tight before. You had to "Pull" yours in with the Axle Nut? How did you know How Far to go? Does that Seal fit right up tight against where the Axle enlarges near that Inflation Ring? Thanks Man.
 

cbrTodd

Well-known member
Steel Soldiers Supporter
270
483
63
Location
Indianapolis, Indiana
In my case the resistance only started right as the rear most seal contacted the spindle. It was just slightly more force than I could push by hand - when I put the first axle nut on it installed with minimal torque. When the torque started to suddenly increase, the seal was fully seated and I was on to the step of setting the initial torque to seat the wheel bearings (before backing them off, per TM instructions). My CTIS seals never acted that tight, and mine does work like it should so it's not that they are so loose they don't seal. If yours is that hard to get assembled, it sounds like something's not right. I wish I had pictures of exactly where the seals sit in that bore, but that process was way too greasy for me to have my phone out taking pictures!
 

Vermonster

Member
Steel Soldiers Supporter
32
39
18
Location
Guilford, Vt.
In my case the resistance only started right as the rear most seal contacted the spindle. It was just slightly more force than I could push by hand - when I put the first axle nut on it installed with minimal torque. When the torque started to suddenly increase, the seal was fully seated and I was on to the step of setting the initial torque to seat the wheel bearings (before backing them off, per TM instructions). My CTIS seals never acted that tight, and mine does work like it should so it's not that they are so loose they don't seal. If yours is that hard to get assembled, it sounds like something's not right. I wish I had pictures of exactly where the seals sit in that bore, but that process was way too greasy for me to have my phone out taking pictures!
It's definitely the Inner Seal that is causing the problem. The Hub came off extremely hard to begin with. The old seal was a National 4591SCR. I assume it was the correct seal. I got the CTIS Seal Kit from Mike. I cleaned the Spindle up with Emery Cloth, and it's polished. Probably should have applied a light coating of oil to it as I tried to slide it on dry. I don't have an Axle Wrench and was using big water pump pliers to turn the nuts. I'll be getting the correct wrenchs. Polish up the spindle some more, oil it, and it'll go on. Just a really tight fit I guess. I don't think there is anything structurally wrong with the spindle and the seal turned as it was supposed to. Thanks for the info.
 

KN6KXR

Well-known member
243
575
93
Location
Felton, CA
The little star adjusters? Clearance is 0.020" to 0.040" it's pretty basic. The wedge style brakes are different but really simple. I had to use a mallet to get mine off, rocking it side to side and striking it, but it wasn't anything abnormal. Just a 3# dead blow for a dozen whacks side to side. It's probably the seal that is hanging it up; combined with the mass of the hub and orientation it's sticking just enough to make it a PITA. If you have to use more force than that then STOP something is wrong. The same style seal is really popular and yes sometimes they come out and stay on the hub. Pretty sure my '95 F250 is the same and did this only difference is the seals are smaller.

Yes it does say to grease the bearings. As far as I can tell yes it does get gear oil down the tube to the end. Nope no idea I greased them anyways.

Inner locknut is 50# torque while spinning then back off until the lock ring fits. Outer locknut is 250-400#. You have to have the socket. You could try improvising with other tools but we aren't in the 3rd world and nobody is shooting at us here so just do it right.

Pro tip: clean the axle drive bolt holes, bolts and parts really well then use fresh lock washers and blue loctite on the bolts. If you don't then they will shift a tiny bit and the gasket will weep gear oil all over your tire/rim. If possible occasionally check these as part of your yard maintenance. I learned this.....

If you're CTIS system is operational see if you can save it. This is a dump truck, yes? I have a wrecker and can tell you that off road the system makes the truck so much more capable it's totally worth the hassle. I imagine with the dump you would use it the same way. The #1 failure on these systems is hub seals go out. I suspect that it's due to them sitting and not being lubricated, then the seals stick, then they get torn when the truck gets moving again. Trucks that get regularly used don't have this issue. Ones that sat in DRMO yards for years (like mine) had a lot of bad seals. I had to do 4/6 of them. There's a whole test and TM for CTIS the manuals are around....

Speaking of manuals make sure you have them. You can download them all. This is how I can tell you that for the job you are doing right now you need to be looking at TM9-2320-272-23-3, WP 0482, page 1035, titled FIELD MAINTENANCE REAR HUBS REPLACEMENT (M939A2).

For manuals I suggest creating a directory, downloading all the ones you can find, put them on a USB and copy them where you need them. I have a desk computer, one in the shop and a Toughbook for jobsite use. Even then sometimes I print the paper out in my home office. Additionally see if you can download and get working the "P2P" program available on this site. You have to run it in "compatibility mode" for Windoes but it's just really handy. Totally worth the hassle.

Hope that helps.
 

Jbulach

Well-known member
Steel Soldiers Supporter
2,672
2,220
113
Location
Sunman Indiana
It's definitely the Inner Seal that is causing the problem. The Hub came off extremely hard to begin with. The old seal was a National 4591SCR. I assume it was the correct seal. I got the CTIS Seal Kit from Mike. I cleaned the Spindle up with Emery Cloth, and it's polished. Probably should have applied a light coating of oil to it as I tried to slide it on dry. I don't have an Axle Wrench and was using big water pump pliers to turn the nuts. I'll be getting the correct wrenchs. Polish up the spindle some more, oil it, and it'll go on. Just a really tight fit I guess. I don't think there is anything structurally wrong with the spindle and the seal turned as it was supposed to. Thanks for the info.
If you installed the hub on the spindle with the seal and spindle dry, I would pull it back apart to inspect the seals for damage, then lube them as well as the surface on the spindle they ride on before reassembly. As previously stated the inner bearing needs packed with grease and packing the outer will not hurt either. Try to keep grease to a minimum between the two CTIS seal in cast you ever want to try and get the CTIS going in the future.
 

Vermonster

Member
Steel Soldiers Supporter
32
39
18
Location
Guilford, Vt.
The little star adjusters? Clearance is 0.020" to 0.040" it's pretty basic. The wedge style brakes are different but really simple. I had to use a mallet to get mine off, rocking it side to side and striking it, but it wasn't anything abnormal. Just a 3# dead blow for a dozen whacks side to side. It's probably the seal that is hanging it up; combined with the mass of the hub and orientation it's sticking just enough to make it a PITA. If you have to use more force than that then STOP something is wrong. The same style seal is really popular and yes sometimes they come out and stay on the hub. Pretty sure my '95 F250 is the same and did this only difference is the seals are smaller.

Yes it does say to grease the bearings. As far as I can tell yes it does get gear oil down the tube to the end. Nope no idea I greased them anyways.

Inner locknut is 50# torque while spinning then back off until the lock ring fits. Outer locknut is 250-400#. You have to have the socket. You could try improvising with other tools but we aren't in the 3rd world and nobody is shooting at us here so just do it right.

Pro tip: clean the axle drive bolt holes, bolts and parts really well then use fresh lock washers and blue loctite on the bolts. If you don't then they will shift a tiny bit and the gasket will weep gear oil all over your tire/rim. If possible occasionally check these as part of your yard maintenance. I learned this.....

If you're CTIS system is operational see if you can save it. This is a dump truck, yes? I have a wrecker and can tell you that off road the system makes the truck so much more capable it's totally worth the hassle. I imagine with the dump you would use it the same way. The #1 failure on these systems is hub seals go out. I suspect that it's due to them sitting and not being lubricated, then the seals stick, then they get torn when the truck gets moving again. Trucks that get regularly used don't have this issue. Ones that sat in DRMO yards for years (like mine) had a lot of bad seals. I had to do 4/6 of them. There's a whole test and TM for CTIS the manuals are around....

Speaking of manuals make sure you have them. You can download them all. This is how I can tell you that for the job you are doing right now you need to be looking at TM9-2320-272-23-3, WP 0482, page 1035, titled FIELD MAINTENANCE REAR HUBS REPLACEMENT (M939A2).

For manuals I suggest creating a directory, downloading all the ones you can find, put them on a USB and copy them where you need them. I have a desk computer, one in the shop and a Toughbook for jobsite use. Even then sometimes I print the paper out in my home office. Additionally see if you can download and get working the "P2P" program available on this site. You have to run it in "compatibility mode" for Windoes but it's just really handy. Totally worth the hassle.

Hope that helps.
Thank You Sir for the information and guidance. I bought a 4 volume set of TM's from a Manual Guy on ebay a while back. Kinda think I wasted my money. They cover most Everything I guess but for all different trucks. Hard to paw through to find what I'm looking for.

I intend to get the right sockets/wrenches for the axle nuts. Follow directions as stated and do this right.
Thanks again.
 

Mullaney

Well-known member
Steel Soldiers Supporter
Supporting Vendor
7,769
19,877
113
Location
Charlotte NC
Thank You Sir for the information and guidance. I bought a 4 volume set of TM's from a Manual Guy on ebay a while back. Kinda think I wasted my money. They cover most Everything I guess but for all different trucks. Hard to paw through to find what I'm looking for.

I intend to get the right sockets/wrenches for the axle nuts. Follow directions as stated and do this right.
Thanks again.
.
Yeah, several hundred pages in each book - and they include the entire 939 Series of trucks. They do have a lot of stuff about the hydraulics on the crane etc, but if you use those books you will get the answers you need...
 

Vermonster

Member
Steel Soldiers Supporter
32
39
18
Location
Guilford, Vt.
If you installed the hub on the spindle with the seal and spindle dry, I would pull it back apart to inspect the seals for damage, then lube them as well as the surface on the spindle they ride on before reassembly. As previously stated the inner bearing needs packed with grease and packing the outer will not hurt either. Try to keep grease to a minimum between the two CTIS seal in cast you ever want to try and get the CTIS going in the future.
Thanks. Don't know what I was thinking putting it together Dry. I know better, especially how hard it came apart. I've done a couple hundred brake and wheel bearing jobs on civilian trucks and trailers over the years and never seen the likes of this set up. I pulled the hub back off and the new seal stayed on the spindle. It was ok, but I buggered it up trying to get it off the spindle. Got a new one coming. Be more careful next time. Any idea how far back on the spindle the hub should go in relation to the CTIS unit, or end of spindle? I would assume it would go right up flush to the end. idk. When I put this back together after securing the right wrenches, I assume the hub can be drawn in that way as someone stated erlier.

Really. Thanks to ALL You guys for the assistance.
 

Vermonster

Member
Steel Soldiers Supporter
32
39
18
Location
Guilford, Vt.
.
Yeah, several hundred pages in each book - and they include the entire 939 Series of trucks. They do have a lot of stuff about the hydraulics on the crane etc, but if you use those books you will get the answers you need...
God I hope so. Hate to think it was a wate of money. Mine is a 929A2. What's the difference between that and a 939?
Few years back I bought a 1980 Timberjack Skidder. Knew nothing about it. I had a '62 Timberjack and wanted to upgrade. I learned a lot about skidder repair in the first few months. Manuals for that are damn near impossible to find. Then I bought a '67 Cat D6 Dozer. It came wirh shop manual, parts book, even sales brochures. Cat manuals are simple to go through. I spent 3 yrs. in the Army tail end of Viet Nam. Government tends to complicate things. 🤣
Thanks again for all your help Mister.
 

Mullaney

Well-known member
Steel Soldiers Supporter
Supporting Vendor
7,769
19,877
113
Location
Charlotte NC
God I hope so. Hate to think it was a wate of money. Mine is a 929A2. What's the difference between that and a 939?
Few years back I bought a 1980 Timberjack Skidder. Knew nothing about it. I had a '62 Timberjack and wanted to upgrade. I learned a lot about skidder repair in the first few months. Manuals for that are damn near impossible to find. Then I bought a '67 Cat D6 Dozer. It came wirh shop manual, parts book, even sales brochures. Cat manuals are simple to go through. I spent 3 yrs. in the Army tail end of Viet Nam. Government tends to complicate things. 🤣
Thanks again for all your help Mister.
.
Ha! Yes Sir. The military can definitely make things a lot more difficult that they should be. The 939 Series covers a boatload of 9xx Series vehicles. Yeah, the CAT books are infinitely easier to read. The 939 books are written (supposedly) for 18 year olds to read and understand.
 

Vermonster

Member
Steel Soldiers Supporter
32
39
18
Location
Guilford, Vt.
.
Ha! Yes Sir. The military can definitely make things a lot more difficult that they should be. The 939 Series covers a boatload of 9xx Series vehicles. Yeah, the CAT books are infinitely easier to read. The 939 books are written (supposedly) for 18 year olds to read and understand.
My Gas Mask came with a TM.
 

Vermonster

Member
Steel Soldiers Supporter
32
39
18
Location
Guilford, Vt.
Update: First Day of Rifle Season up here in Vermont. Boss gimme the weekend off.
Got a set of Axle Nut Sockets from Big Mike. His listing says they won't fit a CTIS Truck. I talked to him, and he said try them. They will work with mine. Lock Nut, (Outer Nut) Socket is 1/16" To Big but it will work fine. I think Mike's a Good Dude as he has treated me beyond fair a couple of times.

Sat in the woods for a couple hours, couldn't stand it. I log in the winter on my own land and all I'm doin is lookin at trees and thinkin about workin on my 5 Ton. Back to the house. My little bearing packer wouldn't work with the Axle Bearings, as they're to big. I had this Gizmo I made up for greasing Bar Tips on a Wood Processer I had years ago. Screwed it on a Hand Pump Grease Gun and got Grease down inside every roller. Way better than tryin to rub it in by hand.
Emery Clothed my Spindle again real good, Applied a thin coat of oil on spindle and Inner Wheel Seal and used the Axle Nut Socket to draw it in. Went Fairly Easy. Greased the Outer Bearing too. Spun the Hub and Torqued to Specs. Slid the Axle in and applied thin coat of ATV Sealent to New Gasket. I'm Battin a 1000 so far.

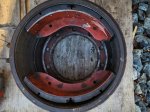
Went to slide the Brake Drum on and WTF? It would only go on a little bit and Stop. Brakes are Caged, Adjusters all the way in and it ain't happenin. WTF am I doin Wrong. I know better than to force it. Pulled the drum back off and looked at everything, Seems OK. I don't get it. Just for the fun of it I'm thinkin check how the shoes fit in the drum "Empty" for loss of better words. Tryin to slide the drum on it looked weird as there was an unusual Gap between lining and drum. Set the Shoes in the Drum and I found my Problem. Somehow during the night of the incident, the bottom show contacted the ground and being loaded, it bent that shoe. Never seen that happed before. I tooks the shoes off and cleaned them up good, but never checked for damage. Attaching those Springs is a chore. Gotta be an easy way to do that. I just don't know it. Yet.

Mikes outta shoes. Wheres a good place to get them? # that is on exsisting shoes is 3222-P-1420.
Thanks in advace. You Guys have been a Big Help so far. .
 

Attachments

KN6KXR

Well-known member
243
575
93
Location
Felton, CA
From TM9-2320-272-24P-1, page 680. Looks like they are only listed as the backing, the liner and the rivets. No complete assembly. You can search for the NSN and part number on the web then comb the results. Usually you'll get crossovers, other manufacturers, etc... These are standard truck parts the problem is the NSN system is built to sell $900 toilet seats to NASA and those numbers are "trapped" in the system. But like I said many times you get the civilian equivalent right off the bat. Brake shoes shouldn't be a problem. If all else fails take them to a heavy mechanic shop they may be able to cross them right off the bat with a tape measure....

2 KFOZZ 19207 12356896 .LINING, BRAKE PART OF KIT P/N......................... 8
5705695 ...............................................................
3 PAOZZ 5320012906360 96906 MS16536-243 .RIVET, TUBULAR PART OF KIT P/N...................... 96
5705695 ...............................................................
4 KFOZZ 19207 12356897 .SHOE, BRAKE .................................................... 4
 

KN6KXR

Well-known member
243
575
93
Location
Felton, CA
1731810009106.png

That's one of the spots the part number leads to. Not a lot of info on cross over.... Good one might take some sleuthing.....
 
Top
AdBlock Detected

We get it, advertisements are annoying!

Sure, ad-blocking software does a great job at blocking ads, but it also blocks useful features of our website like our supporting vendors. Their ads help keep Steel Soldiers going. Please consider disabling your ad blockers for the site. Thanks!

I've Disabled AdBlock
No Thanks