• Steel Soldiers now has a few new forums, read more about it at: New Munitions Forums!

  • Microsoft MSN, Live, Hotmail, Outlook email users may not be receiving emails. We are working to resolve this issue. Please add support@steelsoldiers.com to your trusted contacts.

M998 Front Differential

General Hood

Member
712
2
18
Location
Fort Towson, OK
Both output seals installed. I wasn't fortunate enough to own the HMMWV special seal driver, but a 2" PVC coupling worked great, and I had one handy. Assembly temporarily halted when the wife hollered chow time.
IMG_20180627_174930817 (1).jpg
 

General Hood

Member
712
2
18
Location
Fort Towson, OK
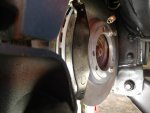
Went ahead and replaced both brake rotors since the old ones were scored and pitted

IMG_20180628_133451708 (1).jpg

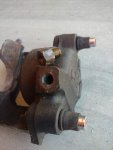
The brake line flare fitting adaptor on the driver side caliper was 80% blocked with whatever whitesh looking thread sealant Uncle Sam used. I pulled it off to clean it up and noticed globs of that same sealant down inside the caliper piston. Local Oreilly Auto Parts has the calipers cheap, so might as well replace those while Im at it

IMG_20180628_133015457_TOP.jpg
 

General Hood

Member
712
2
18
Location
Fort Towson, OK
I'm having what I presume to be rookie issues with re-assembly. I couldn't get enough clearance between the driver side brake rotor and the CV shaft to mount the shaft in place. At the suggestion of fellow member IGM, I went ahead and worked the passenger side and it all went together easily as pictured
View attachment 733078

However, driver side still does not have clearance
1.) I took the output flange back off and inspected the components- no burrs or obstructions, re-installed and it noticeably seated against the bearing housing on the output shaft
2.) visual inspection revealed the bright area of the output flange that rides inside the output seal is where it is supposed to be
3.) I made somewhat of an attempt to measure between the flange and pumpkin on both sides and there was no noticeable difference
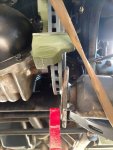
4.) One thing I did notice that may or may not make a difference - the passenger side CV shaft had more than enough clearance, in fact I had to stretch it a little toward the flange in order to mount, whereas the driver side doesnt have enough clearance to mount, as pictured here
IMG_20180701_165143125.jpg

Please advise best course of action, and thanks in advance
 

Milcommoguy

Well-known member
Supporting Vendor
1,708
2,261
113
Location
Rosamond, CA
Thinking out loud here... Would turning the steering wheel a little open up the gap?

Don't scream, I'am sensitive, CAM
 

Milcommoguy

Well-known member
Supporting Vendor
1,708
2,261
113
Location
Rosamond, CA
Thinking out loud here... Would turning the steering wheel a little open up the gap?
Don't scream, I'am sensitive, CAM
 

Milcommoguy

Well-known member
Supporting Vendor
1,708
2,261
113
Location
Rosamond, CA
More thinking... Jack up the frame so that the control arm drops a bit.

My head starting to hurt. Bigger hammer? I'am done, CAM
 

cwc

Active member
Steel Soldiers Supporter
307
153
43
Location
Sweeden, KY
The inner joint is the "plunge" joint and should slide in and out a couple of inches. Is it stuck in the fully extended position?


Sent from my iPhone using Tapatalk
 

Action

Well-known member
3,576
1,557
113
Location
East Tennessee
Yeah, lower the hub. compress the halfshaft into the hub some. It may help to slide the inner end arounf the flange and bring it in from the top.
 

General Hood

Member
712
2
18
Location
Fort Towson, OK
The inner joint is the "plunge" joint and should slide in and out a couple of inches. Is it stuck in the fully extended position?


Sent from my iPhone using Tapatalk


actually I had to slide it in an inch to get it to where it is, and that's all she would give me


actually I had to slide it in an inch to get it to where it is, and that's all she would give me
 

General Hood

Member
712
2
18
Location
Fort Towson, OK
Update: I had some local mechanics look it over and they are of the opinion there is a problem within the halfshaft assembly, as some of you had referenced earlier. I havent remove the boots to diagnose, but with all the past issues I have had with this truck, my best bet is to just purchase a new halfshaft and hopefully no further issues in the immediate future. I will post a response once the new halfshaft arrives
 

Action

Well-known member
3,576
1,557
113
Location
East Tennessee
Before spending $$ on a new shaft, why dont you remove the upper ball joint, tip the hub out, bolt the halfshaft to the rotor, then put the nut and pin back on the upper ball joint? that wont cost you anything.
 

General Hood

Member
712
2
18
Location
Fort Towson, OK
Before spending $$ on a new shaft, why dont you remove the upper ball joint, tip the hub out, bolt the halfshaft to the rotor, then put the nut and pin back on the upper ball joint? that wont cost you anything.
I'm thinking that would bind the shaft up. There is less than half an inch in/out movement on the plunger end of the half shaft
 

cwc

Active member
Steel Soldiers Supporter
307
153
43
Location
Sweeden, KY
It wouldn't cost anything to pull the inner joint apart and see if it is limited in its travel - just messy.


Sent from my iPhone using Tapatalk
 
Top
AdBlock Detected

We get it, advertisements are annoying!

Sure, ad-blocking software does a great job at blocking ads, but it also blocks useful features of our website like our supporting vendors. Their ads help keep Steel Soldiers going. Please consider disabling your ad blockers for the site. Thanks!

I've Disabled AdBlock
No Thanks