• Steel Soldiers now has a few new forums, read more about it at: New Munitions Forums!

  • Microsoft MSN, Live, Hotmail, Outlook email users may not be receiving emails. We are working to resolve this issue. Please add support@steelsoldiers.com to your trusted contacts.

M998 HMMWV Rebuild/Repair Alexandria, VA

Bulldogger

Well-known member
Steel Soldiers Supporter
1,330
586
113
Location
Quantico VA
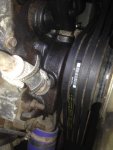
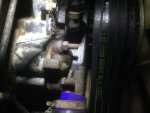
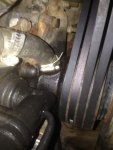
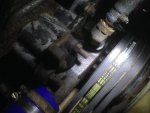
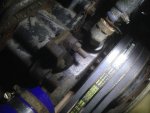
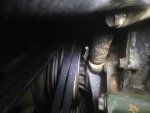
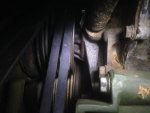
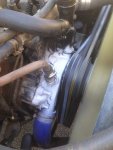
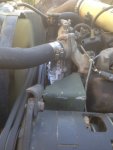
Thanks for the comments gents. I took some pictures in case they help. The wetness is around roughly the top half of the pump. I can't see anything much down below the shaft. Couldn't spot the weep hole.
It is starting to sound like an RandR.
Bulldogger
 

Attachments

Last edited:

Bulldogger

Well-known member
Steel Soldiers Supporter
1,330
586
113
Location
Quantico VA
It doesn't seem to be the hoses but that is a cheap and easy thing to try. I'd meant to replace them anyway. I already did the larger coolant hoses.
Ill try that and report back later this week.
If it doesn't work, my weekend has planned itself, I guess.

Bulldogger
 

Bulldogger

Well-known member
Steel Soldiers Supporter
1,330
586
113
Location
Quantico VA
Well folks, dilvoy wins the award! The bypass hose between the top of the water pump and the bottom of the thermostat housing had a failed hose clamp!!! I discovered it when replacing the hoses as he suggested.

I cleaned the body and dried it, then sprayed the pump body down w talc based aerosol deodorant and have driven it 30-40 miles since and no signs of leaks.

I am am very happy.

Tomorrow, TheCaptain is coming to I help me replace the steering pump. Today I'll probably do some small jobs like removing the temporary manual oil pressure gauge and other stuff.

She is doing well.

Bulldogger
 

Attachments

Bulldogger

Well-known member
Steel Soldiers Supporter
1,330
586
113
Location
Quantico VA
Got more work done this long weekend. Removed the mechanical oil gauge, after becoming confident in the accuracy of the new OEM replacements.

Tightened lots of fittings. Notice my valve cover gaskets were leaking, perhaps because the bolts were quite loose.

Also had to tighten scads of hose clamps, which seem to be slacking off with resumed use (it sat for something like 10 years in motor pool). I will order some new higher quality hose clamps and begin replacing them just in case, when I can get to it. Coolant leaks appear to be stopped. some new ones appeared Saturday in new hoses whose new clamps decided to slack. I hope this is just break in, and they will hold, but I'm thinking of replacing the clamps with better brand name than Advance Auto...

The steering pump seems fine. It was tedious getting the reservoir swapped. I am worried it will leak by, though I did get it on almost as far on the new pump body as the old one was. I'll be watching it.

Also replaced the steering pump return lines, but noticed that the old tubing was thicker. I guess there's a difference between power steering rubber hose and standard fuel hose? I assume the new hoses will last long enough for me to get the right kind. I don't drive often. So, no combat duty until I replace those, eh? :)

While I was under the HMMWV watching the new steering pump reservoir I noticed some seepage from the block. I tried to video it. Come into focus about 10 seconds in. Sorry for the poor video, but I was stuck under a running truck with an iPhone after all. It's just a tiny, tiny bubbling along that seam for about 3 inches. How bad is this?

Should I try to re-torque the heads or is that ill-advised? I could use some kind of block sealant in the coolant, but every time I used any kind of stop-leak treatment in years past in old cars, I always blew out the heater core in short order. I really don't want that, given that the heater core is INSIDE the cab in a HMMWV...

I welcome advice on this issue of seepage. It's not terrible, but I'd like to stop it of course.

Bulldogger
 
Last edited:

Bulldogger

Well-known member
Steel Soldiers Supporter
1,330
586
113
Location
Quantico VA
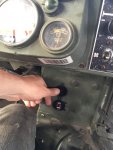
Latest addition/improvement: LED headlights!

After having one headlamp burn out from letting the hood drop too hard, I decided to look at LED headlights again. Last time, just earlier this year, they were still a bit pricey for my taste. I see that the price is steadily coming down, be it slightly. Depending on availability, one can end up spending as much as $50 each for 24V halogen headlamps. In my experience, when you have a headlamp burned out, you are obliged to replace it ASAP, so buying a set of 24V halogen lamps and paying for shipping during a low period of availability can run as high as $115. I have found them cheaper, but I had the luxury of being able to search around and wait a few weeks for availability to improve, as I was still doing "new to me" maintenance and not running her on-road yet.

This past weekend, having burned out my headlight Friday night, I found a seller on "the auction site" that had one of the site's periodic 15% off sale periods going, and this seller was already one that had decent prices to begin with, so I decided to pull the trigger on a set of 7" Jeep Wrangler retrofit lamps. These LED lamps can handle 10-24VDC input, so I wasn't worried about the effects of my 24V system. There are military style 24VDC headlamps available, but they are priced at or above $250 in my experience.

I wonder if people realize this: LED lighting can often accept a wide range of input power, because the electronic power supply inside (commonly called a "driver") is capable of managing input power with its built-in intelligence. Analog incandescent lamps pass all the input power to the filament, meaning a 12VDC lamp installed in one of our vehicles will burn brighter and burn out in short order. LED lamps in contrast are more forgiving due to their driver's capabilities. Of course, putting electronics in high-shock, vibration and damp conditions have their own risks. Electronic ballasts and drivers are being used outdoors long enough now that these issues can be mitigated more effectively. Since my LED replacements are marketed to Harleys and Jeeps, both high vibration vehicles or driving situations, I felt somewhat reassured that they would stand up to use in a HMMWV.


Anyway, the replacement lamps came (in two days!) with a standard Halogen lamp plug, so I had to adapt them to Packard connectors. I have a set of DIY connectors from Erik's MilSurp, but I also have some 24V incandescent lamps that were "out of work", so I just cut off the connectors from my halogen lamps. I left the wire ends a bit longer on the one that wasn't burned out, in case I ever need it. Cannibalizing the military 24V headlamps also meant they had wiring label number tags on them too.

I used spade connectors to connect to the halogen plug on the LED lamps for now, so that I can test them without cutting the wires to splice to the Packards and thus void the warranty.


Installation was easy except that the anti-flicker box on the leads of the LED lamp, along with the Halogen connector AND my splices was a lot to cram into the headlight cavity. It just managed to fit, but the real trick was that the LED lamp is thicker at the rim than the halogens. This gave me some delay as I tried to get all three screws from the trim ring into the threads in the mount. I managed it, and they seem OK.

The brightness of the high-chromaticity light is really something! I aimed the headlights as far down as I could, to help avoid blinding incoming drivers. Once I get some time in full darkness, I will reverify the aiming for possible further adjustment.


Two oddities: 1) the high beam indicator lamp in the instrument cluster is always on now, regardless of the headlamp setting, and 2) when swapping out the one broken halogen for the first LED lamp and energizing the mismatched lights, the halogen didn't hardly glow at all, and the LED seemed to be lighting up all the individual LEDs instead of just the middle or outer rows (it's the three row style). When I put in the second LED lamp, both lamps glowed the same and lit up properly in high/low.

I suspect this has something to do with differences in power draw between LED and Halogen.

This pair cost under half what the 24V LED headlamp assemblies advertised for our MVs sell for. The seller had substantial positive feedback and they are rated for up to 24V input power, so I figured I'd give them a try. They also noted good ingress protection (i.e. water resistance) and given that they are marketed to the 4x4 Jeep crowd logically they should be tough.

I'll report back if anything untoward happens, but I sure like them so far.

If someone wants to look at a set, since I can't (shouldn't) post links, one may search for Turbo SII (that's sii capitalized) on the Auction site or on Amazon. They sell on both, and they ship with the same policy, i.e. two days drop shipped out of Louisville KY by UPS. I'd check both sites to see which is cheaper. I saved $3 using the Auction site, but it varies as each site has sales and other incentives.

I should also mention that these lamps also have two rows of small LEDs above and below the larger ones in the face. These can be wired up (see the small male spaded yellow wire in the picture) to function as daytime running lights or to blink with the turn signals. I just taped that up for now.

Bulldogger

IMG_2860[1].jpgIMG_2862[1].jpgIMG_2863[1].jpgIMG_2864[1].jpg
 

infidel got me

Well-known member
1,679
32
48
Location
Newberry, Florida
Bulldogger-- Glad to (see) that you have evolved from the stone ages! The Amish headlight system on the military vehicles is a joke. The blackout lights are brighter than the headlights..... lol
 

NormB

Well-known member
1,220
72
48
Location
Cloverly,MD
Bulldogger-- Glad to (see) that you have evolved from the stone ages! The Amish headlight system on the military vehicles is a joke. The blackout lights are brighter than the headlights..... lol
Amish? Mein Gott im Himmel! I think you mean "Lucas electric" headlight system.

;-)
 

Bulldogger

Well-known member
Steel Soldiers Supporter
1,330
586
113
Location
Quantico VA
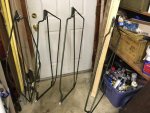
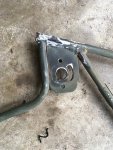
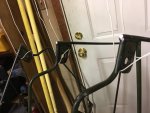
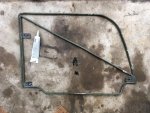
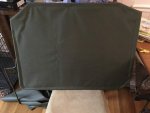
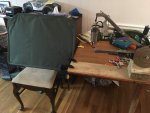
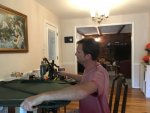
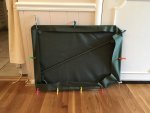
Started in earnest on the half door frames I sourced from Hawkman. Cleaned up the frames w wire wheel and evened out the corners. Then sprayed with a rust reformer primer I've never used before. Hopefully it works. They get painted OD tonight, and I'll begin covering later this week. I sourced some heavy weight OD canvas from the Bay site and hope it will work well. I have a hand crank heavy sewing machine, which I intend to stitch the canvas on with.
Bulldogger
IMG_0397.jpgIMG_0395.jpgIMG_0398.jpgIMG_0396.jpg
 

Bulldogger

Well-known member
Steel Soldiers Supporter
1,330
586
113
Location
Quantico VA
I have a 24V USB power node to mount and several other PMS items to complete before driving to the Graves Mountain Rally end of the month. The USB power supply has an internal voltmeter, which will be interesting. It is off Amazon, and the last USB p/s I bought didn't last long. I hope this one is better.
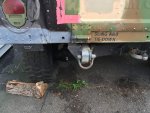
Lots of little things to do, and still need to pull the tires off my new-to-me M116A3 and check the brake shoes and wheel bearings. I'll also have to move the recently mounted LED license plate bracket, as I learned I mounted mine too close to the pintle hitch. Thankfully I spotted it BEFORE it attacked the plate in a turn when towing.
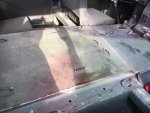
Will also mount the plywood decking given me by TheCaptain last year. I had intended to wait until I'd cleaned the interior better and repainted it, but I am coming to accept that painting might not happen tomorrow. Or next week. Or next month. Or.....

Bulldogger
 

Another Ahab

Well-known member
17,999
4,556
113
Location
Alexandria, VA
Started in earnest on the half door frames I sourced from Hawkman. Cleaned up the frames w wire wheel and evened out the corners. Then sprayed with a rust reformer primer I've never used before. Hopefully it works. They get painted OD tonight, and I'll begin covering later this week. I sourced some heavy weight OD canvas from the Bay site and hope it will work well. I have a hand crank heavy sewing machine, which I intend to stitch the canvas on with.
Bulldogger

That's a deceiving project, you're tackling, Bulldogger.

- It looks small and simple, but it's kind of complicated (some of this, some of that, a little here, a little there).

That hand-crank sewing machine sounds interesting. Got a pic? Where'd you pick it up?
 

Bulldogger

Well-known member
Steel Soldiers Supporter
1,330
586
113
Location
Quantico VA
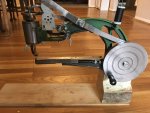
Here is the sewing machine AA. They are readily available on theBay.
It is rough hewn and needed work to function well, but the price was good.
Bdgr
 

Attachments

Bulldogger

Well-known member
Steel Soldiers Supporter
1,330
586
113
Location
Quantico VA
Moved the license plate holder out of the way of the pintle hitch, mounted the USB and voltmeter and installed the decking TheCaptain gave me. Am going to be helping him Sunday w idler arm replacement. Wheeee!
Bulldogger
 

Attachments

Bulldogger

Well-known member
Steel Soldiers Supporter
1,330
586
113
Location
Quantico VA
Half Doors!

Finished all of the canvas stretching and stretching, then cut out openings for hinge screws in doorhandles. Then with the help of my soldier be mounted the hinges and handles then put the half doors on the Humvee
Looking good
Bulldogger
IMG_0432.jpgIMG_0433.jpgIMG_0436.jpgIMG_0431.jpg
 
Last edited:
Top