From personal experience in the shop and at home with the baby HEMTT, here are some tricks I've found work every time:
Mag drills like to be attached to thick metal. If you're drilling 1/4" or thinner, back up the piece with a 1/2" thick piece of plate (no need to weld in place, just so the magnetic field can grab it). The magnet holds better if it thinks it's against a thick surface.
The mag base has to be against a clean, flat surface. If there are chips in the way, or if it's curved or only partially covered by the base, the magnetic field (grip) won't be as strong.
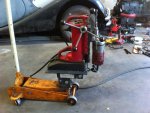
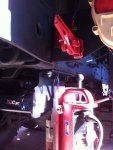
ALWAYS use a safety strap or chain when drilling from the side or bottom. If the mag drill comes off, it won't stop running until you recapture it and hit the off button (hard to stay calm and composed, especially if it's running in your lap).
A mag drill has enough torque to break as big a bit as it's capable of turning so cost is another reason for working safely.
"It'll be OK, I'm only drilling one hole" is quite often heard just prior to a trip to the emergency room. One hole or twenty, work safe!
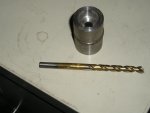
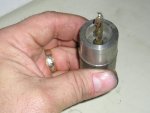
Annular cutters are good for big holes because they cut like a hole saw with lower chip load that a twist drill. If you're drilling a new hole just mark with a center punch. The annular cutters have a center pin that makes lining up on your mark a snap. That pin becomes spring-loaded thanks to the mag drill design and serves to eject the "button" out of the cutter once the hole is through.
The only flaw of an annular cutter might be the inablilty to drill "blind holes" since it leaves the center undrilled.
Annular cutters are also able to drill off-center of an existing hole because, unlike a twist drill, they don't have a beveled point that keeps trying to find it's way into an existing hole. Say you have an off center 1/2" hole that needs to be enlarged to 5/8" and be put back on center; an annular cutter is the tool for the job. All they ask is good cutting oil and chip removal, especially in the case of deep hole drilling.
My trick for chip removal (works good on twist drills too) is to apply down pressure for cutting 3 to 5 seconds, then back off just enough to weaken the chip so it breaks off and falls out of the way, then start down feed again. This is also good for your knuckles as you won't keep getting whipped by that 8" long spiral chip every time it goes around.
Rivet removal is a snap with a couple of tricks I've learned.
If you're good with an angle grinder; a .040" cut off wheel in a 4" grinder makes short work of rivet heads. A little more work is a sharp cold chisel and a 4 pound sledge (don't waste your time and energy with a little general purpose ball peen hammer).
Once you've got the rivet head off, make a center punch mark dead center on the rivet shank and drill an 1/8" starter hole deep enough to be into the shank the thickness of the frame rail or bracket but not so deep that you drill through the rivet head on the other side. Now step drill up an 1/8" at a time to within 1/16" of your rivet shank diameter, always drilling to the bottom of the hole, not all the way through.
Step drilling this way gives you light chip load (1/16" per side) and lets you have plenty of control in keeping the hole straight and centered. Stopping 1/16" undersized (7/16" hole into 1/2" rivet shank for example) lessens the chance of drilling into frame, bracket, etc.
What you've done by drilling out the rivet is to weaken it's internal structure. The remaining thin walled shank "tube" will collapse easily. Last, slip a pin punch into the hole 'til it bottoms out on the underside of the remaining rivet head and drive it out with a hammer. What you couldn't move with an air hammer before will almost fall out now that it has no internal support for it's shank-to-hole grip.
True, this is more time-consuming than the torch, or sledge hammer and big punch method; but once you start using it you'll find you really have to work hard to ever screw up a frame or bracket hole again.


