• Steel Soldiers now has a few new forums, read more about it at: New Munitions Forums!

  • Microsoft MSN, Live, Hotmail, Outlook email users may not be receiving emails. We are working to resolve this issue. Please add support@steelsoldiers.com to your trusted contacts.

MEP-003A Generator grinding the starter motor while running

stickshift

New member
4
3
3
Location
Grass Valley, Ca
I posted this on another thread, then I saw the generator forum. This subject has been beat to death before, but the only fix I've seen is to adjust the starter lock-out points. I've owned my MEP-003A for over 10 years. The last couple years the starter will re-engage after the engine starts, thus grinding the starter gear on the flywheel. It will also occasionally engage when I shut the unit off and the engine is winding down. . This drives me nuts because I know it is damaging the gears although it cranks fine. I do have a TM and I did follow the starter lock-out setup and the lockout points are set at .040 when running. The crazy thing is that I can sometimes, but not always, engage the starter by turning the switch to "start" when the engine is running and the point are completely open. I can do this even with the connector to the points un-plugged. This should be impossible with the points open, right? My unit was manufactured 1/87 and I have the older version starter with the bendix lever on top. My only thought is that there's something like a minor short in the starter itself. I read in the manual that there is a version II starter that has gear reduction and I'm thinking of ordering one, but I don't want to ruin it with this problem going on. By the way, are the spur gears still available for these older starters? I'm afraid to pull it and look, but I'm sure it's damaged and I would hate to get rid of it if it's repairable. Thanks for any responses. Here's the point setup procedure I used.
 

Attachments

Scoobyshep

Well-known member
1,144
1,528
113
Location
Florida
I posted this on another thread, then I saw the generator forum. This subject has been beat to death before, but the only fix I've seen is to adjust the starter lock-out points. I've owned my MEP-003A for over 10 years. The last couple years the starter will re-engage after the engine starts, thus grinding the starter gear on the flywheel. It will also occasionally engage when I shut the unit off and the engine is winding down. . This drives me nuts because I know it is damaging the gears although it cranks fine. I do have a TM and I did follow the starter lock-out setup and the lockout points are set at .040 when running. The crazy thing is that I can sometimes, but not always, engage the starter by turning the switch to "start" when the engine is running and the point are completely open. I can do this even with the connector to the points un-plugged. This should be impossible with the points open, right? My unit was manufactured 1/87 and I have the older version starter with the bendix lever on top. My only thought is that there's something like a minor short in the starter itself. I read in the manual that there is a version II starter that has gear reduction and I'm thinking of ordering one, but I don't want to ruin it with this problem going on. By the way, are the spur gears still available for these older starters? I'm afraid to pull it and look, but I'm sure it's damaged and I would hate to get rid of it if it's repairable. Thanks for any responses. Here's the point setup procedure I used.
There is a diode that goes bad that can cause that. There is a correction for it, ill see if i can find it. In the mean time see if the starter solenoid is getting voltage when not commanded

Sent from my SM-G973U using Tapatalk
 

stickshift

New member
4
3
3
Location
Grass Valley, Ca
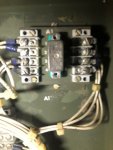
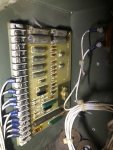
This is great info guys, thanks. My unit may be labeled differently though. On my unit, the circuit board with the components is labeled A2, not A1. The one labeled A1 just has what looks like a small relay or thermal breaker and terminals. See pictures. I used my meter on diode check mode and CR2 on A2 seemed to be open. I reversed the leads and the same thing. I did find TB4 and I will do the wire swap when it's daylight. I don't want to cut back all the zip ties and move wire #3 all the way down to #12,13,14, so I think I'll move it up one to terminal #2 that's not in use and run a jumper down to #12,13,14 that I did see were linked with a strap. Thanks again.A1.jpgA2.jpg
 

Ray70

Well-known member
2,598
5,931
113
Location
West greenwich/RI
A2 is your voltage regulator board. CR2 on the voltage regulator is NOT what you are looking for.
I'm not familiar with the CR2 diode, but have you tried looking on the back side of A1 to see if it is soldered across 2 terminals on the back?
I also notice the relay is unscrewed from A1, have you had to remove it in the past? I would screw it back down to prevent it from vibrating loose.
 

Guyfang

Moderator
Staff member
Moderator
16,795
24,155
113
Location
Burgkunstadt, Germany
That's a relay on the A1. Remove the 4 nuts on the back of the control cube, that hold the card to the back wall. pull the A1 card toward you and look at the back. There you will find the CR1. Its best to simply remove the 8 wires that are connected to A1, and then pull out the relay. Then you can make your check of the CR1. I normally un solider at least one end of a CR before testing.

If your batteries are charged and hooked up, do keep in mind you have the potential to cause damage to your set and tools, if you come in contact with MT4. So un hook the Neg terminal.
 

stickshift

New member
4
3
3
Location
Grass Valley, Ca
That's a relay on the A1. Remove the 4 nuts on the back of the control cube, that hold the card to the back wall. pull the A1 card toward you and look at the back. There you will find the CR1. Its best to simply remove the 8 wires that are connected to A1, and then pull out the relay. Then you can make your check of the CR1. I normally un solider at least one end of a CR before testing.

If your batteries are charged and hooked up, do keep in mind you have the potential to cause damage to your set and tools, if you come in contact with MT4. So un hook the Neg terminal.

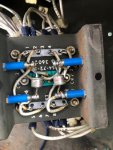
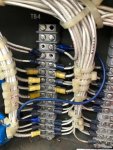
Yes, You guys are correct. There were actually two diodes on the back of A1 (see picture). I also secured the relay on A1 with two spare terminal screws (good eye). I checked the diodes with a Fluke 87 on diode mode and I got 0.5 vdc with the neg lead on the neg side of each diode, 0.0 vdc reversed. I'm not sure if these are special diodes, but I can usually check basic diodes on ohms scale and that didn't work with these. I also lifted the lugs on terminals 6 and 8 so the diodes would be isolated. I found wire # P59E15 on the right side of terminal 3 on TB4. Moved it up to terminal 2 that was not used and ran a jumper from there to terminal 12 ( blue wire in picture). This seems to be working. I started the generator and shut down several times with no grinding issue. You guys made my day! I still want to replace the spur gear on this starter, any leads on where to get one? The TM shows an exploded diagram with the spur gear as a separate part. Thanks All!


CR2.jpgTB4.jpg
 
Top