- 1,090
- 1,623
- 113
- Location
- Wilson County, Texas
Long post inbound, standby....
Just wrapped up what I hope is the last of any major work for this unit!
Started by removing the top panels, and the one side panel so I could replace the fuel return lines & the fuel feed line with the incorrect fitting.

Even with the side panel removed, getting at the nut on the AN fitting for the fuel line is a PITA, so I removed the entire fuel/water filter assembly. That in itself is a bit annoying. Also, got the battery out of the way. Made the new 4AN fuel line with a kit I had.
4AN fuel line kit on Amazon - https://amzn.to/3Y66Bu1


Installed new fuel return line & the upgraded brass T's. Made everything nice and neat. Removed the muffler & air intake filter assembly to make it easier. I sell the T's in pairs on my eBay store. Since we can't share links to eBay, you can get there via my website in my signature at the end of any of my posts.


Figured since I was at it, I would replace the crappy rubber fuel tank well nuts. This is where things started to go bad....
Fuel tank drain well nut was STUBBORN and took me hours to get out. I basically had to rip it apart to get it out. Because of this, it slightly "puckered" (lack of a better term?) the hole of the fuel tank. But, since I was installing the new brass type fitting & o-ring I sourced, I figured it would just flatten it out. In the end, I was right that it would, but took a while to get there.
So, issue with this lower well nut is, that they made the opening in the metal body of the generator JUST big enough. When you put the big 7/8 nut in there, you have no room. If the tank is off center at all, it will not tighten properly down... catching the metal body, and leak. You might get lucky, or not. So far on these, I have been 0-2. I ended up needed to remove the fuel tank.
With that said, it being the second time I have done this & overall having a lot more "repair" experience now, removing the fuel tank when you have the top off for everything else I had been doing, is annoying but not horrible. Now that I am 0-2, I will probably just NOT try to fish a fitting into place anymore, and just remove the tank to install everything. You get to clean the tank out at this point as well. I got the bottom half of the old fuel sender out of the tank while it was removed.
I didn't document any pictures at this point because I was covered in diesel, grime, oil, and irritated. But, you basically just remove all the bottom bolts along the main frame, along the inside along that lip where the well nut come through, and don't forget the two on each side tucked facing toward the fuel tank end. I will try to grab some pictures & come back to update this post pointed out these not so obvious ones. If I forget, remind me!! Added.

There is just enough to lift the body to not have to remove the shroud around the fan. Getting two items around 1 inch thick and putting them between the main frame and the body along the sides once you lift it to remove the tank is helpful. Sorry if this is not as detailed as I usually am with my work. These few tips all will make a tone of sense if you are going for this task though!
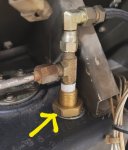
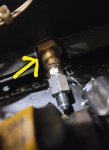
Here are the well nuts that are different that the ones talked about on the forum a lot that I sourced. I got a bunch of different ones over the past few months. Finally found ones that were a good length, size, and had a little lip to hold the o-ring in place. They worked out fantastic. I plan to order them in bulk & keep them in stock, like the upgraded brass T's, on my eBay store. They will be sold as a set & with Viton o-rings.


At this point, everything was just done in reverse, and just kept everything neat & cleaned up. I can't attach more files so I am going to move on to another post.
Just wrapped up what I hope is the last of any major work for this unit!
Started by removing the top panels, and the one side panel so I could replace the fuel return lines & the fuel feed line with the incorrect fitting.

Even with the side panel removed, getting at the nut on the AN fitting for the fuel line is a PITA, so I removed the entire fuel/water filter assembly. That in itself is a bit annoying. Also, got the battery out of the way. Made the new 4AN fuel line with a kit I had.
4AN fuel line kit on Amazon - https://amzn.to/3Y66Bu1


Installed new fuel return line & the upgraded brass T's. Made everything nice and neat. Removed the muffler & air intake filter assembly to make it easier. I sell the T's in pairs on my eBay store. Since we can't share links to eBay, you can get there via my website in my signature at the end of any of my posts.


Figured since I was at it, I would replace the crappy rubber fuel tank well nuts. This is where things started to go bad....
Fuel tank drain well nut was STUBBORN and took me hours to get out. I basically had to rip it apart to get it out. Because of this, it slightly "puckered" (lack of a better term?) the hole of the fuel tank. But, since I was installing the new brass type fitting & o-ring I sourced, I figured it would just flatten it out. In the end, I was right that it would, but took a while to get there.
So, issue with this lower well nut is, that they made the opening in the metal body of the generator JUST big enough. When you put the big 7/8 nut in there, you have no room. If the tank is off center at all, it will not tighten properly down... catching the metal body, and leak. You might get lucky, or not. So far on these, I have been 0-2. I ended up needed to remove the fuel tank.
With that said, it being the second time I have done this & overall having a lot more "repair" experience now, removing the fuel tank when you have the top off for everything else I had been doing, is annoying but not horrible. Now that I am 0-2, I will probably just NOT try to fish a fitting into place anymore, and just remove the tank to install everything. You get to clean the tank out at this point as well. I got the bottom half of the old fuel sender out of the tank while it was removed.
I didn't document any pictures at this point because I was covered in diesel, grime, oil, and irritated. But, you basically just remove all the bottom bolts along the main frame, along the inside along that lip where the well nut come through, and don't forget the two on each side tucked facing toward the fuel tank end. I will try to grab some pictures & come back to update this post pointed out these not so obvious ones. If I forget, remind me!! Added.

There is just enough to lift the body to not have to remove the shroud around the fan. Getting two items around 1 inch thick and putting them between the main frame and the body along the sides once you lift it to remove the tank is helpful. Sorry if this is not as detailed as I usually am with my work. These few tips all will make a tone of sense if you are going for this task though!
Here are the well nuts that are different that the ones talked about on the forum a lot that I sourced. I got a bunch of different ones over the past few months. Finally found ones that were a good length, size, and had a little lip to hold the o-ring in place. They worked out fantastic. I plan to order them in bulk & keep them in stock, like the upgraded brass T's, on my eBay store. They will be sold as a set & with Viton o-rings.


At this point, everything was just done in reverse, and just kept everything neat & cleaned up. I can't attach more files so I am going to move on to another post.
Last edited:


