• Steel Soldiers now has a few new forums, read more about it at: New Munitions Forums!

  • Microsoft MSN, Live, Hotmail, Outlook email users may not be receiving emails. We are working to resolve this issue. Please add support@steelsoldiers.com to your trusted contacts.

MEP-803a success story

Digger556

Well-known member
Steel Soldiers Supporter
275
650
93
Location
Denver CO
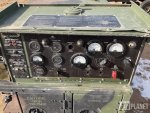
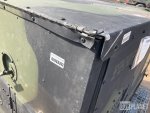
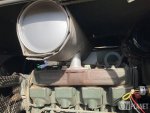
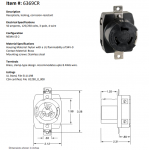
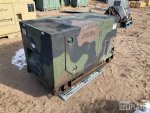
Back in February a non-running MEP-803a and MEP-802a came up for auction locally. I've always wanted an -803a after owning two -802a's. The -803a was missing its exhaust flapper, making me hesitant to bid on it and after asking around here, I was more hesitant. I looked carefully at the photos and didn't see any indications of water running out of the exhaust manifold. (or wet-stacking) It was missing several switches and had some cosmetic damage, but otherwise looked like a nice unit.
3e805fba-a206-48df-b709-ce4cea5c243f-hr.jpg
8fdc13d1-b1e6-4941-9e48-9854eb5e9aa6-hr.jpg
962be5fc-5a50-4a24-b9aa-b8fe6b89aca4-hr.jpg
a7e12176-cc71-4686-a60a-0acbbf32feaf-hr.jpg
I figured if it was a dud, I would take the hit and either rebuild the engine or part it out. My logic being, this is Colorado and we are typically very dry, so the chance of water filling the engine was low. Auction day came and it must have been slow around here because I picked it up for the minimum bid, $1100, not having to fight anyone else for it!
 
Last edited:

Digger556

Well-known member
Steel Soldiers Supporter
275
650
93
Location
Denver CO
Pickup day came and I ran down to the 'Springs to collect my two winning bids. (I also won the 802a after a little back and forth with another bidder)
20230206_120009.jpg

Both units were dirty, but overall not in bad shape and had all the important parts present. I towed everything home and starting pulling apart the 803a to decide if this was a good purchase or not. I pulled the top cover and muffler. To my relief the inside looked clean and only had dry carbon soot present. The manifold looked similar and I started getting my hopes up this was going to be a good unit. To be sure, I turned the engine over by hand and it rotated freely.
20230206_162343.jpg
20230206_162713 (Large).jpg
20230206_162723.jpg
20230206_162731.jpg
 
Last edited:

Digger556

Well-known member
Steel Soldiers Supporter
275
650
93
Location
Denver CO
First step was giving everything a good washdown. The units were dirty, but no signs of oil leaks on the 803 and only minor side cover leak on the 802. Things were looking better and I was getting more excited to get this thing running.
20230709_182216.jpg
20230709_182231.jpg
20230709_182242.jpg
20230709_182258.jpg
 

Digger556

Well-known member
Steel Soldiers Supporter
275
650
93
Location
Denver CO
After washdown, I began taking parts from the 802 to make the 803 complete. The 802 was purchased with the intent of being a parts donor for the 803 and another 802 I have been working on. I transferred all the missing switches and connected up a power supply to the unit. Again, everything went smoothly and the controls system appeared to function as normal.
20230714_203820.jpg

I pressed on prepping the unit for a first start. With all my prior units, I immediately check for the quad-fuse, add a MOV to the voltage regulator, upgrade the wellnut and change all the fluids and filters before attempting to start the machine. It's a small investment and it allows me to inspect everything as I go. Someone mangled the water separator trying to drain the fluids and it took some effort to remove. In the process, fuel began dripping from the return line before I even cranked the engine, so that needed to be replaced as well.
20230714_233326.jpg
20230714_205746.jpg
20230714_205755.jpg
 
Last edited:

Digger556

Well-known member
Steel Soldiers Supporter
275
650
93
Location
Denver CO
The filter dates indicated that this unit had not been serviced since around 2016. The air filter had a hand written date on it and the oil filter had a 2015 manufacture date. So I'm guessing it has been on there a while. The air filter was well used and needed replacement.
20230715_081921.jpg
20230714_204023.jpg

I pulled the top cover and replaced the return lines, trying Tygon tubing this time. I also drained the oil, which is odd, since the unit was supposed to be drained already. And the oil looked brand new too. Odd.
20230715_141424.jpg
20230715_080457.jpg
 

Digger556

Well-known member
Steel Soldiers Supporter
275
650
93
Location
Denver CO
The way I install the wellnut works pretty efficiently and doesn't require removing anything from the tank. First I install a barbed hose fitting on the wellnut.
20230715_142620.jpg

Then I feed a hose through the well nut hole and out the filler and attach the well nut.
20230715_142924.jpg

...and pull the whole thing back through the tank, using the hose to hold things in place while I thread the big nut on.
20230715_142930.jpg
20230715_143001.jpg

.and tighten everything down.
20230715_143910.jpg
 

Digger556

Well-known member
Steel Soldiers Supporter
275
650
93
Location
Denver CO
Now I was ready to test. After a bit of cranking to purge the fuel system, the unit kicked off easily, but had a terrible squeal. I shut it down and guessed it was likely the belt slipping, so I fired it back up for a longer run:


Checking for fuel and oil leaks, everything looked good, so I tightened the belt, reassembled the top cover, and got to work replacing missing and broken parts like the exhaust flapper, NATO port cover and a door handle.

20230718_175850.jpg
20230718_191416.jpg
20230719_195838.jpg
 
Last edited:

Digger556

Well-known member
Steel Soldiers Supporter
275
650
93
Location
Denver CO
I was jumping up and down inside. This unit was running like new. The only thing left was to replace the non-functioning water temp gauge and load bank it to verify things were running right. While I waited for more parts to show up, I opened the documents box and discovered a new, still in the sealed bag, operators manual!
20230720_175910.jpg
20230720_180034.jpg
 
Last edited:

Digger556

Well-known member
Steel Soldiers Supporter
275
650
93
Location
Denver CO
I like to replace the little baggy thing on the power output with a twist lock connector for ease of plugging in my power distribution box. An 803 required a bigger twist lock than what the local home improvement retailers carry.
20230728_181434.jpg
20230728_182941.jpg
20230728_185207.jpg

Later I'm planning to 3D print a cover for this, similar to what the NATO port uses.

My load bank is a pair of electric shop heaters that are rated to 5000 watts each, but I've found they pull closer to 6000 watts each when run at 240 Vac. I can step them from 3000 watts (rated) to 10 kW in 1 kW increments. When all the elements were on, I was measuring 48 amps or 11,500 watts. Not quite a full pull, but close enough to give me confidence things are running right. Even at 5280 ft elevation, where NA diesels tend to smoke more due to lack of air, this unit was pulling really clean, with only the faintest hint of black smoke.
20230728_190309.jpg

The P.R.C meter wasn't all that accurate, but none of the units I've own have been.
 

Digger556

Well-known member
Steel Soldiers Supporter
275
650
93
Location
Denver CO
For giggles, I hooked up my 3.7 HP, single phase air compressor to see how the 803 would handle it. My 802 can start this compressor, but it was hard on the unit and I didn't want to continue doing so.


The compressor had a peak inrush of 186 amps! The way the multimeter measures this, it was be equivalent to the LRA rating, typical of most electric motors. I've compared this with an oscilloscope for accuracy. It's a shockingly high number, but only last for a few milliseconds. The inrush must of shook the PRC meter around, because afterwards it was reading 30% with a constant load of 15.9 amps from the compressor. (15.9/52 x100% = 30.6% rated current.)

My wife has already asked if she can borrow the generator to run a bunch of inflatable bounce houses and obstacle courses at the school's next big event. :LOL:
 

Icesythe7

Active member
147
223
43
Location
Indiana, USA
Later I'm planning to 3D print a cover for this, similar to what the NATO port uses.
Do you happen to have any pictures of this? I do a lot of 3D design myself so I would like to make one for myself as well, I didn't even think of removing the hole and adding a socket like this.
 

Light in the Dark

Well-known member
Steel Soldiers Supporter
3,871
6,108
113
Location
MA
This might fit right on, based on dimensions of the receptacle you used that I am finding online:


The one I referenced doesn't have the central ground, but I assume its the same dimensionally due to ratings

Untitled.png
 

Digger556

Well-known member
Steel Soldiers Supporter
275
650
93
Location
Denver CO
This might fit right on, based on dimensions of the receptacle you used that I am finding online:


The one I referenced doesn't have the central ground, but I assume its the same dimensionally due to ratings

View attachment 902382
Yes, that one is similar. I used the CS6369 from Marinco

Until recently, I wasn't aware there was a version with and w/o the center spike. The two are dimensionally the same otherwise. The CS stands for California Standard, so guessing they slapped an extra requirement on an existing standard. :rolleyes:

When I design the cap, I'll post up pictures and CAD files.
 

Digger556

Well-known member
Steel Soldiers Supporter
275
650
93
Location
Denver CO
Do you happen to have any pictures of this? I do a lot of 3D design myself so I would like to make one for myself as well, I didn't even think of removing the hole and adding a socket like this.
@Icesythe7

I finished the cap after a few iterations and posted the CAD files here:

1691977609331.png
20230813_185116.jpg
20230813_185301.jpg
20230813_185328.jpg
 

2Pbfeet

Well-known member
453
838
93
Location
Mt. Hamilton, CA
Nice (re)build, and postings!

FWIW: It may not matter as much in dry Colorado, but you can also get IEC 60309, pin and sleeve connectors and outlets that are waterproof, available in both three phase and single phase 120/240 versions. It is the same standard used on the standard spiders.
This is the 60A 3 phase outlet version.

All the best,

2Pb
 

Digger556

Well-known member
Steel Soldiers Supporter
275
650
93
Location
Denver CO
Good suggestion on the pin and sleeve connectors. It would be nice to have some overhead on my plug, but I stuck with the 50amp twist lock because they are so ubiquitous on the average spider box.

It is dry here, but ironically, the front range has seen more rain this summer than I can remember. At one point, we were wetter than Seattle.
 

2Pbfeet

Well-known member
453
838
93
Location
Mt. Hamilton, CA
Good suggestion on the pin and sleeve connectors. It would be nice to have some overhead on my plug, but I stuck with the 50amp twist lock because they are so ubiquitous on the average spider box.

It is dry here, but ironically, the front range has seen more rain this summer than I can remember. At one point, we were wetter than Seattle.
Yes, it seems like it has been quite the weather this year for Colorado. The wind and hailstorms have been impressive.

The twist locks are definitely ubiquitous. I just figure that most of the time that I’m going to be using my generator involves bad weather, so I would like something that is at least officially water resistant.

Your build looks great.

All the best,

2Pb
 
Last edited:
Top
AdBlock Detected

We get it, advertisements are annoying!

Sure, ad-blocking software does a great job at blocking ads, but it also blocks useful features of our website like our supporting vendors. Their ads help keep Steel Soldiers going. Please consider disabling your ad blockers for the site. Thanks!

I've Disabled AdBlock
No Thanks