• Steel Soldiers now has a few new forums, read more about it at: New Munitions Forums!

  • Microsoft MSN, Live, Hotmail, Outlook email users may not be receiving emails. We are working to resolve this issue. Please add support@steelsoldiers.com to your trusted contacts.

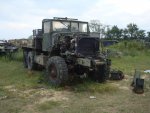
My BIG M925A2 Project Truck Is Home

EZFEED

New member
880
0
0
Location
Lafayette, LA
Fricken awesome Chris!!!!! Damnit I wish I were closer to help you out! Gonna be a nice rig when you are done!
So I presume this will be a daily driver for you when done correct :)
 

steelsoldiers

Administrator
Staff member
Administrator
5,264
4,007
113
Location
Charleston, WV
Fricken awesome Chris!!!!! Damnit I wish I were closer to help you out! Gonna be a nice rig when you are done!
So I presume this will be a daily driver for you when done correct :)
Thanks. It'll absolutely be the daily driver. I may need to install AC for the summer so I don't show up at work with sweat all down my back and armpits! :-D
 

cranetruck

Moderator
Super Moderator
Steel Soldiers Supporter
10,350
75
48
Location
Meadows of Dan, Virginia
Man, what a job Chris! All seems so heavy in comparison to my own 5-ton project.

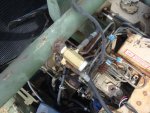
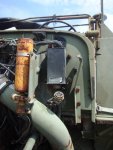
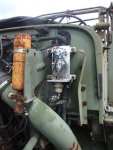
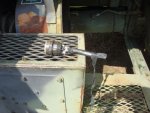
Glad the control box worked well, if there is no hood, you may want to cover it when you aren't working on it, it can take occasional hose-downs, but why push it.

Let me know if you want the old box reworked as well...I'll make a vented cover for it and give it good paint job too. :)
 
Last edited:

steelsoldiers

Administrator
Staff member
Administrator
5,264
4,007
113
Location
Charleston, WV
Most everything on that truck is heavy! I can't wait to see the two of them side by side for comparison.

You did a great job, Bjorn. It is so simple compared to the original box. I don't know why they had to make it so complicated. Is a starter interlock really that important? How many troops can't tell that the truck is running and try to start it again? I can see it in an ultra-quiet sedan, but not is a big rumbling 5-ton.

I saved the old box that was in the truck when I got it. I popped the cover off and it was full of corrosion. I will send that one to you for a rebuild! :razz:
 

cranetruck

Moderator
Super Moderator
Steel Soldiers Supporter
10,350
75
48
Location
Meadows of Dan, Virginia
Most everything on that truck is heavy! I can't wait to see the two of them side by side for comparison.

You did a great job, Bjorn. It is so simple compared to the original box. I don't know why they had to make it so complicated. Is a starter interlock really that important? How many troops can't tell that the truck is running and try to start it again? I can see it in an ultra-quiet sedan, but not is a big rumbling 5-ton.

I saved the old box that was in the truck when I got it. I popped the cover off and it was full of corrosion. I will send that one to you for a rebuild! :razz:
Chris, I'm getting dangerously close to take the 757 for some good road testing, but want all the little things working right, like the torque rods, for example. Got an insurance quote from Gulfway for $250 and registration will be as an antique vehicle so that's only $50.
So, a side by side comparison shouldn't be that far off in the future.

Send me a PM when you get ready to send the old box and I'll get going on the cover.

Pleasure working with you!
 
Last edited:

steelsoldiers

Administrator
Staff member
Administrator
5,264
4,007
113
Location
Charleston, WV
Chris, I'm getting dangerously close to take the 757 for some good road testing, but want all the little things working right, like the torque rods, for example. Got an insurance quote from Gulfway for $250 and registration will be as an antique vehicle so that's only $50.
So, a side by side comparison shouldn't be that far off in the future.

Send me a PM when you get ready to send the old box and I'll get going on the cover.

Pleasure working with you!
Great! I am glad you have been making so much progress lately! I look forward to getting them together. Maybe we could meet up at the Danville Tank Museum this winter.

I will send you the other box in a week or two. I am anxious for you to inspect it. It's a nasty one. Clean on the outside and funky on the inside.
 

steelsoldiers

Administrator
Staff member
Administrator
5,264
4,007
113
Location
Charleston, WV
Quick update:

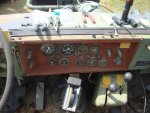
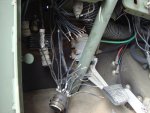
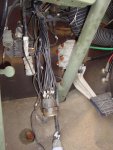
I spent most of the day at Winslow's yesterday working on wiring and steering issues. The biggest wiring issues were a cut off headlight switch plug and a cut off front-clip plug. The headlight harness had 12 wires to chase down and the front harness had 8! What a mess! I made a couple of charts to help me trace the wires and had copies of the wiring schematics with me. All connections were soldered and covered with heat-shrink for longevity. The wires had salt corrosion under the insulation so all connections had to be sanded with emory paper before the solder would stick! Ack!! Many of the wires didn't just go to one place so that complicated things. It would have been pretty easy if the front harness connector wasn't cut because 4 of the wires ran there and could have been identified by the pin in the connector. Oh well, at least it is done. I didn't have the proper connector for the front-clip so I just tagged all of the wires for later use. The only thing left to do is wrap the harness in tape, but I am going to make double sure it works first!!

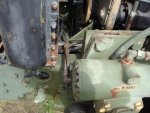
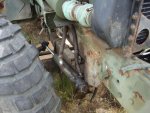
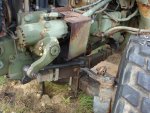
The steering required a good, used drag link to be swapped in since some bone head beat on the threaded end to get it loose and mangled the whole thing. I broke out the 3/4" drive socket set and retrieved one from a parts truck. Then, one of the pressure lines going to the PS ram had a cut in it so I got one from a parts truck to replace it. The system is now complete. All I need to do is jack the front end up, fill the system, start the engine, and crank the wheel to bleed the air out. I was going to do it this time, but ran short on daylight.

Anyone have a parts truck with a good front clip plug on it? I need one please!

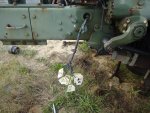
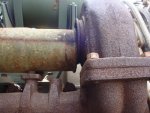
Will Wagner, the turbo pic is for you. That is the flange design. I also need the gasket which is PN 20511420. Thanks!!
 

Attachments

cranetruck

Moderator
Super Moderator
Steel Soldiers Supporter
10,350
75
48
Location
Meadows of Dan, Virginia
Chris, you should consider crimping your connections. Soldering old corroded wires outdoors may not be reliable. The crimping action will "rub off" the surface coating and form a gas tight reliable joint. I have crimped virtually all my connections on both the 6x6 and 8x8 and they number in the hundreds with zero failures. Use heat shrink to finish and wrap your wire bundles with high quality vinyl tape.

Use bare, seamless "butt splice" crimp connectors, so that the finished job can be inspected.

All connections in the control box I sent you, were crimped with the exception of the Cannon connector ones with its solder cups (they weren't done by me anyway).

Soldering works well in a controlled environment, but may also melt wire jackets.
 

steelsoldiers

Administrator
Staff member
Administrator
5,264
4,007
113
Location
Charleston, WV
Good point, Bjorn. I used the bare crimp connectors/heat shrink in some of my splices behind the dash. I was going to crimp the headlight wires if the solder didn't take. It took fine after I sanded all of the wires down to the core. My fear was that any remaining salt corrosion would contaminate the crimp connector and degrade the connection inside the joint. I used a butane powered torch with a soldering tip to ensure good heat and penetration. We'll see what happens next weekend when I get a chance to put power to the harness.
 

paradeduty

New member
727
28
0
Location
Chelsea, Michigan, U.S.A.
Hey Guys -

Just FYI for future - I have used Crimp style Compression Connectors with integral shrink-wrap style coatings which "melt" a water-tight sealant inside of the connector when heated and shrunk. I used these when I was doing custom wiring for hot rods and trailers. Havn't had the need to do a major rewire on one of my MV's yet. They seemed to work great. I can try to track down the supplier/manufacturer if you're interested.

Dave
 

Nonotagain

New member
1,444
41
0
Location
Parkville, MD
Chris,

When we performed Mil-Spec soldering, the only solder flux that was allowed was RMA flux. RMA stands for Rosin, mildly activeted.

Clean up is with alcohol and is a breeze.

Here is the link to Digikey for both the flux and the self adhesive heat shrink.

Heat shrink with adhesive liner.

http://search.digikey.com/scripts/DkSearch/dksus.dll

Solder flux

http://search.digikey.com/scripts/DkSearch/dksus.dll?Detail&name=KE1803-ND

This solder flux will clean the dirtiest of wire. Once you complete the soldering operation, take a clean cloth with isopropyl alcohol and wipe the solder joint. Once the alcohol has evaporated shrink the heat shrink.
 

steelsoldiers

Administrator
Staff member
Administrator
5,264
4,007
113
Location
Charleston, WV
Thanks guys! I haven't seen the alcohol clean-up flux before. That's very slick.

One thing I worry about is how far up the wire the salt corrosion goes. I wonder if it will continue to corrode for years to come? I may eventually do a complete harness swap if I can find a NOS one. I found a good used harness, but man, what a project to swap it out!! For now, I'll just keep on fixing this one. I know I will have to chase down grounding issues for a while.
 

Oldvw2

Member
Steel Soldiers Supporter
169
2
18
Location
Wake Forest, NC USA
Chris,

When we performed Mil-Spec soldering, the only solder flux that was allowed was RMA flux. RMA stands for Rosin, mildly activeted.

Clean up is with alcohol and is a breeze.

Here is the link to Digikey for both the flux and the self adhesive heat shrink.

Heat shrink with adhesive liner.

http://search.digikey.com/scripts/DkSearch/dksus.dll

Solder flux

http://search.digikey.com/scripts/DkSearch/dksus.dll?Detail&name=KE1803-ND

This solder flux will clean the dirtiest of wire. Once you complete the soldering operation, take a clean cloth with isopropyl alcohol and wipe the solder joint. Once the alcohol has evaporated shrink the heat shrink.
Nice!
This is what the I&E guys at my work were describing but couldn't remember the specifics about - I wish we would have had some for the alternator harness... Chris, we might want to cut out and re-do that one heavy alternator wire with this as I am still not convinced that the solder really took.
 

steelsoldiers

Administrator
Staff member
Administrator
5,264
4,007
113
Location
Charleston, WV
Nice!
This is what the I&E guys at my work were describing but couldn't remember the specifics about - I wish we would have had some for the alternator harness... Chris, we might want to cut out and re-do that one heavy alternator wire with this as I am still not convinced that the solder really took.
Good thought. Better to do it now in the field than later on the side of the road somewhere :evil:
 

Ferroequinologist

Resident railroad expert
Steel Soldiers Supporter
4,810
742
113
Location
Liberty Hill, SC
Looking good Chris and Chad!

I would think the harness might hold up for a couple of years until some NOS harnesses appear on the market. If you even have this truck that long! :wink:

Wish Winslow's wasn't so far away, I'd come up and lend you a hand.
 

DanielP

New member
53
1
0
Location
Utah
Wow, that is a big project. Whoever let that truck get into such a state should be whipped with a length of rusty rebar. :evil:
 
Top