Elbow Deep In Grease!
(original post can be found here:
The Imperial Car Destroyer: Elbow Deep In Grease!)
AKA - Axle Boot Repair Part Two
Where we tear this sucker apart!
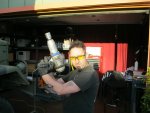
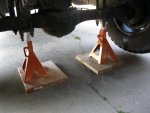
"Gee, sure hope this thing doesn't
land on me...
Success!
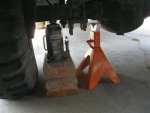
So, picking up on our story from last post, I had FINALLY found a solution for getting off my lug nuts, and it was time to get to business in earnest. Next available weekend I tore back into the truck, confident I had all of the right tools at my disposal (this time for sure). First matter of business was to jack up the truck and get it onto the 6 ton jack stands I had purchased. Now, I have jacked up small Mini Coopers and Honda Civics and the like, but I had never contemplated jacking up a truck in excess of 15,000 pounds! Luckily, I had prepared for this ahead of time, and had purchased a cheapo 20 ton bottle jack from Harbor Freight. The axle that I was going to lift up is so high off the ground however that you have to use some kind of support to go under the jack in order to have it work. I bought a cheap 2 by 8 from Home Depot and cut the thing into workable pieces. You then jam these pieces under the bottle jack, and get pumping!
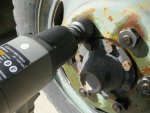
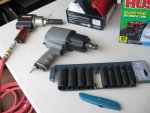
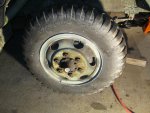
Next I fired up the old air compressor, let it build up to 120 PSI, and hooked up my new kick ass impact wrench. I attached the 1.5" impact socket, and started popping off the lug nuts. After the trials and tribulations of the last attempt, I was amazed at how easy it was once I had the right tool. I think I had all six lug nuts off in under six minutes per side, tops! Word of advice, when that last lug nut comes off, the wheel is now hanging freely on the studs. Be careful with it. Also, these tires are heavy. Take care when lifting them off to not scrape the threads on the way out. Another gotcha is the fact that the driver side lug nuts are reverse threaded, so don't go hammering on them with your new impact wrench the wrong way or anything! (I was actually extremely careful with this part, as I was sure I was going to get it wrong. Luckily, disaster was averted...)
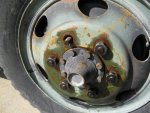
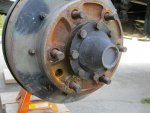
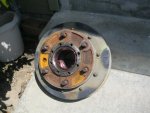
Check out the nice Rust Haven I have discovered!
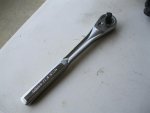
"1/2" drive socket wrench, check!"
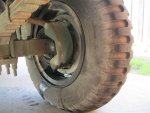
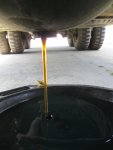
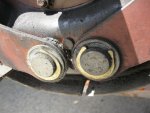
The wheels were off, and I carefully rolled them to the side of the house and leaned them up against the fence there. There was a fair amount of rust trapped between the inside of the wheel hub and the outside of the brake housing, but it was on the surface, and none of it looked too severe. Sure was some pretty colors though! Next I had to drain the oil out of the axle housing itself. For this I borrowed a giant oil drain pan from Joe, and placed it under the drain plug on the front axle housing. Crawling under the housing, I saw that the drain plug has a square half inch socket on it. I guess you are simply supposed to shove a 1/5" drive socket wrench up there and work it free. Of course, I didn't have said socket wrench, so I popped out to the local hardware store, bought one, and returned. Said socket in hand, I carefully undid the drain plug. I don't know about you guys, but I always get my "lefty loosey, right tighty"confused when I am on my back for some reason. I always remind myself by pretending to open a beer bottle, something so instinctual I can always remember it, no matter which direction I am facing.
I got the thing out without too much difficulty, and I was pleased to see that the oil coming out of the front axle didn't appear to be in too bad shape at all. It had a nice amber quality to it, and didn't have any chunky particulate matter show up. All this was good news! I had had some trepidation about what I might uncover once I stared tearing this thing apart - who knows how well maintained a forty seven year old army truck would be, right? So far, so good!
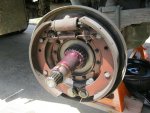
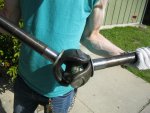
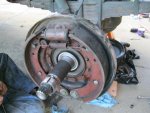
Next I needed to take off the axle hub cap itself, the cap on the end of wheel that holds in the axle proper. This is held in place with eight smaller sized nuts, as is visible in the picture above. The inner side of this cap is splined, and without it the wheels will not drive. I discovered I had no sockets of the appropriate size, and sighed as I headed back out to the hardware store. I had this new 3/4" bad ass impact wrench, so I went out looking for some smaller 3/4" sockets. It ends up that no retail store in Santa Cruz carries 3/4" sockets. I know, I looked. After trying four different places, I was directed to try Sears. I drove to Capitola, and walked into the place, well aware of my good daylight hours slipping by. When I discovered they didn't carry them either, I was understandably disappointed. I did the only sensible thing - I bought a 1/2" drive impact wrench as well and a smaller set of sockets to go with it. Problem solved!
With the smaller half inch impact wrench I was able to pull out the axle hub bolts with no problem. It's nice working with air tools, because the bolts are broken free without much damage to them at all. And lets face it, it puts a smile on my face every time a new bolt or lug comes free and I get that sexy "air tool whine" at the end. Maybe its just me... *grin* Pulling off the axle hub cap and setting it aside, you reveal the end of the axle and its retaining nut and washer. There was a wonderful mixture of red and green (how festive!) grease once I got it apart, green on the axle itself, and red on the wheel bearings. Note the splines on the end of the axle shaft that is now revealed.
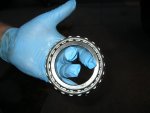
Axle shaft, 8 sided lock nut, and outer wheel bearing...
Next I had to straighten out the bent clips on the castellated retaining washer. I did this with a hammer and my largest flat edge screw driver. Hey, this vehicle aint subtle, neither are its tools! Once most of them were straight, it was time for me to break out my specialty tool, something I am pretty certain will only be used for doing wheel repair on giant army trucks, school buses, and fire engines. An eight sided, three inch socket made of solid steel. I had to special order mine from Winchester Auto, because they had never heard of one that large. It made me smile. I attached it to my 3/4" impact wrench, and slipped it over the lock nut and gave it the tiniest blip of torque. It came right off, and nothing was damaged. Success!
Next I had to pry out the outer wheel bearings. This is done by using the same aforementioned largest flat head screw driver and wedging it in there and prying the sucker out. It requires a strange combination of delicacy and brute force, much like a barbarian would wield a zweihandler. Or at least it did in my mind. This was a little tricky at first, as I wasn't exactly certain what was bearing and what was seal, and where they would all come apart at first, but I soon got the trick of it as I wiped away from of the grease and got a better look. I also have to say, being able to refer to the Technical Manuals and see the blow out diagrams of them was a HUGE help!
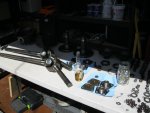
A quick note on keeping yourself sane when doing a large project like this. Do things methodically, and follow a pattern. It doesn't have to be the 'perfect pattern according to blah blah blah', you just need to be consistent, and do things the same way, every time. Mostly I am talking about where you place the bolts you take off, the nuts you collect, the hubs you disassemble, and so on. For me, I setup one of my plastic fold out gaming tables and re-purposed it be my parts bench. Whenever I would finish with one step of the disassembly, I would then add the recent parts to the bench in a pile of like with like, taking care to keep the right side separate from the left, and so on. I happened to start from right to left, and planned to go from left to right in reverse order when it was time to put the sucker back together. In this manner I would be able to give myself every advantage possible when it came time to actually making this sucker work once more. Let's be clear - this is help for the assembly stage. Anyone can tear something to pieces. But putting it back together, and actually having it work better than before, there in lies the province of mechanics! Anyways, find a system that works for you, and stick to it throughout the entirety of a project.
Lugs, hubs and bolts, and outer wheel bearings...
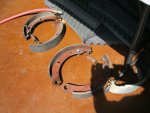
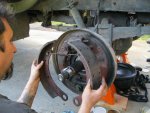
Brakes, revealed!
So, I had the outer wheel bearings out, the axle hub off, and all the various bolts removed. It was time to pull off the drum! At this point there was nothing holding it in place besides friction, so all I had to do was carefully lift it and pull it past the six threaded studs. Easier said then done though, as the drum weighs a significant amount, and it likely one's fingers are covered in grease at this point! Still, I managed to feat without any unfortunate mishaps, and seen the interior of my front brakes were bare to the world! I set the drum aside and put it down gratefully and checked out the interior of my brake assembly. I was stunned at how clean it was, and in what good repair. Plenty of life left on the front brake pads, and there was no significant amount of rust anywhere I could see. I was prepared for many things, but it had never actually crossed my mind that perhaps everything would be in pretty decent shape once I started digging into the beast. Obviously I was missing something!
Next was the tricky business of actually disconnecting the brakes themselves. In case you didn't know, the deuce has an "air assisted" drum brake system. This means it is essence a traditional fluid based system using these epic pads and drums to stop the vehicle, and relies on the additional power provided by the air tanks to give you that extra umph required to stop a vehicle this large. Removing the brake shoes required taking out the two pairs of guide bolts roughly in the middle of the shoes, as well as the primary retaining bolts with their horse shoe retaining clips. These are located on the bottom of the assembly. You should also remember to actually disconnect the brake lines from the back of the hub before proceeding, otherwise its even more of a mess than it needs to be.
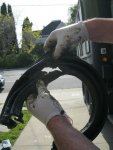
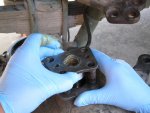
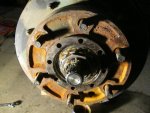
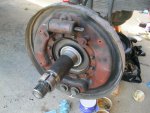
By far the trickiest part is getting two main bottom bolts out, as those horse shoe clips like to slide around if they are not held in place. I used a wacky 'dual screwdriver and hammer' technique I came up with on the spot, which basically involved holding two flat bladed screw drivers in place, each with a blade on the opposite side of the end of the horse shoe clip, and whacking them ever so delicately with a large hammer. Sounds nutty, but it worked, so hey. Once those are off, you can move the brake pads back so they disengage from the pistons at the top of the assembly, and then you can simply lift them clear and away. Next you have to remove the twelve bolts that hold on the brake assembly, set them aside, and then remove the assembly itself. This is pretty straight forward, but as you can see I managed to remove one of the studs themselves int he process! (see picture below) Luckily they are double threaded, so it would go in again no problem, but I was a little worried at first.
Is it just me, or is that a tad bit phallic?
I now had just the steering knuckle, inner wheel bearings, and axle boot left to go! I was getting close, I could feel it. Joe had shown up at this point, so it was time to bust out a cold one and marvel at the progress so far. We gave thanks to the great god of Auto Mechanics and Fermented Yeast Products, and then got back to it.
Oil, heat, hit. Repeat as necessary.
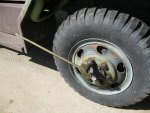
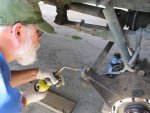
Next came one of the toughest parts of the whole job, if not THE toughest part. Removing the tie rod. This is tricky to do on a conventional truck or car (or Lesser Vehicle, as we on the Imperial Car Destroyers crew compliment like to say), and was downright intimidating on a vehicle of this magnitude. Luckily, we had beer, and a veritable wealth of backwoods ingenuity, so we plowed ahead, undaunted. First thing to remember is to remove the cotter pin from the top of the castellated nut before proceeding. That done, we moved on towards actually trying to remove the sucker. Joe had brought a wide assortment of tie rod removers, but none of the contraptions seemed to work. In the end, it was a combination of soaking the thing in PB Blaster, hitting it with my giant sledge hammer I bought for just such a purpose, then heating it up with an acetylene torch, then repeating the process. If at first it doesn't come loose, use more PB Blaster, then hit it harder. If it still doesn't come loose, heat the sucker up til just below when the PB Blaster starts to boil off, then hit it again, this time with feeling. If that doesn't work, return to step one and repeat. I can tell you this, all of us cheered when the thing busted free and clanged onto the driveway, that's for sure!
Yummy!
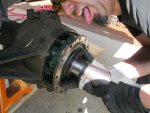
Next was one of the most rewarding parts, removing the axle and the inner wheel bearings! There are twelve bolts that hold the We had worked hard to get here, and it was exciting to pull that sucker out. Gripping the end of the shaft manfully, you simply have to give it a good yank and it will come (off) in your hands. I am, of course, speaking of the axle itself. It revealed a ton of green axle grease behind it that looked for all the world like so much ogre snot. It was disgusting I just had to love it! Contrary to popular belief, ogre snot is actually quite yummy. tastes like apple pie actually. I could tell as much by simply sticking out my tongue and tasting it (do not try this at home).
Joe's son Nate holding the passenger side axle
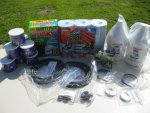
The axle itself was way cool, and made of good old solid American steel, back from when we still mined our own metals, and paid our own iron and auto workers to make it! Mostly at this stage I was using the boxes of plastic gloves, over sized trash bags and blue shop towels I had purchased for this project to clean up the epic amounts of axle grease packed into this sucker. There was no way to this gently, cleanly, or gentlemanly. Pretty much you were going to get disgusting, and get disgusting quickly. As a kid, I would have fainted or come up with some lame excuse for why I suddenly needed to be doing something else right now. As an adult, I reveled in it and may have started cackling madly at some stage. Who can tell, eh? Amazing what a little bit of perspective and thirty odd years can do to you...
Passenger side, easy peasey!
Drivers side, not so much...
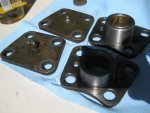
I think we filled something like two trash bags of towels, grease and gloves before we got them both out, but we were singing and joking the whole time. Next we had to get off the steering knuckle itself. This proved to be fairly straight forward on the passenger side, but was a little tricky on the drivers side. Passenger side was a simply matter of removing four nuts (two really, as we had removed two before to get off the axle boot guard), remove the top plate, and simply lifting the knuckle off over the studs. On the drivers side it has the steering arm attached, and the bolts are actually under pressure due to being fitted into concave cavities. Very tricky to remove. This proved to be almost as difficult to remove as the dreaded tie rod, and we found ourselves unprepared for it.
With the tie rod, at least we knew we were in for a hard task. With this driver side steering knuckle, none of the technical manuals or the walk through on Steel Soldier's mentioned this small technical detail, and the top plate of that steering knuckle was not coming off, no matter how hard we tried. Sure, we got the bolts holding it to the steering arm off just fine, but then we had to remove the top plate from the steering knuckle in order to lift it free, and that just wasn't happening. At first we tried prying it free with large flat head screw drivers, but that wasn't having any effect what so ever. We tried some PB Blaster, so heat, some swearing, and some more swearing. In the end I had the vindication of using one of my favorite tools my wife thinks is ridiculous (and to be clear - it is), my four foot long wrecking bar. This thing is great! Its an Uruk Hai weapon if I have ever seen one! When you hold it in your hands, you feel like you could pretty much destroy just about anything you came into contact with. Taking this weapon of Mass Decontrsuction into my hands, and my large sledge of tie rod removal fame, we pounded the crap out of that stupid little metal plate until eventually it had to come free, and it did, oh yes, it did! Was not expecting this to be such an epic tale, but it seems every auto repair of merit has at least one of these - the little detail that turns out to be the The Big Deal.
Yeah, those tools of auto repair. Honest!
Modern art, or M109A3 axle?
Oh yeah, that's pretty!
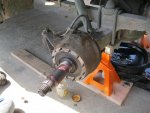
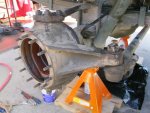
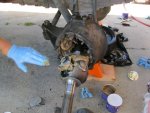
With both steering knuckles off, the axles out, and the brake assembly removed, we now had the thing down to its skivvies. What was kind of cool is that you could look through the entire front of the axle and see clear through to the other side! This was all kinds of cool, and of course I had to take a picture.
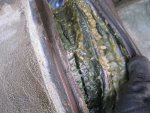
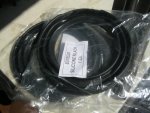
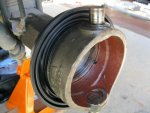
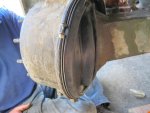
Next was the part where we actually took off the axle boots. You know, the part we had done all of this other work to get to? Yeah, I had almost forgotten about them too at this point. There is a large retaining ring held together with a simple bolt that needs to be removed first, and then it is a simple matter of prying the boots free. When we did so we were confronted with the some pretty gnarly bad grease. In a way, it was vindication that I needed to do this repair in the first place, as the more disgusting discoloration and opaque quality of the grease was an indication that it was starting to break down from the additional material and crap that was getting in through the rip in the axle boot.
I felt around until we found the zipper in the boot, and then began to unzip it. This was harder than you might think, because at this point pretty much everything was covered in a fine layer of axle grease, from the boot, to my gloves, to the zipper and my beer bottle. Still, we managed to get the sucker apart, and yanked it out of there. Before bagging the thing, we examined it for a bit to see how bad it was. Ends up, it was in sorry ass shape. There was a huge rent through the boot, large enough to pass three or four fingers through at least! Holding it up to the light made it really clear - that thing was FUBAR! The other side had a tear as well, not quite as bad, but still in sorry shape. We felt ultimately justified in our need for the repair, and congratualted ourselves mightily. It now being quite late, we packed it in for the day, carefully covering the exposed axle with trash bags and stuffed with shop towels to keep them vaguely protected, and called it a day. It would end up being weeks before I got the axle back together, but that is a story for another day (and my next post). Please stay tuned, details are forthcoming!
"That doesn't look like a problem, does it?"


