• Steel Soldiers now has a few new forums, read more about it at: New Munitions Forums!

  • Microsoft MSN, Live, Hotmail, Outlook email users may not be receiving emails. We are working to resolve this issue. Please add support@steelsoldiers.com to your trusted contacts.

My M715 'rework' project

M813rc

Well-known member
Steel Soldiers Supporter
4,250
3,387
113
Location
Near Austin, Texas
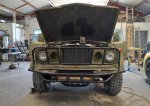
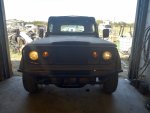
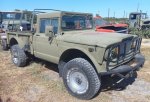
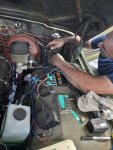
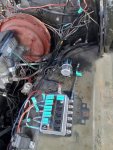
After a couple of days of serious work on the M715, it is now plumbed, wired, and tweaked to the point that she is running on all her own systems. All the leaks, squeaks, and other issues seem to have been eliminated, she has lights, gauges, and windshield wipers.

It was time to drive her for the first time. Success!

She starts, runs, drives, and (rather importantly) stops.

Lots of details to do now, like getting the civilian lights switched over to military units, tidying up the way the wiring in the engine bay runs, taking the bench seat out and putting the stock ones back in, etc.
She has a date with a muffler shop too, since she's a bit loud with no exhaust system!

Cheers

49.jpg 50.jpg
 

M813rc

Well-known member
Steel Soldiers Supporter
4,250
3,387
113
Location
Near Austin, Texas
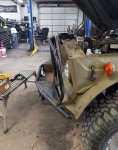
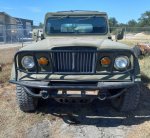
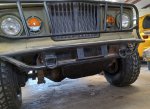
Since most of the "make it run" work has been accomplished, time to tackle some other tasks. Like that front bumper.

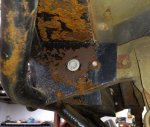
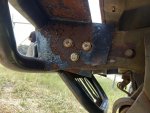
In getting the five bolts removed from the six bolt holes, it was noted that no two were the same size! No wonder the thing moved....
It was also obvious that the bumper sat a little too far back and contacted the body work at deck level. The metalwork on the drivers side was hooked over the top of the deck plate, the passenger side was trapped under the plate. That explains the front of the truck having a slight lean to the right... :cautious:
There also turned out to be some ideally placed holes in the top of the truck frame, seemed a very good idea to put those to use when the bumper went back on.

Going back on, the bumper was placed 3/4" forward of where it had previously been. All original bolt holes now lined up nicely with sides of the frame, and two new ones were drilled in the deck for the ones in the top of the frame, allowing all the bolts to be the same size.
The deck is now level to the ground, the bodywork is free and level again, and the bumper is very secure and does not move. I'm pretty happy with it.

I still need to get rid of that lettering in the lower bar.

Cheers

51a.jpg 51b.jpg 51.jpg 52.jpg 53.jpg 53b.jpg 53c.jpg
 
Last edited:

M813rc

Well-known member
Steel Soldiers Supporter
4,250
3,387
113
Location
Near Austin, Texas
After getting the bumper squared away, we moved into the cab for a bit.

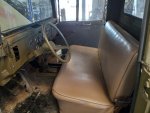
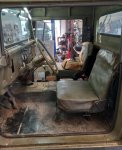
The truck came with an unknown-origin bench seat installed. Apart from it not belonging there, I felt like a 10-year old driving dad's truck sitting way down near the floor on it! When we were making the deal on the truck, Jim had said he still had the stock seats, and did I want them. "Why yes, yes I do!"

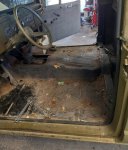
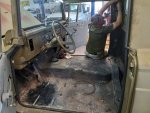
So, out the bench seat came. Amidst the detritus accumulated under the seat from years in place were found yet more spare parts, many still in their factory wrappers. It's always nice to find unexpected little treasures like that.

With the seat out and the floor vacuumed, it was a good time to replace the transmission hump cover and to install seat belts.

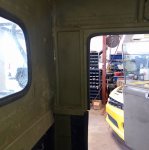
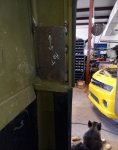
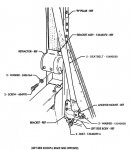
Early on, in looking at how the hard top was constructed with heavy steel tubing, all well done and very sturdy, I had come up with the idea of welding a couple of plates to the frame behind the side windows to mount 3-point seat belts.
So I bought a set of NOS Humvee belts from Mark at Rapco while at the MVPA convention last month.
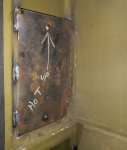
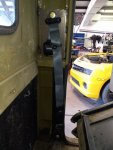
After studying the Humvee seat belt installation MWO (last picture below) to see exactly how they mounted, a couple of heavy steel plates were cut out, appropriate holes drilled in them, nuts welded to the back, and they were welded into the frame, These held the takeup reels and the upper swivel in a similar manner to how they go in a Humvee, the lower strap ends were bolted into the stock M715 seatbelt holes near the floor.

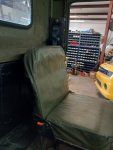
Once the belts were installed, the stock seats went in. These mount to threaded subframes and captive nuts through holes in the floor. Like the seatbelt holes, each had to be located and have the thick floor sealant cleaned out and the threads chased with a tap. One obviously wasn't going to hold up, so it was replaced with a bolt, washers, and a nut.

Once done, I can now sit in the seat and see out the windshield like an adult (even if I don't always act like one).
This part of the project was done with getting it all produced and put together as quickly as possible in mind, otherwise I would paint and tidy as I went along. I will in time take various parts back out to paint the inside of the cab, but right now getting it all functional takes precedence over pretty.

Cheers


55 - Copy.jpg 56 - Copy.jpg 57 - Copy.jpg 58 - Copy.jpg 59 - Copy.jpg 60.jpg 61 - Copy.jpg 62 - Copy.jpg 63 - Copy.jpg 64 - Copy.jpg 4.JPG
 
Last edited:

M813rc

Well-known member
Steel Soldiers Supporter
4,250
3,387
113
Location
Near Austin, Texas
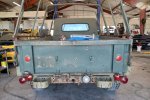
At some point, the M715 had been backed into a post or something that put a dent right in the middle of the tailgate top rail. This caused the top left side to be torqued out, making the tailgate very difficult to close. You basically had to put a shoulder to it and hope you could get the chain hook into the slot. The left hinge was bent up a tad, which certainly didn't help matters.

One must use finesse to remedy such problems. :wink:
In this case, the dent was finessed by getting smacked on top with a BFH, which took most of the upper crumple out. :hammer:
Then heat was applied to the left hinge, while applying downward pressure with the forklift (!).
It worked, too, because now the tailgate is pretty much straight and latches easily.
The second picture below makes it look bowed down in the center, but it isn't, it is quite flat across the top now.

This morning, the truck was loaded onto a trailer and driven to a muffler shop with a very good reputation to have an exhaust system built. We probably could have done that task, but without the expert knowledge and specialized equipment, it would take five times as long as the professionals would take, and not be nearly as good.

Cheers

65 - Copy.jpg 66 - Copy.jpg 67 - Copy.jpg
 
Last edited:

M813rc

Well-known member
Steel Soldiers Supporter
4,250
3,387
113
Location
Near Austin, Texas
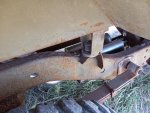
Picked her up from the muffler shop this morning. They did a really nice job, very neat and tidy, dual pipes and mufflers tucked up under the bed. The exhaust comes out both sides behind the wheels.

Next will be some more wiring, then off to the sandblaster to get that frame cleaned up before paint.

Cheers

68 - Copy.jpg 69 - Copy.jpg 70 - Copy.jpg
 

NDT

Well-known member
Steel Soldiers Supporter
10,540
6,734
113
Location
Camp Wood/LC, TX
At some point, the M715 had been backed into a post or something that put a dent right in the middle of the tailgate top rail. This caused the top left side to be torqued out, making the tailgate very difficult to close. You basically had to put a shoulder to it and hope you could get the chain hook into the slot. The left hinge was bent up a tad, which certainly didn't help matters.

One must use finesse to remedy such problems. :wink:
In this case, the dent was finessed by getting smacked on top with a BFH, which took most of the upper crumple out. :hammer:
Then heat was applied to the left hinge, while applying downward pressure with the forklift (!).
It worked, too, because now the tailgate is pretty much straight and latches easily.
The second picture below makes it look bowed down in the center, but it isn't, it is quite flat across the top now.

This morning, the truck was loaded onto a trailer and driven to a muffler shop with a very good reputation to have an exhaust system built. We probably could have done that task, but without the expert knowledge and specialized equipment, it would take five times as long as the professionals would take, and not be nearly as good.

Cheers

View attachment 901661 View attachment 901662 View attachment 901663
Why does your tailgate not have "Jeep" embossed? It doesn't look home made?
 

M813rc

Well-known member
Steel Soldiers Supporter
4,250
3,387
113
Location
Near Austin, Texas
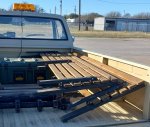
Why does your tailgate not have "Jeep" embossed? It doesn't look home made?
My understanding of M715 history is that Jeep got around the military prohibition of company brands on vehicles by claiming the tailgate and other parts of the M715 family were stock civilian truck parts.
I have been told by a couple of sources that after Jeep fell from grace with the military, another manufacturer was contracted to produce some replacement parts for those commonly damaged in field use, including tailgates. I've seen several "unbranded" tailgates, and all, including this one, were made to the same standard as the originals. In comparing this tailgate to those on my other M715s, the only difference is the lack of brand.

So, all spoken word, I've not seen any documentation to support the unbranded tailgate origin, but it does seem completely plausible.

The "already existing on civilian trucks" embossed brand is why the early M915/916 trucks had CCC on them. I'm not sure how Oshkosh get away with slapping their brand on MVs, since they can't claim they are modified civvy vehicles!

Cheers
 

M813rc

Well-known member
Steel Soldiers Supporter
4,250
3,387
113
Location
Near Austin, Texas
Another side project - troop seats and bows.

The M715 came with a very nice set of redone troop seats. They were built with a high quality wood, but one rail was significantly cracked.
The cracked rail was unbolted from the seat assembly, the crack filled with wood glue, and then tightly clamped.

While that was drying, I cut a 25" piece of 1/2"x1/8" aluminium strip, then drilled and countersunk holes in it for screws.

Once the glue was well dried, I drilled the wood and attached the aluminium strip to the bottom (formerly cracked) edge of the rail with long stainless screws, and bolted it back onto the seat assembly. That's probably more reinforcement than was needed, but at least I'm confident it will hold together!

Some time past, I had acquired a complete NOS-in-factory-box M715 bow kit, originally with one of the other M715s as the designated recipient, but I changed my mind and will put them on this truck.
Once painting commences, these and the troop seats will be painted to match the rest of the vehicle.

I edited the first post to include the following information, but I'll add it here too for folks who have already read beyond that post and likely won't go back to it -
I had a little thought niggling in my mind for a while reference the M715A1 designation and why I didn't want to use it, and finally remembered that designation was used for a Kaiser Jeep proposal, that was not accepted, for production series modification. This included changes to the engine, and larger tires (10.00x16) for better clearance and off road mobility. I have a PDF copy of that proposal in my files.

Cheers

71 - Copy.jpg 72 - Copy.jpg 73 - Copy.jpg 74 - Copy.jpg 75 - Copy.jpg 76 - Copy.jpg 77.jpg 78a.jpg 78b.jpg 79 - Copy.jpg 80a Bows parts -20 manual.jpg
 
Last edited:

M813rc

Well-known member
Steel Soldiers Supporter
4,250
3,387
113
Location
Near Austin, Texas
Here is a comparison of the tailgate on this M715 and the one on another of my unrestored trucks. As can be seen, they are pretty much identical in detail apart from the Jeep embossing.
The other M715 is all stock. It is a soft top truck in good overall shape; runs, drives, and stops, its just not pretty yet. It looks extra ugly in the picture because it was taken in the rain.

The extra holes in the left tailgate are where a license plate once was (on the left), and two foldout steps (inside) just to the right of center. I have the steps and the rubber bumpers, but those will go on later during or after the paint process.

I'll be very glad to get those goofy tail lights off there!

Cheers

81 comparison.jpg
 
Last edited:

M813rc

Well-known member
Steel Soldiers Supporter
4,250
3,387
113
Location
Near Austin, Texas
Out of curiosity, was the M715 tailgate actually used on any civilian Jeep vehicles?
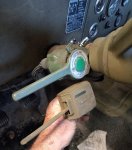
I have not found any pictures of anything else with that supposedly "off the shelf civilian part therefore it has the company logo" on it.
The Jeep 'Thriftside' tailgate is very different and doesn't seem to have the logo embossed.

Cheers

1969 Gladiator Thriftside b.jpg Gladiator Thriftside.jpg 1967 Gladiator Thriftside.jpg 1963 Gladiator J200 Thriftside b.JPG
 

Barrman

Well-known member
5,288
1,855
113
Location
Giddings, Texas
Not that I am aware of Rory. During the Daimler-Chrysler days lawyers swarmed anyone selling anything with JEEP on it. There were several vendors selling newly built replacement M715 tailgates at the time. I know of at least one in Kingston, TN that continued to sell tailgates with no JEEP logo. I have a suspicion that your tailgate is one of those.

I remember pallets of them when I visited there in 2006 so I know many were made.
 

M813rc

Well-known member
Steel Soldiers Supporter
4,250
3,387
113
Location
Near Austin, Texas
Thanks Tim, very interesting!
Well, whether one contracted for by the military or an aftermarket from Kingston, it is a high quality product and I'm happy to have it.

Cheers
 

M813rc

Well-known member
Steel Soldiers Supporter
4,250
3,387
113
Location
Near Austin, Texas
Life has meant that I haven't had a lot of time to work on the M715 lately, and sometimes when I did have time I just plain didn't want to when it's 110* in the shade! But bit by bit I've gotten things done.

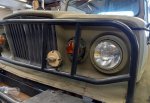
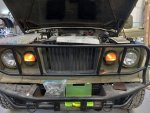
The truck was proving to be hard to start and to run a bit rough. We figured out that the brand new spin-on fuel filter had a bad o-ring and was leaking fuel and sucking air. A new filter solved the problems nicely.

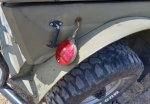
The fender lollipop lights were unbolted, pulled out, and disconnected, then all that wiring was pulled out to the front through the turn signal holes. I don't know what colour blind methbilly did that wiring, but I had to remove a lot of really bad work to get back to something usable.
The wires were tested for function and tagged. The running light wire was Y'd on both sides, military connecters were put on all the wires, and one wire was run back into the wheel well on each side for the clearance lights. I picked two good composite lights from the stash and put 12v bulbs in them.
Once everything was put back together, rather amazingly it all worked as it should. :D

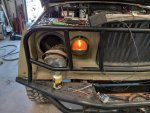
Except the weak orange headlight on the passenger side. :cautious:
I thought maybe it was a 24v bulb because it still had the military wires running to it. Took the whole fixture apart, and found a 12v bulb, and a quick test of it direct wired gave nice bright light, so the problem was in the fixture wires. I pretty quickly narrowed it down to a broken ground wire. That one was replaced and connected to a good ground, and voila! good bright headlight!

So, except for the blackout driving light, all the front lighting is done.

Time to start on the back....

Cheers

PS - The headlights look a bit dim, because of the exceptionally bright outside the camera was compensating for.


82.jpg 83.jpg 84.jpg 85.jpg 86.jpg 87.jpg
 
Last edited:

M813rc

Well-known member
Steel Soldiers Supporter
4,250
3,387
113
Location
Near Austin, Texas
I had noticed that the installed amber LED clearance lights looked very dim, and initially wrote this off to the bright sunshine. I had previously tested these type lights at 12v and found them plenty bright.
On a whim Monday, I grabbed another set and hooked them to 12v next to the ones on the truck, they were much brighter!
It seems that of the five sets (each set has two red and two amber) of these LED clearance lights I have, the four packed in plastic bags are omni-volt and the one set in boxes is 24v only. Naturally, the box set is what I had grabbed for the 12v M715!
So I pulled those back off and replaced them with bag omni-volt lights and now they are nice and bright.
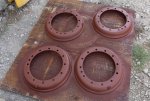
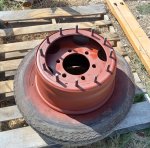
While I was doing this, the re-centered Humvee 12-bolt wheels arrived from the company that did the work. :naner:
They were promptly pulled off the pallet, given a good coat of red primer, and set out to bake in the 110* sun.
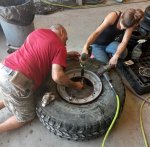
Tuesday morning while it was still cool, the set of newish Humvee tires I had were removed from their rims and mounted on the new rims. A lesson learned long ago - except in an emergency repair, always use new o-rings when mounting tires, so we did.
Jason and Courtney are well experienced at getting these rims together properly, so they installed the o-rings and outer ring, and as they finished each wheel, it was rolled outside, painted black, and left to sun bake.

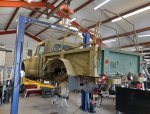
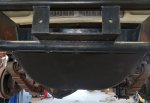
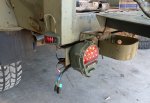
The M715 was raised on the lift for the old wheels to be removed. While it was up there at a convenient level, and the new wheels were outside baking, I used that time to strip off the old tail lights and clean up that wiring. We also got rid of the cut out lettering on the lower bumper by simply welding a flat plate over them. ;-)
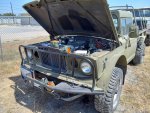
While the welder was out, a tab was welded to the grill guard for the blackout light. I decided that since this truck is my interpretation of a mid-life upgrade, and the blackout light mounting holes in the hood had been sealed up by the previous owner, I would put an LED b/o light in the grill guard.

During the cleanup of the tail light wiring, it soon became evident why this M715 had so many lights on the back. That same colourblind methbilly who did the front lights had managed to wire the brake lights and turn signals by some unfathomable method so that each required its own wire and light. With military composite lights, you could either have turn signals or brake lights, but not both. Jason, who is a vehicle electrics whiz, was uttering a constant stream of invective trying to figure out how it had been wired behind the dash.
Our final decision was to wait until today, rip all that drunken spiderweb mess out, and rewire the whole thing using a proper military harness.

Once the wheels were dry, they were mounted on the 715. I have to say, I think she's starting to look pretty sharp. :)

Cheers

Pic 1 is a good example of why you can't trust digital pictures to judge colour accurately. ;)

87b Clearance Lights comparison.jpg 88.jpg 89.jpg 90.jpg 91.jpg 92.jpg 93.jpg 94.jpg 95.jpg 96.jpg 97.jpg 98.jpg
 
Last edited:

M813rc

Well-known member
Steel Soldiers Supporter
4,250
3,387
113
Location
Near Austin, Texas
First thing Wednesday morning a visit out back to Jason's parts deuce yielded the turn signal arm and it's complete wiring harness.

Once we started ripping out the drunken spider's web of wires from the 715, we found that some of it was actually connected to the original military harness to the back, which still had the Packard connectors intact. Several of the military wires had just been unplugged and shoved back underneath, and it was all in good shape, which meant life suddenly got a lot easier. The wire tags were in good order, so it was a matter of a quick continuity check of each, then plug them into the deuce signal harness. A civilian 12v flasher was wired in to replace the military 24v one.

Once all the wiring was switched out and connected, everything worked as it should, brake and signal lights now sharing the same composite light bulb, and with the added bonus of 4-way flashers, which the old switch didn't have provision for. The trailer plug harness, which was tucked up in the back, now works properly too. :clinto:

On the topic of LED tail lights - while they are cool and work well on the 715, it is not my intent that they stay there, as they are just not from the right time period for that truck. I used them because they were handy, and because I still haven't figured out where my NOS metal incandescent composite lights are stashed, and I'm not particularly well disposed to digging through big box trailers when its 110* outside.
Once I find those lights though, they will go on the truck.

Still a lot of detail work to go, but the truck is now roadworthy. Naturally, that being the case, Jason and I took turns taking it on the road for a spin. :p
It runs great, has plenty of power and will happily spin those Humvee tires on takeoff in 2nd gear. Steering is light and comfortable. The brakes work well, but need a little adjusting to correct a pull to the left.

Cheers

99 -Jason doing his magic.jpg 100.jpg 101 - new above old.jpg 102 - 4-way flashers.jpg 103 - donor M35 in the background.jpg 104.jpg
 
Last edited:

G744

Well-known member
Steel Soldiers Supporter
1,731
3,907
113
Location
Hidden Valley, Az
I repowered a M725 ambo with a Caddy 472/turbo 400 years ago. I had lot of Goat tries/wheels then, so made up adapter plates to run the 11.00-18 NDT's.

Our son took it on a ska band concert road trip from Phoenix to NYC, and the 4 of them slept on the bunks for the most part.

It pulled a gear trailer, and the motor did well for them. Gas wasn't so high back then, and that was good...

If I was predisposed to do another M715-ish truck I'd put in a Detroit Silver 4-53 Turbo and a Deuce 5spOD trans.
 

M813rc

Well-known member
Steel Soldiers Supporter
4,250
3,387
113
Location
Near Austin, Texas
I hear mutterings and the quiet question being asked "If you think LEDs are not appropriate for this M715, then why did you use LED clearance lights??"

The answer, I'm almost embarrassed to admit, does not come from some great philosophical enlightenment, but merely from the size of holes that needed to be drilled in the truck! :unsure:

I had originally intended to use incandescent lights, but those require big holes to clear the bulb socket on the back, and a second smaller hole or slot for the indexing pin. LED lights are almost flat on the back, have no indexing pin, and only need a hole big enough to clear the single wire. The rubber terminal shroud is easily removed, to be slipped back on once the light wire has been inserted through the hole.
Both type lights, of course, require a couple of holes for the securing bolts.

So, now you know! :D

Cheers

PS - In both photos, the LED light is above the incandescent.

105.jpg 106.jpg
 
Top
AdBlock Detected

We get it, advertisements are annoying!

Sure, ad-blocking software does a great job at blocking ads, but it also blocks useful features of our website like our supporting vendors. Their ads help keep Steel Soldiers going. Please consider disabling your ad blockers for the site. Thanks!

I've Disabled AdBlock
No Thanks