• Steel Soldiers now has a few new forums, read more about it at: New Munitions Forums!

  • Microsoft MSN, Live, Hotmail, Outlook email users may not be receiving emails. We are working to resolve this issue. Please add support@steelsoldiers.com to your trusted contacts.

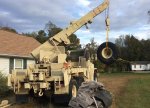
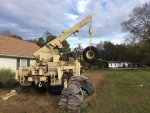
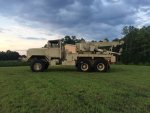
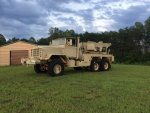
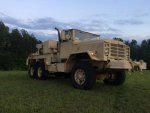
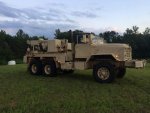
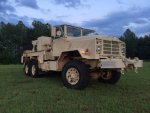
My new M936A2 Wrecker

SouthJL

Member
Steel Soldiers Supporter
53
2
8
Location
Piedmont Triad, NC
Since you have the poles for heavy lifting and and the chock. Could you send me demeans ions of everything on them. I can fabricate them for my truck. Would need the pipe thickness for all the pipes and lengths.
Sorry, but life has a funny way of changing priorities. I've done very little with the wrecker for the past couple of months. Take CSM Davis up on his offer, as measuring just the boom jacks would be quite an undertaking, never mind the whiffletree.
 

SouthJL

Member
Steel Soldiers Supporter
53
2
8
Location
Piedmont Triad, NC
Tire Advice

This a s.. l.. o.. w.. work in progress project, and I'm taking my time. But the next thing I want to conquer is replacing the tires. As Suprman pointed out in this thread months ago, don't trust the older Michelin 14.00R20 XL tires. I just barely trust them to drive around the property... slowly. Mine are old and starting to rot.

I've been reading and researching the cost of new tires. fuzzytoaster recommended going with 395 (i assume 395/85R20). Anyone have any experience with putting them on a wrecker? This is for fun/farm use only. I'd like to be able to drive down to the GA rally, and that's the longest drive I'd ever envision (~300 miles). It looks like I might be able to get the 395's cheaper or at least easier/closer.

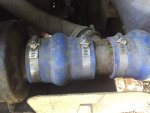
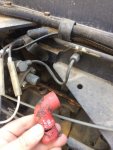
What else have I done... back in Sept I changed the oil and tightened up every radiator hose. It was low on coolant, but didn't find any in the oil. So I hooked up a pressure tester to it, and found they were seeping under pressure. The hoses are old and dry, but tightening them up seems to work for now. Just something else to keep an eye on.
IMG_0870.jpg IMG_0863.jpg

I only have two batteries, so I decided to try starting it up on one of our coldest days recently. It took a couple of cranks, but I think that is more likely caused by losing fuel prime as I haven't replaced the fuel lines. (more old hoses)

Hydraulics was low, so couple 5 gallon barrels of that to fill up the tank. Exercised the boom a bit, seems to work fine. At least without a load. Found out at least one of the places it leaks, the hydraulic swing motor has a drip. Just guessing, the seals might be shot. I haven't had any time to dig any further. For what little I plan on using it for, probably will just buy another barrel of hydraulic fluid. At least until one of the hydraulics lines pop (more old hoses) and then I wonder why I ever thought this was a good idea.
 

73m819

Rock = older than dirt , GA. MAFIA , Dirty
Steel Soldiers Supporter
In Memorial
12,195
326
0
Location
gainesville, ga.
On the swing motor seals, before you think about redoing the seals, work the swing when the oil IS HOT, I mean at least an hour, from the sound of things, the wrecker had been sitting for a while, by working the swing motor after the oil is hot, the seal will absorb the hot oil which will make the seal expand and be more pliable, which will make the seal seal better (stop the drip), this HOT OIL exercise should be used on ALL the hyd. moving parts, also some of the seals are designed to have pressure behind then in order to maintain the seal. REMEMBER even a NEW seal will start to seep if left unused for a length of time.
 

M35A2-AZ

Well-known member
Steel Soldiers Supporter
3,224
398
83
Location
Tonopah, AZ
My wrecker when it is cold out has a number of HD leaks. I was told by guys that used them in the military that they all leaked.
 

Valence

Well-known member
Steel Soldiers Supporter
2,112
555
113
Location
Davis County, UT
This a s.. l.. o.. w.. work in progress project, and I'm taking my time. But the next thing I want to conquer is replacing the tires. As Suprman pointed out in this thread months ago, don't trust the older Michelin 14.00R20 XL tires. I just barely trust them to drive around the property... slowly. Mine are old and starting to rot.

I've been reading and researching the cost of new tires. fuzzytoaster recommended going with 395 (i assume 395/85R20). Anyone have any experience with putting them on a wrecker? This is for fun/farm use only. I'd like to be able to drive down to the GA rally, and that's the longest drive I'd ever envision (~300 miles). It looks like I might be able to get the 395's cheaper or at least easier/closer.
Forum member 'red' put 395/85R20's on his M816 wrecker. It looks and handles the weight well.

Here's a few shortcuts to some of the relevant posts:
http://www.steelsoldiers.com/showth...M816-Wrecker&p=1829422&viewfull=1#post1829422
http://www.steelsoldiers.com/showth...M816-Wrecker&p=1849089&viewfull=1#post1849089
http://www.steelsoldiers.com/showth...M816-Wrecker&p=1863535&viewfull=1#post1863535
http://www.steelsoldiers.com/showth...M816-Wrecker&p=1868466&viewfull=1#post1868466
http://www.steelsoldiers.com/showth...M816-Wrecker&p=1879415&viewfull=1#post1879415

He flipped the rear hubs and had a bit of issue with stud length and had to cut off the dust cover on the front hubs due to the thickness of the aluminum wheels.
 

mdss

New member
14
4
3
Location
Lynnwood, WA
Just wanted to give the M936a2 owners a heads up. You can use grp27 batteries from wal mart in these trucks. You can even use all the original wires to. These batteries are 810cca and over 1,000 ca above 32f. They have a run time of about 160ah. Considering the 6tlmf that came in them are 750cca and 875ca. With 180ah reserve. Almost the same battery. Another note. The 6tlmf or tmf as they are called now run about 4-500$ each and the grp27 run 90-100$ each. I have been running those in my m936a2 for awhile now and they run perfect. I even use them in the humvees to. Just don't forget to install a solar charger and they will last a long long time. I know I just saved some you you thousands! You are welcome! Another note for the purests out there. You can get the same style tmf from napa for about $250 each about if I remember right but not worth it in my opinion as the everstart grp27 blows it out of the water. !! :)))
 
Last edited:

SouthJL

Member
Steel Soldiers Supporter
53
2
8
Location
Piedmont Triad, NC
Realized its been a year to the day since I last added anything to this post. I got some almost new 395's from simp5782 at the GA Rally. Tires make my pickup look small.
tires.JPG

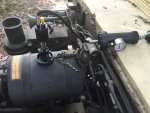
Question, what type of hose is used between the engine block and the compressor? There are two small rubber sections, one an elbow & one straight on each end of the metal air inlet tube. The -24P lists them as HOSE,NONMETALLIC(3911936) & HOSE,PREFORMED (3911935).
compressor-hose.jpg

Unloaded the spare from the wrecker, as that was going to be my first test-subject for swapping the tires.
spare-unload.JPG
 

SouthJL

Member
Steel Soldiers Supporter
53
2
8
Location
Piedmont Triad, NC
This purchase was a bit of stretch for me, I didn't grow up working around cars or trucks. Its quite intimidating. The TM's are a great help, but just understanding and figuring out how to use the TM's takes some learning. Some of you experts will laugh at this thread, and rightly so. But for those of you new to this like me, if I can figure this out, you can too. And maybe learn from my mistakes.

I'm taking this project slow, as in glacier slow. I purchased some tools along the way. It's been said before, but having the “right” tool makes a world of difference. Next order of business is swapping the old tires out for some new rubber.

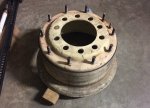
Was able to get the lock nuts off the spare tire with no issues.
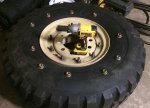
remove-nuts.JPG


Got the first half of the rim off.
rim-half1.jpg


Then got the second half out.
rim-half2.JPG


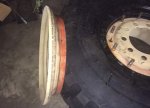
Then got the bead lock out of the old tire. Mistake #1... in my excitement of making progress I put the first rim half back in the new tire. Wait did I skip a step... yes... put the bead lock back into the new tire. So, out comes the rim. Put in the bead-lock, then put in the rim half. I purchased some new o-rings. (again, the 5-ton part spreadsheet here on SS was a life-saver). The ones that came out looked pretty good, but why take the chance. I don't want to do this again.
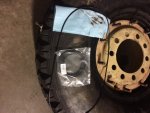
tire-oring.jpg


Mistake #2... forgot to put the o-ring on first. After some attempts at trying to get the o-ring on with the rim in the tire, I removed the rim from the new tire again. Much easier getting the new o-ring on out of the tire.

Rim back in the tire, flip it over, put the second half of the rim clamp on. Tighten down new locking nuts.
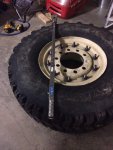
tire-done.jpg


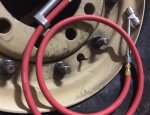
Everything should be good, put the valve core back in the step and add just a little bit of air.
tire-air-hose.JPG


Hmm.... whats that sound? Air entering the tire. No, that other sound. Ahh... that hiss, that would be air leaving the tire. Take the clamping rim off and check. Mistake #3... the o-ring got pushed down between the rim and bead lock when I put the rim in for what felt like the 100th time. Who would have thought... the o-ring was put in there for a reason. So, fix the o-ring, 2nd half of the rim back on and tighten the locking nuts again.

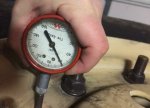
Add air, no leaking this time. I stopped at about 15 pounds. Waited a few hours, mostly because I was just tired. The tire still had 15 pounds of air. Slowly add more air up to 60 pounds, and the next morning, it's still holding 60 PSI.
air-60psi.jpg


Success! I don't really want to admit how my hours I have into this little tire-swap project at this point. And I still have 6 more to go.
 

SouthJL

Member
Steel Soldiers Supporter
53
2
8
Location
Piedmont Triad, NC
I've been fighting the nuts to separate the two rims halves, and they are winning. I have a 1/2" dewalt 20v impact wrench that goes to 700 ft/lbs, which worked on the spare. Got 5 of 10 off on the first "old" passenger side front tire. I put a 1" socket wrench head with 5+ feet of handle on it, and still nothing. I've soaked them with WD40 penetrant, homemade ATF/acetone, and even tried some heat from a hand held MAP-Pro torch from Lowes.I'm giving up, and going to take the wheel into a local truck tire place and see if they will try and break the nuts free.
 

mdss

New member
14
4
3
Location
Lynnwood, WA
Before taking it to a shop here is what I would do. At some point you will have this problem again if you keep playing around with these trucks, go to Amazon, napa or eBay, look for a torque multiplier wrench, you will most likely need a 1" to 3/4 adapter to fit the socket that will fit on the studs. They cost $50 and will solve all your problems now and in the future. Then I would hope on eBay later and buy a 3/4" electric impact gun that plugs into the slave of your truck. Make sure you clean all lugs with a wire wheel on a drill gun first. I promise you it will take any lug off. Don't forget to buy a 1" to 3/4 adapter or you won't find a socket to take the lugs off. Take it easy when you start running the torque multiplier. But over all just make sure threads are clean before taking them off. The 20v gun you have will work for putting it back together you need At least 3/4 to 1 inch to separate these halves. Trust me lol sometimes you will get away with it but most the time not.
 
Last edited:

M35A2-AZ

Well-known member
Steel Soldiers Supporter
3,224
398
83
Location
Tonopah, AZ
I've been fighting the nuts to separate the two rims halves, and they are winning. I have a 1/2" dewalt 20v impact wrench that goes to 700 ft/lbs, which worked on the spare. Got 5 of 10 off on the first "old" passenger side front tire. I put a 1" socket wrench head with 5+ feet of handle on it, and still nothing. I've soaked them with WD40 penetrant, homemade ATF/acetone, and even tried some heat from a hand held MAP-Pro torch from Lowes.I'm giving up, and going to take the wheel into a local truck tire place and see if they will try and break the nuts free.
They can be a bear, I clean off the paint, rust and put a little oil penetrate on them, then use my 1" impact and it still works hard. I feel your pain!
 

SouthJL

Member
Steel Soldiers Supporter
53
2
8
Location
Piedmont Triad, NC
So, I got a torque multiplier and got the front two tires and spare changed over. Was feeling good, as the 3rd tire went much faster than either of the first 2.

I moved on to the back and started to take off the rear tires. Got the CTIS and lug nuts off. But... what is the secret to getting the tire off the rear hub?

The rim seems to be almost the same exact size as the hub cap. Will get back to it tomorrow and try again. Not sure if it helps to have the tire completely off the ground or if it would be better to have it just barely touching. Its on a gravel right now, so its kind of hard to slide the tire. I'm thinking I might jack it up a bit more and place a sheet of plywood under to help sliding the tire out.
 

simp5782

Feo, Fuerte y Formal
Supporting Vendor
12,130
9,405
113
Location
Mason, TN
So, I got a torque multiplier and got the front two tires and spare changed over. Was feeling good, as the 3rd tire went much faster than either of the first 2.

I moved on to the back and started to take off the rear tires. Got the CTIS and lug nuts off. But... what is the secret to getting the tire off the rear hub?

The rim seems to be almost the same exact size as the hub cap. Will get back to it tomorrow and try again. Not sure if it helps to have the tire completely off the ground or if it would be better to have it just barely touching. Its on a gravel right now, so its kind of hard to slide the tire. I'm thinking I might jack it up a bit more and place a sheet of plywood under to help sliding the tire out.
Use a deep well chrome 1-1/8" socket and take the Boss adapter for the CTIS out of the hub before it gets damaged if you havent. once the lug nuts are removed. Let down on the jack a slight bit. pull the tire out to near the hub. Then let the jack down to where it is almost level with the tire and it will slide right off. That is how I do it.

Going back on is a pain as well. you will have to jack it up and down to get it on the lug nuts unless you want to fight with it with a prybar. I slide it back on over the hub. try to line up the ctis to the right spot. Let the jack down to almost level. push it on the lug. start 1 or 2 if i can and jack it back up then use a prybar between the ground and the tire to hold it up to seat the lug nuts down so it is true to the hole. Do NOT tighten down one side all the way before the other side lug is almost all the way down.
 

SouthJL

Member
Steel Soldiers Supporter
53
2
8
Location
Piedmont Triad, NC
Use a deep well chrome 1-1/8" socket and take the Boss adapter for the CTIS out of the hub before it gets damaged if you havent. once the lug nuts are removed. Let down on the jack a slight bit. pull the tire out to near the hub. Then let the jack down to where it is almost level with the tire and it will slide right off. That is how I do it.

Going back on is a pain as well. you will have to jack it up and down to get it on the lug nuts unless you want to fight with it with a prybar. I slide it back on over the hub. try to line up the ctis to the right spot. Let the jack down to almost level. push it on the lug. start 1 or 2 if i can and jack it back up then use a prybar between the ground and the tire to hold it up to seat the lug nuts down so it is true to the hole. Do NOT tighten down one side all the way before the other side lug is almost all the way down.
That was the exact instructions I needed to get this done. This is just a toy/hobby, and time w/ family comes first. So, this started way back last year when I got the tires from Simp at the GA rally.

Getting the spare down, as it was the first one I was going to "practice" on. I probably could have found someone to swap the tires for me... but I wanted to do it.

IMG_0285.jpg

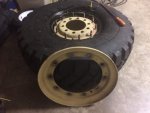
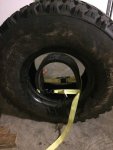
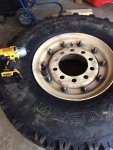
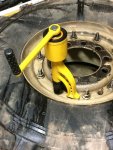
Dismounting the tire... if I could only have one torqe multiplier or impact wrench, I'd take the torque multiplier. What I assume to be a little extra torque on installation and 13+ years of just sitting there, those distorted thread lock nuts where not coming off w/o some persuasion.

IMG_0328.jpg IMG_0348.jpg IMG_0423.jpg IMG_0860.jpg

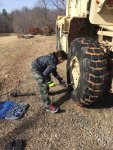
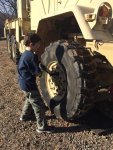
Put the helper to work when I could. Got the front switched over easy enough.

IMG_0456.jpg IMG_0461.jpg IMG_0464.jpg


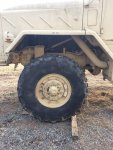
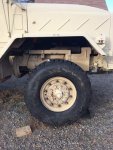
Comparing the 14.00x20 (driver side) vs 395/85R20 (passenger side). Probably not a real good comparison, as there is a very slight side-to-side lean where the truck is parked, driver side is just a bit sloped down.
IMG_0467.jpg IMG_0468.jpg
 

SouthJL

Member
Steel Soldiers Supporter
53
2
8
Location
Piedmont Triad, NC
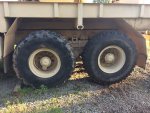
Here are the two rears switched on the back axle, compared to the the middle axle still with 14.00's.

IMG_0888.jpg IMG_0863.jpg

Looks funny with the middle tires missing...

IMG_0957-EFFECTS.jpg

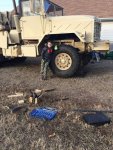
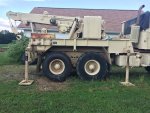
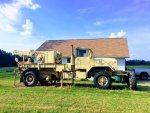
And finally some pictures from last night out in the field with 6 shiny new 395's on her.

IMG_1054.jpg IMG_1055.jpg IMG_1058.jpg IMG_1059.jpg IMG_1066.jpg

And finally thank you all that provided comments when I've asked questions. It's was amazing how much faster the last two tires took compared to the first spare I swapped. I got the middle two wheels off, tires dismounted, new tires on, and wheels back on the truck faster then it took me to just swap the tire on the spare. Like many things, it sure is easy when you know how to do something.
 
Top
AdBlock Detected

We get it, advertisements are annoying!

Sure, ad-blocking software does a great job at blocking ads, but it also blocks useful features of our website like our supporting vendors. Their ads help keep Steel Soldiers going. Please consider disabling your ad blockers for the site. Thanks!

I've Disabled AdBlock
No Thanks