• Steel Soldiers now has a few new forums, read more about it at: New Munitions Forums!

  • Microsoft MSN, Live, Hotmail, Outlook email users may not be receiving emails. We are working to resolve this issue. Please add support@steelsoldiers.com to your trusted contacts.

My Recent Chenowth Acquisitions

Lawdog734

Active member
267
101
43
Location
Colbert, GA
I have always wanted the Chenowth Desert Patrol Vehicle since I was younger and remember seeing the SEALs zipping around 29 Palms with them in the late 90's when they came out to play with us Marines. Finding a legit DPV has proven to be extremely difficult to find. It seems like what comes up for sale are either in the occasional museum, or it's something that's been cobbled together and is far from being a correct vehicle. So several months ago, I set out to build a correct Desert Patrol Vehicle using a Chenowth donor chassis. The Chenowth 4LWD chassis is can be found and there were vehicles built off of this chassis, but the one we typically see are the type built off of the Chenowth Magnum DR2 which are pretty rare and when you do find them - they're $$$$.

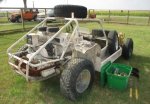
So I mapped out my plans and researched everything the best that I could before buying a vehicle based off of the 4LWD chassis. No sooner did I pay for it and start shipping it from the west coast when I speaking to a work contact that I have about my plans and how I was going to go about making a finished vehicle. As it turned out, my contact had not just a SEAL Desert Patrol Vehicle behind his shop, but also had a Chenowth SEAL "Squad" vehicle as well. They'd been left out to the elements for at least 5 years and it was his intention to drag them to the dump as scrap metal. While the vehicles have seen better days, they're complete and he said that I could have them if I came and dragged them away - so drag them away I did. As a result, I now have 3 buggies at the house, so if you know anyone who wants a 4LWD, let me know lol.

20140811_110444_zpszwaicjyv.jpg

20140811_110545_zpsm6lmfubo.jpg

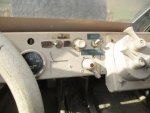
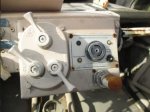
The 6 seat "Squad" Vehicle is in considerably better shape than the 3-seat DPV with very little chassis rust. Seats, wheels, tires, baskets, and other smaller parts will clearly need to be replaced, but overall it isn't bad and I can turn the engine by hand. If I was smart, I would have started with that vehicle, but nobody ever said that I was that smart, so I started with the 3-seat vehicle instead. In addition to the above parts, I'll have to replace the floor of the DPV as it has considerable rust under the seats and gas tank - the rest, really is salvageable. The engine was stuck, but patience and Marvel's eventually cleared it up and I can now turn it. I've been slowly stripping down the DPV and should have it to the point of blasting/cutting/welding very soon.

I've been trying to research the history of these vehicles. It seems like whatever information you find on the DPV is incomplete, incorrect and has been regurgitated from the same source over....and over.....and over again. There is zero information out there on the 6 seat vehicle. If you google "Desert Patrol Vehicle", it'll come up with a couple of pictures of the 6-seater running with the 3-seaters, but nobody ever paid attention to it. So using my NSW contacts, as well as reaching out to Lynn Chenowth (former owner) and Ryan Thomas (GM at Chenowth), I've been able to dig up some information on what I have.

There were a total of 120 of the 3-seat Desert Patrol Vehicles built and they were sold for $56k a piece. Most went to the west coast SEALs, but some went to the Marines, others to CAG and even a few to the British SAS. They were used from 1989 up until the late 90's. There were 12 of the 6-seat "Squad" vehicles built and they all went to the west coast SEALs. These were used from the late 90's up until the invasion of Afghanistan and Iraq before the GMV's started being used due to being more appropriate for the terrain and the cargo capacity.

The vehicles are both made with chromoly tubing (DR2's and 4LWD's are made with steel DOM tubing).

The engines on both are VW Type 4 engines with Porsche upright cooling conversions. They were 2.0's but worked on by FAT Performance to 2650cc.

The transaxles are VW Vanagon setups with a locking diffrential. The diffrential locks via push/pull cable versus the factory vacuum setup.

They have CNC Disk brakes all around with CNC pedals and turning brakes.

They both have SACO steering boxes and most all other miscellaneous parts came from SACO.

Once I get the DPV stripped down, I plan on blasting it and replacing whatever needs to be replaced. Fortunately, most of the parts are still COTS parts, but they aren't exactly cheap - there's no real repurposed VW parts on them.

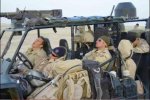
It's been a fun project so far that is going to take some time - my son in the photo above still seems to think this will be a 2 week project, but he's learning it's going to take a while.

I look forward to getting them done and having a unique piece of American Military history on my hands - some guys collect deuces, jeeps, etc - I guess I'll have a couple of SEAL vehicles!
 

Attachments

Last edited:

cbear

Member
244
4
18
Location
Cincinnati, OH
Now that's just beyond cool. I've never heard of the squad vehicle before, I'm glad they got saved.

Do you know how they ended up behind your friend's shop?
 

Lawdog734

Active member
267
101
43
Location
Colbert, GA
CBear, these were purchased via auction by the guys brother. The brother intended to restore them, then a divorce happened, my contact got them and they had been sitting behind his shop until I got them

The DPV is stripped down and the only thing left to remove is the engine and transaxle. I'm having the ****dest time getting them separated, so I'm probably going to separate them as one unit.

Overally, it's not in bad shape. Areas that were exposed where rain could drip off, or were covered by the body are in great shape. The worst parts I've found so far, besides the metal meshwork, is directly under the seats/gastank and one of the supports under the transaxle. The torsion bars are good to go, so I'm hoping that by cutting out the tubing, I can weld new tubing in. All of the outer tubes that make up the shape of the chassis are good to go.

The below pics seem to be the worst of the chassis damage.
ATT00000-2.jpeg
20141007_174725.jpg
 

Lawdog734

Active member
267
101
43
Location
Colbert, GA
Any progress? Love the chenowth's!!
Actually, there has been quite a bit of progress. I finally have the 3-Seat vehicle completely stripped down to the bare chassis and have been able to get a better look of what needs to be repaired.

20141130_151337.jpg

The support tubing from the seats back needs to be replaced. While the torsion adjustment housing will likely need to be cut out and replaced as well, the tubes that make up the remainder of the housing is in remarkably good shape otherwise.

So this is what I've found as needing repair:


Support tubing under the seats and gas tank.
20141130_151146.jpg

Right rear frame horn - supports the transaxle and engine. While this one looks the gnarliest, both horns will need to be replaced because of the rust forward of the torsion bar
20141130_151157.jpg
20141130_151224.jpg

Torsion Adjustment Housing
20141130_151240.jpg

So that's just the framework that needs to be done before I can start building on it again. Most everything that I've pulled off of it can be restored, or I can identify and easily replace. The areas that had me the most concerned was the rotating platform for the gunners seat and the rear hubs. The gunners platform would need to be completely fab'd if I messed it up - and I really thought I was going to have to destroy it to get it off. Fortunately a lot of penetrating fluid and heat and we got it coaxed off. The rear hubs are from Summers Brothers and are no longer made. Both of the hubs have some fractures at the edges, but I think they can be used anyway. I contacted Summers Brothers yesterday and they said that if I sent back what I had, they could recast them for me - but I'm sure it wouldn't be cheap.

The few other problem areas are shown below.

Not one, but two broken torsion bars
20141130_152227.jpg

Summers Brothers Rear Hub
20141207_153436_zpstpfikv6r.jpg

The rear axle, which is splined to match the hub
20141207_175625_zpshowgvkwv.jpg

And then is secured by this big nut - about 2.5" across
20141207_154225.jpg

The Spring Plates have thinned out a little due to corrosion. Given the load they're under I figure it would be smarter (and safer) to replace them. They're cut down Sway-Away swingaxle spring plates, which isn't an uncommon mod on the race buggies
20141202_204029_zpsud3pge4g.jpg

This is the other area that concerns me. The front transaxle mount (top) is flat plate and is easily recreated. The rear mount though (bottom) isn't something that you can just go out and buy and will need to be fabbed up. I was given the spec sheet for it from an old Chenowth employee, but that means I still need to get it made - which likely won't come cheap.
20141202_203853_zpsopqcx3pq.jpg

I never did get the transaxle separated from the engine, which ticks me off to no end. Given that it was a stroked Type4 2 liter from FAT performance, I'm going to send it to them to see what they can do to bring it back to life. Since they're the pros, I'll send the whole unit over to them and they can take it apart, as much as I don't want to ship the extra weight and size of a transaxle.

All in all, I'm feeling pretty good about it. I can turn a wrench, but have no fab skills so I'm going to have to rely on my recently retired uncle to help me out with that - it's just going to take time. I'm trying to make it happen in a fairly expeditious manner. I'd really like to have it up and running again by Memorial Day, 2015, which I know is extremely ambitious, but I've got to at least set some goals.
 

Attachments

Last edited:

Dirt4evr

New member
3
2
0
Location
Tampa fl.
DPV I would love to talk to you and help you out with these vehicles I own 4 Chenowth

Hello I would like to know more about these vehicles and can probably help you out quite a bit. Please contact.
Actually, there has been quite a bit of progress. I finally have the 3-Seat vehicle completely stripped down to the bare chassis and have been able to get a better look of what needs to be repaired.

View attachment 531559

The support tubing from the seats back needs to be replaced. While the torsion adjustment housing will likely need to be cut out and replaced as well, the tubes that make up the remainder of the housing is in remarkably good shape otherwise.

So this is what I've found as needing repair:


Support tubing under the seats and gas tank.
View attachment 531560

Right rear frame horn - supports the transaxle and engine. While this one looks the gnarliest, both horns will need to be replaced because of the rust forward of the torsion bar
View attachment 531561
View attachment 531562 I would like to talk to you about these vehicles please contact me. Thx

Torsion Adjustment Housing
View attachment 531563

So that's just the framework that needs to be done before I can start building on it again. Most everything that I've pulled off of it can be restored, or I can identify and easily replace. The areas that had me the most concerned was the rotating platform for the gunners seat and the rear hubs. The gunners platform would need to be completely fab'd if I messed it up - and I really thought I was going to have to destroy it to get it off. Fortunately a lot of penetrating fluid and heat and we got it coaxed off. The rear hubs are from Summers Brothers and are no longer made. Both of the hubs have some fractures at the edges, but I think they can be used anyway. I contacted Summers Brothers yesterday and they said that if I sent back what I had, they could recast them for me - but I'm sure it wouldn't be cheap.

The few other problem areas are shown below.

Not one, but two broken torsion bars
View attachment 531564

Summers Brothers Rear Hub
View attachment 531569

The rear axle, which is splined to match the hub
View attachment 531572

And then is secured by this big nut - about 2.5" across
View attachment 531571

The Spring Plates have thinned out a little due to corrosion. Given the load they're under I figure it would be smarter (and safer) to replace them. They're cut down Sway-Away swingaxle spring plates, which isn't an uncommon mod on the race buggies
View attachment 531568

This is the other area that concerns me. The front transaxle mount (top) is flat plate and is easily recreated. The rear mount though (bottom) isn't something that you can just go out and buy and will need to be fabbed up. I was given the spec sheet for it from an old Chenowth employee, but that means I still need to get it made - which likely won't come cheap.
View attachment 531567

I never did get the transaxle separated from the engine, which ticks me off to no end. Given that it was a stroked Type4 2 liter from FAT performance, I'm going to send it to them to see what they can do to bring it back to life. Since they're the pros, I'll send the whole unit over to them and they can take it apart, as much as I don't want to ship the extra weight and size of a transaxle.

All in all, I'm feeling pretty good about it. I can turn a wrench, but have no fab skills so I'm going to have to rely on my recently retired uncle to help me out with that - it's just going to take time. I'm trying to make it happen in a fairly expeditious manner. I'd really like to have it up and running again by Memorial Day, 2015, which I know is extremely ambitious, but I've got to at least set some goals.
 

Mogman

Moderator
Staff member
Moderator
Steel Soldiers Supporter
6,937
9,599
113
Location
Papalote, TX
I just picked up one of the original FAVs , The research is ongoing there is allot of stuff that has been repeated over and over but may or may not be true, time will hopefully straighten the errors out.
This one got under the radar, well there was one other bidder that must have had some idea what it was but my pockets were just a little deeper, would have been nice to just "haul off" some though!!
I have petitioned a moderator to have a FAV/DPV forum added here.
 

Attachments

Last edited:

Mogman

Moderator
Staff member
Moderator
Steel Soldiers Supporter
6,937
9,599
113
Location
Papalote, TX
This is a little frustrating, it appears Chenoweth Racing is no more, and several attempted contacts to folks that have any knowledge of these go unanswered.
It has only been a few days but I cannot even get a response from fastattackvehicle.com.
Seems everyone may be dead..
I would like to find out where the serial number is located...
I did find some examples of Chenoweth Racing serial numbers and how to decipher them but not where they are located, they are on a plate welded to the chassis so one would think it would be easy to find, will keep looking, when it gets a little cooler this evening
 

Mogman

Moderator
Staff member
Moderator
Steel Soldiers Supporter
6,937
9,599
113
Location
Papalote, TX
I found the chassis number, the chassis is a 4LWC the C stands for chrome molly, most race chassis were made from mild steel (M) or DOM (D) one of the common racing chassis to mod into a clone is the 4LWD.
All the military chassis were chrome molly with all the welds hardened, good thing the gov. has deep pockets!
 

675striple

Member
21
75
13
Location
Missouri
Anyone else looking for the Army stamping number it is located on the driver's side frame beside the steering wheel (shown in attached photo) it will have a 4 digit stamp assigned by the army, followed by the 4 digit chenowth serial number. The chenowth S/N is also located on a plate welded to the floor behind the driver's seat.fav in italy 1 circled.jpg
 
Last edited:

NEIOWA

Well-known member
1,195
127
63
Location
NE IOWA
I was a young Inf LT with 9ID during the "High Technology Testbed Divison" days of the late 80s. A BUNCH of FAVs running around in the division when it was transitioning to Motorized MTOE. The Fast Attack Bns (2-1 and 2-2Inf as I recall) had a horde of the rigs. Mix of Mk19, M2 or TOW mounted. The CAB-L and CAB-H had them in Bn Scout Platoons.

FAVs had all the nifty bells/whistles but just totally unsuited to Big Green. Too "high strung". The Scout Platoons of the Mtx Bn had something like 8x FAVs in 1985-88 period. When we deployed to Yakima Firing Center for a typical 20+ day FTX the went thru an average of 2-3 engines per FAV over the course of the FTX. Cost a FORTUNE buying/rebuilding the things. Loaded for exercise it was as if took an Indy car (a real one from back when) and strapped a 500lb steamer trunk on each side. They just couldn't handle the loads. I always wondered whe BS the Seals were doing to keep some of the things operational. Perhaps they just abandoned when they broke.

I was the BN S-3Air for quite a while on a couple big airmovements with C-130, C-141, etc. LONG LONG ago but as I recall, scale weight (no crew) for aircraft load plan of our FAVs was over 4200lb. WAY to much stuff. But they were neat.
 
Top
AdBlock Detected

We get it, advertisements are annoying!

Sure, ad-blocking software does a great job at blocking ads, but it also blocks useful features of our website like our supporting vendors. Their ads help keep Steel Soldiers going. Please consider disabling your ad blockers for the site. Thanks!

I've Disabled AdBlock
No Thanks