• Steel Soldiers now has a few new forums, read more about it at: New Munitions Forums!

  • Microsoft MSN, Live, Hotmail, Outlook email users may not be receiving emails. We are working to resolve this issue. Please add support@steelsoldiers.com to your trusted contacts.

Need help figuring out these 10 issues I have with my 404s

79
4
8
Location
Baton Rouge, LA
This Topic is TL - DR material. Please read if you're able to assist with a new Mog owner who is probably in over his head. ;-)

This is all still new to me so please go easy on me. As I am not a formally trained mechanic, I need to dive in deep here.
I just ordered a bunch of spare parts from Expedition Imports to address various issues in the cab and around the truck. However there are bigger things that concern me. Here are 10 of them.

Item #1: Knocking noise coming from engine. I shot a video of my 404s running and it makes this noise which appears to be the air filter (?). I have the shop manual and I am reading it, yet this noise still is concerning me, or should it?

https://youtu.be/qmWDQHJy7o8

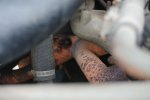
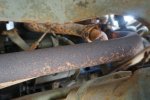
Item #2: Look closely at the pipe in the middle towards the back there appears to be crack that was mended at some point. With the engine running nothing was coming out, however this appears to be an exhaust pipe that is also rusting very heavily. Recommendations on what to do here? Does it need replacing?
404s_Exhaust_Pipe_Issue.jpg 404s_Exhaust_Pipe_Rusting.jpg

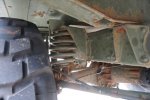
Item #3: The rear axle, picture speaks for itself. How far out am I from restoring or replacing the rusting metal?
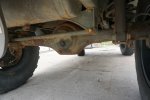
404s_Underside_Rear_Axle.jpg

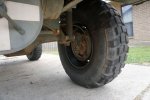
Item #4: Inside Wheel Wells are corroded, suggestions?
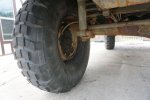
404s_Underside_Rear_Left.jpg 404s_Underside_Rear_Right.jpg 404s_Underside_Rear_Right_2.jpg

Item #5: The hinge on the driver side door was busted at some previous point, spot welded, painted over and broke again. I ordered a replacement door from a surplus provider in upstate NY. Will get it later this week. The old door will be available for sale if someone has the tools to pop the rivets and replace the plate (Expedition-Imports has them for $31 I think). The cost of the tools to replace the rivet was about the cost of the door so I just went for the easy route.

I still need to pass inspection (which here in Louisiana is pretty basic), the door hinge would have been an apparent fail.
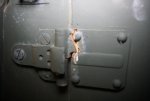
404s_Broken_Door_Hinge.jpg

Item #6: The electrical seems to be all working and in tact.
A colleague of mine who works on rat rods was asking if the distributor cap could be upgraded to an after market that would help with setting the timing, which might make replacing the spark plugs an easier task. Anyone have experience with this or should I just leave it alone?
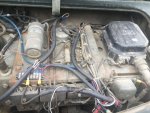
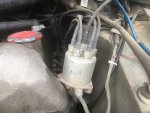
404s_Engine_Electrical.jpg 404s_Dist_Cap.jpg

Item #7: Burning Oil?

I have a video that (is still uploading at the time of this post) it's an 8min of startup, warmup, idle, throttling and engine view and truck walk around (It's my 2nd YouTube video ever) so go easy on me. Should be up by 12:30pm CST. (I'll edit this post to remove this comment later).

https://www.youtube.com/watch?v=zyMgIwZg0XM

You'll see when the truck starts up it puffs out some smoke. But then when it gets running it's ok. I checked the oil its low and I will be replacing it this week. Should I use 10w30 real, half or synthetic? Truck has 9KM on it. Previous owner didn't change oil much, manual says to do it twice a year.

Item #8: The other issue is the paint on the windshield is bubbling, peeling and cracking. The weather seal is also cracking. It looks like it was just painted over (to preserve it?) the weather strip is also cracking on the rear of the radio box. Any suggestions here?

Item #9: Building a shop to work on my Mog (and future Mogs).
I know this going to be a challenge. I knew what I was getting into. I'm currently planning to build a work shop next to my house just to work on the mog, what equipment / tools would you guys recommend I invest in? Engine Lift? etc?

Item #10: I think at some point I will need to take the box off the back of the 404, what apparatus do I need to construct to do this, and /or can someone tell me where to find this info and if you've done it, what did you do?

I still love the fact that I own a Mog. I really appreciate any feedback y'all can provide.
 
Last edited:

The FLU farm

Well-known member
Steel Soldiers Supporter
3,345
1,336
113
Location
The actual midwest, NM.
I'm not much help, only being able to comment on number three. If that rust bothers you, brush/grind most of it off, then with paint POR-15 or the rust inhibitor of your choice.
That axle won't rust away in our lifetime.
Okay, for number 10, either get a few friends together for the bed removal, or buy a cheap gantry crane. The latter may be cheaper, depending on how much beer your friends would require.
 

rchalmers3

Half a mile from the Broad River
Steel Soldiers Supporter
1,926
30
48
Location
Irmo, South Carolina
E-gads, ten questions! I'll answer one of them, but first, Welcome aboard from 10* latitude!

For removing the box, I'd suggest building or purchasing a gantry. It's a rolling overhead lifting apparatus that will support the box so you can drive the truck out from under it.

Rick
 

Karl kostman

Well-known member
Steel Soldiers Supporter
2,308
893
113
Location
Fargo ND
Hey crunchy and welcome aboard. The 404 is a pretty nice looking truck, it was my first Unimog also! Let me try to address the questions that I can. The ignition system can be upgraded to a Pertronix system they work very well and provide a much hotter spark to the system. The rust on the rear axle assembly. Scrape it, wire wheel it sand it, prime it and paint it. The corrosion inside the wheels? See the answer to the last question, use the same answer here. You have some rust in the fender wells? crunchy the answer here is the same answer as every other vehicle with this problem. Clean it scrape it sand it Neutralize it, then prime and paint it. If it through the metal you going to be welding in some patches. The 404 was once described to me by a friend who called it a cockroach, he then followed that statement up by saying when all the other vehicles in the world are gone, there will still be 404 Unimogs around!!!
Good luck and feel free to PM me and I will do what ever i can to assist you.
Karl
 

swiss

Well-known member
Steel Soldiers Supporter
2,732
863
113
Location
Oakwood, Ga
Having once been in the same shoes as you with a new old and not working wrecker I would suggest the following:

Focus on safety and operational items first. All cosmetic items are low priority.

In order of priority
1.) Brakes
1a.) Steering
2.) Engine fluids, filters, belts
3.) Fuel System
4.) Axles, bearings, grease etc. Tires

After you have dealt with the mechanical items then worry about anything else.

ps. by my estimates that would be about 3-6 months of work playing around after work etc. Start by ...

1.) Reading the TM's on brake systems then track all components
2.) Go in TM to troubleshooting guide and follow along to identify each part they call out in a troubleshooting situation.
3.) Then go to the maintenance TM related to the item and perform the maintenance.
4.) Ask allot of intelligent questions on here

Once you have done this for the 4 items above you will be confident in the truck and yourself.

pps. This is my opinion :)
 
Last edited:

The FLU farm

Well-known member
Steel Soldiers Supporter
3,345
1,336
113
Location
The actual midwest, NM.
After you have dealt with the mechanical items then worry about anything else.
First it was peakbagger, earlier today on a different thread, now you, swiss. Both of you seem to insinuate that it's somehow more important to make a vehicle mechanically sound before testing its limits and making it look purdy. What's up with that?
It's not particularly entertaining, I think, to crawl underneath a vehicle, grease gun in hand, and search for Zerk fittings. Then checking all those pesky oil level plugs - or at least the ones you manage to find, and get to.
You guys are taking all the fun out of it. Drive it like you stole it, then fix whatever broke. Yeah, it's infinitely more expensive to do it that way, but nowhere near as boring.
And if all else (or enough parts) fails, there's always the old saying: If it doesn't run, chrome it.
 

tennmogger

Well-known member
Steel Soldiers Supporter
1,579
544
113
Location
Greenback, TN
The thunk-thunk-thunk you hear is the air compressor. That sound is normal and you can ignore it. Since air is not needed for running the truck (not used for brakes or anything else) you could remove the belt if you do not want the noise. With a proper air filter that compressor input noise will be muffled. As it is, the K&N does nothing to subdue the noise.

I agree that you need a better filter. K&N is made for street cars (clean air input) and advertises high flow. But, if you don't drive in dust it will work ok. Those original oil bath filters cannot be beat for filtering.

The distributor already has a Pertronix ignition module installed. In the picture, the red wire coming out of the shield of the cable to the distributor is the 24v power for the Pertronix. If you follow that red wire, doesn't it go to the noise suppressor? (the long tubular thing). The picture looks like it does. The problem with this connection point is that the voltage here is modulated by the ignition system because that point is beyond the ignition resistor. Every time the Pertronix conducts, causing a spark, the voltage on that suppressor drops considerably. The Pertronix probably does not like that! A good steady 24v source, controlled by the key, should be provided to power the Pertronix.

There is considerable added wiring in the engine compartment, all that wire in the black bundling tube. No idea what it is.

A highly recommended upgrade would be to replace the original shielded ignition wires, distributor cap, and spark plugs with non-military parts. Expedition Imports has what you need. The original ignition system worked but was restricted to a spark gap of only half a mm. The reason was to let the spark plug be the point the high voltage arcs over, just as it should be, but some people increase the spark gap and that causes ignition system arcing in distributor and wires, carbon tracks build up, and it'll never run right.

Timing can be adjusted on that distributor in two places, the S-F scale, and by loosening the Allen bolt in the clamp behind the distributor shaft, near spark plug number one. Easiest reached from the drivers seat (6mm hex if I recall, might be 5 mm).

The rust is typical of a poorly cared for vehicle of any kind. As already mentioned, just treat the rust as for any vehicle. The running gear is in no danger of rusting away. Sheetmetal repair is done just like other sheet metal except in this case you are dealing with heavier metal, and it's good German steel. It's easy to weld in patches. Just about every part is available for cab sheet metal.

From the picture, the box has already had some rust remediation done during a rebuild. The telltale is the trim strip running along the side of the box about a foot from the bottom. The sheet metal edge is under that strip, a 'cover-it-up' layer over rust. this is common. These boxes rust along the bottom edges.

One easy way to remove the box is to use a car lift, the kind in a mechanics shop with the arms that rotate in under the vehicle frame. Lift the box, drive out from under it, and drive another flatbed trailer underneath to haul the box away. The box weighs a ton, literally and figuratively, and is awkward to suspend from a single point on each side. You have found the four pull-out posts from which to lift the box? Just be careful.

It's your truck, but those boxes are useful. Once the box if off, the torsion isolation frame goes with it and a new bed will flex as the Unimog frame flexes, and that is considerable. Anything else you build on the frame will have to be torsion isolated.

I agree that brakes should be first on list to recondition. The 404 has a single circuit brake system and a single failure takes out the brakes. However, the parking brake works great on these trucks once you have it adjusted correctly. The parking brake can serve as emergency brake but hope you never have to use it that way. I suspect some sarcasm in the advice to forget the brake maintenance and just drive it, eh?

Exhaust pipe crack: you can drive it that way but that crack will let air into the exhaust and cause backfiring especially when coasting down hill. If you hear it you will know why. All 404's run rich and the excess fuel in the hot exhaust will ignite when it gets air. Looks like that crack could be welded up.

The door hinge breakage is too common too. The original limiting strap was an electrical grounding strap and those eventually break and might have been removed. A good limiting strap will prevent breaking your new door. BTW, the doors lift off and that break could be welded properly.
 
Last edited:
79
4
8
Location
Baton Rouge, LA
You have all been very patient and gracious with me. Thank you for all the great info. I noticed many folks on here have been working on cars since they were a kid, not me. My son is 8 and I want him to grow up knowing how to work on his own cars / trucks so he'll be helping me with some of this. I got all the manuals from Expedition-Imports (Engine Guide, Chassis Guide, little Blue Book from 1979) and the truck came with Operators Manual and the Workshop Manual. The original owners manual is very impressive. I help write manuals for my company and this has to be one of the best manuals I've ever read.
 
79
4
8
Location
Baton Rouge, LA
The saga continues.... Insurance

State Farm told me they needed to insure my Mog as a commercial vehicle at $240 a mo. Louisiana is an at fault state (Napoleonic Code, no precedent here) so everything is double! They told me if I had not been a customer for 15 years they would not have been able to insure me. I told them it was a 1.5 Ton Class B Pickup (from a thread elsewhere on this site) and my agent wrote it up but then she got in trouble by her HQ and she had to rewrite it. They even wanted to know what MSRP was in 1965!!! They should have just said we can't do this.

A colleague who is rebuilding an Indian Motorcycle suggested Hagerty's and now it's $191 for the year. I told State Farm to stuff it.

Saga Continues Further.... User Error

Last Saturday I made the terrible mistake of leaving my fuel pump running for 8+ hours. A previous owner made the switch backlit so I saw it when I checked on the Mog late at night. Crap!

Next morning it wouldn't start. I noticed that if I turned the lights on the fuel pump did not run. Low battery? I checked voltages and it was 8.0V on Battery at edge of tray and 12.2 in the rear. I charged the battery back to 12.3 (took about 7 hours). Now the voltage reads 24.5 across both batteries.

The Mog starts right up, faster than it did when I got it. Which tells me the battery was going.

Both Batteries are NAPA #7565 (1075 CCA32, 875 CCA0). These 2 are too big for the battery box as the door won't close all the way. I believe battery group size spec is Group 27?

I go to start it up today and it is throttling really high. It was scary, adjusting throttle down and choke to make sure they were down had no effect. I am thinking maybe just replacing the batteries? Or something with carburetor as I read on a Benzworld forum thread about someone having same issue. Just seems illogical that charging the battery would cause this erratic behavior.

You guys said to ask lots of questions here. Any suggestions or places to read would be helpful.


Sent from my iPhone using Tapatalk
 

tennmogger

Well-known member
Steel Soldiers Supporter
1,579
544
113
Location
Greenback, TN
Time to pull your doghouse cover for access to the carb. Check that choke is really off, not just the choke knob bottomed out. If you adjust the cable clamp at a length that has the knob a short distance from bottom, like 1/4 inch, you will know choke is off.

Than set the throttle linkage for a slow idle. Now you can adjust the idle air mixture with the two screws on front at base of carb.

The more you run your truck the better it will run.

Please check the oil level again too. An electric fuel pump could have over powered the carb's needle valve and leaked gas into cylinders, and into the sump. The mog carb likes only about 2 psi. What does your pump put out? You might need a fuel pressure regulator if not already equipped.

That's really good news that the engine started so we'll, not like in your video! Starting nearly immediately is more normal..
 
Last edited:
79
4
8
Location
Baton Rouge, LA
Time to pull your doghouse cover for access to the carb. Check that choke is really off, not just the choke knob bottomed out. If you adjust the cable clamp at a length that has the knob a short distance from bottom, like 1/4 inch, you will know choke is off. Then set the throttle linkage for a slow idle.
That was it! I took the dog house off and immediately saw that the Throttle wire was not tight against the throttle lever. Had to adjust tension on Throttle wire screw and that was it!

I was on the phone with Michael from Army Surplus in Upstate NY about something unrelated and upon mentioning that I was working on identifying the high idle, and I noticed the choke wire is a bit rough to pull and push in on the control, as it slides out of the metal coil guide sleeve and through the metal guide hole just before it attaches to the carb lever. Michael suggested to put some grease on the wire through that guide hole to make the motion easier.

After making these two adjustments it's running normal again.

Next thing to do is to check the float on the carb.

I contacted Expedition Imports about getting the Oil Bath Air Filter and all the parts to get my air intake back the way it was meant to be. Thanks for all the suggestions earlier in the thread.
Also going to order the Pertronix Ignitor Upgrade. Thanks for the suggestion on that too.
 

tennmogger

Well-known member
Steel Soldiers Supporter
1,579
544
113
Location
Greenback, TN
Did you not read my post that the distributor already has the Pertronix? The red wire is the power. If you want to verify, loosen the three screws holding down the dissy cap and look. No points, and will have magnet ring around cam and the Pertronix unit attached to the red wire.

While in there there are two 'gotchas on Pertonix: the magnet ring does not seat far enough onto the cam, and the rotor has to have a little cut off it's bottom, up to 1/8 inch on some. If the rotor base looks like it has been trimmed off then that is already done.

Then send me the money you saved not buying another Pertronix set :)

Or maybe you were thinking the 'civilian' dissy cap and wires?

Bob
 
79
4
8
Location
Baton Rouge, LA
Did you not read my post that the distributor already has the Pertronix? The red wire is the power. If you want to verify, loosen the three screws holding down the dissy cap and look. No points, and will have magnet ring around cam and the Pertronix unit attached to the red wire. While in there there are two 'gotchas on Pertonix: the magnet ring does not seat far enough onto the cam, and the rotor has to have a little cut off it's bottom, up to 1/8 inch on some. If the rotor base looks like it has been trimmed off then that is already done. Then send me the money you saved not buying another Pertronix set :) Or maybe you were thinking the 'civilian' dissy cap and wires? Bob
You're totally right, I did not see that... and the reason I missed (believe it or not) it is I didn't know what I was looking for, now I do! When you mentioned it in your last post I went and studied up on the Pertronix system, installation, etc on the Exp-Imp site, watched the videos and read up on it on the Pertronix web site. Going back and looking at the engine, now that I'm looking at the engine I see it, I did face-palm.

To answer your question, yes the civilian dissy cap did throw me a bit, the one on Exp-Imp is a Bosch Red cap. You think it's worth it to upgrade the cap and replace the wires too? I still need to pull the plugs and examine them to see if they need replacing. Examining the wires going to the spark plugs appears these were installed when the Petronix was put in, wires say Silicon Dioxide (or similar) Made in USA and appear to be recent. The only other question is what is the coil? I'm hoping it's a Petronix coil, won't know until I open it up. I'll pull part the distributor cap as you suggested in a few days when I have some more time.

Looking at the condition of the engine (it is a 52 yo truck of course!) I'm sure the money you saved me there will be spent on other things. Thanks again for being patient and very direct with me.
 

tennmogger

Well-known member
Steel Soldiers Supporter
1,579
544
113
Location
Greenback, TN
Your noticing the 'silicon dioxide's label was very observant! Your truck must have upgraded wires already. In fact, when zooming in on your picture of the distributor cap shield (which is not upgraded) it seems to show non-shielded wires and plugs! If that's correct, you are set to go! No more upgrades!

However, these observations indicate that some sort of home-made interface might have been done to adapt the new wires into the old dissy cap. If that's the case, if ignition issues are observed, you might have to investigate more. Worst case, the wires were just stuffed into the holes on the dissy cap. One of my 404s is like that and has worked fine for 15 years!

Glad to be of assistance. I'm anxious to hear your truck is running great!

Someone has done some good work on your truck. That puts you much closer to a great running truck!

By the way, the original coil, if in good condition, can handle the improved spark just fine.

Bob
 
Last edited:
79
4
8
Location
Baton Rouge, LA
That's great to (hear) I mean read!

I'm almost there (I think). In the workshop manual I spied a page for checking the truck after it's been "layed up" for a while. Page 00-1 - Checking and Adjusting Engine, 12 Steps to making sure things are running fine. Going through that list as best as I can. (also noticed the spelling error, cheking in the Note) I thought that was interesting. Germans don't make mistakes. Maybe the translator who wrote the UK English manual did! '

[UPDATE - Read the Entire Forum and found answers to my own questions, posting updated edited version now]

WARNING: TL-DR (Too Long Don't Read Material)

Item #12:
Some of the gauges (oil, air and speedometer) all have their lights out when I turn the dash light switch on. I don't see the light bulbs for these gauges on the parts explosion diagrams, nor can I find other posts online about it. Suggestions on what needs to be replaced or repaired? or just deal with it ;-)

Answer to my own question: I read this entire forum all 20 pages and found no reference, I think I will need to remove the gauges, and disassemble them to replace the lights. Unless anyone else can correct me on this.

Item #13:
On my 404 on the bottom edge of the dash I have 4 switches, the manual (circa 1979) only shows 1 and 3 location populated. Yet on my dash I have in this order:
#1 - Dash Lights
#2 - Blower Fan (at my lower left leg)
#3 - Map Light (found out my map light is burned out, replaced it with a bulb from Expedition-Imports 10w 24v (https://expedition-imports.com/910151024000)
#4 - Supplementary Fuel Pump - Noise is a pump but it emanates from behind the passenger seat. I thought it was my washer fluid pump, but that's a foot pedal on the floor below the driver seat (at least in my s404 it is)

Also found that some of these configurations may differ, for anyone not wishing to read the entire forum to find it, I found a post deep in the thread that explains this: http://www.steelsoldiers.com/showthread.php?86148-Picked-up-a-unimog

Item #14:
When working on the engine, I really wish I could just take off the radiator grill and light section, I've seen pictures of front sections of Swiss 404's taken off without the entire cab removed. Is this even possible with mine? It would make things like replacing the bracket for the windshield washer bottle a lot easier to access. Looking inside the chassis it appears there are folds of metal against each other on the corner edges and on the outside there are creases that are painted over.

Answer: Taking the cab off as directed in the Workshop manual and the 1979 Owners Manual is only way, only the 404.0 has the ability to tilt the cab (per the manual).

Item #15:
Jack Needed, should I ever need to change the tires on this beast, where can I get a bottle jack, or do you recommend an after market for it? or is it hiding on the truck some place? It's not in the boxes at the rear, those have chains in them.

Answer: I did not find a good thread on this forum, however over at Benzworld was a great discussion and I learned that I need a 20 Ton Air Assist Bottle Jack (Northern Tool sells one for about $100). Also putting sections of 4x4 wood under it to fortify and level the jack and get it closer to the axle is advisable. Whatever you do don't use a fender lift type of jack (old style) unless you want to risk your life. Here is a link to the discussion, very worth the read: http://www.benzworld.org/forums/unimog/1394898-will-hi-lift-jack-sufficient-change-2.html

Item #16:
Battery Box inquiry, on mine, I just have 2 bolts, but I need something more secure I think. On Exp-Imp Scott has these Battery Box pins, how is this supposed to work or what's supposed to secure the box?

Answer: I never found an answer to this, what I did find in the manual is that the battery box for a 404 is designed to hold Group 27 Batteries so two Group 24 or Group 27 batteries should work fine. Prior to owning a mog as a newbie (don't hate on me as I have not been spinning a wrench since I was twelve) that battery sizes come in groups. Here's a nice size chart for reference: http://www.batteryweb.com/bci.cfm. Turns out my Mog has 2x NAPA Group 65 Batteries so the box does not close all the way. Putting in 2 properly sized batteries will allow the box to close and you'll need 2 of these battery wing nuts (Part # 4045410071) I got a couple from Exp-Imp for a mere $3.40 each. I replaced the NAPA Batteries with 2x AGM Group 24 batteries which were not cheap at $165ea.. A friend of mine works for a battery distributor here in Baton Rouge and told me pricing on AGM Batteries is crazy and that price wasn't too bad.

Item #17:
Seats, has anyone replaced their seats and/or upgraded seat belts to cross chest instead of just lap belts? My seats are in good shape actually, no rips or tears.

Answer: Found few Mog pictures with new seats and cross chest seat belts. I can install better ones if I want a new project. Driving here in crazy, either don't know where they're going or like they're running from the law!

Item #18:
I got a 24v fan from a HMMHV (don't hate please). Go it from online auction site for half the price of the UK import version, just need to figure out where to mount it. Will post pictures when I have it in.

Answer: I found 24volt oscilating fans like the ones found here at Wal-Mart for $12, the ones from the UK are more like $100 with shipping. So I opted for a hardwire version that I will install myself with a variable pot for fan speed. This is a future project, still working on this.

Additionally, I found that BMW motorcycles from Europe have the same 24v accessory plug as found on my Mog, I can't mention where but if you search for BMW Motorcycle Accessory plug, you'll find 24v USB Adapters that either plug in to the dash mounted 24v plug.

Also I also found 24v powered inline USB Power Adapters that you can hard wire into the electrical system giving you 2x 2.1A USB Ports in a weatherproof LED Backlit connector. Pretty cool actually. Just have to figure out where to mount the jack.

Item #19:
24v/12v transformer - I spied the ones on Exp-Imp but found a better one from a marine supply that was about $200 70A model. Anyone have experience doing this? Is it worth it?

Answer: I did research on these and found that the lower power 20A or less burn up quickly (on Mogs and HMMHVs). If you were to do this, it needs to be mounted as close the battery box as possible and it needs to be beefy enough not to die, I found this 70A model from Victron Energy (https://www.victronenergy.com/dc-dc-converters/orion-dc-dc-converters-12v-24v-48v-110v) not sure if I'll get it now that I found a solution for my #18 (see above). I thought the info was useful reviews from other heavy equipment and MV owners confirmed it's usefulness. Assuming you have a winch, may need to opt for a more powerful version.

Item #20:
Headlights - I went to address a crack in my right front head light. It appears so though the 2 screws are just spinning in place that hold the thread cap on. Just old I guess. Suggestions on where to read up on opening the headlights without breaking them?

Answer: Exp-Imp and others has the replacement glass for the headlight and not for very much which is why I am thankful these guys are there.

Answer: 2 screws are for adjustment, while one allows the rim of the light to be unscrewed, then the glass folds down for access to the bulb.
I was interested in upgrading the 40w/45w incandescent to a higher wattage Halogen. Will need a relay or the light switch will be burned up. Hella does make 70w/75w and 90w/100w H4 bulbs. I read somewhere that Exp-Imp has a kit for this but I couldn't find it, I did find a 5 pint relay but nothing else (maybe someone can point me out to the correct kit or parts). I figured a 24volt relay inline between the light switch and the H4 socket should work. I found several of these socket sets pre-wired with relays elsewhere on the web. Unless someone wants to chime in, I'll figure it out and post my results at a later time.

I also on a 2000 Mercedes S420 (also known as a W220) and the local guy (not the MB Dealer / Shop) who told me previously that he could not work on my Mog apparently changed his story. My wife asked if they could work on Unimogs and one guy said "what's that? to which the older and wiser gentleman in the room said, yes, we can do limited work on those". But I'm not going to put any merit into that I think that working on my 404 will be my greatest challenge yet.

I'll be working on this on my own 100%. You guys are my education. So I'm going back and reading every thread on this forum and every other forum. [UPDATE: I have finished doing that, and have many notes and have learned a lot!]

I'll be busy continuing to read other forums, manuals and making hopefully not too many mistakes.
 
Last edited:

The FLU farm

Well-known member
Steel Soldiers Supporter
3,345
1,336
113
Location
The actual midwest, NM.
For number 15, I'd get a jack from HF. Especially when they have a 20% off, which is pretty much all the time.

Number 19: Don't you already have two good 12 Volt sources, aka batteries?

See, I was gracious. Sort of.
 
Top
AdBlock Detected

We get it, advertisements are annoying!

Sure, ad-blocking software does a great job at blocking ads, but it also blocks useful features of our website like our supporting vendors. Their ads help keep Steel Soldiers going. Please consider disabling your ad blockers for the site. Thanks!

I've Disabled AdBlock
No Thanks