• Steel Soldiers now has a few new forums, read more about it at: New Munitions Forums!

  • Microsoft MSN, Live, Hotmail, Outlook email users may not be receiving emails. We are working to resolve this issue. Please add support@steelsoldiers.com to your trusted contacts.

New to Mep-803A ownership general questions

71
57
16
Location
New Jersey
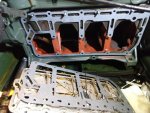
So the crankcase inspection door gasket originally was a one piece rubber gasket. The replacement set I recieved came with two different gaskets that are shaped for the crankcase inspection door, but i dont see any info anywhere in regard to which goes on the door and whichgoes on the block. or If only one is to be used. ( I've never sandwiched gaskets before.) 1 gasket has the 2 areas in the top ledft punched out. the other has only one area in the top left punched out. Anyone ever use these paper gaskets ?
 

Attachments

Ray70

Well-known member
2,598
5,931
113
Location
West greenwich/RI
Humm... that doesn't really seem right to me. I've used those gaskets on both the LPW4 and LPW2 and never stacked up both gaskets.
I don't think there's any openings in the block or cover that prevent either gasket from being used by itself.
IIRC I used 1 gasket on one machine and the other gasket on another machine.
Also, I don't recall ever opening up a machine and finding a rubber gasket on the cover, always paper.
 
71
57
16
Location
New Jersey
Humm... that doesn't really seem right to me. I've used those gaskets on both the LPW4 and LPW2 and never stacked up both gaskets.
I don't think there's any openings in the block or cover that prevent either gasket from being used by itself.
IIRC I used 1 gasket on one machine and the other gasket on another machine.
Also, I don't recall ever opening up a machine and finding a rubber gasket on the cover, always paper.
Hmm, so which gasket would you use? the one with the 4 squares, or the more open one? The facotry gasket was definetly more hevy duty than paper and more closely resembles the 4 square design. im 100% certain my machine has never seen a reset or been touched.
 

Light in the Dark

Well-known member
Steel Soldiers Supporter
3,836
5,964
113
Location
MA
I've seen gasket kits sold for different engines over the years, with varying thickness gaskets... identical cut, I assume to take up manufacturing tolerances on older engines.

As Ray said, I think going with one is the right method. You get one of the universal rebuild kits off ebay from HQ Parts or similar?
 
71
57
16
Location
New Jersey
I've seen gasket kits sold for different engines over the years, with varying thickness gaskets... identical cut, I assume to take up manufacturing tolerances on older engines.

As Ray said, I think going with one is the right method. You get one of the universal rebuild kits off ebay from HQ Parts or similar?
Yes i got the gasket kit from walmart.com actually. seems like cheap foreign manufacture.
 
71
57
16
Location
New Jersey
Firstly I want to give a huge thanks to the moderators and this whole community. The community here is a prime example of what the internet should be; and was made for. Sharing knowledge, power and wisdom! Each and every one of you here working on these machines are the best part of this dang country, and probably are last hope when SHTF.

Anyways, continuing my escapade in resurecting my beautiiful 803-a. I Unstuck, disassebled, honed, 1 new pison, all pistons new rings. Put it all back together with new injector but not injector pumps and..
First Crank no start. After the golden info in other pages i pulled the injector pumps and behold,, they were frozed as others had described.

Soo I cleaned, disassebled top of injector pumps. cleaned in there and had to BEAT THE SH*t out of the metering arms with big ass hammers until the metering arms rotated freely. than after more bathing in PB blaster i manually can hand pump the injector pumps and they seem right. lol. The price of new pumps being near 300$ i decided to try to renew the old ones no matter how.
It is now obvious the fuel governer rail is stuck so It seems im going to pull the front gear cover next and try to just unstick that and than i should be good to go.
I'm extrmemely lucky my fuel govenor rail was stuck closed or else i would have shot 20 year old nastyness from the old injector pumps into my new injectors.. So im kinda glad first start attempt was a fail. Now i better understand the fuel delivery and the nature of the IP's,
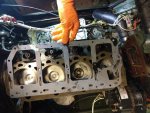
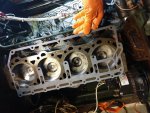
(Pictured is worst of the Injector pump bottom end) this is because i bathed the inside of the engine with practiclly everything oily to unstick the seized condition first off so it all sank to the lowest points..
 

Attachments

71
57
16
Location
New Jersey
Soo I can use some tips here.. The metering arms are free to a pinkys touch and in their coorosponding slots on the fuel governor rail, yet once even just one injector sits in the fuel governor rail, the rail is held in place and is not freely operated by the throttle. This is not as i've seen the linkage react in Call me Colts videos about the govenor rail... He was able to rotate the metering arms within via handplay with the fuel shut off knob. I cant. My rail moves freely and can be movd with the shutoff knob with all the injectors out but it gets stuck with any injector inserted to its slot... Probably going to crank it with the front gear cover off and everthing else all hookd up again to see whats goin on when i can the next day or so.
 

Ray70

Well-known member
2,598
5,931
113
Location
West greenwich/RI
Do you have all the injectors bolted down tight or are they just sitting in the holes??
IF they are not bolted down fully, the arm will hit the underside of the block surface and bind the rack, you must have them almost fully down against the block for the arm to clear the underside of the casting.
Ask me how I found that out! Had the same problem on my first go around!
 
71
57
16
Location
New Jersey
Do you have all the injectors bolted down tight or are they just sitting in the holes??
IF they are not bolted down fully, the arm will hit the underside of the block surface and bind the rack, you must have them almost fully down against the block for the arm to clear the underside of the casting.
Ask me how I found that out! Had the same problem on my first go around!
Indeed with all of them bolted down the rail still won't budge.. i can confirm all 4 are in their slots with a boroscope through the gearcover.
Thanks for the reply though, no doubt something is binding up improperly, although i wacked the metering arms free they still all seem stright and true to the original size..
 

Light in the Dark

Well-known member
Steel Soldiers Supporter
3,836
5,964
113
Location
MA
It still sounds like an alignment issue... it doesn't take much to make the rail want to not move. Remove them all, and install one properly and see if the rail moves... go down the line until you have an issue.
 
71
57
16
Location
New Jersey
Thanks so much for the tips. I'm going to do that exactly,. I'll report back later today
OOOO YESS im on to something here.. Refrenceing the lister repair series on youtube. It discusses how The engine must be rotated when installing the pumps to get the tappets to lower to the appropriate height. I was not rotating the engine Thus the tappet heights are not proper causeing them to bind!!!!
 

jamawieb

Well-known member
1,437
556
113
Location
Ripley/TN
So the crankcase inspection door gasket originally was a one piece rubber gasket. The replacement set I recieved came with two different gaskets that are shaped for the crankcase inspection door, but i dont see any info anywhere in regard to which goes on the door and whichgoes on the block. or If only one is to be used. ( I've never sandwiched gaskets before.) 1 gasket has the 2 areas in the top ledft punched out. the other has only one area in the top left punched out. Anyone ever use these paper gaskets ?
Ive rebuilt about 30 and always use the open gasket. Dont sandwich them. Good luck with your build
 
71
57
16
Location
New Jersey
Hey thanks for the gasket advise,, Here's my update:naner: I"m possible seeing the light at the end the tunnel, no pun intended. Rack and injectors seem to be in-line and rotating properly. I finished late this evening and got a few cranks in to try to start it. No start after three, 5 -7 seconds long cranking. Cracked upper inector lines and began to see small amounts of fuel.. I assume its gona need to rebuild pressure a bit before it fires.. Would anyone recommend any type of accellerant into the intake to initaially get things a pumpin and help build up fuel pressure without so much strain on the starter?? I know that considered a Big NO NO . but i don't like to crank and crank. I did start to see some oil push up the pushrod tubes toward the gen head, also from reading the manual Im assuming after torqing the rocker arms to 25lbft and letting the lifter bleed down the manual says there self adjusting and the oil pump will build up pressure to "ajust them upon running" keeping in mind I never removed the crankshaft or camshaft.
 

Light in the Dark

Well-known member
Steel Soldiers Supporter
3,836
5,964
113
Location
MA
Let the fuel pumps run and prime the main system for a good minute. Crack the lines at the injectors until you see both spraying fuel. Clean it up, retighten, and go again. It might take two more times, but it will go. Just make sure your batteries are in tip top shape. They will recharge as soon as the set starts up.
 
Top
AdBlock Detected

We get it, advertisements are annoying!

Sure, ad-blocking software does a great job at blocking ads, but it also blocks useful features of our website like our supporting vendors. Their ads help keep Steel Soldiers going. Please consider disabling your ad blockers for the site. Thanks!

I've Disabled AdBlock
No Thanks