• Steel Soldiers now has a few new forums, read more about it at: New Munitions Forums!

  • Microsoft MSN, Live, Hotmail, Outlook email users may not be receiving emails. We are working to resolve this issue. Please add support@steelsoldiers.com to your trusted contacts.

NV4500 swap clutch fun!

erasedhammer

Active member
843
60
28
Location
Maryland
I was going to attempt the nv bellhousing. The guy I bought my pedals from had one swapped in a square and it seemed to fit fine. Figured it was worth a shot first.
They work fine, it's just personal preference. I wanted an external slave (for ease of servicing) on drivers side (no need to worry about front driveshaft).
 

Ilikemtb999

Active member
698
45
28
Location
Denver, CO
They work fine, it's just personal preference. I wanted an external slave (for ease of servicing) on drivers side (no need to worry about front driveshaft).
I read some people claim they hit, the one I saw looked like decent clearance. Seems worth potentially saving $500 on the AA one if possible.
 

Recovry4x4

LLM/Member 785
Super Moderator
Steel Soldiers Supporter
34,012
1,808
113
Location
GA Mountains
This pilot bearing was putting up quite the fight. Tried the grease/bread trick, no go. Tried a 2 jaw puller, no go. Ground down my cheap 3 jaw to puller to fit in there, it bent and broke. Got a 3 lb slide hammer, it just laughed. Started to cut into it but the shell is so thick I'd go bankrupt buying saw blades.

Decided to make a tool from some of the 2 inch steel I got to make a cross member spacer for the nv4500 swap. Cut a strip off it, drill three holes, tapped two of them for long bolts. Used the slide hammer bit to grab the bearing and an impact to drive the bolts on one side at a time. I actually ended up bolting an old flywheel on for the bolts to press on. Finally got the pilot bearing out. Glad to put the drill press to work. View attachment 817972
I have the same dragon to slay on my 4500 install. I already have a working truck with the SM465 but need a larger ID pilot bearing for the NV4500. I also escaped the hydraulic clutch blues, used a linkage design. Since I never twist it up off road, It should be just fine. What kind of pilot bearing puller didn't work. I have a nice Snap-On, hoping it gets the job done. Its not failed me yet.
 

shotty

Active member
211
56
28
Location
Northern VA :(
I have the same dragon to slay on my 4500 install. I already have a working truck with the SM465 but need a larger ID pilot bearing for the NV4500. I also escaped the hydraulic clutch blues, used a linkage design. Since I never twist it up off road, It should be just fine. What kind of pilot bearing puller didn't work. I have a nice Snap-On, hoping it gets the job done. Its not failed me yet.
This one couldn't reach behind the bearing, it would hit the raised portion of the crankshaft and not get deep enough: 1605361830971.png

This one broke, bending the horizontal arm, and I had to grind the teeth on the legs down to get them small enough to fit in:

1605361890314.png

Truth be told, I think I just had some corosion buildup or something on the pilot hole, and that's why it was such a bear to get out. I cleaned it up a bit when I reinstalled the new bearing and it went in a bit easier.
 

SuperAwesomeDOOD

New member
20
17
3
Location
Cool, CA
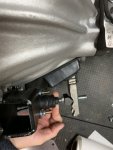
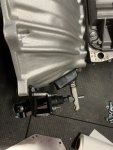
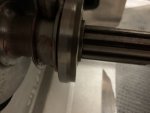
I just went through the clutch bracket fiasco from AA today. I’m doing an nv4500 swap with their bell housing and bracket. The clutch was fully depressed with the rod bottomed out in my LUK slave cyl. Like you, I cut 9/16” off and rounded the tip up again, but the two jamb nuts and house looking wedge block still bottomed out on the boot. So I had to invert the boot on itself so the part that fits the rod was still there to create a seal, but nothing really went as expected.

here are the before pics, forgot to snap some after pics, but what a pita.

0CE2AE15-67DB-4C17-B4A5-A0E2316F4A3F.jpeg2DC0DC1B-75C2-4E1D-9055-3A6A42C95213.jpeg
473CEE49-D90F-4129-92C1-A60C0C134DA0.jpeg
 

shotty

Active member
211
56
28
Location
Northern VA :(
Yeah it's been fun dealing with that. I actually ditched one of the nuts to get things to line up better. Granted, I can't adjust the position of the wedge right now but I'll cross that bridge when I come to it.

I might just tap the wedge for a larger diameter all thread rod so I can just run one nut and still be able to adjust it's position.

What clutch and flywheel did you use?
 

SuperAwesomeDOOD

New member
20
17
3
Location
Cool, CA
Yeah it's been fun dealing with that. I actually ditched one of the nuts to get things to line up better. Granted, I can't adjust the position of the wedge right now but I'll cross that bridge when I come to it.

I might just tap the wedge for a larger diameter all thread rod so I can just run one nut and still be able to adjust it's position.

What clutch and flywheel did you use?
I have an SBC now, but I used a McLeod clutch kit and a center force billet flywheel. I can get p/n next time I go out to the shop. Hopefully everything else fits as expected.
 

erasedhammer

Active member
843
60
28
Location
Maryland

chevymike

Well-known member
597
463
63
Location
San Diego, CA
So far its pretty solid, no slop. The nut is against the fork pretty good, I don't think its going anywhere.
Plus I think its allowing me to back the fork further up the half threaded rod AA provided.
You actually want something there to allow the fork to pivot as the rod moves in and out. Without the wedge or something, that nut will eventually wear into the arm and possibly bind.

What I did on another project trans swap was to take a piece of solid round rod (big enough to allow the rod through) and drilled a hole for the push rod. Then I cut the round rod in half, basically making a U shaped pivot. Put the curved part against the fork and the flat against the adjusting nut. Worked good and didn't take as much room as that wedge block would.
 

SuperAwesomeDOOD

New member
20
17
3
Location
Cool, CA
Mine came with the wedge and a pass through acorn nut. The acorn nut would work in place of the wedge if need be. Someone I’m doing this swap at the same time as on GMSB has a totally different looking bracket from AA. That’s the third different design I’ve seen under the same part number...
 

shotty

Active member
211
56
28
Location
Northern VA :(
You actually want something there to allow the fork to pivot as the rod moves in and out. Without the wedge or something, that nut will eventually wear into the arm and possibly bind.

What I did on another project trans swap was to take a piece of solid round rod (big enough to allow the rod through) and drilled a hole for the push rod. Then I cut the round rod in half, basically making a U shaped pivot. Put the curved part against the fork and the flat against the adjusting nut. Worked good and didn't take as much room as that wedge block would.
I like that idea. I think the wedge is less than ideal as it seems to bind a bit on the pointed edge. A half round shape, maybe with a nut welded inside it so you can still use a jam nut setup would be great.
 

erasedhammer

Active member
843
60
28
Location
Maryland
You actually want something there to allow the fork to pivot as the rod moves in and out. Without the wedge or something, that nut will eventually wear into the arm and possibly bind.

What I did on another project trans swap was to take a piece of solid round rod (big enough to allow the rod through) and drilled a hole for the push rod. Then I cut the round rod in half, basically making a U shaped pivot. Put the curved part against the fork and the flat against the adjusting nut. Worked good and didn't take as much room as that wedge block would.
I would assume the nut would be come rounded to the point where the fork can move without the nut turning. I just wouldn't be able to take the nut off lol.
 
Top