• Steel Soldiers now has a few new forums, read more about it at: New Munitions Forums!

  • Microsoft MSN, Live, Hotmail, Outlook email users may not be receiving emails. We are working to resolve this issue. Please add support@steelsoldiers.com to your trusted contacts.

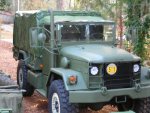
On the way to Bobs

3dAngus

Well-known member
4,719
101
63
Location
Perry, Ga.
Thanks Dave.

Don, I haven't decided yet. For some reason, I kinda like them the way they are, but need to clean up some of the lug nuts on the 24 bolt side.
 

3dAngus

Well-known member
4,719
101
63
Location
Perry, Ga.
I like.
How much weight do you think you took off her?
Suggest changing to dual circuit brakes - you may thank me in the future.
OK, that is something I will consider if I have any kind of problems in the future with the brakes, for sure. For now, I still have plenty to do to make this "unique" and maintenance to do as well. I've owned it for about three months, unofficially, or since I put the down payment on it, but only have possession of it for a few weeks and lots of catching up to do. And I'm not one to fix something that is not broke though your thoughts are very well received. Thank you. I'll research the process and get ready for it, just in case.

I'll be weighing her after the Ga. Rally at the local scrap yard. Details have already been worked out, but no time to get her up there right now. I'm racing against the clock with items right here at home "getting ready." I'll let you know....
 
748
5
18
Location
Woodstock, GA
Thanks Dave.

Don, I haven't decided yet. For some reason, I kinda like them the way they are, but need to clean up some of the lug nuts on the 24 bolt side.
I also like the way the rims look but may be inclined to paint them black if they were mine. I would leave them the way they are before I'd paint them green. IMHO
 

3dAngus

Well-known member
4,719
101
63
Location
Perry, Ga.
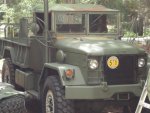
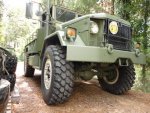
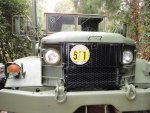
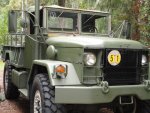
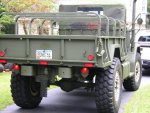
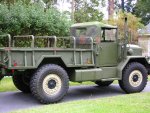
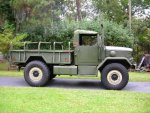
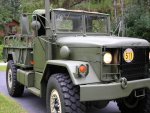
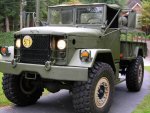
Well, today I completed the base coat of paint. I hope to give it a final coat after the Ga. Rally. It's come a long ways.

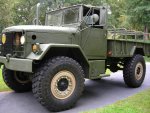
I took it out for a joy ride this afternoon. Way cool! I like it better than my other two deuces. It feels like it has power steering with those 395s on it. They stand about 47" tall.

I stopped at a light next to a Frito Lay truck where he was already stopped. I could see the guy leaning into his mirror to see this truck coming up beside him. When I got to his side, I was every bit as tall as he and he waved and smiled. I could tell he liked it.

There was a lot of head turning going down the highway. People bent over to look up and see who or what was driving this thing. It was kinda funny.

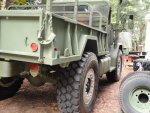
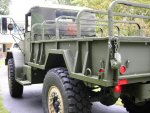
I also am adding three extra 24vdc lights in the back for added visibility at night. People get tired at night and just don't always see these big ole trucks for some reason unless you really light them up with extra lights and reflectors and reflective tape. Even with them not wired yet, they will help as reflectors.

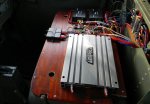
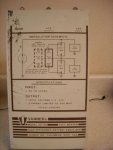
I have a battery equalizer to install yet. It will safely convert 24vdc to 12 vdc for all my electronics. I'll add it and an inverter to convert 12vdc to 120 vac, so I'll have three different kinds of power available. The 12 vdc equalizer puts out up to 50amps. Any suggestions on where I should mount the equalizer?

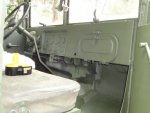
That's about it for now. Tomorrow I'll put on my datatags on the interior.
 

Attachments

3dAngus

Well-known member
4,719
101
63
Location
Perry, Ga.
WOW. That's some nice work. Ready to go tailgating I see. Where do you store the grill?
The battery equalizer is about the same thing square, maybe a couple inches longer.
I'll check behind the seat. I have to figure out some way to protect the battery terminals as they are exposed. I would hate for someone to drop a penny on them.
 

Attachments

748
5
18
Location
Woodstock, GA
WOW. That's some nice work. Ready to go tailgating I see. Where do you store the grill?
The battery equalizer is about the same thing square, maybe a couple inches longer.
I'll check behind the seat. I have to figure out some way to protect the battery terminals as they are exposed. I would hate for someone to drop a penny on them.
Yeah I can't tell how thick it is there. If mounting behind passenger seat, the thickness will likely be the limiting factor. However, the lower you mount it on the seat back the more room you will have because the seat back is angled.

As far as the grill goes, I usually just put my Weber Q in the bed. That or I put a stand burner in the back if I feel like frying wing or boiling peanuts.
 

Cycletek

Member
345
4
18
Location
Panguitch, Utah
I mounted my Vanner EQ next to the batteries in my M813, I have never had a Deuce, yet..... So i am not aware of the room you have in your battery box. I installed mine forward of my two Optima Truck batteries, I am installing two more Optima batteries for my Inverter in the rear position in my battery box.
 

3dAngus

Well-known member
4,719
101
63
Location
Perry, Ga.
Well, I have been a real MV slacker since the Ga. Rally and really haven't done much of anything. I still want to get back to my Bobber here and make is special in some kind of way before I sell it. I wish I had room for it, but with a M37, and maybe two soon, and about 6 trailers plus a tractor and six cars along with a 16 foot flatbed trailer, it is just a matter of time before the neighbors complain. In any case, I have been ordering a lot of parts. Seems like most come in two-three days, but there is always another who takes his good ole time to get them out and it might be weeks for that one critical part.

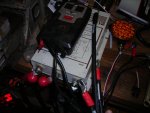
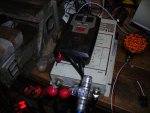
Today I looked at my Vanner Equalizer. I have been adding parts and wires and fuses to it over the last couple of months and not done a whole lot. I do still want to give the capability of having all three primary voltages, +12VDC, +24VDC, and 120VAC so a user can plug in just about any low level device without harm to the batteries. But, more significantly...

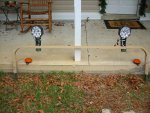
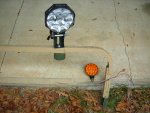
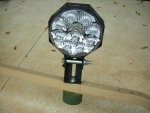
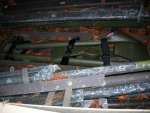
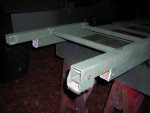
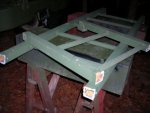
I received my bracket hardware for my LED lights. I wanted to take a couple of my 24vdc LED lights and use them for flood on the back of the deuce. I decided to just have a spare aluminum rather than wood, top bow, drilled out and brackets and lights mounted on it. Picture shown. I can then remove it at will and put on a cover for covering goods in the back, or mount this top bow with special lighting upon demand. It is top bow number six, and I have the other five already painted in green mounted on the truck. Now that I have it physically mounted, where it will swivel left, right, up, or down, with a minimal adjustment, I'm ready for dismantling it again and applying paint. I'm doing the bobber in Rapco Forest Green.
I also received these 24vdc yellow led lights, but haven't decided if I am going to sell them and recoup some of my money, or mount them for ??? I did hook them up to a new 6TL battery at 12v to see if they would light up and made the mistake of laying them down, face up, right in my eyes. I was seeing blue spots for five minutes afterward, and seeing them again now while on this laptop, so I'm going to go take a break and find something else to do on the OD machines. Thanks to JuanPrado for assisting in helping me find something to mount the LED headlights on. These brackets off ebay worked out great!

edit: By the way, that big round green washer like slug on the bottom of the lights is a counterweight I added. It's heavy and the right sized hole, and it was not being used, so,... I used it. Seemed to work out well.
 

Attachments

Last edited:

DHennon

Member
Steel Soldiers Supporter
364
16
18
Location
Orlando, Fl
Nice job, Dell! I have been wondering what you have been up to. Just finished my teaching for the rest of the year and am going to spend much needed time finishing the S-250 Camper, Wiring up the 3 station Vic-1, and installing the electric wipers.

I have one wiring harness plug to tackle and the A/C will be done. The weather has been so pleasant, I have not made it a prioroty to finish...but.......summer will be here sooner than I think!
 

3dAngus

Well-known member
4,719
101
63
Location
Perry, Ga.
Thanks Dave. Better to get that A/C done in this nice weather then when it hits 95 again.:D
You find more things to do on that deuce, and I thought it was perfect when I saw it. :p

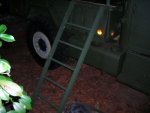
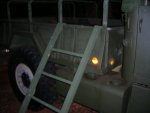
Anyway, today, I decided it was just to difficult to get in the back of the deuce. I had an aluminum ladder that was to long for anything at 8', or to short for the rest, so I decided to cut it off and remount the feet at the 72" level. This will give me a ladder that is light weight and of perfect heigth to get in the back of the Bobber from any side. And, at 72", it will be just short enought to fit in the back of the 105 bed if I can find a way to get it in there and out of the way of the Pioneer Tool Kit rack and tools I put together for the Bobber. I might just load it up on the 105 side rails with a special rack mount for it. It's light enough with aluminum it should not be a bother at all.

One mistake I made was in the use of the reinforced M105 bed, rather than the standard. With the VSE remanufactured bed, the side reinforcement gets in the way of the carpenters toolbox when I try to load them up and in, above the wheel well. They just won't go all the way up to the sides with those extended ribs. I hate that as I have these two absolutely fantastic (what I call saddle bag toolboxes) that cannot be used as originally planned. The best laid plans of Mice and Men...
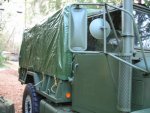
In any case, neither the pioneer tool rack, nor the ladder have been mounted, but should be in the next week when I get the feet back on the ladder properly. It got dark and I had to quit.
 

Attachments

3dAngus

Well-known member
4,719
101
63
Location
Perry, Ga.
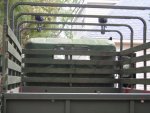
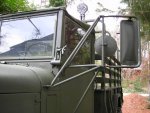
With help this week from my son up from Debary Fl, I managed to open up the holes in the side of the VSE refurbished bed of the bobber and get some side rails banged down in there for the first time. I've always had a brand new, in the box, M105 cover in wait, and wanted to get it on to keep out the leaves and such from getting in the bed. Now, I can start loading up my tool box and parts bins in the back. I also managed to mount my LED spot light kit, though not wired, and then remove it for using the cover. I'll use the LED spot light kit when going convertible and the cover for cargo hauling with the spotlight kit down in a rack I plan on building later for it. With the limited time we had together, we could not do it all. And, I still have to get the convertible top replaced after it tearing from the trip up to the Ga. Rally. The white you see on the top and windshield is the remnants of the cheap tape I purchased on the way up. I tore it off this week and it stayed on to long. Hopefully, I'll get the top off this week and either repaired or replaced. I have a M35A3 used top to go on there. Not sure if it will work the same or not.
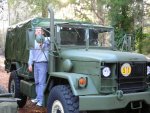
It would be nice to have a new one but I'm not going to pay gold for them.

Anyway, here is some pictures with lights on, lights off, and cargo cover on for the first time.
 

Attachments

juanprado

Well-known member
Steel Soldiers Supporter
5,605
2,898
113
Location
Metairie/La (N'awlins)
Awesome looking amber lights.

Have you considered using them for rear facing lolipops with the right bracket and/or I have seen commercial wreckers / logging trucks with rear facing turn signals mounted high on the head ache racks. You could mount them on the bow next to the other lights.

Great looking build!
 
Top