• Steel Soldiers now has a few new forums, read more about it at: New Munitions Forums!

  • Microsoft MSN, Live, Hotmail, Outlook email users may not be receiving emails. We are working to resolve this issue. Please add support@steelsoldiers.com to your trusted contacts.

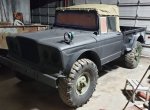
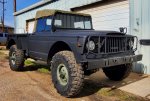
Operation: Gertrude. Kendelrios M715 restoration thread

67Beast

Well-known member
983
500
93
Location
Silver Lake Sand Dunes MI.

kendelrio

Well-known member
Steel Soldiers Supporter
2,677
8,648
113
Location
Alexandria, La
OK, been a busy week.

First, my new oil and temp sending units came in:

20230128_173832.jpg

20230128_173845.jpg

Spent a day troubleshooting all of my gauges and am happy to say they are all working.

Then, I took a concrete bit to the truck to knock any loose paint/debris/oil off and was.... surprised...

20230126_104627.jpg

20230126_104640.jpg

20230126_151722.jpg

Then was body work and paint:

20230128_173743.jpg

20230128_173754.jpg

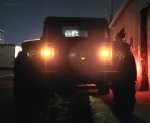
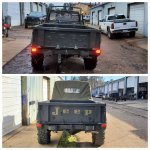
Then was wiring and adding the rear tail lights and marker lights:


20230128_173942.jpg

20230128_173954.jpg

This coming week will be adding the roof channel to the windshield, front marker lights and taking the winch bracket off and finishing paint.
 

kendelrio

Well-known member
Steel Soldiers Supporter
2,677
8,648
113
Location
Alexandria, La
Yesterday was tackling the exhaust leaks and cleaning up the exhaust manifold.

20230131_101616.jpg

As you can see from the old gaskets, they weren't in the best shape:

20230131_104404.jpg
20230131_105041.jpg

Cleaned up the manifold, resurfaced the ports, treated with a rust neutralizer, then high temp primer and paint, new studs and voila:

20230131_182156.jpg

My buddy who is an awesome welder also got busy attaching the soft top channel to the windshield:

20230131_192526.jpg
20230131_193452.jpg

And now the windshield can hold the top and is ready for cleaning and prep/paint

20230131_194155.jpg

There was also a spot in the front fender that had been beat up pretty badly, so the dents were hammered out, a skim coat of filler, and now it's ready for prep and paint

20230131_194313.jpg
 

67Beast

Well-known member
983
500
93
Location
Silver Lake Sand Dunes MI.
Yesterday was tackling the exhaust leaks and cleaning up the exhaust manifold.

View attachment 890027

As you can see from the old gaskets, they weren't in the best shape:

View attachment 890028
View attachment 890029

Cleaned up the manifold, resurfaced the ports, treated with a rust neutralizer, then high temp primer and paint, new studs and voila:

View attachment 890030

My buddy who is an awesome welder also got busy attaching the soft top channel to the windshield:

View attachment 890031
View attachment 890032

And now the windshield can hold the top and is ready for cleaning and prep/paint

View attachment 890034

There was also a spot in the front fender that had been beat up pretty badly, so the dents were hammered out, a skim coat of filler, and now it's ready for prep and paint

View attachment 890035
Nice, making good progress.
 

kendelrio

Well-known member
Steel Soldiers Supporter
2,677
8,648
113
Location
Alexandria, La
Today was only about half a day... cold and rainy makes it hard to get going!

Mounted the windshield weatherstripping and windshield and installed the canvas top:

20230202_102652.jpg

20230202_105302.jpg

Then it was mark and mount the front blinker/marker lights
20230202_110240.jpg

20230202_111158.jpg

20230202_111226.jpg

20230202_113850.jpg

Screenshot_20230202_114436.jpg


As far as putting the top on, due to the issues I had with the footman loops on my deuce, I already knew to remove them before attempting to slide the top on. It's 4 bolts and makes life SO much easier!

20230202_113955.jpg

Tomorrow is pressure wash, final paint and assembly.
 
Last edited:

kendelrio

Well-known member
Steel Soldiers Supporter
2,677
8,648
113
Location
Alexandria, La
Woof... where have I been? Busy! There will be multiple posts today.

Lets see... what's been going on?

After the blinkers, the lights and brackets that @G744 so kindly provided arrived, so i mounted them.

20230208_183615.jpg

The previous owners had put LED turn signals in when the system was 12v, and I liked the look of the plates covering the holes, so I went with them. The only problem was the hardware to mount to the engine bay was too short, so I repurposed some exhaust manifold studs in order to get the correct stand off.

20230213_172613.jpg

20230204_192154.jpg
I finished 98% of paint. (Still have to do the cab interior and some details on the exterior:

20230204_142334.jpg

20230204_145412.jpg

I took the canvas top into Lowes and had them color match it so everything would match.

Then it was a test drive. She was really running horribly, so new plugs and wires. In the process of doing that, I found plugs 2 & 4 were wrong on the distributor. Another test drive:


She is running great!


Then i installed 24v wipers and blades.

20230207_200435.jpg

Then it was a call to the insurance company then off to the OMV for plates.

I spent a couple of days just test driving her in different environments and speeds rain/sun/cold/heat (because Louisiana weather is awesome like that!) and she consistently ran great!

We went ahead and ordered some LED ditch lights to mount in the old spotlight mounts (because we know i love my lights!):

20230211_105501.jpg

20230211_105455.jpg

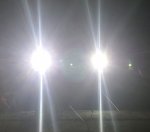
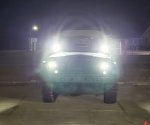
Just the headlights

Screenshot_20230210_113745.jpg

And with the ditch lights


Screenshot_20230210_113911.jpg
 

kendelrio

Well-known member
Steel Soldiers Supporter
2,677
8,648
113
Location
Alexandria, La
My battery box came in, so I removes the temporary box, prepped and installed it:


20230208_183701.jpg

I added a keyed kill switch

20230209_152555.jpg

20230208_210424.jpg

Then this last Saurday, it was a dreary rainy day and I asked my sweet lady @IRIS_Always if she wanted to go for a ride in the rain and of course she said yes.

We were going to a local boat ramp down a gravel road, so I dropped her into 4wd and ran through the gears, then checked 4wd low, and no issues.

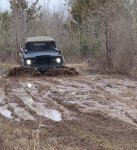
Almost to the boat ramp, we saw a muddy road going up a hill and **someone** said "Wanna check it out?" So we did...

Screenshot_20230211_142701_Gallery.jpg

Screenshot_20230211_135615.jpg

A little compilation video (it has music, so careful with your speakers!)


20230211_151641.jpg

Then on Sunday, we were moving the M1061A to the shop to add a dovetail and long story short, the main power wire to the coil inside the distributor failed.

3 days of fighting it (mainly due to my ineptness) and she's now running great again!

Oh, and she and Bertha get along!

20230208_104314.jpg
 

M813rc

Well-known member
Steel Soldiers Supporter
4,218
3,254
113
Location
Near Austin, Texas
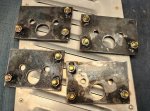
That standoff of the turn signals from the rear bulkhead is how the larger military turn signals fit in the M715, since the back of the light gets stopped by the front bulkhead hole not being large enough for them to go through.
The smaller diameter lights like you have would normally fit inside the hole and the bracket would be flush against the rear bulkhead, the space at the rear of the bent bracket was to clear the wiring.
Once I realized I didn't need that space on two of my trucks (large turn signals) it sure made replicating the brackets easier, because they could be flat!

I have to say I like the cleaner look of those rings you have around your turn signals, rather than the half-finished utilitarian look with the gaps on stock 715s. Since the one I'm working on now isn't exactly stock, I may see about making a set of similar rings. ;)

I'm really impressed with how much you got done in a short period! My own projects tend to go at a glacial pace by comparison. My rather pathetic and unconvincing excuse is I'm always doing several projects at once. :rolleyes:

Cheers.

Turn signals - new mounting plates for large turn signal housings.jpg Turn signals 20230119_141324.jpg
 

kendelrio

Well-known member
Steel Soldiers Supporter
2,677
8,648
113
Location
Alexandria, La
I'm really impressed with how much you got done in a short period! My own projects tend to go at a glacial pace by comparison. My rather pathetic and unconvincing excuse is I'm always doing several projects at once. :rolleyes:

I've been fortunate that I've been "on the beach" from offshore since December. They're paying me to stay at the house and I'm using the projects to keep from going NUTS!
 

M813rc

Well-known member
Steel Soldiers Supporter
4,218
3,254
113
Location
Near Austin, Texas
Having looked at your "post-mudding" pictures, an idea you may consider or discard at your choice is some mud flaps.

The 715 I am currently working on came with some simple rubber flaps front and rear, which look to me like a good idea as I have always thought the M715 fenders stopped a little high. I don't like leaving a plume of mist behind me in the rain, or want to take a chance of slinging a rock into someone's windshield, which is why I added mudflaps to my M1028A2.

Anyway, just a thought. ;)

Cheers

2.jpg
 
Top