• Steel Soldiers now has a few new forums, read more about it at: New Munitions Forums!

  • Microsoft MSN, Live, Hotmail, Outlook email users may not be receiving emails. We are working to resolve this issue. Please add support@steelsoldiers.com to your trusted contacts.

Parking brake

USN_Green_Addict

Active member
Steel Soldiers Supporter
250
206
43
Location
Oahu, Hawaii
I was in the middle of rebuilding the parking brake and noticed it is missing a E retainer clip. Are there any hardware stores that might stock the large ones? Or should I just order from a military parts supplier?
 

Valley Rock

Big wheeler cat peeler
Steel Soldiers Supporter
433
792
93
Location
Orygun
You can buy an entire box of all assorted sizes from horror fright for like I think 25 bucks or less ?
 

LowTech

Active member
Steel Soldiers Supporter
971
151
43
Location
Arizona
Since there's a current thread about the parking brake,
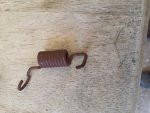
Is this the spring for the outer shoe return? And if so how does it go on?
The pics in the -209-20P don't show how it attaches and I'm having trouble getting a good view up there.
20240806_114130.jpg
 
  • Like
Reactions: HDN

Valley Rock

Big wheeler cat peeler
Steel Soldiers Supporter
433
792
93
Location
Orygun
Man if you were working on this from under the truck it's really going to bring the suck, that spring goes from the top of your outer shoe over to a tab off the top of the frame right underneath your rear cab mount crossover .

And it is a bear from under the truck, try some long needle nose pliers .

I did my second one with the water tank off the truck, and it made it exponentially easier
 
  • Wow
Reactions: HDN

LowTech

Active member
Steel Soldiers Supporter
971
151
43
Location
Arizona
Yep, that's the location. Yours looks shaped a little different but basically the same.
Thanks for being brave! If it was up to my lady that would have been a hard NO!

"Sent w/o me knowing"
 

LowTech

Active member
Steel Soldiers Supporter
971
151
43
Location
Arizona
Tried putting that spring on today 😂.
After fighting w/ it for quite a while I just stopped. There has to be some "trick" that I just couldn't come up w/ since I know it's not impossible. At some point I thought " is this what that removable plate on the bed wall is for?"
Of course that plate is currently behind large ammo boxes containing things like pipe wrenches, bolt cutters, and the like.
So on day two we'll find out if removing that plate helps at all. In the meantime if anyone has experience and handy tips from the motor pool . . . I'm all ears.
 
  • Wow
Reactions: HDN

HDN

Well-known member
2,105
5,069
113
Location
Finger Lakes Region, NY
After fighting w/ it for quite a while I just stopped. There has to be some "trick" that I just couldn't come up w/ since I know it's not impossible. At some point I thought " is this what that removable plate on the bed wall is for?"
I had no idea there was a removable plate on the bed wall o_O I'm going to have to take a close look at that part of my cargo bed now!
 

LowTech

Active member
Steel Soldiers Supporter
971
151
43
Location
Arizona
Well I moved the things that live in the bed area blocking that part of the front wall and got the plate off.
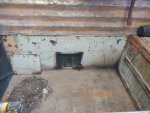
IMG_20240830_110811817.jpg

It only helped a little w/ viewing the area. It seems to mainly be for accessing the rear cab mount point.
A few hours later I had finally gotten the spring in place. Thats a ridiculous amount of time to invest in putting a spring on, two days w/ a total hours around 4.
This is how I eventually made it happen,
First off I turned the bolt that it goes on in far enough that there was enough of the bolt above the locking nut. It was adjusted so that that part was very short, probably to compensate for there being no spring in place?
Then I adjusted the point where the cable attaches so that the shoe and the bracket that the bolt goes through were closer together.
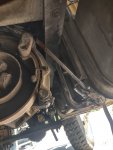
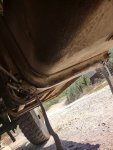
After that I tied a loop of cord around the frame cross member and had it go through the loop in the end of the spring. On the outside of that cross member I added a rod to act as a lever and a ratchet strap to hold it once it was pulled.
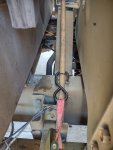
IMG_20240830_130338039_HDR.jpg

IMG_20240830_130346962_HDR.jpg

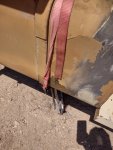
Then underneath I added another ratchet strap to pull down once the spring had been stretched far enough.
IMG_20240830_130412778_HDR.jpg

IMG_20240830_130419775_HDR.jpg

After stretching the spring till it was almost in place I started tightening the lower strap. Of course this required going from underneath to around the other side multiple times as I loosened the top strap a bit and then tightened the lower strap again and again.
The spring popped onto the bolt nicely using this method. Now I just need to do all the adjustments to have it working right. I can definitely understand why I found the spring in the glove box and not in place on that shoe location. 😂
 
Top