• Steel Soldiers now has a few new forums, read more about it at: New Munitions Forums!

  • Microsoft MSN, Live, Hotmail, Outlook email users may not be receiving emails. We are working to resolve this issue. Please add support@steelsoldiers.com to your trusted contacts.

PEASHOOTER's M109A3 CAMPER Build Thread

yagenrok636

New member
20
0
0
Location
Tallahassee, FL
Gauge Enclosure:

Here is one of the Steering Column mounted gauge enclosures I made as first posted here: http://www.steelsoldiers.com/showth...Boost-Gauges&p=1278514&viewfull=1#post1278514

I've really found it helpful when I turned up my fuel a tad to offset the extra weight I've added to the truck. It gives a great spot to mount a couple gauges and has a built in 24v-12v converter to run the gauges as well as other 12v items like the weather proof cigarette style socket. It has 3 warning lights on it. I have mine wired so the small super brite LED blinks with the turn signal so I don’t keep forgetting to turn it off (this idea thanks to member BONES1), and the other 2 LED lights are warning lights for low air and Parking brake/dual circuit brake issue warning). I have a weatherproof dual USB power socket installed in the dash as well for charging cell phones or GPS. This one also has a weatherproof key switch that disables the starter button when selected (also BONES1's idea).
On my gauge unit, I'm using VDO brand "vision" series boost & EGT/Pyrometer gauges. I couldnt find any Matching Stewart Warner ones that came in a 0-15psi boost gauge and couldnt ever even find a picture of the Stewart Warner HD pyrometer that would match the gauges I'm using on the dash.

Feel free to PM me if you are interested in an Enclosure setup. I still make some they come with 12v converter, warning lights and labels, mounts, circuit breaker, 2 gauge holes, & 12v cigarette style outlet
Do you have any more of these enclosures?? I've got two gauges already. Thanks!
 

peashooter

Well-known member
1,038
205
63
Location
Hanover, minnesota
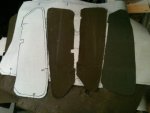
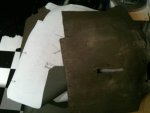
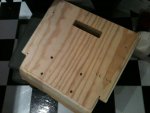
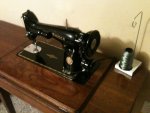
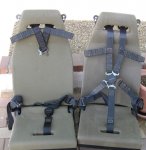
I started to re-upholster the MRAP seats I got earlier. Originally I hoped to have it done, but the quotes I got ranged from $200-$300 per seat and that was with me supplying all the material! No way was I going to pay that so I decided to try it myself. I bought a few yards of some Foilage Green 1680D Balistic Nylon Cordura and matching thread off ebay (each seat needs about a yard, it was around $10/yard). Its really strong stuff and coated on the backside so its water proof. The wood on 2 of the 3 seat bottoms just rotted away so I made some new bottoms out of 1/4" plywood. My sewing skills haven't been used since I made a bb gun case back when I was a kid. I bought an extra yard of material to practice with and ended up breaking my wifes sewing machine. So I spent the last week rebuilding an old sewing machine I had gotten from my mom, its been just a decoration up until the other day. Its from 1951 so it needed some new wiring, grease, lube, and a little adjustment, and partial motor rebuild.
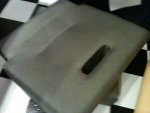
To make the new patters, I just marked the seams of the old seat covers with lines and labeled them (the lines help show where to line up the pieces when sewing so things fit right). Then I cut the stitches out with a razor blade, ironed the original pieces flat and traced them onto the new Cordura material. So far I've sewn 2 of the 3 bottom parts, still have 1 bottom left and the 3 tops to go. The hardest part is just that center "pocket" in the bottom seat cushion that the seat belt goes through. Below are some pics of the patters and cushions I've finished and also a picture of what the seats looked like before.
mrap seat front.jpgIMG_0559.jpgIMG_0561.jpgIMG_0562.jpgIMG_0563.jpgIMG_0557.jpg

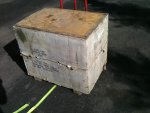
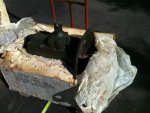
I had been searching for another transmission to have on hand as I think that's the weak link of my truck at the moment. I was able to pick up a Toole Depot rebuilt unit off of Scott (tie6044) this summer for just a little more than the price of a good takeout.
IMG_0524.jpgIMG_0525.jpg

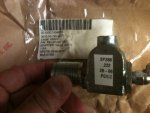
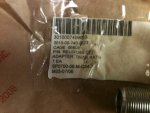
Also I found the correct speedometer adapter needed to correct the speedometer when running the larger diameter 395 tires. This is the right angle adapter that mounts to the front of the transfercase and connects to the speedo cable. Its a 1:0.222 ratio (stock is 1:0.187). I used part SP-288 .222 unit (NSN 3010-00-740-9623)
IMG_0543.jpgIMG_0542.jpg
 

peashooter

Well-known member
1,038
205
63
Location
Hanover, minnesota
Do you have any more of these enclosures?? I've got two gauges already. Thanks!
PM Sent (none left)

can you post some pics of the space between the front bumper and the grille?
I don't have any additional pictures that I know of, just the ones here in POST 26 & 27 and POST 128 I'll try to get some more (sometime) as I probably get the most questions on the front bumper stuff. Pm me if you have any specific questions. Thanks
 

peashooter

Well-known member
1,038
205
63
Location
Hanover, minnesota
I haven't done much recently but did manage to finish reupholstering 1 seat which took me probably 12 hours spread out over the last 2 months since I'm learning as I go (the next 2 should go lots quicker). Below are some pics showing before/after. Thanks to member RED who just installed some of these in addition to V-Ped, hopefully install will go smooth for me as well come spring.
I had tried to find the manufacturer of these seats but never could. As I was putting it together the other day I saw a name on the back of a plastic bezel PALTECHNICA. Turns out the seats were made by an Israeli company for the Oshkosh MATV MRAP trucks which seems strange to me that they made some of these in Green as I've never seen a green MRAP. Here is a link to their website and it shows some dimensions as well for these: http://www.defence-paltechnica.com/web/8888/nsf/prolookup.taf?&_id=10213&did=8741&title=shiny

I may try to add some flanged bearings to the springer seat instead of the rubber bushings on the swing arms in order to reduce some of the slop otherwise the seat's backrest can tip forward or backwards a good several inches and rub against the back of the hardtop.... I'd like the seat back as far as possible without rubbing so I'll let you know if it works out.
 

Attachments

VPed

Well-known member
Steel Soldiers Supporter
1,104
294
83
Location
Clint, TX
Part of what I did and recommend to others is changing the backrest angle relative to the seat base so the backrest is closer to the angle on the stock seat (less reclined). This allows the seat to be considerably further back for gut-room, without hitting the back of the cab when the springer compresses. There are two bolts per side that hold the backrest to the base. I removed the lower bolts and redrilled holes in the base to hold the back more upright. That worked well for me and I off-road a bunch. 2 cents. Good luck.
 

GunGuy510

New member
7
0
0
Location
California
Sorry to butt in, just wanted to say how informative and awesome this thread is... And of course, your camper build project!
Giving my lots of ideas... That will undoubtedly cost me lots of money in the future :)
 

peashooter

Well-known member
1,038
205
63
Location
Hanover, minnesota
Sorry to butt in, just wanted to say how informative and awesome this thread is... And of course, your camper build project!
Giving my lots of ideas... That will undoubtedly cost me lots of money in the future :)
Thanks a ton for the kind words. Its easy to spend a lot of money, or a lot of time. The wheels/tires cost a lot of money regardless how cheap you get them for, but everything else can be had pretty reasonably if you instead put the time into finding the deals on ebay, craigslist, and the various surplus sources. When I did most of this project I had more time than money and my kids were really young so there was several hours a day they were napping and I could work on it...... But now they are old enough that I don't have the extra time for projects of this scale.
Get the best condition truck you can when you buy one, it will save so much in time and money in the long run!
 

jsrule62

New member
11
0
1
Location
paola, ks
When my kids took naps, I got a lot done too, like you. However, a few decades later, I find my naps more in the way of my projects. As an aside, did you do any more mods to the trailer in regards to the 395s and fender/rubbing issues. Or were there any issues at all? Thanx. Jerry
 

peashooter

Well-known member
1,038
205
63
Location
Hanover, minnesota
When my kids took naps, I got a lot done too, like you. However, a few decades later, I find my naps more in the way of my projects. As an aside, did you do any more mods to the trailer in regards to the 395s and fender/rubbing issues. Or were there any issues at all? Thanx. Jerry
Hey Jerry. Its only been a couple years since I started the m109 conversion but my kids no longer take naps (although they should sometimes), so I get nearly nothing done these days it feels like.
I never did do anymore with the trailer in regards to adding the 395's. I still have the new/larger fenders laying against the wall in my garage but not much motivation to install them. I still have the stock fenders that I just trimmed with a sawzall or Jigsaw. So far they have never hit or rubbed the tires. I don't have the trailer super loaded and haven't used it on anything worse than a rutted out gravel road. With the cargo box cover and everything in it, I'm sure the trailer has at minimum 1000 lbs in it at all times and probably closer to 1500 lbs. No issues

Below are some of the related pictures again so you don't need to try to find them in some previous posts.
 

Attachments

Top
AdBlock Detected

We get it, advertisements are annoying!

Sure, ad-blocking software does a great job at blocking ads, but it also blocks useful features of our website like our supporting vendors. Their ads help keep Steel Soldiers going. Please consider disabling your ad blockers for the site. Thanks!

I've Disabled AdBlock
No Thanks