• Steel Soldiers now has a few new forums, read more about it at: New Munitions Forums!

  • Microsoft MSN, Live, Hotmail, Outlook email users may not be receiving emails. We are working to resolve this issue. Please add support@steelsoldiers.com to your trusted contacts.

PEASHOOTER's M109A3 CAMPER Build Thread

peashooter

Well-known member
1,038
205
63
Location
Hanover, minnesota
filters

I'm never near my truck when I think of ordering filters for it, so I'm posting the numbers on here. Basically its a reference for myself.

Baldwin:
OIL (2x): BT124
COOLANT: B5134
Primary FUEL: BF1212
Secondary FUEL: BF7587

Water filter (camper drinking water): Hydro Life 52073, HL-170
Softener Cartridge: Pentek WS-20BB
 
Last edited:

Section8

Member
503
6
18
Location
Little Fort, B.C., Canada
Peashooter,
I have a quick question for you. Your adaptor plates for MRAP rims to 6 lugs are steel right? Mild? Medium or High carbon content?
Are there concerns about warping or fatigue cracks? Do you only mount them to the steel version of the MRAP rims or the aluminum ones as well?
Steel on aluminum? ?
I am highly considering getting some since MRAP rims seem to be miles cheaper than A3 rims or others with 6 lug pattern. This I don't get since MRAP rims are newer and such.
Such as things are though.
Feel free to pm so your thread doesn't go off track.
Thanks and keep up the awesome builds.
 

peashooter

Well-known member
1,038
205
63
Location
Hanover, minnesota
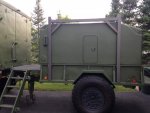
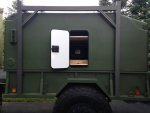
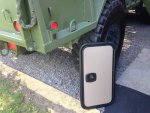
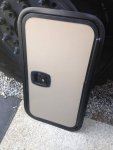
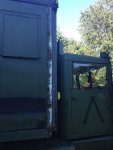
As has been the case over the last year or 2, I haven't been doing too much to the truck. Mostly trying to maintain it and finish little projects Ive started on it. Last year I bought some cargo doors off ebay. I got around to mounting them a few weeks ago and below shows some of the pictures. They are coming in handy enough that I bought 2 more from the seller and will probably add them later. The doors are a bit narrow, but they are the largest doors that I can install easily on the Cargo Box Cover. Any wider and I'd have to cut the vertical aluminum supports that the CBC has fiberglassed in.
Also you can see I built a frame around the CBC for our bike racks. I have 2 bike racks on there now and 2 to go. It gets pretty tall with bikes up there! My handle bars have been sticky from sap due to hitting tree branches going down our road.
IMG_2745.jpgIMG_2746.jpgIMG_1883.jpgIMG_1882.jpgIMG_1880.jpg

Next planned (and partially started projects) are:
-Install larger air compressor (already have it)
-install extra air tank (already have it)
-add a fold up & down dinette table inside (designed it, but that's it)
-add pantograph style hinge door/hatch to front of cargo box cover (right off the fold down deck)...have drawn concept but that's it
pantograph hinge door concept closed.jpgpantograph hinge door concept open.jpg


I suspect I wont get around to any of those projects this year but its good to have goals right?
 

peashooter

Well-known member
1,038
205
63
Location
Hanover, minnesota
Those access doors look great.

Are they all keyed-alike?
Thanks Ahab! Yes, I did make sure to get all the doors with the same key. The truck went from having zero locks, to having quite a few (doors, rear door, starter button disable, battery disconnect, misc paddle locks, now cargo doors).

What's the insignia on the door?

The truck is beautimus!
Hey thanks! The door insignia is a greek lamda from the phrase "ΜΟΛΩΝ ΛΑΒΕ" (Come and take them!).


Will the MWRAP wheels fit the 5 ton Rockwells with out the adapter? Or do they use a different adapter?
Nope the common MRAP wheels wont fit the 5 ton axles. I think some of the Caiman MRAP wheels will fit however with the right lug nuts. If the wheel has a 11" center hole it can be adapted to the deuce, but not the 5 ton. If the wheel has a 8-3/4" hole, it may fit the 5-ton but cant easily be adapted to the deuce (would need cutting).
 
277
4
18
Location
Belton, SC
Thanks Ahab! Yes, I did make sure to get all the doors with the same key. The truck went from having zero locks, to having quite a few (doors, rear door, starter button disable, battery disconnect, misc paddle locks, now cargo doors).

Hey thanks! The door insignia is a greek lamda from the phrase "ΜΟΛΩΝ ΛΑΒΕ" (Come and take them! )
Excellent! That's what I thought at first. But I want sure. Carry on!
 

rustystud

Well-known member
9,251
2,938
113
Location
Woodinville, Washington
Thanks Ahab! Yes, I did make sure to get all the doors with the same key. The truck went from having zero locks, to having quite a few (doors, rear door, starter button disable, battery disconnect, misc paddle locks, now cargo doors).

Hey thanks! The door insignia is a greek lamda from the phrase "ΜΟΛΩΝ ΛΑΒΕ" (Come and take them!).


Nope the common MRAP wheels wont fit the 5 ton axles. I think some of the Caiman MRAP wheels will fit however with the right lug nuts. If the wheel has a 11" center hole it can be adapted to the deuce, but not the 5 ton. If the wheel has a 8-3/4" hole, it may fit the 5-ton but cant easily be adapted to the deuce (would need cutting).
How did you get the computer to spell out Greek letters ? Is there some App for this ?
 

Mike929

Member
820
22
18
Location
DFW, Tx
You can hold down the "ALT" key and enter the digital ASCII character number that you want to use. I use a few like: It is 95° out here (ALT 248 to create the degree symbol). You can look up the list of codes online (ASCII character codes) to find a list.

Enjoy
 

peashooter

Well-known member
1,038
205
63
Location
Hanover, minnesota
We recently took a week long camping trip to Hayward Wisconsin and had a good time. On the way home while fueling up another deuce pulled up so we had a brief but fun chat.
Deuces at gas station.jpg

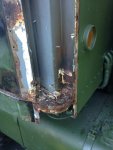
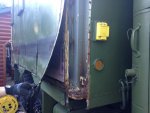
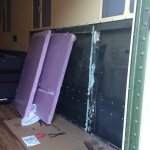
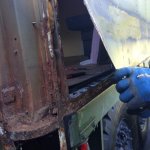
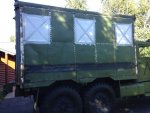
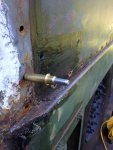
Once we got home I had decided to fix a little rust that was starting to appear behind the rub-rail along the side of the van box. I treated the areas with rust converter but it bothered me knowing that there was probably rust on the backside and certainly between some of the sandwiched areas. One thing lead to another and I just kept pulling rivets. I then decided to just replace the lower 1-2 feet of metal on the box (the seam could be hidden by the rub rail when reinstalled). But I decided I have to take the 4 corner posts off anyway (200-300 rivets there) so I may as well replace all the skin on the 2 sides and the back. So here I am removing rivets and hating it, its got to be the worst job I have ever done mainly because of the sheer number of them. There are a few aluminum pop rivets in places that come out easy, but the solid steel ones are a bugger. I read through the thread by MDMOGAN who has done this before, and I've pm'd him several times getting advice. Its slow going though. My current plan is to replace all the side steel sheet metal (18g) with a thicker aluminum (14g) skin so I don't ever have to deal with this again.
Also I'll be using Olympic shavable head rivets (like what you can use on airstream trailer repair). I have some mushroom caps that can get pressed into regular aluminum pop rivets also to plug the hole and give it a solid rivet look. I'm currently having the sheet metal quoted (again), I first had it quoted with just being cut to size, how I'm having it quoted with the window cutouts and all the rivet holes (except in areas where I suspect the holes were made manually). Fingers crossed on how much that will cost. I'm hoping to have this all done by summer of next year, (with winter, it leaves me a couple months of fair weather to work on it).
 

Attachments

Jericho

Well-known member
1,180
69
48
Location
Landaff NH
Your a brave man INDEED, I looked at mine with that same thought, BUT I'am nearly 60. Cut it out flush repaired and glassed it over. It will no doubt out last me. . looking for nice twenty foot bed A2 5 ton.
 

rustystud

Well-known member
9,251
2,938
113
Location
Woodinville, Washington
We recently took a week long camping trip to Hayward Wisconsin and had a good time. On the way home while fueling up another deuce pulled up so we had a brief but fun chat.
View attachment 638063

Once we got home I had decided to fix a little rust that was starting to appear behind the rub-rail along the side of the van box. I treated the areas with rust converter but it bothered me knowing that there was probably rust on the backside and certainly between some of the sandwiched areas. One thing lead to another and I just kept pulling rivets. I then decided to just replace the lower 1-2 feet of metal on the box (the seam could be hidden by the rub rail when reinstalled). But I decided I have to take the 4 corner posts off anyway (200-300 rivets there) so I may as well replace all the skin on the 2 sides and the back. So here I am removing rivets and hating it, its got to be the worst job I have ever done mainly because of the sheer number of them. There are a few aluminum pop rivets in places that come out easy, but the solid steel ones are a bugger. I read through the thread by MDMOGAN who has done this before, and I've pm'd him several times getting advice. Its slow going though. My current plan is to replace all the side steel sheet metal (18g) with a thicker aluminum (14g) skin so I don't ever have to deal with this again.
Also I'll be using Olympic shavable head rivets (like what you can use on airstream trailer repair). I have some mushroom caps that can get pressed into regular aluminum pop rivets also to plug the hole and give it a solid rivet look. I'm currently having the sheet metal quoted (again), I first had it quoted with just being cut to size, how I'm having it quoted with the window cutouts and all the rivet holes (except in areas where I suspect the holes were made manually). Fingers crossed on how much that will cost. I'm hoping to have this all done by summer of next year, (with winter, it leaves me a couple months of fair weather to work on it).

Good job Aaron ! I too hate rust with a passion !!!!
 
91
2
8
Location
San Diego, CA
I've found when I need to type or post something with letters from a different language, or with hyphens or special characters my keyboard doesn't have, I just do a search on the Internet, then copy and paste into my reply or post.
How did you get the computer to spell out Greek letters ? Is there some App for this ?
 

mdmorgan

AM3 U.S. Navy
1,085
102
63
Location
Forsyth, Ga.
Temp install the rub rail and tack weld the 2 halves together, then remove and finish weld them. That will eliminate one gap for water intrusion, plus it gives the rail a smoother appearance. Just a suggestion.
 

peashooter

Well-known member
1,038
205
63
Location
Hanover, minnesota
well I have been working on the truck, although not too much... its hard to get motivated to do work that one hates. Thankfully, I found a better way to remove rivets that goes faster. Here are the tools I now use: A small grinder to cut a slit in the rivet head without damaging the sheetmetal (on pieces I will reuse) which reduces the amount I need to drill, a rivet remover on a drill (basically a drill guide that centers the correct size drill bit on the rivet head and then an air hammer. My old air hammer didnt have the guts though, I spent $50 on a "Long nose" air hammer that just has a bigger piston that moves further and hits harder. These tools have allowed me to get a corner off (about 80 rivets or so) in under 2 hours, where before it would take over a day of work. on pieces I am not reusing, I just grind the rivet head off with an angle grinder and knock it out with the air hammer.
WIN_20160822_20_28_44_Pro.jpg
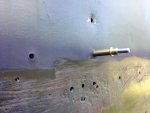
Below are some pics of the rivets I'll use and was playing with. Some are just aluminum pop rivets with mushroom plugs that get hammered in and make it look like a solid rivet. The others are olympic shavable head rivets that work like pop rivets but you cut the stem off after and then shave it down so it also looks like a solid rivet.
WIN_20160822_20_34_26_Pro.jpgWIN_20160822_20_34_48_Pro.jpg
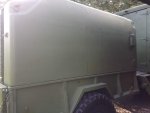
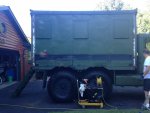
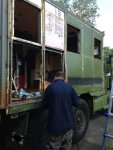
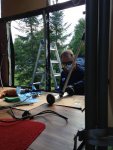
Lastly are some pics that my wife took when I wasnt looking. I have the passenger side all off (now temporarily back on with some Clecos) and just waiting for the new sheetmetal to arrive. I ended up having the sheetmetal cut with most of the rivet holes and window cutouts in it already and a few pieces pre-bent (the box's back parts and door skin).I'm getting rid of the loose rust with a needle scaler (harbor freight), and then treating everything with some POR15 rust treatment. Also still need to get some new aluminum rain gutter extrusion/molding from a local extrusion place (same place I found the aluminum decking at for the trailers fold down deck here.
IMG_3257.jpgIMG_3258.jpgIMG_3260.jpgIMG_3259.jpgIMG_3261.jpg
 

Another Ahab

Well-known member
17,989
4,532
113
Location
Alexandria, VA
Lastly are some pics that my wife took when I wasnt looking. I have the passenger side all off (now temporarily back on with some Clecos) and just waiting for the new sheetmetal to arrive. I ended up having the sheetmetal cut with most of the rivet holes and window cutouts in it already and a few pieces pre-bent (the box's back parts and door skin).I'm getting rid of the loose rust with a needle scaler (harbor freight), and then treating everything with some POR15 rust treatment. Also still need to get some new aluminum rain gutter extrusion/molding from a local extrusion place (same place I found the aluminum decking at for the trailers fold down deck here.
Hey, peashooter; great progress and as always great summary here. Your projects are the best!

I'm not sure what sheet metal you're using where the rain gutter fits, but dissimilar metals should have a separation to prevent galvanic action at point-of-contact (which is corrosive). But I'm guessing you know that. Did I guess lucky!?
 

Jericho

Well-known member
1,180
69
48
Location
Landaff NH
Shoot all your seams wet just like an airplane, I use GE black "Paintable" RTV (silicone sealant/adhesive) it was invented for use in jet engines , only thing to look for is a quick sniff, if it smells of vinegar, don't use it , its corrosive to metal BUt youve been at this a long time and I like your work "First rate: am sure you know the wet seam solution Called a "faying" surface in AF jargon, good for steel to Aluminum lap joints . If you get bored you could start doing 109 shack rebuilds !
 
Top