• Steel Soldiers now has a few new forums, read more about it at: New Munitions Forums!

  • Microsoft MSN, Live, Hotmail, Outlook email users may not be receiving emails. We are working to resolve this issue. Please add support@steelsoldiers.com to your trusted contacts.

PEASHOOTER's M109A3 CAMPER Build Thread

peashooter

Well-known member
1,038
205
63
Location
Hanover, minnesota
Sink and Drains:

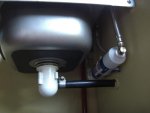
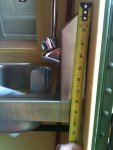
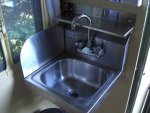
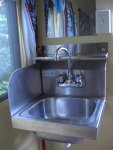
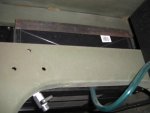
We figured a SINK would be a good addition to our otherwise minimalist kitchen area. I decided on a wall mount one for space reasons. We got a wall mount “hand sink” and mounted that. The sink (from eBay) came with a faucet and drain. The most difficult part of the whole sink project was finding a drain trap to fit it. I finally found one that fit well, it’s an RV item even! After using the sink for a while we learned it splashes a lot so I cut a side “splash guard” out of some stainless and screwed it to the side of the sink.
We use a filter on the end of the hose when we fill the water tank, or when we hook the hose up to the truck but we added a secondary filter anyway since some water can be pretty nasty and we will be using some of the sink’s water for drinking. I decided to attach a replaceable water filter under the sink and have it plumbed to the “COLD” water faucet. The “HOT” water faucet doesn’t go through this filter. (we have no water heater either, so this setup makes more sense than 2 fauces doing the same thing).
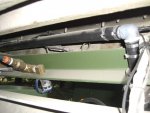
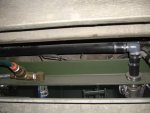
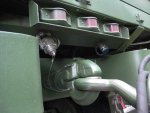
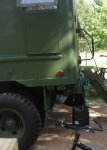
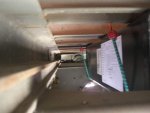
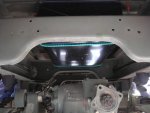
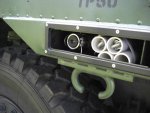
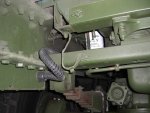
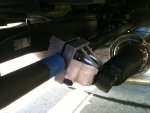
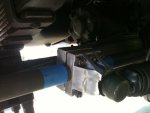
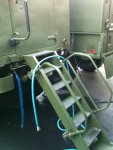
We didn’t need a grey water tank for the drain water so I just ran tubing from the drain trap down to a coupler bar I made under the box (above the pintle area). When we get to a campsite, we hook up a short hose connection to the drain coupler (larger of the couplings shown in the pic) and the other end of the hose into a Military Water Can.
 

Attachments

Last edited:
peashooter

Well-known member
1,038
205
63
Location
Hanover, minnesota
Water Tank and Pump:

WATER INLET (Coupler for hose)

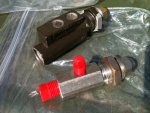
For the potable water we have 2 options, either connecting a hose or using the onboard water tank. For the hose connection, there is a check valve coupler on the back that we attach a hose to (similar to a pneumatic quick coupler on an air compressor, this is the smaller one with the blue cap pictured in the post above).

WATER TANK

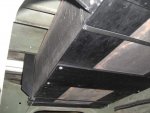
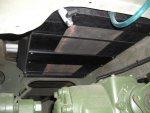
The water tank is under the van box between the frame rails. I searched again for the largest tank (or multiple tanks) I could find that would fit in that area and still allow full suspension articulation. To do this the tank had to be less than 8” thick and 32” long I if I remember correctly. The best I could find was a single 15 Gallon tank from VALTERRA, its made out of ABS. ABS was a nice feature because it meant I could put fittings anywhere I wanted, the other material tanks came with fittings already attached because they must be done at the factory with a spin welder. JC Whitney had the best price and free shipping on the tank.
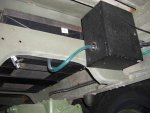
To mount it to the truck I made a frame & brackets to hold the tank out of scrap aluminum pieces I found and then wrapped some adhesive backed foam around the tank and covered it all with some perforated stainless sheet metal to give it some protection from road debris. The water tank’s fill port and vent is behind a little door mounted on the side of the box between the wheels. There is also a check valve after the water pump to prevent the tank from getting filled when we just connect the truck directly to a water source with a hose (so not using the tank).

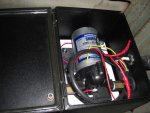
WATER PUMP (from Potable water tank)

I wanted a 24v water pump so we could use the sink with battery power and won a new one on eBay for cheap. The pump is mounted inside a box under the rear of truck. The pump has a pressure switch on it, so when the pump has power it will run until a preset pressure is built. In other words when you turn the faucet on, the pump will run, when you turn it off then the pump will shut off automatically, or if you run out of water in the tank then the pump will run indefinately trying to build pressure. This pump sort of pulses water out the faucet, there are nicer pumps out there that don't pulse as bad because they have variable speed motors, but they cost a lot more.

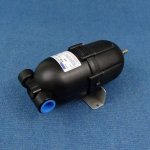
***update, I'll be adding a Shurflow 181-201 accumulator tank to smooth out the pulsation from the pump. Its basically got a pressurized bladder inside that works like a shock absorber for the pulsating water from the pump. There are some really good pulse free pumps that dont cost too much but I havent found any USA available ones that are 24vdc yet. For any of you guys running 12v, the Flojet 03526 144A pump would be a good choice. I havent been able to find the 24v version in the USA yet though.
 

Attachments

Last edited:
peashooter

Well-known member
1,038
205
63
Location
Hanover, minnesota
Awning & Support Storeage:

Well this part of the project turned out to be sort of fun since it killed a few birds with 1 stone.

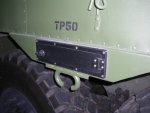
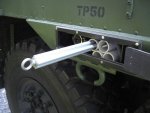
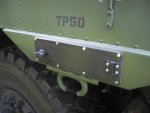
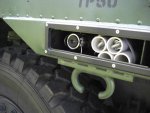
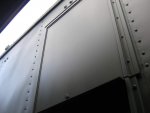
We had been trying to find a used canopy/awning from a camper but much like the propane/electric rv refrigerators; the retractable awnings were terribly expensive and far from "matching" the truck. Also the 2 worst spots on the truck for rust was the box/tie down hook area between the rear wheels. The problem is that this area is made up of 3 layers of metal and its in a prime location to collect road splatter and then rust. I had already cut out and replaced this section on the drivers side, but a year later the other side started to bulge as well so I knew the rust had grown there. At this point I had decided it would make a good spot to hide some longer poles that I could use for the Camo net awning we were making. I cut the rusty section out here and then made an aluminum door that fit the area.

Behind the aluminum door is some storage for the awning support poles, and also the Water tank fill port. So when we fill the water tank we connect a hose to a RV water filter that has a mating coupler to fit this fill port. We let the hose run a while until we can hear some strange noises start coming from the vent tube which indicates the tank is about topped off.

The awning provides some shade but otherwise it really is just more for some fun looks since it doesnt keep any rain out. We found a 10'x12' piece of British surplus 3D camo from some intenet site for this part, and then bought a tie-down strap kit from Camping world to finish it all off. The poles are some scrap aluminum structural extrusion someone had given me (this was 80/20 brand, and sometimes refered to as the "Industrial Erector Set"). I use this type of framing at work a lot; I like using it for lots of personal projects too but only if I can get it used.
 

Attachments

Last edited:
peashooter

Well-known member
1,038
205
63
Location
Hanover, minnesota
Boarding Ladder, blackout covers:

A few other trouble spots on the truck were the windows, blackout covers, and ladder.

NEW LADDER

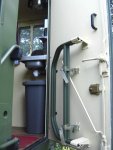
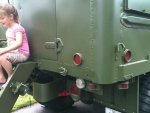
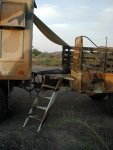
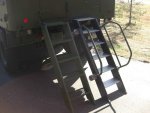
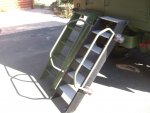
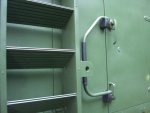
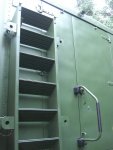
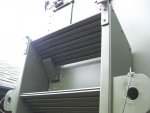
The ladder seemed too short (even with stock tires) so when it was attached then the angle of the steps was a little dangerous. Also the steps were spaced a bit far, and got really slippery when wet, plus it was heavy to top it all off. I decided to make a new one over the winter. The new one would be longer and have an extra step to make it easier for the kids. Something I probably haven't mentioned yet, but in addition to Costco and Vulkem caulking, I also really love ALUMINUM. Its easy to machine and doesnt leave sharp chips on the floor like steel after you cut it. Aluminum can also be cut with standard carbide sawblades on the tools you probably already have for general wood work. It won't rust, and is light weight. I had a sheet metal place I use for work make me 4 aluminum channels. I had some scrap aluminum extrusion that I used for the tread plates, and then attached everything with screws and rivets. I reused the side rail mounts that came on the original ladder (these were typical with late model M109a3's and M109a4 trucks). I had to make a new ladder hanger bracket and put it up a tad higher than the original one as shown in the pic. The pics show the ladders side by side, the aluminum one was anodized but not yet painted. Also a few handles were added to the back door inside and out. The larger handle folds in and out, it was from Camping World (they are on ebay too). Again because of kids, my parents, and people stopping by who want to look inside, the fold out handle has been appreciated by those who arent used to getting into a camper that is more like a tree fort up in the air.

REBUILT WINDOWS

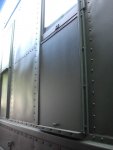
I think a common issue we M109 owners have is that the windows separate eventually from the wood center cracking or rotting, and then it allows water to get into the walls of the box and rust. I had 2 windows that were like this. I ended up taking the 3 wood core windows off the truck and then apart. They are assembled by the inside bezel of the window being screwed into the wood cores, and the outer frame "pinching" the wood core (wood core consists of 4 pieces of wood). When the wood cracks or rots then the 2 halves seperate and cause many issues.
Now 3 of my windows were different from the others. 3 had wood cores, and 3 had plastic cores so obviously some improvment was made at one point in time. I found some plastic and ripped it with a table saw unit it matched the same shape. I took the glass apart as well and cleaned it all out and then reassembled everything in reverse order. For added peace of mind, I also put 8-32 ss button head screws through the frames and core of the windows to keep it all together and used some sealant in the holes (the stock outer window frame is aluminum by the way).
Another issue I ran into was that I had 2 cracked windows once I took the mask off after painting the truck. Apparently when I trimmed the masking tape with a utility knife, it must have scored the windows and let them crack. I had 2 new pieces cut at a local glass company out of the laminated safety glass. No one could get the same thickness as the original glass however so I went up to the closest size which was 1/4".
WINDOW GLASS: The glass I replaced in the windows measured .200-.210" thick. I had 1/4" thick safety laminated glass cut to 21-7/8"x18-7/8" and they worked well.


NEW BLACKOUT COVERS

Because 1 window's wood core had roted out, it caused the blackout cover to fly off while on the freeway and we never could find it. A few of the other covers were pretty rusty and didn't all match anyway; some were from different era's so they were different designs. I ended up having that same sheetmetal shop cut and bend me 6 new ones out of 1/8" aluminum I think. I used some UHMW plastic trim on the edge to make it fit the existing slider tracks. I found some spring loaded pin things from mcmaster.com that worked well enough for duplicating what the other windows had.
 

Attachments

Last edited:
peashooter

Well-known member
1,038
205
63
Location
Hanover, minnesota
Spin on filters:

OIL FILTERS

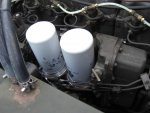
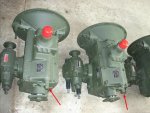
On my first trip up to TIE6044's place I purchased a spin on oil filter kit that he sells. To my knowledge, this is the most affordable kit out there. It includes EVERYTHING you need: Machined mounts, machined threaded adapters, gaskets, and Wix Filters. The machining is perfect and the price is the best I know of.


COOLANT FILTER

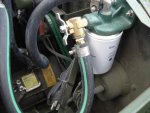
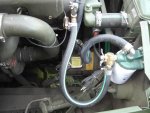
Last summer I decided to replace the belts, hoses, thermostat, and flush/fill the coolant. While I had it all drained I decided to add a coolant filter set up. I purchased the filter housing and filter from FLEET FILTER which had great prices and I think it was probably around $35 total. I just replaced the filter this year and cut it open. It was doing its job! Even though I flushed the truck and radiator many times over a few days before refilling with coolant, the filter had what looked like mud the color of gravel on it.


PRIMARY FUEL FILTER

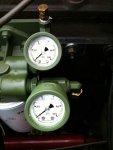
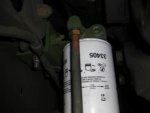
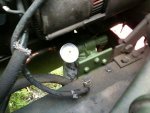
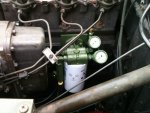
This spring I decided to replace a leaky gasket on the fuel tank pump. While at it I drained the tank, cleaned it out, and put the new 12v Stewart Warner Sender unit in it for the new fuel level gauge. While I had the pump out of the tank, I also put a 0-15PSI fuel pressure gauge on it so that I could easily see problems with the pump or compare pressure readings from it to the gauge on the primary filter to know if there is a restriction or something. Since I had the fuel system apart I figured it was a good time to do other fuel work. So I also purchased a fuel filter base and Filter/water seperator to make a primary spin on kit. It was easy, just an aluminum angle bracket (or you can reuse the existing bracket and add some holes) and $30 for the parts from FLEET FILTER. I like these filter bases because they have 2 inlets and 2 outlets which makes hooking them up to any system a snap. The extra ports also make it easy to add a gauge. You can see in the picture that I added a pressure gauge. Although its on the same side as the fuel line from the tank, the particular port that the gauge is connected to is actually an outlet port (pressure after the filter). So comparing this gauge to the tank's pump mounted one should show me any pressure drops across the filter to know if its time to replace.


SECONDARY FUEL FILTER

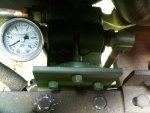
I hadn't planned on replacing the secondary/final fuel filter but I figured "while I have it apart".... Originally I thought of just making something similar to Westfolks new single filter design that uses the same filter base as my primary unit had but then decided that his price was pretty good for what it all was. Normaly I hate to spend money on something I can do myself for cheaper, but it was nice getting a kit ready to bolt on with some new hoses and the specialized pressure check valve. It's a good kit from first impressions. I did make a couple changes to it in that I added a gauge to the 2nd unused outlet port as well as the pepcock air vent that I took off the original filter unit. A second gauge was also added to the intake side of this filter housing so that again I can compare intake & outlet pressures to (in theory) monitor the filter condition...... I really don't know how well the gauges will work for this but again since it was all apart I chose to add it now rather than down the line when I would have to purge the fuel system again.

I'll probably rig up a WMO filter system soon out of the truck's original primary and secondary filters for the 55gal drum of oil/ATF I've got thats about full.

PART NUMBERS:

Coolant Filter Base:
Wix 24019 / Napa 4019

Coolant Filter:
Wix 24070 / Napa 4070

Primary & Secondary Fuel Filter Base:
Wix 24770 / Napa 4770

Primary Fuel Filter Water Seperator w/drain (12micron)
Wix 33405 / Napa 3405
 

Attachments

Last edited:
peashooter

Well-known member
1,038
205
63
Location
Hanover, minnesota
Bumper Mods-Can Mount:


JERRY CAN BUMPER MOUNT

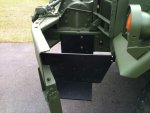
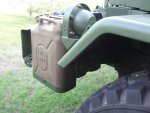
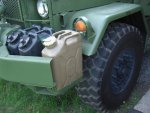
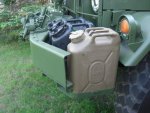
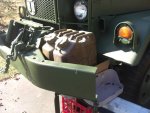
At some point over the winter I decided to start making a jerry can mount behind the front drivers side bumper. I had found a nice large piece of 3/8" or 1/2" (cant remember) aluminum and some other pieces I could make work. I bought 2 military water cans from ebay and had 2 military fuel cans. I test fit cans until I came up with this configuration. Getting 3 cans in there was about the best I could come up with. I went over to Scott's (Tie6044) and bought 3 jerry can mounts and had them sandblasted and primed. I then mocked up the mount out of cardboard and then cut the mounts out of aluminum and bolted them all together and used screws and bolts to hold it to the bumper, winch extensions, and fender mounts.
I found some green tie down straps from Mendards that I use to hold the cans in place.

1 Black water can is for CLEAN WATER (to use for whatever)
1 Black water can is for DIRTY GREY WATER, which we attach to our sink drain when camping
1 Fuel can is used to hold GASOLINE for the generator on the other side of the bumper.
 

Attachments

Last edited:
peashooter

Well-known member
1,038
205
63
Location
Hanover, minnesota
Bumper Mods-Generator Mount:

GENERATOR

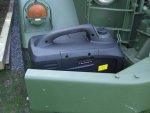
After giving up on finding a decently priced used Propane/electric refrigerator I decided to go the generator route and then it could be used for other things as well. I got the idea of mounting a generator behind the front bumper from ss member MAGNETO. I couldn’t afford or justify a nice Honda brand inverter gen (EU2000). I did lots of searching and found some Chinese versions of the inverter generators….also beyond what I could afford or justify.
I learned of a local RV parts Wholesaler in my area and called them up asking about some generators and wondering if they had any “scratch and dents” or something more affordable. To my surprise, they did!

They had 2 production samples of a new generator that was being made for Dometic, but Dometic had temporarily decided not to get back into the generator business (they have since gotten back into it).
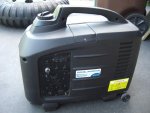
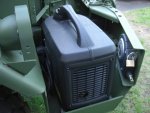
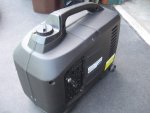
This generator is a Dometic LW3000 Plus inverter type. It’s Chinese and has its “isms” but it’s fairly quiet, has electric start, can run everything I have (AC & Microwave together). It is rated 3000 watts max, its black, and most importantly it fits behind the bumper!
It was originally $700, but I got it for about half of that since it was such an oddball at the time and had broken wheels. I also sold the existing generator I had, so after all of that I ended up paying about $100 total to get a new generator that I could use both on the truck and home for typical emergency back up stuff. This generator takes 2nd place for my “BEST FIND FOR THE MONEY” award!
By the way, Dometic does sell this LW3000 plus again. Also another clone is the Extreme Max EXT3000. I believe that currently this is probably the largest generator (for power output) that can fit behind the front bumper area of winch trucks.

GENERATOR TRAY

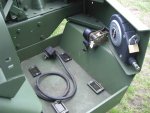
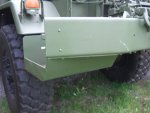
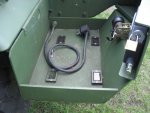
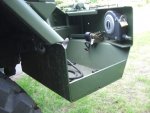
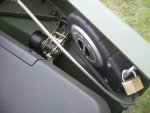
I had the sheet metal company bend me up a tray out of ¼” aluminum (they give me deals since they can never meet their quoted completion date for work projects:)) . I then cut it to match the angle of the bumper and bolted it in. I also added a ratchet tie down strap from NorthernTool so that it would hold the generator securely while driving. The generator fit is tight in there, so I made some blocks that mate up with the generator’s feet so it stays put.
While at Home Depot one day I saw this 20’ retractable cable lock thing on the clearance shelf. I mounted it to the bumper so that I can lock the generator and jerry cans to prevent theft. The lock also comes in handy to lock our bike to the truck while camping.
 

Attachments

Last edited:
peashooter

Well-known member
1,038
205
63
Location
Hanover, minnesota
Misc. Add ons:

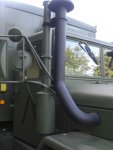
SNORKEL

I originally got the idea from POWERSTROKIN’s post here:http://www.steelsoldiers.com/showthread.php?72039-My-Snorkel&p=1055774&viewfull=1#post1055774
The cheapest place I found all the parts was from Summit Racing, here are the part numbers I ordered:
-SUM-640040 (4"x4' aluminized pipe, cheaper than the 2' section also sold) $21.95
-WLK-41378 (90deg elbow, this one lines up the snorkel with the exhaust) $23.95
-WLK-41430 (45deg elbow) $23.95
-WLK-35752 (4" Exhaust clamp that fits mushroom cap/snorkle tube, for bracket to hold snorkle to muffler) $3.25
-WLK-35753 (3.5" Exhaust clamp that fits muffler, for bracket to hold snorkle to muffler) $2.95

MUFFLER

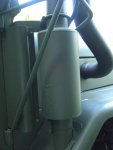
I added the Donaldson muffler and band clamps soon after I purchased the truck: DN-M070028 - Muffler ~$60ish and 1x DN-X007831 - 3 1/2" Preform Seal Clamp on the bottom $8ish (reused the stock top clamp). This was by far the easiest modification I did, and it bolted right in. It was nice to have a project go quicker than I expected. While at it I also put a 3.5” clapper on the top of the exhaust pipe to prevent water from getting in and blowing black spots all over people standing next to me at start up…..again.

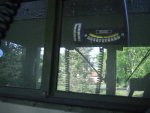
LEVEL INDICATOR

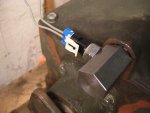
To help me park the “camper” in a level spot when camping, I decided to add one of these dual axis level/tilt indicators to the front of the van body which I can see when I look out the back cab window. So I’m able to find a level spot to park without having to get out of the truck to check. It also gives that poor little rear cab window a reason for its existance on a M109 truck.

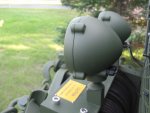
IR LIGHTS

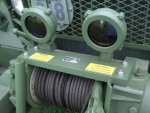
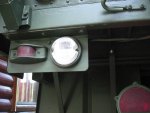
I traded some stuff for a couple sets of armored lights, one set had the IR lenses. I sandblasted the housings and put new o-rings and seals in. I also replaced the bent up winch top plate with a big chuck of aluminum from a scrap pile, it has new data plates from dataplats.net as well.

FUEL LEVEL SENDER

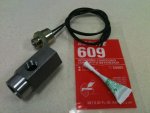
Since I replaced the original 2-1/16” dash gauges with Stewart Warner HD Series gauges including a 12v fuel level gauge, I needed to get the correct sender unit for it. The new on is a Stewart Warner Fuel Sender for 12v 240/33ohm systems. 391B-F R (right swing), and this will work with any other 12v 240/33ohm fuel level gauge as well (that is a common output).

REAR DOOR LOCK

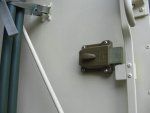
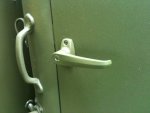
I got this idea from someone else also it was a clever one. It allows me to lock the door from the outside with a key or the inside with a knob. I looked hard for the best one for fit and function. This is a Yale brand one from Mcmaster.com part number 8047A47. I also cut off the locking tab that was on the outside of the door handle so that no one could lock us in from the outside.

MISC

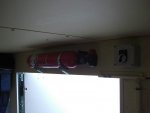
Added a fire extinguisher above the rear door, as well as a new switch for the 24v lights in the ceiling.

DOOR HANDLES

I put some locking handles on from mcmaster.com one side is part number, 1226A46 and the other side is 1226A64. They use the same key and work well, I think they are made in England, it was about $30 for the pair. I believe there is a cheaper alternative now in the classifieds section however.
 

Attachments

Last edited:
peashooter

Well-known member
1,038
205
63
Location
Hanover, minnesota
Reverse Light Kit:

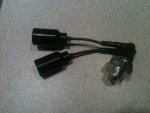
For some reason my truck came with marker clearance lights on the back (which worked) as well as reverse lights (which didn’t work). I had always just assumed some switch or wire was broke and that’s why the reverse lights didn’t actually work. At some point I discovered that the a2 deuces and M109a3’s didn’t have reverse light systems. I guess my late model 109 just had many of the items that the new m109a4’s were getting even though the reverse lights didn’t actually light up. I never really needed backup lights with the IR backup camera I installed but nevertheless I hooked them up this spring when I had the cab apart. I did start making a reverse light switch kit based off of Gringeltaube’s original design.

Instructions on how to make one or to purchase the kit in the classifieds can be found here: http://www.steelsoldiers.com/showth...ITCH-KIT-***&p=1323786&viewfull=1#post1323786
 

Attachments

Last edited:
peashooter

Well-known member
1,038
205
63
Location
Hanover, minnesota
Light Bar:

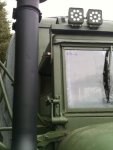
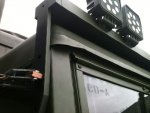
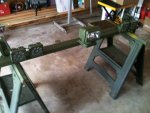
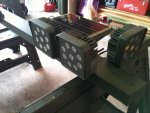
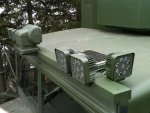
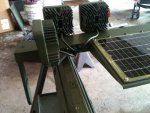
Earlier this year I traded some parts for one of those larger Solargizer kits with the 12v & 24v taps. I didn’t want to put any holes in the top of my 109 box roof or the hardtop roof in order to mount the big solar panel. One thing led to another and I ended up making a light bar that holds the big Solargizer panel, has a 12v GoLight remote controlled searchlight that I got cheap off of eBay, and 6x 27w LED lights (4x flood lights, 2x spot lights) that I got off of amazon for about $25 each.


Although not yet completely installed due to lack of time, here is some info on it.
The bar and all mounts are made of aluminum. The “bar” is a 3”x1.5” tube with ¼” walls. I’m going to bolt it to the windshield uprights with a few 1/4-20 cap screws. Something I didn’t notice at first until I was test fitting is that the windshield frame sides (where I’m mounting too) aren’t parallel. I assumed the military would have made them parallel out of simplicity but rather they are angled like the roof sides so you either need to twist your upright mounts or cut your light bar at an angle like I did to make it all fit nicely.
I don’t care too much for the looks of the bar (seems too “busy” up there), but it is functional. The other problem I discovered too late is that when I put the hood up it hits the search light..... I'll take care of that eventually but it’s one of those things I wish I would have thought about before I made it the way I did.


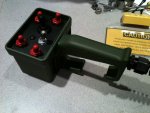
CONTROL PENDANT (handheld switch box)

I’m using a handheld pendant for all the switches to control the lights. The search light has a switch to turn it on along with a red light to know it’s on and a joystick to move it. The other 4 switches (with the red boots) are for the LED lights. Right switch is for right side, left for left side, and top 2 are for the front 4 lights... 1 controls the 2 spot lights, and the other controls the 2 flood lights.


LED LIGHTS

I'll just mention the LED lights. They are cheap and Chinese but they get really good reviews. I haven’t used them much yet so I can’t confirm it but if you are looking for some cheap rugged light just search for "TUFF LED LIGHTS" on amazon, they have the round or square flood lights (60degree spread), I had to get the "RUPSE" brand for the square spot lights (30degree spread) but they appear to be made by the same company, just different boxes. Also I didn’t like the look of so much lens on the light bar so I took some of that 3M Traction safety walk film and punched holes in it where the lights/reflectors were. That’s why these things look more like dice than a standard light.
 

Attachments

Last edited:
peashooter

Well-known member
1,038
205
63
Location
Hanover, minnesota
Trailer CBC:

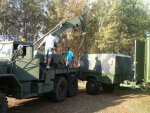
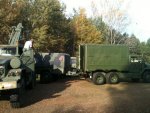
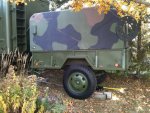
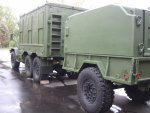
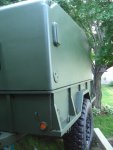
I ran across a lot of 4 Cargo Box Covers (CBC) from the closest GL site to me one day. I had never even heard of one of these before. It looked pretty nice for what our plans would eventually be with the M105 trailer. Eventually we plan to turn the trailer into a bunkhouse for the kids since it gets tight with us all sleeping in the van box at night. I figured if I have never heard of or seen one of these CBCs before then they must be somewhat rare and probably a good idea to try to get one while they are up for auction.
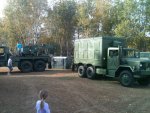
I called up Scott (Tie6044) who is the local Minnesota go to guy for MV parts. He won the lot of 4 and sold them off to myself and other customers of his. The below pictures are when I was at his place to pick up the CBC. He loaded it on with one of his wreckers.

Scott has been the most helpful resource to me with this project (besides SS). He sells deuces, 5 tons, takeout parts from trucks, tires & wheels, anything Rockwell related (for the mud truck & rock crawler guys), Ouverson Lockout stuff, and the most affordable spin on oil filter kit out there (nicely machined as well might I add). I’ve had to replace many broken items (including a transmission), get replacement items, and collect parts for some of my mods. Scott has always been able to help out quickly, lots of advice and great prices. Anyone with a deuce/5 ton who lives in the Minnesota/Wisconsin area should really know Tie6044.
 

Attachments

Last edited:
peashooter

Well-known member
1,038
205
63
Location
Hanover, minnesota
Trailer MRAPS:

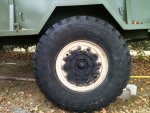
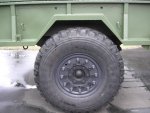
Having won the 2 lots of MRAPS (8 wheels total) on GL, I had planned on putting 6 on the truck and 2 on the trailer. I figure it will make everything match, but I also (originally*) wanted the trailer to have them because if I did get a flat on one of the truck wheels, I could just pull one off the trailer and move it up to the truck to prevent any axle gear fighting due to a mismatch in rear tire diameters. I can replace the trailer one with the stock spare tire from the deuce.... of course I would still have to somehow get the damaged/flat 450 lb flat MRAP wheel into the trailer. (*Now that I added the rear lockout to one wheel, this doesn’t matter anymore)


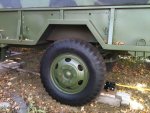
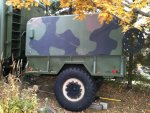
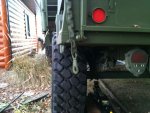
The MRAP wheels obviously wouldn’t fit the existing fenders very well. As a temporary fix, I’ve just trimmed off part of the fender’s lip to prevent it from digging into the tire on a medium to heavy bump. I have some new fenders made but not installed yet (probably next year?)
The clearances aren’t as bad as I thought they would be. The inside of the tire clearance to the fender wall is about the same as the stock tire. The tire does stick out past the trailer an inch or 2 but the new fender/ fender skirts I’ve got will address this.
 

Attachments

Last edited:
peashooter

Well-known member
1,038
205
63
Location
Hanover, minnesota
Camping Trips:
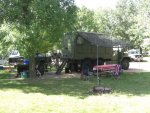
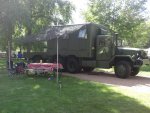
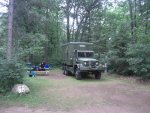
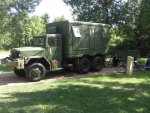
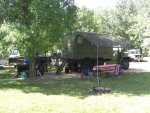
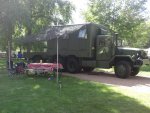
Some random pics from trips where I remember to take pictures.
 

Attachments

Last edited:
peashooter

Well-known member
1,038
205
63
Location
Hanover, minnesota
TROUBLES

Here is a list of some problems I’ve had with the truck that I can remember. Everything has been fixed unless noted.
-Damaged Valve cover which caused an oil leak while driving (forward most)
-RUST !!!!
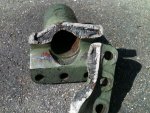
-Broken Air-O-Matic Cylinder Ram Mount casting (machined a new one from aluminum)
-Sticky Air-O-Matic Drag Link valve (Marvel mystery oil, then air tool oil)
-Leaky Air-O-Matic hoses (replaced)
-Cracked section on oil cooler/oil filter mount casting (fixed with JB Weld, have a replacement takeout casting from TIE6044 for future replacement)
-RUST !!!
-Spin on Oil filters don’t hold oil longer than a few hours (these have anti-drain back valve and I’ve now changed them 3 times).***STILL NOT RESOLVED*** Maybe the oil I use or some type of vacuum sucking the oil out after shutdown?
-3 of the rear hubs had bad seals that ended up letting grease and gear oil coat the breaks
-Front Passenger side wheel brake cylinder leaking (rebuilt w/ USA made napa kit)
-Front Passenger side wheel bearing & cup was questionable (replaced)
-Wet side air tank developed pin hole (replaced)
-Leaking Van Box roof (covered in post 4)
-Oil pressure gauge not correct (had 120psi sender on 60psi gauge, replaced with mechanical unit)
-Brake warning light didn’t work, it was bypassed because the parking brake switch turned out to be damaged so it no longer switched.
-Van Box windows coming apart (covered in post 24)
-Cracked Van Box glass (covered in post 24)
-Manifold Flame Heater leaked on turbo (first wrecked nozzle, then replaced nozzle, got wrong nozzle, replaced again, had air leaks, Disconnected system, bought can of staring fluid for when needed)
-Parking brake didn’t work (replaced cable)
-unusually fast steer tire wear (replaced front shocks with Monroe 66903 shocks from Amazon)
-Fuel leak on IH, replaced the o-rings but it ended up being the 12 point screw on the side of the HH that I replaced and that fixed the problem.
-Dual Circuit Brakes locked up (Gringeltaube solved it on this thread: http://www.steelsoldiers.com/showth...nder-failure&p=1151984&viewfull=1#post1151984 )
-Couldn’t figure out how to put the horn button back together:) (bought the new style button off of ebay for $20, no assembly required)
 

Attachments

Last edited:
peashooter

Well-known member
1,038
205
63
Location
Hanover, minnesota
FUTURE PLANS

BRAKES

I plan on overhauling the brakes next year with new wheel cylinders, air pack rebuilds (2x), M/C rebuild and new hoses (braided stainless ones). I’ve slowly started collecting the parts for this.
Other than that I’ve got a couple projects started that I need to finish such as the Light Bar / Solargizer set up.

TRAILER

I have new fenders to put onto the M105 trailer that will fit the MRAP 395’s better. While doing that I also thought it would be a good time to make & mount a fold down platform set up like LOWTECH did here in the picture below. Here is a link to his post: http://www.steelsoldiers.com/showth...rmations-style&p=921571&viewfull=1#post921571

TRAILER CBC

Many years from now we will probably convert the cargo box cover of the trailer into a bunkhouse for the kids. This would include some bunk beds, maybe vents, maybe a door on the front of the trailer, etc.

DINNETTE TABLE

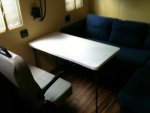
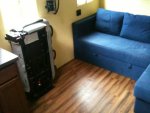
We use a small folding table when the weather is bad and need to eat inside. We use the couch and the foldaway seat and then set up the folding table between the 2. (Folding table is currently stored behind the sofa with some other similar shaped items.)
I’d like to eventually make a fold out table for this area. It sounds easier than it is however. The table will need some thought and probably a few odd flip out features in order to make it fit in a convenient spot and fold into the correct position without hitting anything else.

TRANSMISSION

We had transmission troubles last summer while driving from Northern Wisconsin where we were camping to Ft. McCoy where we picked up the M105A2 trailer that we won on GL. The 5[SUP]th[/SUP] gear syncro wore out and wouldn’t stay in gear unless I held it in the whole time (2 days’ worth). I bought a ’73 take out trans from TIE6044 that’s working well for now. I think I’d like to get the original trans rebuilt if possible. In the meantime, I’m collecting internals from dead Spicer transmissions so that hopefully I’m able to have enough good parts that I can have mine rebuilt with just purchasing new seals and bearings. The same way the M35a3’s were built rightJ
 

Attachments

Last edited:
tie6044

Active member
Steel Soldiers Supporter
860
42
28
Location
Blaine, MN
Wow that is a great thread! Everyone loves pictures and you definitely fulfilled that need for sure! My son Billy had fun that day helping put the cover in your trailer.
 
194
2
16
Location
Norfolk, VA
Wow Peashooter that looks great! It seems your attention to detail has touched every part of this build! I have a lot of questions, but I'll let you fill in some of the blanks first.
 

clinto

Moderator, wonderful human being & practicing Deuc
Staff member
Administrator
Super Moderator
Steel Soldiers Supporter
Supporting Vendor
12,596
1,129
113
Location
Athens, Ga.
Jeez, how many years did you have to take off from work and life to do all that?

Looks amazing.
 
Top