• Steel Soldiers now has a few new forums, read more about it at: New Munitions Forums!

  • Microsoft MSN, Live, Hotmail, Outlook email users may not be receiving emails. We are working to resolve this issue. Please add support@steelsoldiers.com to your trusted contacts.

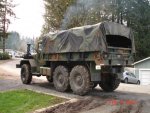
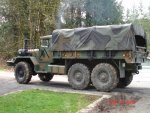
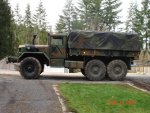
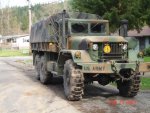
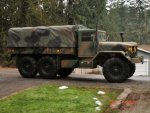
pics of my 5-ton with the 3" bedlift installed

dma251

Member
648
15
18
Location
Arlington, Washington
Well, I didn't really need it, but I think it looks great with a little more vertical axle clearance over the rear tires.

Here's some pics, I also installed the taillights up into the rear bed instead of hanging down below it. I busted one taillight up already when they were mounted the old way, so with the new LED taillights I wasn't taking any chances.
 

Attachments

dma251

Member
648
15
18
Location
Arlington, Washington
I'll get some light pics tomorrow for ya. Yeah, the tires are 16-20's tubeless XL's. A buddy of mine just gave me 6 new ones he had kicking around and didn't need - in case I shred one.
 

JDToumanian

Active member
1,655
14
38
Location
Phelan, CA
COOL! 8) I like the look of the rear tire-to-bed clearance being the about same as the front tire-to-fender clearance. Gives you a little more clearance for driving over uneven "terrain", eh? :wink:

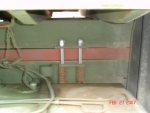
What is that thing on top of your exhaust in the third pic?

Regards,
Jon
 

dma251

Member
648
15
18
Location
Arlington, Washington
The exhaust tip is off an APC, not sure which one. Maybe my buddy Jim will chime in here and tell you which APC, that's his specialty. It's flapper came off, so I made a new one out of some diamondplate scrap I had kicking around. I like the way it looks.

I'm getting ready to install my new rear winch on the back, and I bought a Superwinch 2000ATV winch that I'll permanently mount on the loading crane. When the bed is six feet off the ground you need all the help you can get to put stuff in the back. I'd like to make some ramps next that stow underneath the bed. So many ideas, so little time...
 

bigmike

Well-known member
Steel Soldiers Supporter
2,005
355
83
Location
Dixon CA.
That really is a nice difference. Looks like a pretty straight forward installation. Any issues you ran across to share with us?
 

dma251

Member
648
15
18
Location
Arlington, Washington
Pretty straightforward. Just 2 sticks of 3"x3"x.25" x 14' square steel tubing and about $50 for grade 8 bolts that are 3" longer. I used all-thread with double nuts on the spring-mount up front, as it's pretty tough to find bolts 14" long...
It took much more time to weld up the ends of the tube and prime and paint them then it did to put it together. I had to plasma-cut some relief notches in the last 8" of tubing where it rests on the frame to clear some rivets at the very end of the truck frame.

All it all it is a super easy mod to do. I'm going to pull the tubes out and cut off another 6" off the ends to fab up a rear winch mount back there, but otherwise it turned out exactly as I expected. When it dries out over here I'll paint the visible edge of the tube OD to match the truck. I've got 4 different shaded of green from Rapco in spray cans. Mirine Corp Lusterless forest green seems to be closest.
 
Top
AdBlock Detected

We get it, advertisements are annoying!

Sure, ad-blocking software does a great job at blocking ads, but it also blocks useful features of our website like our supporting vendors. Their ads help keep Steel Soldiers going. Please consider disabling your ad blockers for the site. Thanks!

I've Disabled AdBlock
No Thanks