GYs_M998
Member
- 17
- 26
- 13
- Location
- Temecula, CA
I have several questions about the parking brake setup on my 998. I have tried searching the existing threads for answers but either missed them or they just aren’t out there. If the answer is already in a thread, I am sorry for taking everyone down a familiar rabbit hole and would be thankful for the location of the pre-existing thread.
My issues started when I noticed my right rear caliper was leaking significantly one day - Big obvious stain underneath it in the driveway. It looks to be coming from the parking brake actuator shaft. I bought a rebuild kit and followed the steps to replacing every seal in the dang thing. When I was seating the parking brake actuator shaft dust seal, I pinched the little spring inside of it. Not too bad, but it did give me pause. I pushed ahead and I got it all back together. Then I used a negative pressure pump on the bleeder valves to flush all old fluid as well as air bubbles (old fluid was really bad). Turned on the truck, gave the brake pedal a couple of pumps until the squishiness subsided. Once the pedal firmed up I gave it one more pump for good measure. Felt a slight pop through the pedal, head something matching what I felt, and the pedal was super squishy again and the brake light came back on. Looked under the truck… big ol’ puddle is back bigger than before and the parking brake assembly side of the caliper is dripping.
First question: does the parking brake actuator shaft dust seal retain fluid, or is it truly just a dust seal? The actuator shaft has its own o-ring so I figured by the name [dust seal] that pinching the metal tension spring wouldn’t be too big of a deal. If that is true, anyone have any ideas on what I may have messed up in rebuilding this thing that would make it leak like I put it together with bubblegum and duct tape?
Second question: does anyone have an auto parts store part number, an NSN, or the dimensions for the parking brake actuator shaft dust seal? I don’t want to buy another $60 kit for a single 50¢ seal.
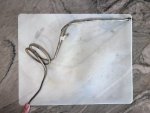
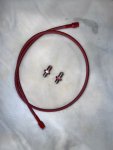
Third question: in taking the caliper off and putting it on, I have discovered that the brake line is a hard line with coil above the caliper for slack rather than a soft line. Those who have had to remove one of the rear calipers know how much of a pain it is to remove the brake line without removing the half shaft. Is there a kit to change a portion of that hard line to a soft line, or is it something that one would have to cobble together on my own?
I appreciate all thoughts and input. Apologies for delving into any topics that exist in other threads.


