• Steel Soldiers now has a few new forums, read more about it at: New Munitions Forums!

  • Microsoft MSN, Live, Hotmail, Outlook email users may not be receiving emails. We are working to resolve this issue. Please add support@steelsoldiers.com to your trusted contacts.

Rebuilt Steering Box

Iceman3005

Active member
933
97
28
Location
Holt, MI
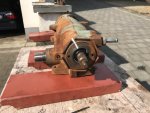
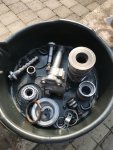
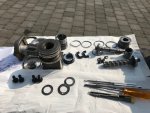
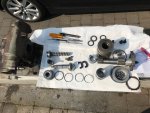
I rebuilt my steering box, instructions were very vague with the rebuild kit, but I still managed to figure everything out. This is my first one I have ever rebuilt, the problem I am having is when I turn the wheel too the left fluid sprays out of the bottom around the steering shaft, when I turn too the right no leaks. I had too rebuild due to a bad steering shaft bearing, and a small drip around steering shaft. I have no leaks anywhere else and all my slop is gone but now I have a major leak, more like a high pressure leak around the steering shaft, it was only dripping before I rebuilt it.
 

bushhawg73

Member
122
0
16
Location
Columbia, Missouri
I saw the pirate 4x4 thread a while back and just ordered a upper and lower seal kit fom napa. I hope I do not have to go all the way in mine to get it to stop leaking.
 

CPAPPY

Member
313
6
18
Location
Xenia , Ohio
ICEMAN3003 on a ball screw there are different size balls they are different in color. Should say a lighter shade of gray and darker gray balls , if you ever take it apart you should fix it . there is only about .0003 to . 0004 tenths difference between them. Not to bad of a job except cleaning the unit , the only problem I hade was replacing the big end cap. Anyways good luck with you rebuild unit.
 

Iceman3005

Active member
933
97
28
Location
Holt, MI
Ya that's what I was told after I put box back together, It probably doesn't help that I am color blind, they all looked the same to me. As far as the big end cap I used my press and a large socket to push it back on and then install the snap ring. Cleaning was pretty easy, I used my parts washer and high pressure sprayer on the parts washer.
 

CPAPPY

Member
313
6
18
Location
Xenia , Ohio
I had no parts washer or arbor press that would of help push that end cap with new o-ring. I had a heck of a time . I also altered my gear box for hydro assist steering
 

Rutjes

Well-known member
Steel Soldiers Supporter
359
272
63
Location
Amersfoort, The Netherlands
I know this thread is old, but I figured the following would help people who stumble across this thread searching for information (like I did).

Here is a good video series showing how to rebuild a Saginaw steering box. I've watched it a long time ago and it didn't seem too difficult. Might not be the exactly the same as ours, but can't be too much different?

https://www.youtube.com/watch?v=sMyFEpAl5NU

I'm about to order a rebuild kit myself. Probably 2 so I can rebuild the one from the donor truck as well and store it rebuilt as a spare.
 

Jake59

Active member
170
103
43
Location
Kaggevinne, Flanders, belgium
Hello all,

I have recently purchased a M1009 and am restoring it before I take it on the road.
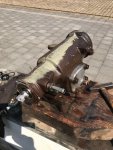
I noticed that the steering gear is also covered in oil and leaking through all seals.

Can you tell me what type of steering gear the M1009 has a dn what service kits part numbers I need to order for my steering gearbox?

Thank you very much,

Jake
 

Chaski

Active member
684
56
28
Location
Burney/CA
I have done a few steering boxes.
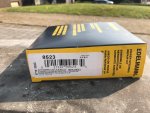
Edelmann 8524 or Gates 350440. Rock Auto offers them for about $30

A few pointers...
Read & follow the Saginaw 800 series service info here.
https://www.midweststeering.com/service-information/
Keep things as clean as you can.
Don’t rely solely on YouTube videos.
If any part is junk just toss it (inspect the casting and toss it if there are deep grooves or rust pits inside)

Also, you really need a few things to set preload correctly
1) Inch pound dial or beam type torque wrench.
2) Home made socket for the splined input shaft (old rag joint with a socket welded to it).
3) A proper spanner that you can put a torque wrench on.

Other handy things.
Arbor or hydraulic press.
Good snap ring pliers.
Assortment of bushing and seal drivers.
Transgoo (automatic transmission assembly goop).
Electrical tape (for compressing the new Teflon seals)
Hose clamps (for comprising the new Teflon seals)
Thin plastic water bottle (to cut a piece out of to use as a seal protector when inserting the piston with new Teflon seal.
Time
Vodka
 

Jake59

Active member
170
103
43
Location
Kaggevinne, Flanders, belgium
Hi all,

I am fairly new here as I own a M1009 only since last December.
Am still working on getting it roadworthy...
The usual you know, replacing badly worn Ball Joints and sticky Universal Joints, leaking Oil Seals, brakes and lots more still to do... not to mention bodywork and welding in new plates and panels....

I also had a badly leaking power steering input shaft.
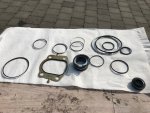
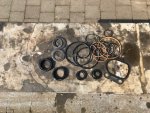
So I ordered an Edelmann repair set, with all the seals but without the new needle bearings.

I know I did not have to go through the full overhaul, but I figured why not... I have never taken apart a Saginaw so it's about time I do this and learn...
And thus I did.
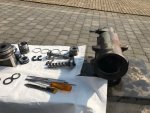
First took off the power steering unit, then cleaned and de-greased the outside completely so I cold work clean.
Then opened it up and dropped everything into cleaning solvent.
Then started rebuilding with all the new o-rings and seals from the repair kit.
Had to redo the ball installation process 3 times before I got it right ( I always managed to have a few of the balls going in on the wrong side...) but now I know what to pay attention to when doing this job, so it won't go wrong anymore.
And unfortunately got somewhat midevel with the big teflon piston ring... totally my own fault, being inpatient and wanting to get things done too fast... damaged that one, so I temporarily re-installed the old one... But if anyone should have one of those big piston teflon rings laying around, I would be more than grateful as US Truck parts are so hard to come by here in Europe!!
To get the big end cap back in, it is easy as well, just make sure all parts, o-rings and seals are well lubed with ATF when rebuilding and then push the end-cap on by hand and work it in all the way by prying with a screw driver all the way around in the ring grove and onto the cap, it will go in smoothly!
Finally adjusted the pre-load and the job was done.

It was a very interesting job and I will do this again in the future, this is something anyone can do!
And if anyone wants some online assistance I will be happy to help!
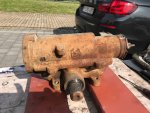
IMG_1675.jpgIMG_1659.jpgIMG_1660.jpgIMG_1670.jpgIMG_1676.jpgIMG_1678.jpgIMG_1677.jpgIMG_1674.jpgIMG_1679.jpgIMG_1682.jpg

Jake
Belgium
 
Last edited:

Finallygotone

Member
73
26
18
Location
South Louisiana
Great glad that you have it back together and working, reading comments from others where does one get a rebuild kit, I have the M923A2 and has a little play in the box, don't want to tear down with out a kit.
 
Top
AdBlock Detected

We get it, advertisements are annoying!

Sure, ad-blocking software does a great job at blocking ads, but it also blocks useful features of our website like our supporting vendors. Their ads help keep Steel Soldiers going. Please consider disabling your ad blockers for the site. Thanks!

I've Disabled AdBlock
No Thanks