• Steel Soldiers now has a few new forums, read more about it at: New Munitions Forums!

  • Microsoft MSN, Live, Hotmail, Outlook email users may not be receiving emails. We are working to resolve this issue. Please add support@steelsoldiers.com to your trusted contacts.

"Rescued" M816 Wrecker

red

Active member
1,988
25
38
Location
Eagle Mountain/Utah
Cant say how fast I will get around to it, as trying to prioritize and pay off some accumulated debt concerning the B&B remodel as of this point. But having the 10 laying here and amassing the parts to do the swap is getting very high on my list as we both know that winter up here brings things to a sudden halt. Thus you run like mad in the summer trying to play catch up.... If I get the 10 installed, I will have to re do the shafts for the crane and the PTO thus instead of re-inventing the wheel again like I just did, I want to plan ahead and drop the power divider due to it being put into a bad angle again by the 10 speed pushing the drive line back 12". The axle drive shafts will be ok, but the power divider will be the problem. And with my PTO on the T case making an odd noise I would rather eliminate future set backs by relocating the pump down below. THis will give me power to the rear winch at the same time and Yes I would plumb in a valve for feed out and pull in on the rear winch. Preferably off the side of the bed or in the rear most storage boxes as they do not get used on my rig due to dirt. This would keep them from being caught on something on the side of the bed, or bumped by something on the crane swing.

Red, If I get thing mess put together and you still want to keep the power divider I would give you first dibs on my current setup with the modified pwr divider PTO and U joint shaft .......
Sounds good. I think for me in the long run it will be cheaper to stay with a modified PTO setup for the crane. The idea of a second wrecker bed modified to be a excavator sounds very useful for me and with my plans to have the bed removable on this truck that will work out well. Find a non operational m543/m816 and use it's bed for that plan. They are cheaper and easier to find than a non operational m936.

With the hydraulic pump from the dump truck mounted onto the chassis mine will have it's own wet kit. Mount a valve bank behind the cab with 4 valves and a 20? gallon tank behind the passenger side fuel tank. The 4 valves gives enough to operate:
1. passenger side 2 crane outriggers
2. driver side 2 crane outriggers
3. rear spades
4. trailer (say a dump bed trailer for example)

Weather is warming up and just got my midterm stuff outta the way (using the GI Bill, one of the older people in class haha) so I can start working on this thing again.
 

red

Active member
1,988
25
38
Location
Eagle Mountain/Utah
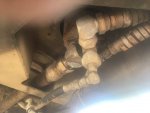
So anyone know what the 3rd port is for?

Sent from my SM-G930V using Tapatalk
Going off the pic it must be for the rear winch. The 2 hoses that are the same size are headed towards it. Large hose is going from the tank to the pump, then other hose is the high pressure from pump.

Doesn't need to be a 3 port but they did it.
 

wcuhillbilly

Member
421
5
18
Location
Devils Tower, WY
Hmm... True, it doesn't need to be a 3 port if the pump is on the frame, then just a supply and a return need to go to the crane pot,.... a supply/return to the rear winch, which could be valved to go to the front too...... I don't remember how the 936 that I was looking at was routed, as I only had a few minutes to snap a few pics... was lucky enough to get the Hydramotion swivel pic with part/serial number, and the same for the front winch motor... but it was dark and I had very little time.
Davis: any luck on rounding up a spare swivel, or the winch motors...???

Ultimate setup for me would be an air shift PTO/wetkit off the 10spd that would engage the pump or be the pump then vavle the hydro to crane/rear winch, and then a valve to the front winch... I can see needing the front winch in the cab, but none of the rear. The airshift would be nice so that I don't have to keep dropping the transfer into neutral, just the tranny.
 
Last edited:

red

Active member
1,988
25
38
Location
Eagle Mountain/Utah
Moving the pump down to the chassis certainly has it's advantages. On ebay there is a company that is selling parts from excavators and they have a bunch of hydraulic swivels for cheap. For those kinds of prices (average of about $300 each) it just makes sense to do the conversion. Many of those are 4 passage rotary swivels so it would be possible to add 1 single valve bank to the chassis, maybe to just provide a second parallel control for the crane cable in/out. That way if you are lift towing a vehicle you won't have to climb up to the operator bucket to raise/lower the hook.


For my particular uses with the bed swap plan on this truck. Either:
1. Relocate the winch behind the cab, install a roller at the tail end of the frame, and use that setup to pull up/roll off the different bed platforms.

2. Relocate the hydraulic pump/tank down to the chassis from the wrecker bed and use a pair of longer hydraulic hoses to power the bed while it is off the truck. Then the wrecker bed (while sitting on it's outriggers) can place the other beds onto the truck chassis. I wouldn't do this with the original manual outriggers because of how they pivot, but with hydraulic outriggers that won't let the bed pivot, it's nice and stable.


So a metal bracket to mount the pump onto the chassis, a short/low angled PTO shaft going from the power divider to the pump, hydraulic swivel, pair of hydraulic QD's, new flange adapter at the power adapter, and 2 hoses should have the conversion taken care of.
 

BnaditCorps

Member
479
1
18
Location
Solano County, California
Moving the pump down to the chassis certainly has it's advantages. On ebay there is a company that is selling parts from excavators and they have a bunch of hydraulic swivels for cheap. For those kinds of prices (average of about $300 each) it just makes sense to do the conversion. Many of those are 4 passage rotary swivels so it would be possible to add 1 single valve bank to the chassis, maybe to just provide a second parallel control for the crane cable in/out. That way if you are lift towing a vehicle you won't have to climb up to the operator bucket to raise/lower the hook.


For my particular uses with the bed swap plan on this truck. Either:
1. Relocate the winch behind the cab, install a roller at the tail end of the frame, and use that setup to pull up/roll off the different bed platforms.

2. Relocate the hydraulic pump/tank down to the chassis from the wrecker bed and use a pair of longer hydraulic hoses to power the bed while it is off the truck. Then the wrecker bed (while sitting on it's outriggers) can place the other beds onto the truck chassis. I wouldn't do this with the original manual outriggers because of how they pivot, but with hydraulic outriggers that won't let the bed pivot, it's nice and stable.


So a metal bracket to mount the pump onto the chassis, a short/low angled PTO shaft going from the power divider to the pump, hydraulic swivel, pair of hydraulic QD's, new flange adapter at the power adapter, and 2 hoses should have the conversion taken care of.
That sounds like a great set-up. I am guessing quick disconnects on all of the hoses?
 

red

Active member
1,988
25
38
Location
Eagle Mountain/Utah
That sounds like a great set-up. I am guessing quick disconnects on all of the hoses?

Yep, 2 QD's on the hoses running from the pump to the hydraulic swivel on the underside of the crane. If I bought one of those 4 passage swivels from a used excavator the 2 extra passages would be used for a set of parallel controls mounted onto the side of the wrecker bed, for just the crane cable in/out. So since that valve bank would be mounted to the bed, no need to ever disconnect those hoses besides maintenance.

IMG_20160802_091553467.jpg IMG_20160802_091621037.jpg IMG_20160802_091511135.jpg


These are the QD's I have. Extreme overkill for our pump pressures since the wrecker system is designed for less than 3000psi and these QD's are designed for 5k and can be removed while under pressure/pump running (I have zero intentions of doing that).

So my truck will have the tank relocated and both hydraulic pumps. Lower volume dump truck pump that is powered by the transmission rear PTO and the higher volume pump from the crane. Both will use the same relocated tank for the hydraulic oil supply.
 

red

Active member
1,988
25
38
Location
Eagle Mountain/Utah
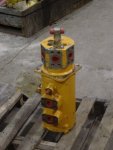
Just bought a used rotary manifold. It's from a Samsung SE350LC excavator, was running when they brought it in and tore it apart. 1 1/4" passages, 4 passages. About 28" tall and 9" diameter so it's tall but don't think there will be any clearance issues with the crane.

Samsung SE350LC excavator Rotary Manifold.jpg


For the price I couldn't pass it up. Last remaining expensive part is the new PTO shaft going from the power divider to the pump.
 

tobyS

Well-known member
4,832
833
113
Location
IN
Just bought a used rotary manifold. It's from a Samsung SE350LC excavator, was running when they brought it in and tore it apart. 1 1/4" passages, 4 passages. About 28" tall and 9" diameter so it's tall but don't think there will be any clearance issues with the crane.

View attachment 671023


For the price I couldn't pass it up. Last remaining expensive part is the new PTO shaft going from the power divider to the pump.
Do seals while it's out. I did mine about 20 years ago (it needs refreshed). Once installed, these are a hard part to get to. Mine's right up against the rotator gearbox. Good score on big hydraulic connections.
 

red

Active member
1,988
25
38
Location
Eagle Mountain/Utah
Spent some time out at the wrecker this morning. Had 3 generators to unload off of 1 trailer, then load 2 of the generators into the bed of a m923. The mep 002a will be going onto my tool/welding trailer.

The chain I would normally use for this is about 3ft long but it's currently at a friends place. So the setup we used is my longer one with 4 15ft legs with large hooks, 4 shortening hooks, and a main loop. Needless to say lots of extra chain had to be tied up out of the way haha.

IMG_20170318_105704127.jpg IMG_20170318_105913526.jpg IMG_20170318_110136204.jpg IMG_20170318_114349961.jpg IMG_20170318_114429510.jpg IMG_20170318_114708568.jpg IMG_20170318_114745550.jpg


Besides that also did some investigating on the hydraulic conversion. Looks like there will be plenty of room for the rotary manifold at the base of the crane. Will be sitting where the pump and 90 degree gear box is right now.

IMG_20170318_104356371.jpg IMG_20170318_104402214.jpg IMG_20170318_104407961.jpg IMG_20170318_112637434.jpg


I have this week off and the weather looks good for the most part so will finally be making progress on the air brake install.
 

Csm Davis

Well-known member
4,166
393
83
Location
Hattiesburg, Mississippi
Just bought a used rotary manifold. It's from a Samsung SE350LC excavator, was running when they brought it in and tore it apart. 1 1/4" passages, 4 passages. About 28" tall and 9" diameter so it's tall but don't think there will be any clearance issues with the crane.

View attachment 671023


For the price I couldn't pass it up. Last remaining expensive part is the new PTO shaft going from the power divider to the pump.
Red i might use two ports for return as that appears to be a 2" line on my 936's , you really dont want a restriction on the return side.

Sent from my SM-G930V using Tapatalk
 

red

Active member
1,988
25
38
Location
Eagle Mountain/Utah
Red i might use two ports for return as that appears to be a 2" line on my 936's , you really dont want a restriction on the return side.

Sent from my SM-G930V using Tapatalk
That 2" ish hose is the low pressure suction from the tank to the pump. I'm relocating the tank on mine to the chassis how wcuhillbilly mentioned so only the high pressure lines will be run through the swivel. All of those are 1".
 

red

Active member
1,988
25
38
Location
Eagle Mountain/Utah
Well after a couple months of break, finally got around to working on the wrecker again.

First thing was the passenger door window. At some point during the winter it came off it's track and fell into the door. Already had some cracks before then but now it needs to be replaced. But that's a later fix since I drive with the windows open anyways. At least it's now back on it's track and able to keep the occasional rain and bugs out while the truck is parked.

IMG_20170320_152809947_HDR.jpg


Was going to start on the front axle, then realized that my jack and sledge hammer are currently not at the wrecker. So instead I spent today removing the remaining hydraulic brake components. Hard and soft lines from the axles, master cylinder, air pack, pedal, everything but the main hard line along the frame and the bracket that holds the brake pedal. When the truck body comes off for repaint (eventually) it will be alot easier to access and remove those parts.

IMG_20170320_135612111.jpg IMG_20170320_135653645.jpg IMG_20170320_145919311.jpg


Will be patching up the hole in the floorboard from the old brake pedal. Also need to move that electrical box to make room for the new brake valve.

IMG_20170320_150151371.jpg


Crawled back under the truck and figured out where to mount the QR1 valve (front axle brakes). Along this crossmember below the transmission bellhousing appears to be a good spot for it. From there the hoses are an equal distance to each front wheel.

IMG_20170320_150519399.jpg
 

red

Active member
1,988
25
38
Location
Eagle Mountain/Utah
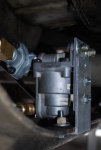
Physically the only thing done today was mounting the QR1 valve. I mounted it on the back side of that crossmember. Centrally located between both wheels on the front axle so they will engage at the same time.

IMG_20170322_134907203.jpg


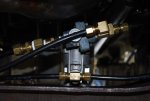
Spent the rest of today figuring out the plumbing plans. Besides some more JIC hose ends for the DOT approved hoses running to the wheel ends (steel braid, cloth covered, very robust) and fittings on the new tanks, heres the other fittings that I currently have. Those 2 flange connections will be used for the front axle. Run the standard pushlock hose inside the frame rails then through those fittings where the heavier duty hose will connect outside the frame, down to the wheel ends.

IMG_20170322_144126826.jpg


All included, looking at about 2 dozen more airline fittings to purchase and a 100ft roll of 3/8" DOT approved airline. The hose is pretty cheap, just the standard pushlock hose.

I'm planning to keep the plumbing as simple as possible, with as few holes in the cab as can be done. So I'll be using the 4 larger ports on the firewall side of the brake pedal. That will provide a clean/organized spot for all the brake airline connections.
 

MyothersanM1

19K M1 Armor Crewman
Steel Soldiers Supporter
1,958
427
68
Location
Culver City, CA
Physically the only thing done today was mounting the QR1 valve. I mounted it on the back side of that crossmember. Centrally located between both wheels on the front axle so they will engage at the same time.

View attachment 672269
The Bendix manual for the QR1 valve indicates the valve should be mounted vertically with exhaust port down. I don't know if that makes a difference in performance or if that is to keep contaminants out.
I used a an LQ4 proportioning valve on my front.
Plumbing and Relay Valves (58).jpgPlumbing and Relay Valves (59).jpgPlumbing and Relay Valves (60).jpg
 

red

Active member
1,988
25
38
Location
Eagle Mountain/Utah
The Bendix manual for the QR1 valve indicates the valve should be mounted vertically with exhaust port down. I don't know if that makes a difference in performance or if that is to keep contaminants out.
I used a an LQ4 proportioning valve on my front.
View attachment 672378View attachment 672379View attachment 672380
I've encountered them mounted at odd angles on civi trucks. If it gives me trouble then it's a simple fix with a piece of angle iron to orient the qr1 with the exhaust down.


Raining all day today so didn't do anything to the truck. Weather permitting will pick up some of the fittings/hoses tomorrow.
 

Csm Davis

Well-known member
4,166
393
83
Location
Hattiesburg, Mississippi
Hey red nice Detroit laying in the floorboard. Would you like me to get some pictures of the mounting of the brake pedal and lines onthe 936?

Sent from my SM-G930V using Tapatalk
 
Top