• Steel Soldiers now has a few new forums, read more about it at: New Munitions Forums!

  • Microsoft MSN, Live, Hotmail, Outlook email users may not be receiving emails. We are working to resolve this issue. Please add support@steelsoldiers.com to your trusted contacts.

Seal replacement

Stonewall

Member
191
2
18
Location
Peoria, IL
I belive you will need to look in tech manual in several places. First the half shaft maintenance which tells how to remove them. Second the brake caliper maintenance area to read on removing them. At that point you should see the yoke and seal. Pretty straight forward at that point. I do know that the front differential seal replacement on my 86 required the differential be removed due to a mounting bracket being in the way of seal removal.
 

dilvoy

Active member
733
25
28
Location
San Francisco, Ca.
On the early Humvees, the diff output seals can not be removed without removing the diff, because the brackets that the diff is bolted to on each side shroud the seals. Later Humvees and Hummers got revised brackets that allowed for seal removal while the diff was still in the vehicle.
 

Mike82ndABN

New member
223
10
0
Location
Tampa/Florida
http://www.flashoffroad.com/Maintenance/Differential/Diff_removal.htm

remove the 6 bolts that keep the inner halfshaft bolted to the rotor.

remove the parking brake cotter pin and clip, remove parking brake cable from caliper.

remove caliper, rotor, and pads, hang caliper with wire and hope the lines aren't rusted or they will break.

remove the caliper mount bracket.

remove the big nut that holds the hub flange to the differential (its a locknut and you should replace it when you reinstall)

at this point you can either drop the differential and remove the seals, or leave it up there and do them while it is on the truck. if you have the old brackets (with no clearance) you can wedge a screwdriver between the bracket to get enough clearance to remove the seal.

replace the locknut on the flange, replace the orings on the shaft with the splined star washers that kascar sells, and replace the 6 lock washers for the halfshaft.

the caliper mounting bracket bolts and diff bracket bolts get red loctite. the caliper bolts, hub flange nut, and 6 halfshaft bolts get blue loctite.
 
Last edited:

Karl kostman

Well-known member
Steel Soldiers Supporter
2,308
893
113
Location
Fargo ND
Hello rookie I dont know how long you have been into military trucks but one thing you will find incredibly useful on this site is the Technical Manual TMs section, if your like me you will like it so much that you will want to have a completel set of manuals for every vehicle that you own. I like them so much now after all these years I read them before bed sometimes! If you do even review them on this site your world will open up concerning your truck you can do virtually anything that needs to be done!
Good luck rookie

Karl
 

Milcommoguy

Well-known member
Supporting Vendor
1,713
2,279
113
Location
Rosamond, CA
Karl's RIGHT! :D

That's the best advice I have read in months. It is all in the book/s.

One step at a time, page by page, then section.

Anyone can do this. CAMO
 

Coug

Well-known member
Steel Soldiers Supporter
3,003
4,420
113
Location
Olympia/WA
So I know this is an older thread, but I have a related question.
Looking at replacing my front diff output seal (looks like it's leaking a little, I saw oil inside the brake rotor vents) and the -20 says to disconnect/remove the brake line from the caliper. In this thread when removing the diff is discussed, I see it mentioned to just hang the brake caliper with wire out of the way.

So question is, do I have to remove the caliper from the truck to do the diff seal, or can I just hang it up out of the way when I'm removing the rotor and output flange?
 

Milcommoguy

Well-known member
Supporting Vendor
1,713
2,279
113
Location
Rosamond, CA
I am not sure you can get the seal out because of the "C" shaped diff mount (left or right side hanger paws) overlaps the seal just enough to be a PITA... as in just pull the diff and do all of them. ( 3, in and outputs)

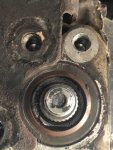
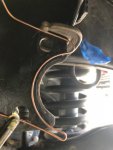
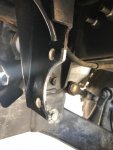
I could be missing something in the translation ... But couldn't do it or figure a way. To fix this from being a problem I plasma cut the "C" opening a bit bigger when the diff was out making a guide out of wire to follow. See the "C" overlapping the seal below. I wasn't going to mess with it. Another Humv bad design "gotya"

IMG_7410.jpg

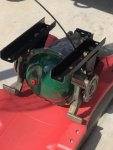
NEXT With Diff out clamped guide wire for cuttingIMG_7414.jpg

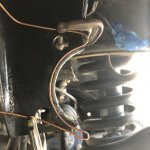
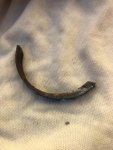
Cut a bigger "C" about 1/4 inch out.IMG_7417.jpg IMG_7439.jpg

Clean it up and do it on the other side.IMG_7423.jpg

IMG_7263.jpg Now...if for some reason they need service... no more headache
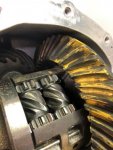
Rebuilt all new with special tractor green paint to hold in all together.
IMG_7208.jpg This is what you want to see on the inside.
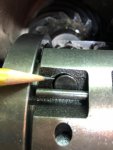
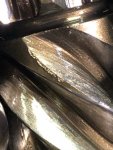
I would also note... while out take a peek inside. There's a lot of wear points inside the torsen Diff's. Take a look >>
IMG_7222.jpg IMG_7228.jpg So... What's in your diff's ????

I think... well in my case, was a problem for in rig service. NOT any more, CAMO

Picture worth a lot of words.
 

Coug

Well-known member
Steel Soldiers Supporter
3,003
4,420
113
Location
Olympia/WA
Yeah, reading through the TM it talks about the old and new configurations, so I'm really hoping mine (2000 M1123) has the new configuration.
As much fun as it would be to pull it out and check the internals, the weather here isn't likely to be that cooperative and I've already taken over all the possible work bench space with other projects. For now it's going to be the quick and dirty "replace the obviously failed parts and get her back up and driving again ASAP" rather than a careful tear down to see if anything else might be wrong while I'm there.
 

Coug

Well-known member
Steel Soldiers Supporter
3,003
4,420
113
Location
Olympia/WA
Co going through the procedures in the TM, it calls for thread sealant. The specs on it are MIL-S-46163 Type I Grade K, which in a search comes up with a specific brand that holds that certification.

Applications/properties shows it has high strength permanent threadlocker. I'd order the specific stuff from the company if it wasn't sold strictly by the case or huge container. ( https://www.saftlok.com/stl/threadlocker.htm the T70 Threadlocker)

So to verify, just use red high strength threadlocker?

Secondary, would using a Nord-Lock washer for this location be a good or bad idea? I'm not opposed to spending a few bucks to buy them if the experts here think it might be beneficial, as I'd really rather not have the bolt back out again.
 

Coug

Well-known member
Steel Soldiers Supporter
3,003
4,420
113
Location
Olympia/WA
So plugging the NSN for the thread sealant into PARTTARGET brought up a bunch of manufacturer part numbers, including Loctite 27121. Apparently it's the 271 but specifically the 10ml bottle with extra words for the specs on the label.
 
Top
AdBlock Detected

We get it, advertisements are annoying!

Sure, ad-blocking software does a great job at blocking ads, but it also blocks useful features of our website like our supporting vendors. Their ads help keep Steel Soldiers going. Please consider disabling your ad blockers for the site. Thanks!

I've Disabled AdBlock
No Thanks