• Steel Soldiers now has a few new forums, read more about it at: New Munitions Forums!

  • Microsoft MSN, Live, Hotmail, Outlook email users may not be receiving emails. We are working to resolve this issue. Please add support@steelsoldiers.com to your trusted contacts.

SEE/FLU419 accessories

Sgt Jiggins

Potato Peeler
Steel Soldiers Supporter
433
205
43
Location
Lynchburg, VA
Hey Speedwoble,

It's been a while on this thread, just curious how you're coming with all of your accessory projects? Because I'll keep buy what you're cranking out!

Just take my money already,
SJ/JD
 

kminer

New member
10
0
1
Location
Redding, CA
Please add me to the waiting list, as well.
Eyes fixated on the:

-Cab Gasket
-Stainless steel hose for the cross-over air line from the regulator to the air tank
 

Speedwoble

Well-known member
606
301
63
Location
New Holland, PA
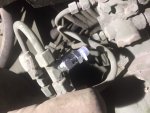
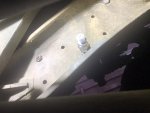
No update in a while. I printed some cab gaskets and sent them to a member to try. I'm now with some extra time on my hands due to Covid, so I thought I would get back to this. However currently I am locked out of access to the 3D printer that makes them, so I can't print my own to try!
I do have a spare stainless airline, so I will try installing the air line on my own truck to verify fitment. Then i can get more of those made.

I welded up the jig to speed up the process of making cab tilt brackets and I cranked out a large batch. I also made 8 pairs for the 406/416 unimogs. All of these are currently at the powdercoater to get coated.

Lastly I borrowed a 3D scanner and will be scanning some parts. Backhoe bucket and Ripper shank done. Next I will scan the loader bucket and try to come up with a model for the quicktach that may be a little cheaper and require less individual fab work. I plan to scan the front end of the mog for designing my 18K lb winch mount that will fit with the loader. I plan to scan the Loader attachment at the front of the frame and the backhoe attachment at the rear for future attachment design. Anything else I should scan while I have a moment? I was thinking about the Engine and engine cover so I could see how tight it is for a future turbo install. However, based on how slowly I get to these things, that may be a few decades.
 

Attachments

Last edited:

Speedwoble

Well-known member
606
301
63
Location
New Holland, PA
Today I 3D printed a bracket to go on the light switch to give me space for 3 switches for auxiliary lights. I currently have 2 rotating beacons and 2 floodlights. I need to study the wiring diagram to figure out where to pull power from, either tapped off the regular light switch, or a relay off of the circuit panel. These lights are both LED’s, so relatively low current, but I still need to measure it.

Then made a revised bracket for the low air horn/power port/USB charger with a hole for a mini switch. This way I can shut off the horn if I don’t need it, and hopefully remember to turn it back on.
 

Attachments

Pinsandpitons

Active member
162
54
28
Location
Central Washington
No update in a while. I printed some cab gaskets and sent them to a member to try. I'm now with some extra time on my hands due to Covid, so I thought I would get back to this. However currently I am locked out of access to the 3D printer that makes them, so I can't print my own to try!
I do have a spare stainless airline, so I will try installing the air line on my own truck to verify fitment. Then i can get more of those made.

I welded up the jig to speed up the process of making cab tilt brackets and I cranked out a large batch. I also made 8 pairs for the 406/416 unimogs. All of these are currently at the powdercoater to get coated.

Lastly I borrowed a 3D scanner and will be scanning some parts. Backhoe bucket and Ripper shank done. Next I will scan the loader bucket and try to come up with a model for the quicktach that may be a little cheaper and require less individual fab work. I plan to scan the front end of the mog for designing my 18K lb winch mount that will fit with the loader. I plan to scan the Loader attachment at the front of the frame and the backhoe attachment at the rear for future attachment design. Anything else I should scan while I have a moment? I was thinking about the Engine and engine cover so I could see how tight it is for a future turbo install. However, based on how slowly I get to these things, that may be a few decades.
That’s awesome sauce! I’ve always wanted to play with one of those scanners. +1 million for the quick-tach. Pull the trigger on that one.
 

419g

Member
40
18
8
Location
USA
No update in a while. I printed some cab gaskets and sent them to a member to try. I'm now with some extra time on my hands due to Covid, so I thought I would get back to this. However currently I am locked out of access to the 3D printer that makes them, so I can't print my own to try!
Looks cool! I have printed out some pla for my 51' Gm bus window hinges, plan on using greensand molds to cast them in aluminum.

Scanner you used for the bucket looks real nice. People been talking about a bucket attach 3 point?! I'd be interested!

I would also like to purchase a skid steer quick attach plate for my flu419, let me know thanks!
 

Speedwoble

Well-known member
606
301
63
Location
New Holland, PA
I got around to installing my SS air line prototype today and found it is much easier than expected. I need to make a slight tweak before ordering the next batch, but should have that done next week.

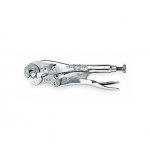
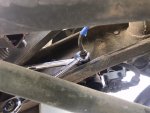
For removal you need 19mm(3/4”) & 22mm(7/8”) wrenches. I really like the vice grip V-Jaw for tubing.
18296F2E-D274-458D-B551-BA7AF453B5A9.jpeg
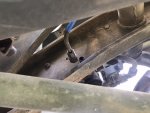
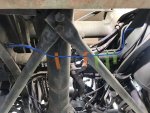
Start by deploying the backhoe and folding down the outriggers to take weight off the suspension to give plenty of room to work. Remove the zip ties (Green)and hose clamps(Orange)holding the line(blue)to the crossmember.
8452636D-7A52-4816-B06D-CA4061FCA71D.jpeg
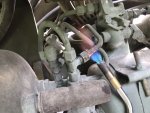
Use the 19&22 wrenches to loosen the fitting on the inside of the frame rail. In my case, I loosened the gland but to allow the adapter to rotate, then removed the adapter from the unloader fitting. You can remove the adapter as the new tube comes with a new adapter. The bulkhead going through the frame remains.
E01962AD-675A-44DC-BB71-CC514885731C.jpeg
6B9DDCCF-244F-4D34-ACCD-C2A0E509672E.jpeg
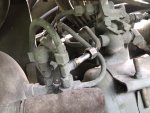
I find a little heat makes things easier by burning the paint so it can be wire brushed off and the nut is easier to turn. Remove the nut holding the tube to the “T” above the air tank
08DBB1B0-DAA3-4B0A-9D6A-FAD320CCEE8B.jpeg
120109B3-D952-402B-AD91-57E469DFE099.jpeg
With a little persuasion, the ends of the tube can be removed and slid out from underneath to the vehicle right side.
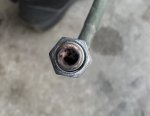
You can now inspect and see how dirty it is. This line was nearly closed by rust.
11C7D852-90C4-428A-99D0-8C8444E555B4.jpeg
Installation is the reverse of removal. Place adapters on first, then fish the line into place, leaving caps on until ready to connect. Tweak tubing by bending if required so the tube fits onto the connections without binding. I put a little anti seize on the threads, but avoided the sealing surface. The sealing surface is metal to metal, so it must not be nicked, damaged, or contaminated.
19812EB2-A19D-4B23-962A-8AECA87AA9B8.jpeg
6864B7D0-0546-43AC-8397-0CCBA0A416FF.jpeg
Start up the engine and check for leaks. I sprayed it down with a soapy water mixture and saw no bubbles. Replace Zip Ties and you’re done!
 
Last edited:

peakbagger

Well-known member
734
360
63
Location
northern nh
The tee you are heating up and attaching to on the air side end is the one that snapped on me despite some care (I did not heat it ). That tee is custom as the connections are different on one of the runs. I could not find a replacement through several suppliers and had to make up something that works out of couple of fittings. Moral of the story, heat the connection prior to removal attempts and possibly consider letting it cool and soaking with penetrant.
 

Speedwoble

Well-known member
606
301
63
Location
New Holland, PA
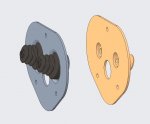
Update on 2 of the projects. I test fit the 3/8" stainless steel line and verified it fit and did not leak. Then I became aware of another tubing mfg around me that could make a tube out of 10mm, the same as original. I contacted them to get a prototype, but it is more than double the cost of the other supplier, so I am going to pursue the original design shown in post #21. I will get a first production run of 10 stainless cross-over pipes made.

For the Cab gasket, I had originally duplicated the function of the original gasket via flexible 3D print. However I shipped the prototypes to a SS member who hasn't installed them yet:grd: ,
In the mean time, I had a better idea. I am going to make the main portion in a firmer urethane and the softer bellows will use a pair of VW master cylinder bellows so they can be replaced in the future.

cab gasket comparison.JPG
 

glcaines

Well-known member
3,912
2,586
113
Location
Hiawassee, Georgia
Update on 2 of the projects. I test fit the 3/8" stainless steel line and verified it fit and did not leak. Then I became aware of another tubing mfg around me that could make a tube out of 10mm, the same as original. I contacted them to get a prototype, but it is more than double the cost of the other supplier, so I am going to pursue the original design shown in post #21. I will get a first production run of 10 stainless cross-over pipes made.

For the Cab gasket, I had originally duplicated the function of the original gasket via flexible 3D print. However I shipped the prototypes to a SS member who hasn't installed them yet:grd: ,
In the mean time, I had a better idea. I am going to make the main portion in a firmer urethane and the softer bellows will use a pair of VW master cylinder bellows so they can be replaced in the future.

View attachment 809475
I think you should do very well with these. I just asked for a quotation from the original manufacturer. They have 3 in stock at $750.00 each! It's no wonder our taxes are so high.
 

glcaines

Well-known member
3,912
2,586
113
Location
Hiawassee, Georgia
For the Cab gasket, I had originally duplicated the function of the original gasket via flexible 3D print. However I shipped the prototypes to a SS member who hasn't installed them yet.
In the mean time, I had a better idea. I am going to make the main portion in a firmer urethane and the softer bellows will use a pair of VW master cylinder bellows so they can be replaced in the future.

View attachment 809475
I am interested in one of your cab gaskets when ready. However, how will the firmer urethane fit over the large third hole? There are brackets on both ends of the large tube.
 
Top
AdBlock Detected

We get it, advertisements are annoying!

Sure, ad-blocking software does a great job at blocking ads, but it also blocks useful features of our website like our supporting vendors. Their ads help keep Steel Soldiers going. Please consider disabling your ad blockers for the site. Thanks!

I've Disabled AdBlock
No Thanks