• Steel Soldiers now has a few new forums, read more about it at: New Munitions Forums!

  • Microsoft MSN, Live, Hotmail, Outlook email users may not be receiving emails. We are working to resolve this issue. Please add support@steelsoldiers.com to your trusted contacts.

Seems like this is turning into a build thread.

CARC686

Well-known member
273
484
63
Location
Las Cruces, New Mexico
Since it's impossible to find information on this bumper other than a few pictures, and the instructions that come with it are boilerplate useless:

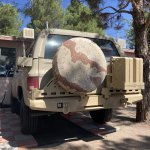
You'll strip everything off the end of the frame. The bumper has two brackets that slide in alongside the frame on the outboard sides. We put the brackets on the bumper finger tight and marked every extant hole in the frame that was inside the gussets of the brackets once we had approximated the mounting location by hanging the bumper from an engine hoist. Drilled five 1/2" holes in each bracket, eight of which took double washered grade 8 zinc plated bolts with nylock nuts, and the remaining two took the OE tailgate spring bolts with new washers and nylock nuts. The brackets are horizontally slotted and the bumper is vertically slotted for alignment. Gives plenty of leeway for trucks that have had several decades to get out of shape. One thing to note is that the brackets block about 2/3 of the wiring harness pass-throughs in the frame. Rather than trying to reroute the wires, they should be kept in the same position. The sleeve will be pinched, but the wires inside will not be affected, as the sleeve is much larger in diameter than it needs to be. The NATO trailer plug has two quick disconnects. No wiring needs to be altered unless you start adding lights.
 

CARC686

Well-known member
273
484
63
Location
Las Cruces, New Mexico
Used a ball joint kit to press the CUCV shackle pins into the bumper this morning. Seems like that shouldn't have been necessary, but on the bright side, they won't disappear in a parking lot. It looks like they may cast a shadow from where they interfere with the lamp location. Mounted the lamp properly with thread locker. Considered wiring the LED into the previous bumper lamp harness, but I honestly have no idea how they operate. Never used them. Are they part of the blackout system? Should probably just tap them into my reverse lights, but then I'd have to actually troubleshoot them, because they are nonoperational at present.

Shackles.jpg
 

WWRD99

Well-known member
Steel Soldiers Supporter
1,117
1,715
113
Location
York Pa
That's a really nice looking bumper!! I will look them up and see if they do a kit style that needs welded together. Be nice to get it without the d ring mounts could pop holes in it and use the stock ones, but that's just me. Glad you're getting it done. The towing plug you disconnected has two plugs...they do have blackout and regular light controls. Each is 3 prong if I remember right. To get your reverse lights working I'd back your blazer up to the wall you park in, at night, then with the key on engine off parking brake applied, grab the park neutral switch at the bottom of the steering column and move it left or right till they turn on...pop it in reverse obviously to do this. You can see them by yourself at night. Once they turn on move the shifter all over then back to reverse and see if they stay on...most can wiggle the shifter and they will flash...you want it so they don't flash but stay on. Can take a few tries to get them to stay on. Once you get that pop a test light in those plugs in the back and see which one turns on the reverse light...if it does have that you'll know in a minute. Total adjustment time is usually 10 minutes. Nice thing getting that adjusted is now it will start in neutral. If they don't turn on at all then dive into bulbs but you seem on top of things so I am assuming you've already done that.
 

CARC686

Well-known member
273
484
63
Location
Las Cruces, New Mexico
The mounting brackets for this bumper completely dominate the available space on the end of the frame, which precludes running the OEM shackles or pintle mount. You wouldn't be able to sandwich the bumper mounts between the OE mounting plates and the frame because they are gusseted. If the end goal is to preserve as much of the original equipment as possible while adding swing mounts, you would be better served whipping something up from scratch with cardboard aided design. This one is 3/16" plate. 1/4" could really take a beating at the expense of even more weight. Depends upon what you're doing with it.

Now that said, you can reach out to customer service at Chassis Unlimited to see if they'd be willing to work with you on something. britny@chassisunlimited.com was my contact. They seem to do bulk production runs, so I don't know if they have the inclination to do custom orders, but it doesn't hurt to ask.

I had planned on installing a relay triggered by the reverse switch to run the flood light, but setting it up to plug into the extant trailer harness definitely sounds more expedient. Also, I've been removing odd wires, not adding them, for a year now. Best not to reverse that habit. Thank you for sharing your knowledge on the neutral switch. Spent a lot of my career working on newer vehicles and never knew a NPS to be adjustable.

One more thing: This bumper stands four feet behind the rear axle and weighs about 300 pounds loaded, plus the load generates leverage due to being an upright at the extremity of the frame. I'm not a mathmagician, so somebody with a chalkboard will have figure those physics. What I've noticed this week is that the rear end wants to keep going once it's picked up side load. In other words, keep both hands on the wheel while turning at speed. I believe this handling characteristic can be corrected with a rear sway bar, obviously with quick disconnects. Looking into it, the aftermarket hasn't impressed me. Hoping to find an OEM GM unit. Something probably exists given most of the stuff under these trucks interchanges from 1963 to 1991.
 
Last edited:

CARC686

Well-known member
273
484
63
Location
Las Cruces, New Mexico
After a lot of hunting, the only OEM squarebody rear sway bar I can find was on the C30, which is a lot more likely to directly bolt onto any CUCV except the M1009.

Anyway, there's a pile of CUCV odds and ends on eBay right now that includes the unobtanium fuel cap if anybody needs one badly. It's listed as:

"1983-87 Military M1009/CUCV Chevrolet K5 Blazer Parts Lot OEM/USED"
 

WWRD99

Well-known member
Steel Soldiers Supporter
1,117
1,715
113
Location
York Pa
Curious what your rear ride height is now. I had to do rear springs on one of mine after adding about 500 lbs to the rear. The other one has no top and bounces like a basketball going down the road. The one I put springs on sits right at 36 inches ground to wheel well. It rides perfectly with no understeer now...was a little scary before. The new springs are 5 leaf vs the 4 stock. I put in new shackles too. Food for thought.


Sent from my SM-S906U using Tapatalk
 

CARC686

Well-known member
273
484
63
Location
Las Cruces, New Mexico
Measures 35.5" on mine. All suspension new with poly except the shackle bushings. The springs were a little hard, but the rear rolls over speed bumps like a Cadillac now. Will have to address the high speed body roll though. If the weight had caused excessive droop, I had a backup plan to install an ORD shackle flip, but the height feels perfect as is for clearance and cargo access.
 

WWRD99

Well-known member
Steel Soldiers Supporter
1,117
1,715
113
Location
York Pa
Oh ok didn't know you put new springs on already. If it's real bad I'd do air bags and call it quits.

Sent from my SM-S906U using Tapatalk
 

CARC686

Well-known member
273
484
63
Location
Las Cruces, New Mexico
Since I put this bumper on, strangers have started trying to buy my truck way more often than before. I guess that's cool if you like attention. I do my level best to avoid people in general. The VA says it's because I'm nuts. They're more tactful than that, but that's about the size of it. Today some guy walked around the building asking my neighbors if "the yellow Suburban" was for sale. I should just put a sign on it that says "$30k FIRM" to get people to leave me alone. Only trouble is I did that with a motorcycle once. Somebody bought it and I regretted it for a decade.
 

Mullaney

Well-known member
Steel Soldiers Supporter
Supporting Vendor
7,716
19,766
113
Location
Charlotte NC
Since I put this bumper on, strangers have started trying to buy my truck way more often than before. I guess that's cool if you like attention. I do my level best to avoid people in general. The VA says it's because I'm nuts. They're more tactful than that, but that's about the size of it. Today some guy walked around the building asking my neighbors if "the yellow Suburban" was for sale. I should just put a sign on it that says "$30k FIRM" to get people to leave me alone. Only trouble is I did that with a motorcycle once. Somebody bought it and I regretted it for a decade.
.
Yep. You said it.
I've done it myself before...
 

CARC686

Well-known member
273
484
63
Location
Las Cruces, New Mexico
That's the trouble, isn't it? I don't want to get rid of the truck and I don't want a bunch of cash either, but if somebody decides they want it that badly, I get both things I didn't want.

I couldn't rebuild that motorcycle if I wanted to. It was covered in parts made by machinists and specialists, half of whom are no longer with us. New old stock that doesn't turn up much. Some of the parts I made out of scrap from old trucks. Headlight was a fog lamp off a '60s Peterbilt. Things I found in the garbage. The shift knob was the ball hitch off the truck I drove when I was stationed in San Diego. The guy that bought the bike couldn't even ride it. He mostly just wanted to look at it. He paid a lot more than it was worth and I have no idea what I spent the money on. It's just gone.
 
Last edited:

WWRD99

Well-known member
Steel Soldiers Supporter
1,117
1,715
113
Location
York Pa
I can't see running airbags without mag blocks to throw rooster tails when I lay frame on the freeway, but this is a high fire risk area, so I'd better just install a quick disconnect rear sway bar instead.

View attachment 931890
Lol use the air bags as a helper. Install them with the springs. There's a kit for it out there. Mounts on the axle up to the frame. Be easier to set the control with the amount of pressure put in them than a sway bar. Can let the air out on the trail and air them back up off.
I got some bike friends that put magnesium blocks on the back of their fenders that light up when they do wheelies...pretty wild. People trying to buy it won't stop...happens almost every time I drive one of mine.

Sent from my SM-S906U using Tapatalk
 

CARC686

Well-known member
273
484
63
Location
Las Cruces, New Mexico
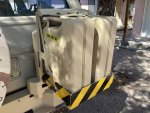
I had thought to fill and paint the plasma cut branding in the carrier, but then remembered I'm lazy. Ten feet of 2" conspicuity tape was exactly the right amount. Red and white felt too modern. The old school reflective stuff would have been too stretchy. Diamond reflective was the ticket. Not bad for $8. Unfortunately it's backwards, but there are only three kinds of people who know that. Me, ambulance chasers, and you by the end of this sentence.

Carrier.jpg
 

CARC686

Well-known member
273
484
63
Location
Las Cruces, New Mexico
My oil trap had a solid three fluid ounces of ATF sitting on it, so I started hunting for where it was coming from. Got distracted by eight gauge red and black wires I found wadded up under the front battery tray. Followed them down the firewall and they disappeared into a loom. Separated them out, followed them down the frame, and fifteen feet later, the other end wasn't attached to anything either. There's already a 24v hot rail in the back. Must've needed 12v for something. If this was any other vehicle, I'd have assumed it was for a stereo amplifier. This being a CUCV, I've no idea.

Anyway, I was having such a hard time finding these things, I was getting ready to source some material and make them myself. Trouble was I didn't know the standard terminology, so all I was finding were steel inner fenders. If your fender flaps are as dry rotten as mine, LMC has them under "Body Components / Body Panels / Front Splash Shields". They're inexpensive.

1727644671541.png
 

cucvrus

Well-known member
11,473
10,432
113
Location
Jonestown Pennsylvania
My oil trap had a solid three fluid ounces of ATF sitting on it, so I started hunting for where it was coming from. Got distracted by eight gauge red and black wires I found wadded up under the front battery tray. Followed them down the firewall and they disappeared into a loom. Separated them out, followed them down the frame, and fifteen feet later, the other end wasn't attached to anything either. There's already a 24v hot rail in the back. Must've needed 12v for something. If this was any other vehicle, I'd have assumed it was for a stereo amplifier. This being a CUCV, I've no idea.

Anyway, I was having such a hard time finding these things, I was getting ready to source some material and make them myself. Trouble was I didn't know the standard terminology, so all I was finding were steel inner fenders. If your fender flaps are as dry rotten as mine, LMC has them under "Body Components / Body Panels / Front Splash Shields". They're inexpensive.

View attachment 932582
Are you talking the cables that ran back under the passenger's side rocker and to the radio rack?
 

CARC686

Well-known member
273
484
63
Location
Las Cruces, New Mexico
Are you talking the cables that ran back under the passenger's side rocker and to the radio rack?
The terminal rails on the bulkhead behind the passenger seat are untouched. They have much larger cables attaching them to the 24v terminals on the firewall. These mystery wires were zip tied to those cables.
 
Top