• Steel Soldiers now has a few new forums, read more about it at: New Munitions Forums!

  • Microsoft MSN, Live, Hotmail, Outlook email users may not be receiving emails. We are working to resolve this issue. Please add support@steelsoldiers.com to your trusted contacts.

Start of my crane truck project

Speedwoble

Well-known member
606
301
63
Location
New Holland, PA
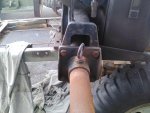
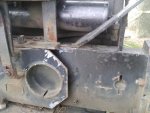
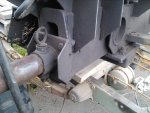
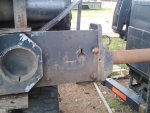
Is it possible to snap me a couple of quick pictures of your outriggers and where they go into the crane base and outrigger tube? Thanks!
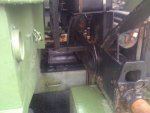
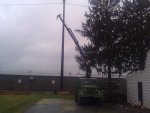
Attached. In the first and third picture, you can see cut-outs on the front and top of the crane frame which I *assume* would be for a version of the crane with powered outriggers.
 

Attachments

spicergear

New member
2,307
27
0
Location
Millerstown, PA
Thanks for the pics!!! [thumbzup] Mine has the square 4 bolt backing plate but nothing else outboard from it. I'm at the crossroad where I either make up something like the stock set up or cut it all out and put a rectangular outrigger arm in the tube like it would be if it were originally truck mounted, not roller mounted.
 

Speedwoble

Well-known member
606
301
63
Location
New Holland, PA
Made a lot of progress this weekend. I started with 318lbs of 2x4 1/4"wall tubing and welded up a framework bolted to the M105 chassis. Then I mounted the 070A crane (with the 17 ft reach) to the frame. I was going to bolt the crane to the the frame using some grade 8 7/8" all thread. But that would have ended up forcing the crane too far forward to clear the tires. I wanted to get the crane as close to the axle as possible with a little bias to the front. However, mounting the crane straight to the frame would have left too little clearance to the tires. So, I decided to leave the 3" rectangular tubing which had been mounted to the trailer the crane came from, as a spacer to lift the crane up higher. With the extra clearance, I could slide the crane back and still have tire clearance. I welded that tube onto the top of the frame I had made with some 1/8" 7014 rod. The overhead welds were a pain, I can tell I need more practice.

There are some tools you are thankful to have. I used two of them today. The first is my portable bandsaw. The second was a 7" angle grinder with a metal cut-off disc on it. The crane had some extraneous brackets welded on it and the angle grinder made short work of removing them.

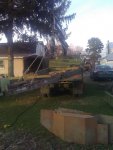
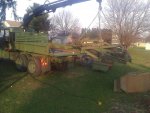
Here are two pictures of the crane after installation. I was finally able to stretch it out to its full reach. Now, the m105 frame is not sufficient to allow the crane to lift its rated capacity of 3000 lbs at this distance, there is simply not enough mass there. However, I am hopeful that it will easily be able to pick up and object beside the deuce and lift it into the deuce bed. My set-up procedure is to use a high-lift jack to raise the frame up slightly to get the outriggers extended on each side. In operation, the weight is supported by the outriggers and front stand.

Pictures coming later this week as I use the crane to load the M105 bed into the deuce. I sold it to a guy who wants to modify it to put on a powerwagon.
 

Attachments

Last edited:

spicergear

New member
2,307
27
0
Location
Millerstown, PA
If you had an X frame and four outriggers the trailer would only have to support the trasport weight of the crane and none of the big weight implied by a load 17' out. A lot of Mogs have this when a big crane is mounted...they're just a powered wagon for crane mobility.

BTW, that trailer is a good idea...
 

indy4x4fab

Banned
1,711
41
0
Location
indy, indiana

cajun666

New member
228
3
0
Location
Larose, Louisiana
I don't think any engine loves to idle. There is not sufficient cylinder pressure to seat the rings, it doesn't get warm enough to prevent condensation in the oil, many problems.
I will get better fuel consumption from a small engine running at rated load than the big one running at an idle.
I am thinking of adding remote outlets so I could have a hydraulic winch off the same power unit,
The biggest benefit in my book is this is all self contained, I don't have to add a tank, plumbing, or pto shaft to the truck. All I have to do is reinforce the frame and bolt it on.
We idle the engine on the ship for days with no problems.
 

Speedwoble

Well-known member
606
301
63
Location
New Holland, PA
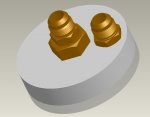
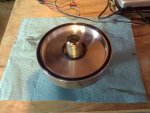
Well, Finally returning to the oil filter adapter portion of this project. I have been juggling files between two computers trying to get this simple thing mocked up in CAD and I finally got it done.
Oil_Filter_adapter.JPG

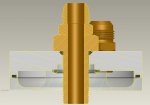
The image below is a cross-section showing the o-ring arrangement and the hollow center bolt through which clean oil will flow. I am using JIC(Taper) and SAE(O-ring boss) fittings. No pipe thread here. The transparent portion at the bottom is a simplification of the deuce oil filter mount that I am adapting to.
Cross-section.jpg
 

Speedwoble

Well-known member
606
301
63
Location
New Holland, PA
Back to this project. Ended up selling the crane on the m105 trailer. It was simply not stable enough to use. I started cutting down the bed on the deuce today. I need to move the air tanks over a couple of inches for clearance to bolt down the crane. Clearance to the cab is going to be tight, but do-able.

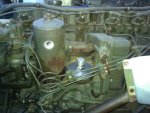
Also got the oil filter adapters machined. I need to get the holes tapped for the dirty oil to exit. Clean oil will return through the previously seen bulkhead fitting.
 

Attachments

Speedwoble

Well-known member
606
301
63
Location
New Holland, PA
No turning back now...Well, not easily.
I took the opportunity over the weekend to cut 3 ft out of the bed. Now I need to move the air tanks to the right about 3 inches, then fab up the brackets for the crane to mount. I used the 5 ton gantry crane at work, and it sure makes things easy.
I need to dig through old posts to see how guys have replumbed their tanks. It has copper on it now and I hope I can get enough slack to shift it three inches, but it looks like the supply line to the tanks will not be long enough.
 

Attachments

Speedwoble

Well-known member
606
301
63
Location
New Holland, PA
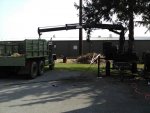
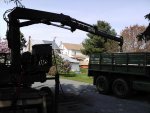
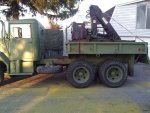
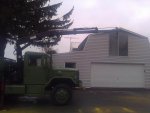
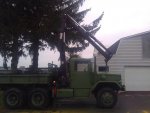
And ta-da, the crane is mounted and operational. I really meant to take more pictures, but I was always too busy doing things to step back and take a photo. I had to move the air tanks inboard 3 inches for clearance to get the mounting bolts through. I avoided lowering them for driveshaft clearance. As a result I got some 1/2" plate steel laser cut to sit on top of the frame to distribute the load and provide additional clearance to the air tanks. That ended up not being enough, so I got a second plate cut from 1/4" and stacked the two. I biased the crane slightly to the RH side by about 1.5 inches because a bolt underneath the crane wanted to hit the fitting above the air tank still. The fore/aft placement was dictated by the crossmember ahead of the airtanks. I would have liked to have it back just a little further to reduce the risk of hitting the cab when moving it to storage. I had to slide the spare tire holder backwards 1 inch and notch the rear fuel tank mount. 7/8" grade 8 threaded rod was used to bolt the crane to the frame with 5/8" HS steel (laser cut) used to attach to the bottom side of the frame. I expected the fabrication to be much more quality time with a hole saw, but I found out the Laser at work can cut up to 3/4" steel. Laser cut parts are very nice!
WP_000331.jpgWP_000330.jpg
The truck now weighs 16885 lbs according to the scale at work, with ~3400lbs on each front tire and ~5000 on the rear duals.

WP_000332.jpgWP_000329.jpgWP_000328.jpgWP_000327.jpg
 

Gear Head

New member
11
0
1
Location
Christiana, TN
Nice! I'm jealous. I'm sitting here thinking of all the things I could do with that setup right now...

Did you cut and section the bed keeping the tailgate in the same spot or did you move the bed back? I saw your sling guide is still between the tandems but can't see the back of the bed.
 

Speedwoble

Well-known member
606
301
63
Location
New Holland, PA
If you look at the top picture on this page, you can see the cut line. I removed material from the front section of the bed, keeping the back fixed. This resulted in the least rework.
 

Speedwoble

Well-known member
606
301
63
Location
New Holland, PA
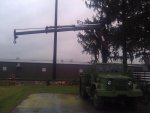
Used it this weekend to load and unload the M200A1 frame and parts to haul to scrap. I need to get better outriggers as I find I don't like messing with the manual ones. As a result, I tend to do most of my loads in and out of the back, which reduces my capacity.
WP_000337.jpgWP_000336.jpg

At the scrap yard, I started to unload the frame from the side and I could really see the truck start rocking to the side. I ended up dropping it out the back and letting the fork operator drag it away.

For now, I need to get the oil filters changed over to my remote system. Also finish some cosmetic and get the heater installed in the cab. The project is far from done, but is usable.
 
Last edited:

Speedwoble

Well-known member
606
301
63
Location
New Holland, PA
Got a question about how I attached the Hiab to my frame, so I decided I would upload some images of the CAD model.
Here is the overall lay-out of the crane chassis attached to the framerails. Framerails are in orange/pink, spacers in blue, crane chassis in black.
Lay-out.jpg
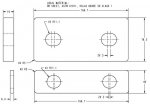
And here are the brackets I had made. The thin one mounts on top of the crane base. The thicker one mounts below the frame. Measurements are in mm, the international standard.
CRANE_BRACKETS.jpg
 
Top