• Steel Soldiers now has a few new forums, read more about it at: New Munitions Forums!

  • Microsoft MSN, Live, Hotmail, Outlook email users may not be receiving emails. We are working to resolve this issue. Please add support@steelsoldiers.com to your trusted contacts.

Successful Deuce Recovery

silverstate55

Unemployable
2,075
872
113
Location
UT
warren, you already have a left and right turn wire at the rear, problem is it is also brake light wire when the turn sig is off. simple solution is to cut the wire at the brake light switch, not the power one, the other one, and run it to the rear. then you have a dedicated brake light circuit.

tom
Thank you Tom, that is exactly what I've been planning on doing: tapping into wires #460 & 461, and running them to the rear side lights. I've been poring over the schematics and your tip for the brake wire is exactly what I've been looking for. Thank you!!
 
Last edited:

silverstate55

Unemployable
2,075
872
113
Location
UT
Clint, thank you! I plan on doing quite a few trips to California & back, and want to improve my visibility (as well as non-commercial compliance...just in case).

You've put some amazing kits & conversions together for these trucks and others, and provided a LOT of useful advice. For whatever reason, whenever I'm logged in I can only post 10 photos in a single THREAD, I keep getting the "You have exceeded the maximum of 10 photos per post" warning whenever I try to split them into different posts. I have to log off, clear out all cookies & history, then log back in and post more per thread. I also get timed out really fast, seems like less than 1 minute.

Also, whenever I post photos as attachments like before (using Quick Reply), they won't show for me even after logging off & clearing everything...they only show as "Attachment 38009 Attachment XXXXX et.al." as TEXT, not photos. So I have to Edit Post and Go Advanced to show the photos inline, then delete the text-showing attachments. Weird.
 

silverstate55

Unemployable
2,075
872
113
Location
UT
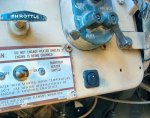
Been working on LOTS of little things in regards to the horn; I replaced the horn button, the horn started working again, but when I make turns the horn engages! How embarrassing. I've been tightening & wrapping parts in electrical tape all through the steering column, but now the horn doesn't work at all. I guess I need to remove the internal gear/contact and see what the heck is going on...I've been contorted underneath the dash for several hours already, if this doesn't work then I guess I might need to bypass the steering column altogether. I've read through the 5-ton TMs trying to figure out what the heck is making contact to engage the horn on turns, but so far haven't found it. I guess I'll keep plugging away.

I also replaced the fuel gauge, but now the in-tank level gauge isn't working. Dangit!

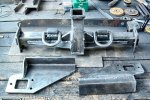
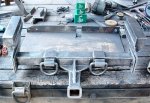
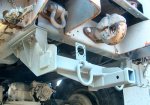
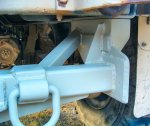
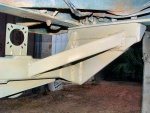
I've also been working on modifying a receiver hitch I was given free from a coworker; it's a little U-Haul one but it will work. I started by grinding away the welds holding the main tube to the side frame plates, as it needed to be narrowed. Once everything was apart, I narrowed the main crosstube by cutting off 2-inches of square tubing from each side. Then I removed the rust & powdercoating, so I could add triangular gusset reinforcements on the receiver tube sides and top (3 triangles total). I also added a couple of extra angle steel reinforcements and other miscellaneous reinforcements. I tack-welded the side plates back onto the crosstube, then started working on the side frame mounts. I cut the rusty, bent stock tabs off and welded in new 2-1/4" angle steel in place of the old tabs. I used 3/8" steel plate as a boilerplate reinforcement, then boxed one end of each. It's now ready to be bolted into place and have the final reinforcements welded in, then painted. I have the trailer receptacles and relays ready to go, once the receiver is in place and finished.

20121215_Deuce_01.jpg 20121215_Deuce_01a.jpg 20121215_Deuce_01b.jpg 20121215_Deuce_01c.jpg
20121215_Deuce_01d.jpg 20121215_Deuce_01e.jpg 20121215_Deuce_01f.jpg 20121215_Deuce_01g.jpg

20121215_Deuce_01h.jpg
 
Last edited:

silverstate55

Unemployable
2,075
872
113
Location
UT
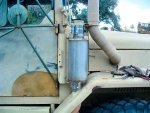
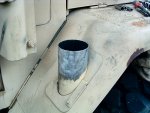
I also got tired of wearing hearing protection while driving, so I ordered the Donaldson M070028 muffler & 2 clamps for it. I ordered the muffler from Filter Parts Pro in Arizona, and I am VERY happy with their service. I will continue to order parts from them when I can.

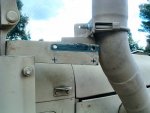
I didn't realize that the exhaust pipe will fit inside the muffler tubing; the muffler simply slides down over the exhaust pipe. I could have cut it a bit taller, but my mistake. It ended up working out quite well actually, as all I had to do was drill 2 new holes in the upper exhaust support bracket, and it didn't interfere with my high-rise air intake at all. The clamps make installation a snap, and they seal everything up quite well. And WOW what a great improvement!

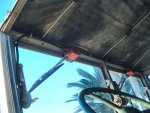
Now I don't need ear protection at all, and my wife & I can actually carry on a normal conversation while driving, even with the soft top. I'm really anxious to get a hard top now, and fully insulate the cab to further reduce noise inside. But that Donaldson muffler makes a tremendous positive difference in noise reduction, I like it much better. It's one of my favorite upgrades (right behind the power steering & new seats). WOW! For the muffler, 2 clamps, and shipping, I paid just over $80 total. And it was well-spent, I highly recommend this upgrade. I haven't found any downsides to this at all yet, and doubt that I will.

Much better!!
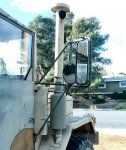
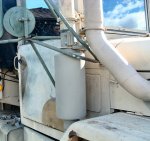
20121215_Deuce_02.jpg 20121215_Deuce_02a.jpg 20121215_Deuce_02b.jpg 20121215_Deuce_02c.jpg

20121215_Deuce_02d.jpg 20121215_Deuce_02e.jpg

I sanded the muffler & clamps thoroughly with 400-grit Wet-and-Dry, then cleaned the surfaces to be painted. I sprayed them all with Hi-Temp paint, then finished with good old Rustoleum Khaki flat. I've driven it several times now, and the exhaust got good and hot, but the paint didn't seem to mind at all. I still have to touch up a few spots on the exhaust pipe & brackets to match.

I did have to bend both mirror support arms to clear the muffler & mounting bracket. I don't have a tubing bender yet, so I had to use my vise...it's ugly but works for now. Someday I'll remove them again and clean them up, as well as de-rust and paint to match. I'm just happy to have the muffler & mirrors in place.

I intend to reinstall the mesh shield to protect against unintended contact with a hot muffler, but I need to fabricate some new mounts as the shield will sit out farther from the muffler than it used to with the straight pipe exhaust.
 
Last edited:

silverstate55

Unemployable
2,075
872
113
Location
UT
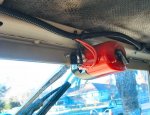
Been working on lots of little things lately; mainly rewiring things that need it. I finally finished my electric wipers conversion.

I couldn't afford the prices of the very few A3 electric wiper assemblies that I found available, and I didn't have the time to spend fabricating a replica of an A3 setup. So, I purchased 2 24-volt wiper motors (made by New Star) from Ted's Trucks on eBay. They arrived with no instructions nor documentation at all, and I spent a considerable amount of time researching how best to install these motors.

I couldn't find anything at all, other than A3 TM schematics, and as I didn't want to replicate that style of linkage setup, I simply bolted both motors into the stock Deuce windshield holes. These New Star motors only used 1 of the 2 machine-screw holes to mount the motor, so I used a machine screw with an O-ring on the outside to seal the unused hole. I mounted them in various ways, but couldn't find anything other than the way I have them mounted, that would make them fit appropriately. I'm sure that there's a better way, so hopefully we'll be able to find out from my mistakes.

I used Wire #27 for the gauges to power the wipers, as they don't draw that much current when in use. I ran the wires through a simple SPST switch that fit into the stock wiper switch hole in the dash. The wiper motors list the three screws as "+", "-", and "S". I assumed that the "S" screw terminal was for a switch to be wired in, but no matter how I wired these motors, I found that there was a direct connection (or short) between the negative and "S" (switch?) terminals, so I used those as grounds and wired in a positive (red wires) via the switch. When using the dash-mounted electrical switch, the wipers will NOT return to their original state but simply stop where they were when the switch was thrown, whereas when you use the motor-mounted toggle switch, the wipers will return to their resting/starting position. I couldn't find a wiring setup that would allow this with the switch. Oh well.

I don't like how they come to rest in the driver's field of view...however, I could always cut them off while out of my field of view too...just didn't think to do it last time I was driving.

20121229_Deuce_01.jpg 20121229_Deuce_01a.jpg 20121229_Deuce_01b.jpg 20121229_Deuce_01c.jpg
 

silverstate55

Unemployable
2,075
872
113
Location
UT
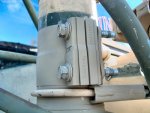
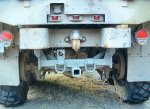
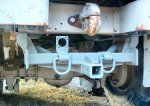
FINALLY finished installing my custom receiver hitch! I bolted it in place using 10 (5 per side) Grade-8 1/2-inch bolts, with large plate washers inside the frame to help distribute the load. I removed both pairs of rivets holding the rear crossmember bottom to each frame rail, and drilled these out to accept the 1/2-inch bolts. I installed the half-finished hitch and set everything up to be tack-welded, and final welding was done while the hitch was bolted into place to avoid any errors. I used 1-1/2" square tubing as the rear lateral supports and 1/4" flat plate for the triangular lateral supports.

Now it's ready for relays & trailer wiring. I picked up a trailer brake control unit on sale for a great price, so I'll use a relay to trigger that for 12-volt operation.

20130105_Deuce_01_500px.jpg 20130105_Deuce_01a_500px.jpg 20130105_Deuce_01b_500px.jpg 20130105_Deuce_01c_500px.jpg

20130105_Deuce_01d_500px.jpg
 

DeucesWild11

Active member
1,265
12
38
Location
Putnam County, NY
Oh my where do I begin.. I started on this thread looking at a locking gas cap and then just kept going. Well done!!! You have tackled most of what I want/dream to do to my deuce, bucket seats, snorkel (although mine ram air), and to top it off the same kind of receiver hitch I was planning on bolting/welding on. Also your WMO filtration system looks great!! What a great thread, thank you so much for posting for all of us to drool over.
 

m-35tom

Well-known member
Supporting Vendor
3,021
222
63
Location
eldersburg maryland
warren, i am curious about what you said regarding the front brakes. if the rear were applied, the front would be equally applied also. make sure the vent line from the air pack is not damaged or restricted. it runs up to just behind the air filter on the firewall. also the problem with the airpack is caused by the seals in the small air regulator on the left side. you can take it off while it is in the truck and replace the seals.

tom
 

glj

Banned
78
1
0
Location
Dammeron Valley, UT
What is the height of your trailer bed? I have a couple military tractors but have not yet found a trailer. Am concerned that I not be top heavy if I need to recover my Deuce or M923 5 ton if either breaks down on an expedition (or convoy, if you wish). I apologize if this question has already been addressed. This is a long thread.

Regards,

Gary
 
Top
AdBlock Detected

We get it, advertisements are annoying!

Sure, ad-blocking software does a great job at blocking ads, but it also blocks useful features of our website like our supporting vendors. Their ads help keep Steel Soldiers going. Please consider disabling your ad blockers for the site. Thanks!

I've Disabled AdBlock
No Thanks