• Steel Soldiers now has a few new forums, read more about it at: New Munitions Forums!

  • Microsoft MSN, Live, Hotmail, Outlook email users may not be receiving emails. We are working to resolve this issue. Please add support@steelsoldiers.com to your trusted contacts.

Survival 109 build

Another Ahab

Well-known member
17,989
4,532
113
Location
Alexandria, VA
I used to work as an Aircraft Inspector, and even the most durable bolts, manufactured from UN-obtainium fail, due to age, stress, and intergranular inconsitencies.
I used to work for a guy who was a door gunner on a Huey during the Vietnam War, and he talked about the "Jesus Nut" that held the rotor blades to the drive shaft.

He mentioned that the metallurgical stresses on that piece of hardware were close to extreme, and it was occasionally subject to failure. And when it failed the comment out of anyone's mouth on-board was pretty predictable I guess.
 

OldDuke6

Member
43
1
6
Location
Tahlequah, Ok.
To the trans shaft, and yes.

Still the best way to auto rotate unintentionally.

We always said it was due to budget cuts. They didn't want to pay for the fuel for decent.. So.. The Jesus nut was invented.
 

daytonatrbo

Member
320
3
18
Location
Tricities, TN
The moment on the mounting hardware is fairly small due to the fact the cable winds on the bottom of the spool. It also doesn't change much as you go above or below horizontal with the line.

The winch manufacturer likely chose the mounting hardware size (as indicated by the holes) based on the performance of a bolt less than grade 8. And even then , they would use at least 3x or 5x factor of safety to account for fatigue stress and stupid people. (Or at least, the name brand winch they reverse engineered would have done all this design work).

If anything the grade 8 hardware will be the last thing to fail as the inferior castings on the winch exhibit sudden crack propagation due to porosity and poor fit and finish. The A36 steel that the plate is likely made out of should have plenty of strength in this application.

In hoisting and rigging, ASME typically requires that in the event of a severe overload, the load hook gently deforms to indicate an issue before anything suddenly breaks. This is true of lifting devices. I'm not as familiar with winching devices, but I've done engineering work for a company that builds hoists in the US. The mounting hardware is typically the last thing to fail and the most "overbuilt".


I say all this not to undermine your point, but to say that QJ's application is likely fine for most uses. If he were up upgrade his winch, then I would be concerned.

Even still, over time he may see just enough flex in that plate for his paint job to start spider cracking. Some additional steel to stiffen the plate and reinforce its connection to the frame would be beneficial for the service life of the mount.
 

daytonatrbo

Member
320
3
18
Location
Tricities, TN
And I would definitely advocate to err on the side of caution, especially with anything home made.

If if the winch flies off its mount tomorrow and hurts someone, I'm just some a-hole on the Internet. Without my PE, you can't even sue me for bad advice. ��
 

QUADJEEPER

Member
Steel Soldiers Supporter
797
6
18
Location
Winter Springs, FL
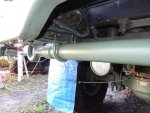
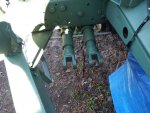
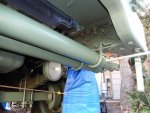
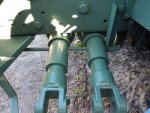
Despite crappy weather this weekend, got one more project mostly completed. Needed to have a place to secure my tow bar so I fabricated a mount for under my front frame extension. Used 4" PVC pipe and u bolts to hang the bars under the frame. Found out this afternoon that Lowes 3/4" steel rod is not the same as 3/4" tow bar pin diameter. Slightly thicker. Just enough to be unusable. Was planning on using it as a lock bar. So just have a 1/2" piece of all thread in there for now. Once I get the correct size bar, will make a hole in one end for a padlock. Also found out that the flame blocking fabric for plumbing repairs stands no chance with a plasma cutter. :doh:
 

Attachments

Another Ahab

Well-known member
17,989
4,532
113
Location
Alexandria, VA
That's a great solution, QJ; and I never saw anybody put them up forward like that; nice thinking.

Not picturing the 3/4" rod as the lock-bar:

- Where would you be putting that?
 

QUADJEEPER

Member
Steel Soldiers Supporter
797
6
18
Location
Winter Springs, FL
Thanks AA. No other place to put it. The lock bar will be where the threaded rod is now, on the drivers side end. Have to make a bracket or two for it.


That's a great solution, QJ; and I never saw anybody put them up forward like that; nice thinking.

Not picturing the 3/4" rod as the lock-bar:

- Where would you be putting that?
 

rustystud

Well-known member
9,254
2,941
113
Location
Woodinville, Washington
Now you've given me another project to do ! I was wondering where to mount my tow bar. I needed a place that I could physically get too. So many places people mount them too need great physical strength ! At my age and with all my injuries I needed a place that is accessible. Yes I want to carry this heavy stupid thing up and into the bed of my deuce. NOT !!!
Great idea Quadjeeper !
 

QUADJEEPER

Member
Steel Soldiers Supporter
797
6
18
Location
Winter Springs, FL
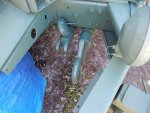
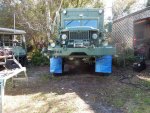
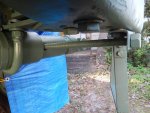
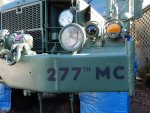
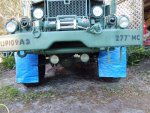
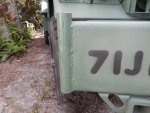
Mostly finished up my tow bar mounting setup. Tried to get another 3/4" steel rod, found the smaller size STILL doesn't fit. Ugg. So just using some all thread for now. Made two brackets to secure it. With it in place, all four tow bar pieces are secured. Eventually I will have it padlocked as well. Nut on forward end of rod is locktited to it, will it it with a weld shortly. Found out from bikeman the unit the truck was from ( thanks ! ) so I stenciled that on the left bumper end. Also lowered the fog lamps to clear the tow bar setup.
 

Attachments

daytonatrbo

Member
320
3
18
Location
Tricities, TN
How long of a piece of 3/4" do you need? And what diameter would actually work for you? I have an old 40's logan lathe. I can't promise good looks, but I can turn something down for you.
 

QUADJEEPER

Member
Steel Soldiers Supporter
797
6
18
Location
Winter Springs, FL
How long of a piece of 3/4" do you need? And what diameter would actually work for you? I have an old 40's logan lathe. I can't promise good looks, but I can turn something down for you.
I'm using a 21.5" piece of threaded rod now. But apparently even though the bar calls for 3/4" pins, they actually are closer to 1/2". Thanks for the offer, but I'll just take back the two that I have now and get a 1/2" one. Crazy.
 

QUADJEEPER

Member
Steel Soldiers Supporter
797
6
18
Location
Winter Springs, FL
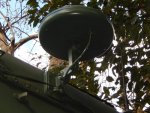
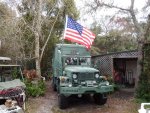
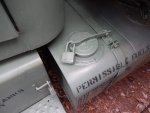
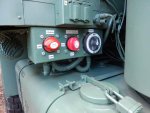
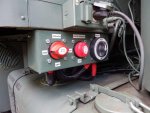
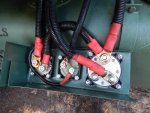
Getting the truck spiffed up for the Fla. Winter Rally this coming week. Finished up the switch panel for the winch. Have a "coach" switch for disconnecting the RV portion from the battery bank while winching. Didn't want the spikes getting into the electronics. Also have a switch for hi amp charging from the truck 24 volt converter ( 90 amps ) to the RV battery bank. Won't normally be used, but good to have the ability. Then of course the switch for the winch. Rated for 900 amps continuous so should be good. Pic also of panel with the wiring tucked up and all painted. Finally made a locking fuel cap for the driver side aux. fuel tank. Wish everything was this easy. Got a pipe welded on the right front bumper for the flag displayed while parked. Got some flack for using the left position, so now that is fixed. Also installed a much better TV antenna. Way more channels received.
 

Attachments

zout

In Memorial
In Memorial
7,744
154
63
Location
Columbus Georgia
Great work Quad.
IMHO flag size is overkill to represent and sorry to say it takes the overall asthetic hard work you have completed on your truck.
Do not hate me.
 

QUADJEEPER

Member
Steel Soldiers Supporter
797
6
18
Location
Winter Springs, FL
Great work Quad.
IMHO flag size is overkill to represent and sorry to say it takes the overall asthetic hard work you have completed on your truck.
Do not hate me.
Ok people, I have tried to display my flag on the left front bumper since the truck came with a mount there, figured it was better than no flag. Got reamed for that. So I removed it altogether, got chastised for that. So I painfully welded a mount on the right front bumper and now my flag is too large. TOUGH BEANS, I'M FLYING MY FLAG AS I SEE FIT! SO GET OVER IT ALREADY.
 

daytonatrbo

Member
320
3
18
Location
Tricities, TN
Ok people, I have tried to display my flag on the left front bumper since the truck came with a mount there, figured it was better than no flag. Got reamed for that. So I removed it altogether, got chastised for that. So I painfully welded a mount on the right front bumper and now my flag is too large. TOUGH BEANS, I'M FLYING MY FLAG AS I SEE FIT! SO GET OVER IT ALREADY.
How dare you do something not to other people's liking!

</sarcasm>
 

zout

In Memorial
In Memorial
7,744
154
63
Location
Columbus Georgia
Appologize you took it that way as it was not meant that way. And i sure know what you go through...i have the tee shirt as well.
 
Top
AdBlock Detected

We get it, advertisements are annoying!

Sure, ad-blocking software does a great job at blocking ads, but it also blocks useful features of our website like our supporting vendors. Their ads help keep Steel Soldiers going. Please consider disabling your ad blockers for the site. Thanks!

I've Disabled AdBlock
No Thanks