Thanks! No they didn't stock any cabs, but Im pretty sure they can arrange them. They had a warehouse with a ton of parts for the 815 and 148 models, since those are still in use, so anything related to those models should be easily available.just spent the last two weeks reading every page of this thread (only when I had some extra free time of course). I cant say anything that has not been said already. Congratulations on a very cool truck that you have put a lot of hard work, love and time into.
Did you see any 815 crew/double cabs at ATH Tatra? Would love to have one of those and put it onto a domestic cabover chassis.
-
Steel Soldiers now has a few new forums, read more about it at: New Munitions Forums!
tatra 813 new owner
- Thread starter tatra813
- Start date

More options
Who Replied?Still working on the thing, and improving it. Finally fixed the exhaust brake today, and boy, what a totally awesome sound it makes! Then I fixed the overpressure system that prevents water coming into the driveline when crossing deep water. And last but not least, I finally got the air horn mounted 
Last edited:
WARWAG
Active member
- 1,487
- 22
- 38
hello guys, I´m new in here, so I´m only watching around, but I wanna let you know that I can send you any needed TATRA parts (I´m in city Ostrava , it is maybe 20 miles from city Koprivnice where TATRA facoty is located and I have manny friends there and I have friends who have TATRA parts from Czech army). let me know what you need and I´ll check for how much money it is aviable here in Czech republic.
Now we have another parts source! Thanks.

- 2,904
- 1,565
- 113
- Location
- Czech Republic
Well it's taken a while, but I finally got the required stamps and approvements! Truck is now officially titled and registered
How long did this take you Duncan? I am taking the other way around; first get it papered and registered, then start restore.
- 2,904
- 1,565
- 113
- Location
- Czech Republic
There is a pretty good picture resource at TatraPrehled (http://www.tatraprehled.com/php/813has.php) The menu on the left switches between all different T813 models.
As for pulling 1 tank... how about 3? http://www.youtube.com/watch?v=eGgDApJcBGQ
If I didnt had one already, I'd buy one
As for pulling 1 tank... how about 3? http://www.youtube.com/watch?v=eGgDApJcBGQ
If I didnt had one already, I'd buy one
I replied in your thread.How long did this take you Duncan? I am taking the other way around; first get it papered and registered, then start restore.
srodocker
Well-known member
- 6,549
- 70
- 48
- Location
- Lacey, Washington
the truck is bigger then the tanks! hahah man i would love to see one of those
Well, got some more work done! The front left brake cylinder was sticking, and it's a b*tch to remove because of the balloon tires. So, let's just remove the wheel....
Spend half an hour with a 3/4" socket and a 2 metre cheater bar to find out the wheel nuts are left hand thread With that knowledge the other nuts where dealt with quickly. Removing the tire was a whole different story. The wide rim fits so tight around the brake drum you have to remove the wheel straight outwards, otherwise it just gets stuck. A high lift jack, crowbars and some encouraging language got that sorted too.
Straight sailing from there on... wire brushed the rim inside and out, and the brake drum. Removed, cleaned and greased the brake cylinder, then sprayed everything in a thick coat of black paint. Reassemble in reverse order, just swear at different moments
Also got the electronic problem solved while the paint was drying. Some (probably drunk) comrad mixed up the wires in the new cab. One of the indicator light wires was linked to the heater, and the heater itself didnt work. Problem turned out to be 2 identical yellow wires which were swapped! Who said MV's are not complex
Sorry, no picture of the end result, it was too dark when we finished work to make proper pictures. Also added high lift jack and big crowbar to the list of essential tools for trips.
Spend half an hour with a 3/4" socket and a 2 metre cheater bar to find out the wheel nuts are left hand thread
Straight sailing from there on... wire brushed the rim inside and out, and the brake drum. Removed, cleaned and greased the brake cylinder, then sprayed everything in a thick coat of black paint. Reassemble in reverse order, just swear at different moments
Also got the electronic problem solved while the paint was drying. Some (probably drunk) comrad mixed up the wires in the new cab. One of the indicator light wires was linked to the heater, and the heater itself didnt work. Problem turned out to be 2 identical yellow wires which were swapped! Who said MV's are not complex
Sorry, no picture of the end result, it was too dark when we finished work to make proper pictures. Also added high lift jack and big crowbar to the list of essential tools for trips.
Last edited:
srodocker
Well-known member
- 6,549
- 70
- 48
- Location
- Lacey, Washington
man i want to see your truck...i need to swing down to washougal!
Jim Hunter
New member
- 266
- 0
- 0
- Location
- Stationed at Ljubljana , Slovenia
Hello to all forum members,
First of all congrats for your T813s guys they are simply awesome trucks
I am from Athens, Greece and I am also looking to buy an T813.
There is none of them here in Greece.I have found some in Germany but I am not sure what I have to look and the price range of them.I see them to sell up to 17.5k eur !
If anyone can share if he know any of them for sale it will be awesome.
Rgds to all,
Jim
- 2,316
- 917
- 113
- Location
- Fargo ND
Tatra that is one beautiful truck and to think I WOULD have been happy with a plain old 5 ton, congrats you have a really neat project on your hands! I am turning green!
KK
KK
tatra813
Member
- 522
- 25
- 18
- Location
- Washougal Wa
Duncan.
Now that youve done the cab swap . what is the fastest way to do it. Can you leave all the ctis stuff and batterys in place? Just trying to figure out how many man hours it would take.
thinking about getting one.
Also always looking for tires and I need axle boots for my 805 if you run into any deals
Thanks
Radegast
New member
- 4
- 1
- 3
- Location
- Ostrava / Czech republic
Tatra
Do you want to buy TATRA or parts? feel free to contakt me.

Do you want to buy TATRA or parts? feel free to contakt me.
I've been asking around for those axle boots but no luck so far. I'm planning to buy new tires this fall, after I get my road-trip done (we're going to do a 4000km trip in july). Will have to see about pricing and such then, might be able to make a deal when ordering 16+ tiresDuncan.
Now that youve done the cab swap . what is the fastest way to do it. Can you leave all the ctis stuff and batterys in place? Just trying to figure out how many man hours it would take.
thinking about getting one.
Also always looking for tires and I need axle boots for my 805 if you run into any deals
Thanks
On the cab change, it's very straight forward. By far the eaiest way is to use one of those movable cranes mounted on ceiling beam, but we used a forklift and some strong langauge, and that worked too.
First off, remove the dashboard. Start by undoing the 3 electrical connectors. One big one is on the left side connecting the dashboard to all cab wiring, the other big on the front plate connecting to the chassis wiring, and next to that is a smaller one which is the + wire.
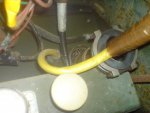
Remove the 2 flexible drive cables going to the tacho and speedo, the air line coming from the CTIS to the metre on the dash, and the oil pressure hose (comes in from the right side).
Now there is a little problematic point, which is the oil temperature meter. It's not removable from the meter because it's a sealed tube. Your options are to disassemble the main combined instrument, or to remove the sensor plug from the oil tank and take the whole tube off along with the dashboard. Last option could be to cut it (I did that as mine was broken anyway) but I have yet to find someone who still sells new ones. Taking apart the combined instrument panel is a horrible job, so if I had to do a swap again, I would remove the sensor from the tank and plug it quickly to prevent the oil from gushing out.
Remove the gear lever, theres a bolt holding it down and an electrical connector for the splitter switch.
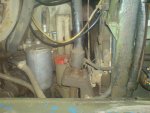
Anyway, that should be all connections to the dashboard dealt with. Now it's only connected to the cabin with 2 bolts. One is next to the gear lever hole, the other one is at the driver's door side and probably hidden behind the door seal rubber. Second picture shows the bolt, with door rubber removed.
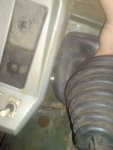
You have to disconnect the oil cooler. There are a few options, either remove the 2 hoses from the cooler to the engine, or remove the grill from the cab (drive out the pins to the 2 hinges on the top), or remove the cooler from the grill without disconnecting the hoses. I did the latter, to keep the oil system closed.
While you're at this side, remove the negative power cable going to the main power relay in the air intake compartment. Either remove from frame or from the relay, it doesnt really matter.
That is the hardest part completed
Now you need to move the steering column. Very straight forward, theres a big nut under the rubber boot covering the hole in the floor. Pay attention to the horn wire, it runs through the column. You can remove the central plastic part on the steering wheel, disconnect the horn wire, and then take the steering column off completely with the wheel. Watch out not to drop the horn wire because it will fall in the steering gear oil tank and you will spend an hour cursing and fishing it out with a bent piece of welding wire, trust me
Now, remove the lever for the winch break, it's held on with a split pin only. It sticks out jsut a little too far so the cab floor wont clear it when lifting. The same applies to the clutch lever, I removed the bolt connecting it to the cylinder so it goes all the way up. Not 100% on what we did with the brake lever, you'd have to see that for yourself.
On the back of the cab, the breather hoses are held with some metal clips, and the air filtration unit is connected with a rubber boot to the pipe coming from the cab. Disconnect these, obviously.
Now the cab should be completely clear. It's held to the frame rails with 6 bolts, 3 on each side. You can access them from inside the cab. 2 are under the bench behind the heater, 2 are
First, there are 6 bolts used to secure the cab to the frame rails, 3 on each side front, middle, and rear (under the bench). Then there are near the rear of the engine, and 2 near the front. A few have a welded nut in the frame rails, but not all. You need 2 people here, one to lock the nut and the other to undo the bolt, because you cant reach both at the same time. Only have a pic of one of these bolts, but they all look the same.
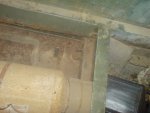
There is one last small bolt connecting the front panel (with the pedals, power steering and clutch fluid tanks, etc) to the cab. I think it's the one on pictured here, just above the hand throttle axle, but again, not 100%. It shouldnt be too hard to find though.
You could choose to remove the fenders and the rear door steps, it makes the cab easier to set down after removing, because it will stand flat on the ground. You can remove with fenders attached though.
Now, if Im not forgetting anything, the cab should be free. As said before, the easiest way to lift is a crane. We managed with a forklift because I removed the front windows. You have to lift pretty high because the whole cab has to clear the engine. Lift straight up untill completely clear.
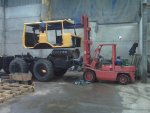
For supporting the cab, the 2 small side windows are the perfect center for weight distribution. I put a beam through there, as pictured. If you want to leave the windows in and use a hoist, use a diagonal beam from drivers too to right side rear door, this is how the factory does it.
It's a very tight fit between the exhaust headers and the cab, but it is most definately possible.
Installing cab is in reverse order, but you curse at different points
All in all it's quite a long write-up, but most of it is very straight forward to do. We removed the cab in half a day with 2 people, finding all this out on the go.
Last edited:
tatra813
Member
- 522
- 25
- 18
- Location
- Washougal Wa
Thanks!! very detailed response. Im looking into getting a cab. Let me know when you get the tires what kind of pricing you are getting. I would like to buy 8 of them. there are no 1500x21 tires over here that I have found.
The other system I wanted to upgrade was the fuel system, maybe switch to electric fuel pump, filter combination system.
I also want to upgrade the air system in regards to drying out the air, so when its freezing I dont find my air lines frozen.
Any input is appreciated.
Your Tatra is looking great, I wish I had the time to go through mine with such detail.
take care and thanks again for taking the time for the response.
Dean
Thanks for the compliments!
1500x21 is very rare almost everywhere I think. I will keep you in mind when I get to ordering some. Easy way out might be to get regular 10-hole truck rims 14x22.5 or something like that.
I tried to install a new air pressure regulator combined with air dryer and heater. But the tatra air compressor is always driven, and all new regulators I found require a compressor that can be offloaded when working pressure is reached. I bypassed that system but then the unit couldnt keep up with the compressor.
In the end I reverted to the standard system, but I might install a seperate dryer. Not had problems with freezing yet though.
tatra813
Member
- 522
- 25
- 18
- Location
- Washougal Wa
How is the tatra pressure relieved if the compressor doesnt unload....pressure relief?
I wander if the offset of a 14x22.5 would work Ill look into it
I wander if the offset of a 14x22.5 would work Ill look into it
The air pressure regulator unit at the rear is set to blow off at around 6 bar, thats all there is to it.The compressor is a 2 cylinder unit with a valve thats opened and closed by the air pressure itself, much like an air matress footpump.
I took the compressor completely apart to clean it. Do not have the pictures on this machine, sorry, but it's a very basic system. It bolts to the front of the engine and is lubricated through a small hole and drain.
I'm glad we choose to just disassemble it completely, because we found on of the locking rings on a piston pen was completely missing. It the pen had moved it wouldve ruined the cylinder wall. Thank god we caught it. Cleaned the internal valves, sandblasted everything, painted and reassembled, looks much better now So good in fact I want to do the same thing to the alternator and powersteering pump.
I took the compressor completely apart to clean it. Do not have the pictures on this machine, sorry, but it's a very basic system. It bolts to the front of the engine and is lubricated through a small hole and drain.
I'm glad we choose to just disassemble it completely, because we found on of the locking rings on a piston pen was completely missing. It the pen had moved it wouldve ruined the cylinder wall. Thank god we caught it. Cleaned the internal valves, sandblasted everything, painted and reassembled, looks much better now
tatra813
Member
- 522
- 25
- 18
- Location
- Washougal Wa
Yea, youve done a detailed job on your truck.....very nice. Nicest one ive seen actually.
Have you done anything in regards to upgrading the fuel system? Im going to move put a fuel tank in the bed of the truck , kind of like the trials trucks and upgrade the fuel system. I also want to remove the existing tanks to enable more clearance for off roading.
I think Ill go to a system with a electric pump and filter setup, with water removal system. Do you know what kind of pressure is necessary if I did this, with its own built in reg? I would obvisiouly eliminate the existing mechanical pump.
I guess also going electric I wouldnt need a manual priming pump. Figured ide pick your brain before I pull out the manuals for diagrams.
Thanks
Dean
- 112,579members
- 166,188threads
- 2,340,640posts
- 708online users

 !
!