• Steel Soldiers now has a few new forums, read more about it at: New Munitions Forums!

  • Microsoft MSN, Live, Hotmail, Outlook email users may not be receiving emails. We are working to resolve this issue. Please add support@steelsoldiers.com to your trusted contacts.

The Centipede aka my new 1988 m35a2c

rustystud

Well-known member
9,266
2,962
113
Location
Woodinville, Washington
Thanks! I wish I'd have known that before I ordered two new switches. :/ The SMARPI for dual-circuit still notes using the hydraulic stop switches. I did find the PSMAG sheet on updating and have ordered the kits from Eriks.

I did find that there is a small conical rubber oring between my air cylinder and the slave body, but there is not replacement in the rebuild kit. Does anyone know where to get one? It goes in a recess around the 5th hole on air cylinder. I may just not be searching right because I don't see other folks mentioning it in their airpack rebuild threads.
View attachment 697264
The reason most don't mention it, is that it is not used on all models. There where several different models of air-pacs in service for our deuce's brake system. I mentioned it in one of my rebuild threads for the air-pac. I just bought some 'O' rings from the big 'O' ring supplier in Kirkland (Totem Lake) .
 

zanther

Member
158
2
18
Location
Maltby, WA
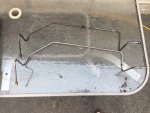
I started bending brake lines for the front axle last night.
20170906_004422000_iOS.jpg20170906_001321169_iOS.jpg
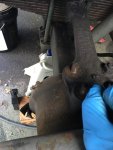
Hoping to start tearing apart front hubs this week to clean/inspect/replace wheel cylinders, replace front boots, and repack wheel bearings.

I also played with using electrolysis to clean up a slave cylinder.
20170905_151215306_iOS.jpg20170906_143150348_iOS.jpg
 

rustystud

Well-known member
9,266
2,962
113
Location
Woodinville, Washington
I used my sandblaster on the first airpack, wanted to see what the electrolysis would do. it was definitely easier!
I've never had really good luck with rust removers in general. They always seem to leave that little bit in the corners. A good sandblasting though gets all that nasty rust out !
 

zanther

Member
158
2
18
Location
Maltby, WA
I've been slowly working on getting the old gal back up and running. Between work and night-college, I'm busy!

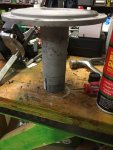
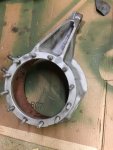
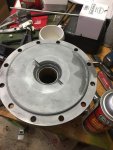
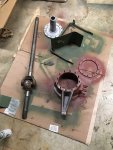
Got the drivers side torn apart and mostly cleaned out. I'm sandblasting and repainting pretty much everything that needs it becuase it was a mess of rust in there. I know i should have checked these out when I got the truck but laziness is easy. :)

Ordered some new u joints today from Eriks. They should be here next week. I'll get the drivers side ready for reinstall and probably start working on the passenger side this weekend. Adding a pic of where my outer boot bolt was too in case it's handy for anyone else.

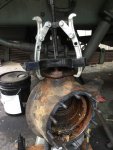
Also for the record, the 3 jaw puller doesn't workand thanks for the fine folk on this forum, after messing with this dang thing for an hour, I found out a BFH(not that big, only a 3#) and hitting on the sides loosened those tapered washers in 5 hits.

You can also see the abomination I created to pull my inner wheel bearing. it was rusted on pretty good, also getting replaced.

20171011_225248841_iOS.jpg20171012_002549966_iOS.jpg20171012_225914742_iOS.jpg20171012_231811925_iOS.jpg20171012_231817034_iOS.jpg20171012_234045430_iOS.jpg20171013_003042325_iOS.jpg20171012_234052315_iOS.jpg20171013_132810298_iOS.jpg
 

zanther

Member
158
2
18
Location
Maltby, WA
Trying to use that GI Bill to complete my Degree in IT Management, it'll hopefully help me at my actual job... though with as many hours as I'm spending working on the deuce, my wife might say that it's my real job!..
We should definitely find some time to drool over trucks.. err I mean hang out?

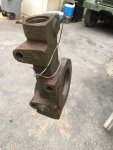
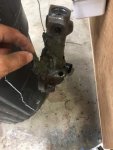
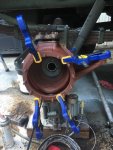
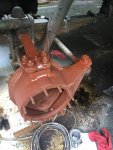
I'm glad I bit the bullet and ordered new u joints yesterday, I decided to disassemble the front axle and clean up the rust as well as re pack the "permanently lubed" u-joints. I broke a cap pressing it out.... :/
I painted the inside of the knuckle with primer too, I figure that since I have U joints and don't need the glob of grease as well as the fact that these surfaces aren't wearing against anything else it wouldn't hurt. If someone has a reason I should strip this paint back off, I'm all ears!
20171013_220907454_iOS.jpg 20171013_220905786_iOS.jpg 20171013_215522404_iOS.jpg
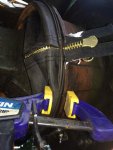
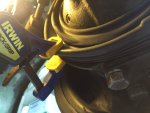
I also used a trick I found in another thread to help me install my dust boot by myself, it worked awesome. I made the decision to ask my wife what color of boots I should put on, and now I have orange boots... You can see that I put the back side foot over the main lip, that helped keep it on the lip and gave me a bit of wiggle room as I installed the clamp.
20171013_233216979_iOS.jpg 20171013_233210028_iOS.jpg
Here's where I ended for the day, it feels good to see it coming back together finally.

20171013_234312285_iOS.jpg
 

frank8003

In Memorial
In Memorial
6,426
4,985
113
Location
Ft. Lauderdale, Florida
I am happy to see that you did read my stuff.
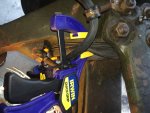
I was always alone and needed a "helping hand" and those
Irwin clamps saved me a lot of frustr%$#@@$#####ation!

Just a note but don't let any grease get on those boots.
Grease destroys boots. I can't find any made of leather like they should be.

Assure that your hole is clear!
Oh, they gonnah have a good time with that one.

Pull the "goesoutah" plug when pumping in grease as per the TM.
The hex plug in the second photo.

IMG_5410.jpgIMG_5407.jpgIMG_5405.jpg
 
Last edited:

zanther

Member
158
2
18
Location
Maltby, WA
While waiting on the U-joints to arrive, which will be today!, I worked on a different project.

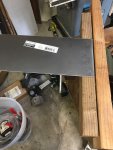
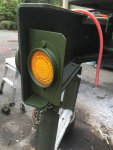
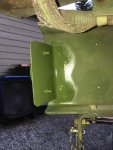
I'm working on improving nighttime visibility of the truck and so have put reflectors on the front bumper but I also wanted to have something the sides of the truck at the front. I bought some standard sheet metal at the Home Depot and bent up a few brackets. I don't have a sheet metal brake but a couple of 2x4's in the vice works well enough.

20171014_224511287_iOS.jpg 20171014_224533049_iOS.jpg 20171015_011716208_iOS.jpg 20171015_011721966_iOS.jpg 20171015_011731741_iOS.jpg
 

rustystud

Well-known member
9,266
2,962
113
Location
Woodinville, Washington
While waiting on the U-joints to arrive, which will be today!, I worked on a different project.

I'm working on improving nighttime visibility of the truck and so have put reflectors on the front bumper but I also wanted to have something the sides of the truck at the front. I bought some standard sheet metal at the Home Depot and bent up a few brackets. I don't have a sheet metal brake but a couple of 2x4's in the vice works well enough.

View attachment 704247 View attachment 704246 View attachment 704245 View attachment 704244 View attachment 704243
You can never have enough reflectors and lights ! Well maybe you can, but I haven't seen it yet !
 

zanther

Member
158
2
18
Location
Maltby, WA
Got the drivers side axle u joint replaced and the whole side put back together. I didn’t have any leftover parts so it must be okay!

AAAD608C-1284-460D-9233-EA0B62515188.jpg
 

emeralcove

Member
Steel Soldiers Supporter
134
15
18
Location
Battle Ground/WA
I am a bit south of you in Washington, just north of Portland OR. You are doing some very nice "repairs" on your truck as well as the upgrades. I will be bringing my M35A2 home next spring from Southern California so I can finally begin to work on it now that I have retired and am home full time in Washington.
 

zanther

Member
158
2
18
Location
Maltby, WA
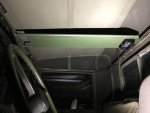
I got about half the dome light install completed this week after it got too dark to work on the wheel bearings. My deuce doesn't have the front center holes for the cab top, so it's currently not fully bolted down. I also need to do the wiring. I may go ahead and install a 24v to 12v 800w converter I have . I'm thinking on the back wall behind the passenger seat. I'd like to put a 12v outlet up top and also mount my intercom system. Too many projects and not enough time!

20171026_042619201_iOS.jpg

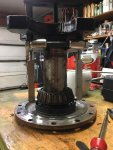
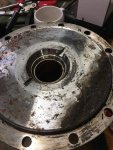
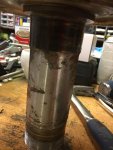
New wheel bearings and races on all axle ends. I found some waves in the races on the front axle and made the choice to invest in new bearings all the way around. If I find a good one or two on the back axles, I'll clean them up and keep them though I'm not hopeful.
20171027_035504717_iOS.jpg

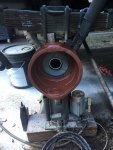
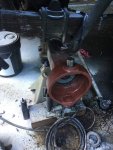
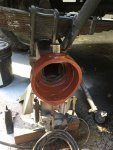
I've moved on to services the back axles, got the bogey drivers side completed this weekend. The process so far has been to tear apart and use a combination of parts washer, sandblasting and a needle scaler on the frame parts that are accessible. I then clean with some combination of Brake Clean, Pressure washing w/ Power Purple, followed by priming and a quick coat of 383 green. It's not a full restore, but as I have easy access to some areas right now, it makes sense to me to do a bit extra work and ensure the truck is taken care of. I should note that when I'm working in the brake area I specifically wear a respirator, use a low pressure rinse , a cleaning with Brake Klee, and then a full pressure wash as mitigation steps for the asbestos in the brakes.
20171029_225506618_iOS.jpg

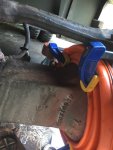
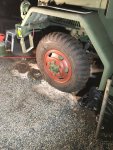
I'm waiting on more inner tubes as I'm also changing tires out with newer NDT's. I'm following much the same plan as my frame work, tear apart, needle scale, clean and then Primer/Paint. It's slow going but it feels good to have this stuff done correctly.
20171030_144704028_iOS.jpg
 
Last edited:

rustystud

Well-known member
9,266
2,962
113
Location
Woodinville, Washington
I got about half the dome light install completed this week after it got too dark to work on the wheel bearings. My deuce doesn't have the front center holes for the cab top, so it's currently not fully bolted down. I also need to do the wiring. I may go ahead and install a 24v to 12v 800w converter I have . I'm thinking on the back wall behind the passenger seat. I'd like to put a 12v outlet up top and also mount my intercom system. Too many projects and not enough time!

View attachment 706210

New wheel bearings and races on all axle ends. I found some waves in the races on the front axle and made the choice to invest in new bearings all the way around. If I find a good one or two on the back axles, I'll clean them up and keep them though I'm not hopeful.
View attachment 706211

I've moved on to services the back axles, got the bogey drivers side completed this weekend. The process so far has been to tear apart and use a combination of parts washer, sandblasting and a needle scaler on the frame parts that are accessible. I then clean with some combination of Brake Clean, Pressure washing w/ Power Purple, followed by priming and a quick coat of 383 green. It's not a full restore, but as I have easy access to some areas right now, it makes sense to me to do a bit extra work and ensure the truck is taken care of. I should note that when I'm working in the brake area I specifically wear a respirator, use a low pressure rinse , a cleaning with Brake Klee, and then a full pressure wash as mitigation steps for the asbestos in the brakes.
View attachment 706213

I'm waiting on more inner tubes as I'm also changing tires out with newer NDT's. I'm following much the same plan as my frame work, tear apart, needle scale, clean and then Primer/Paint. It's slow going but it feels good to have this stuff done correctly.
View attachment 706212

Good job ! Do it right the first time and there is no need for a second !
 

zanther

Member
158
2
18
Location
Maltby, WA
I've been working indoors these last few days with the cold weather we're having. I'm starting to bend the new brake lines for around the MC and airpacks.

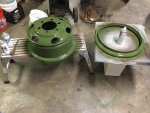
I have 2 axle ends left and a bunch of tires to change, I'm slowly breaking them down and cleaning up the rims.

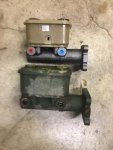
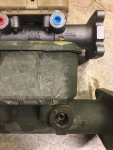
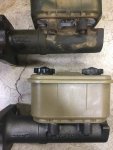
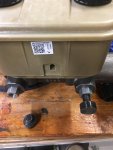
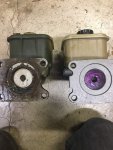
I found a reference in a brake thread to a new make dual master cylinder since I couldn't find NOS version. A big bonus is the price; $119 + core charge
https://www.napaonline.com/en/p/NMBP8553

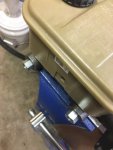
Differences that I've found are the top embossing and the port sizes though a quick trip to my local brake supply shop hooked me up. I am remaking all my lines using 7/16's fittings so the adapter I bought won't work for the standard Air Force model. You may be able to find an adapter for the stock fittings but you'll likely have to replace those lines anyways because the adapters will change the line geometry.


20171104_003926653_iOS.jpg 20171104_003933228_iOS.jpg 20171104_003958792_iOS.jpg 20171104_004010633_iOS.jpg 20171104_185320880_iOS.jpg 20171104_204143140_iOS.jpg
 

rustystud

Well-known member
9,266
2,962
113
Location
Woodinville, Washington
I've been working indoors these last few days with the cold weather we're having. I'm starting to bend the new brake lines for around the MC and airpacks.

I have 2 axle ends left and a bunch of tires to change, I'm slowly breaking them down and cleaning up the rims.

I found a reference in a brake thread to a new make dual master cylinder since I couldn't find NOS version. A big bonus is the price; $119 + core charge
https://www.napaonline.com/en/p/NMBP8553

Differences that I've found are the top embossing and the port sizes though a quick trip to my local brake supply shop hooked me up. I am remaking all my lines using 7/16's fittings so the adapter I bought won't work for the standard Air Force model. You may be able to find an adapter for the stock fittings but you'll likely have to replace those lines anyways because the adapters will change the line geometry.


View attachment 707009 View attachment 707010 View attachment 707011 View attachment 707012 View attachment 707013 View attachment 707014
That's some excellent information ! That's also a really great price on that master cylinder ! Did you find those adapter fittings at NAPA ?
 

zanther

Member
158
2
18
Location
Maltby, WA
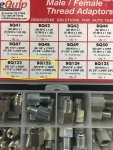
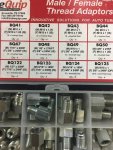
The adapters are BrakeQuip brand, from Olympic 4x4 up in Snohomish.

I don't frequent NAPA too often because I find most of their prices to be inflated but I ordered that MC at 11 AM and they had it shipped in from the Seattle distribution center by 4 PM the same day. Not sure if the casting numbers came through clearly but the casting(other than port size ) is a perfect match to the original Bendix brand MC.

Oly 4x4 are also the guys I had make my braided SS hoses , following PeaShooter's guide. I had them save the info in case anyone else in the area needs to use them. Pretty fast considering they had to order a few of the fittings. Done in 5 days total for ~$40 a line. They're more expensive than NOS hoses but I like the idea of brand new, DOT rated hoses in my brake system.

I did modify the adapter picture and put a yellow circle around the two adapters I used. The bonus here is that I'm already using 7/16x24 fittings on the rest of my 1/4 hard line so it standardized things a bit more.

I'm wondering if I should use a copper crush washer between the MC and the adapters. The male end of the adapters aren't long enough to seat against the interior of the cast port. These port look like a DIN port with their seat going away from the threaded end, but they're very much a SAE size and TPI.
Modd'ed.jpg


I play around with 3d printing and CAD software, I'm not not an expert at all, and made some Dust Caps for the MC ports yesterday. They're just plastic but it'll help keep it clean hopefully through installation.

20171105_211858932_iOS.jpg
 
Top
AdBlock Detected

We get it, advertisements are annoying!

Sure, ad-blocking software does a great job at blocking ads, but it also blocks useful features of our website like our supporting vendors. Their ads help keep Steel Soldiers going. Please consider disabling your ad blockers for the site. Thanks!

I've Disabled AdBlock
No Thanks