• Steel Soldiers now has a few new forums, read more about it at: New Munitions Forums!

  • Microsoft MSN, Live, Hotmail, Outlook email users may not be receiving emails. We are working to resolve this issue. Please add support@steelsoldiers.com to your trusted contacts.

The next Project an ASMH

WillWagner

The Person You Were Warned About As A Child
Super Moderator
Steel Soldiers Supporter
8,530
2,737
113
Location
Monrovia, Ca.
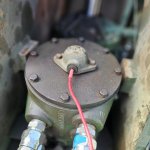
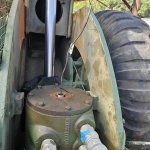
So, today was another productive day. Didn't start that way, but was a win at the end! The boom indeed leaks down. First order of business after trying to repair an ultrasonic cleaner, was raising the boom and installing a new seal under the electrical slip.

We got a seal late last Wednesday. After fighting the freekin' thing for 30 mins, NOTHING has been a walk in the park on this, finally got it peeled out. Got the bore cleaned up, installed the new seal, and it fell into the bore. I even gave the people the CR/SKS part number with measurements, and they STILL got it wrong!. Made a call, gave them the number and dimensions again, and 10 ins later they said they had it. Drove over to them, thankfully only a mile, armed with calipers, and the seal was correct. Drove back, and the seal went in properly.

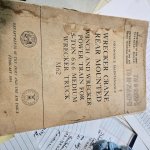
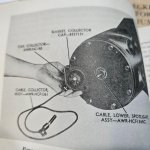
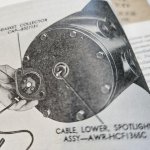
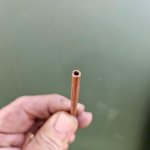
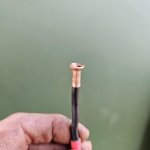
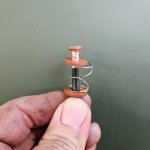
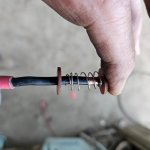
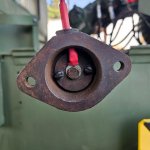
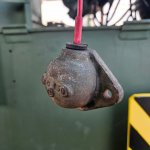
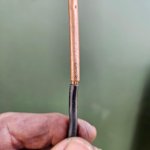
I also browsed thru the TM for the crane, reminds me, need to see if it is here and if not, make a PDF, and saw that the electrics connection through the center is a slip, not a couple of wires with ring terminals, Nat'l Guard strikes again! Decided to make my own. I used a copper pipe that fits nicely over the #10 wire through the center, modified some fiber washers to accept the #10 wire and made a flared wire end so as not to find it's way out of the fiber washer. The original spring I didn't care fore because the OD was too close to the metal center. Ended up making a spring out of some of the stock we have that was smaller OD and I closed the ends so the spring holds onto the wire. I think it came out good. We shall see in the future.

After that was remedied, we un wound the rear winch. One of the volunteers tha comes in on the weekends took the level wind apart, lubed it all up, fixed the too long bolts installed in it, and made it work smoothly. We hooked it to the forklift and, from the cab because the rear de-clutching stuff is still non-op, wound the winch in, nice and neat, to the fairlead and STOPPED, unlike the other operator before us, locked the tensioner, installed the chain on the new cable end and put it in place.

Next came the crane. Got all the controls in place, fired the 6602, rotated the crane to center, installed the travel braces extended to the longest position, lowered the boom into place and secured it to the bed with the pins. We found a 1/2 rope bridal for the hook, installed it and put a bit of tension on the cable. We also topped off the boom winch gearbox, it was apx 1/gallon low.

What's left is to lube the wrecker body, all of the zerks, lube all of the under body stuff for the rear, finish hooking up the de-clutching linkage, remove the throttle cable and try to free it up. If we can't, I have a vernir cable that is long enough that I might be able to make it work. Check the t-case and trans oil levels and install the covers over the control valves and swing stuff.

For the truck, there is a pretty good oil leak at the front. Not coming from the seal/cover, but out of the front of the damper. I believe it is wicking out the keyway in the adapters. The radiator will need removing to tackle this. WAY easier than the crane stuff and up my alley! Install the Stromberg carb I got a while back, we THOUGHT the Holley on it was finem but is crap. The engine smoked black and blubbers on start up and runs bad. IMHO a fuel issue, plus it uses a bunch of fuel. Everyone has said the Holley is junk, and now I believe them!

We still need to order a ft winch shear pin, do a fluid change on the winch, un soppl the ft winch and re wind it neatly, again, unlike the prior operator did.

We want to add stencils. We will do the normal TP, and stuff. I wiuld like to find pictures of one of these from the 70's, this truck was OVH'd at TEAD in '73 or '75, and mark it up like that.

The brakes are still good too! Maybe after it is all done, i'll give it a spin around the block!
boom2.jpgboom8.jpgboom9.jpgboom.jpgboom1.jpgboom2.jpgboom3.jpgboom4.jpgboom00.jpgboom5.jpgboom02.jpgboom03.jpg
 

WillWagner

The Person You Were Warned About As A Child
Super Moderator
Steel Soldiers Supporter
8,530
2,737
113
Location
Monrovia, Ca.
A bit more forward progress yesterday.

I had "repaired" the passenger side clutch cross shaft where the de-clutching linkage attaches a while ago, but after installing the keyed arm, I was concerned that the arm would hit the bellhousing when the clutch was depressed in the cab. Well, it doesn't, so, I continued with the install, installing the arm that attaches to the rotopack and is free on the shaft.

The pics don't show that it is kinda hard to get at. The area is more than an arms reach away between the frame and trans and the hole is just big enough for 1 hand. Since the nerve damage in my neck, my digits don't work as good as they used to, so it was a tad challenging to get at things, but I got it done. I still need to adjust it. I am looking thru the TMs to figure out which one it is in. It only involves setting a freeplay adjustment.

The "repair" was cleaning up the cross shaft where someone had hit with a hammer and out of rounded the shaft and mushroomed the end. Again, since it was where it is, a file and 36 inches of emery cloth did the trick. The bores in both the keyed and pivoting lever were also messed up from the same persuasion tool.

I then moved onto the rear throttle cable. the cable came out of the truck easily. The inner cable is frozen to the case in two spots, the bend where it goes up to the throttle linkage in the engine compartment and the bend where the cable comes up from under the bed and goes to the throttle lever in the bed.

After getting it out and working it a bit, there was still no movement. It needs to be soaked in evapo rust and then oil I think. However, as most of you know, in a prior life, I worked for a diesel engine manufacturer and the last 10 or so years of my life there, I took old technology out of machinery and installed the latest and greatest drive by wire junk. I am a hoarder, sorta. When I removed components, I always put the take offs in a neat pile and gave the end user the option of taking what they wanted before tossing things in their respective bins, trash, recycle, etc. If the components weren't wanted/needed and it came time to dispose of, I would sometimes think to myself, "that could come in handy" , and would cubbyhole the item. The items would eventually make their way to another project, my "collection" or to the Museum because we were always doing little projects that sometimes required some of the stuff I removed, air filter housings, exhaust parts, intake piping, rubber pipe couplings, elbows, etc. One of the items I was infatuated with and re used multiple times were vernier cables. bulkhead type, clamp type, any length. Well, some of these made their way to collections, one such collection is at ASMH. As luck would have it, I rescued one that was exactly the same length as a 1953, M62, 5 ton wrecker rear throttle control uses!
All that needed to be done to use it was make mounting brackets for both ends, easy peasy! I fished the new cable in, made brackets, installed them and mounted the cable. I am however waiting for a rubber seal, sleeve, whatever it is, that covers the swivel tube to cable housing joint as to not allow water into the cable, but it should be here by weeks end.

throttle.jpgthrottle 1.jpg
 

WillWagner

The Person You Were Warned About As A Child
Super Moderator
Steel Soldiers Supporter
8,530
2,737
113
Location
Monrovia, Ca.
Back when I was having issues making hydraulic pressure, I had asked about what I now know it the governor for the crane operation. @msgjd has helped me out in multiple ways, hyd line fittings, pictures of linkages, etc. When I asked about the linkage connected to the governor, he stated that he had no connections to the governor and I said I would send him pictures. Well, it's been a bit, and I thought about sending images to him via PM, but thought again that if someone else has has one of these pigs and needs images of how the linkage connects to the power divider and governor, I should post them here.

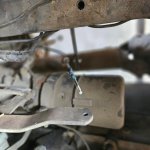
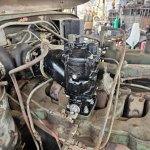
This first pic is looking from the rear of the truck, forward. The large slotted clevis is the linkage coming from the bed mounted power divider engage/disengage for the crane operation only. This attaches to the arm/shaft on the power divider that engages the hydraulic pump. The issue I had was that the 2, 1/2 inch nuts on the rod were out of adjustment, loose and would not let the shaft go all the way to the engage position. The small rod attached to the large clevis is the governor actuator rod.
linkage.jpg

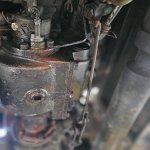
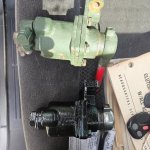
The second picture is looking from the front to rear, looking at the front of the power divider. the small rod is the one attached to the large clevis from the engage/disengage lever in the bed. The other end of the small rod is attached to the air governor. When the RPM is set, IIRC, the TM says to set it at 2000 RPM, When the rear lever is put into engage, the lever on the governor sends air through the governor to the carb and lowers the RMP to whatever it is set at in the governor ang will keep the engine RMP at that speed regardless of load. Basically it is a variable speed, or VS governor like a diesel would have.

linkage1.jpg

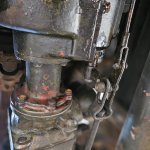
Last pic is looking front of truck toward the rear. This is just a better look at theway the linkages are connected and adjusted. Top of the pic is the bottom of the power divider, bottom of the pic is where the hydraulic pump for the crane is attached to the output of the power divider.

linkage 2.jpg
 

msgjd

Well-known member
1,064
3,266
113
Location
upstate ny
Back when I was having issues making hydraulic pressure, I had asked about what I now know it the governor for the crane operation. @msgjd has helped me out in multiple ways, hyd line fittings, pictures of linkages, etc. When I asked about the linkage connected to the governor, he stated that he had no connections to the governor and I said I would send him pictures.


View attachment 932372
yeah, thanks for pics, i don't think i ever saw that linkage assembly on my truck anytime i went under to grease it, but i will look again !! I have to run it with happy spots on the throttle which depends on the load expected
 

WillWagner

The Person You Were Warned About As A Child
Super Moderator
Steel Soldiers Supporter
8,530
2,737
113
Location
Monrovia, Ca.
yeah, thanks for pics, i don't think i ever saw that linkage assembly on my truck anytime i went under to grease it, but i will look again !! I have to run it with happy spots on the throttle which depends on the load expected
I think that when the throttle is set and the the lever engaged, the RPM drops to around 16-1800 and will hold there regardless of load. That is if the governor is set and not been messed with. I think the one on this truck has been messed with by our NG friends though. The seal wire has been cut and twisted back together.
 

msgjd

Well-known member
1,064
3,266
113
Location
upstate ny
I think that when the throttle is set and the the lever engaged, the RPM drops to around 16-1800 and will hold there regardless of load. That is if the governor is set and not been messed with. I think the one on this truck has been messed with by our NG friends though. The seal wire has been cut and twisted back together.
yes i recall the BN's 5T M62 and M543 gasser wreckers droning away quite happily at a fairly-consistent high-idle RPM regardless of load, like a farm tractor .. Mine unfortunately is nothing like that although it was a gasser which unfortunately got stuck with a multifuel at some point ..

I recall a 1960's deuce TM which noted 2-1/2T wreckers M60 and M108 with multifuel do not have the governor setup, whereas the original gassers do.. Although I have not seen this verbage in any 5-ton TM's I have, I have to wonder if the governor setup was removed from my M62 when it was converted to A2
 
Last edited:

WillWagner

The Person You Were Warned About As A Child
Super Moderator
Steel Soldiers Supporter
8,530
2,737
113
Location
Monrovia, Ca.
Since the rear of the truck is most of the way complete, I started on the front.

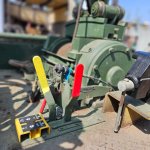
But first, the seal for the swivel joint on the V cable came in. Got that installed, buttoned the throttle arm side up. Fired the beast, let it warm and tried the throttle. Man, that thing is SMOOTH! Next, tried engaging the crane drive from the rear. That didn't go so well. The rotopack cylinder extends, but I think not as far as it needs to. We shut it off, supplied external air to it and found that there is a kinked and split copper line under the truck where the line makes the bend into the rotopack. We have unions, that will be easy. The second issue found was that the vent on the valve in the rear pizzes air out of it as soon as the lever is moved. All ot is is a BW hand valve, like one mounted on the steering column in a truck. Should be able to get a kit for it or just replace it with a new one.

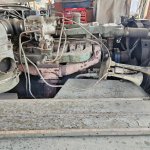
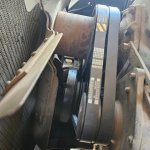
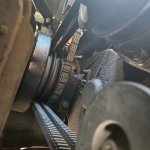
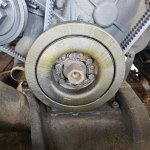
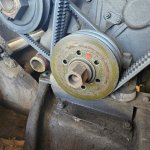
Onto the front. Moved the truck back 20 feet....under it's OWN power! Moved the hoist so we could use it, it was blocked by a rail on the celing for a scope. Moved the truck back, drained the coolant, well, water, Removed the grille, upper and lower coolant hoses, upper support, lower mounts and out came the cooling package. That was one of the EASIEST things I have done on this thing! A welcome surprise! Cut the tie wires for the damper, pulled the damper, ALL of the bolts were loose. You can see where the oil is coming out from the center of the damper in the image. Had to break out the 3/4 CP to get the nut off the snout of the crank. Not too much oil under the washer, Hmmm?

The damper is a two piece, separated by a rubber strip, so I don't think the damper is viscous also, but who knows. The TM's don't say what it is.

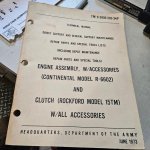
I figured, since I am 3 belts and an adapter away from a seal, might as well do it. Been looking. We did not have the TM 9-2805-203-35P in the library, but after research, the -35P supercedes to TM 9-2805-203-34P, which we have! The Library her doesn't have it. I have talked to Mullaney and am most likely gonna send him 3 or 4 TM's that the site doesn't have for conversion to PDF.

There is another thread about the FSN,NSN, NIIN numbers and what is going on with that mess.

Front.jpgFront 1.jpgFront2.jpgtm.jpg
 

WillWagner

The Person You Were Warned About As A Child
Super Moderator
Steel Soldiers Supporter
8,530
2,737
113
Location
Monrovia, Ca.
I made an executive decision. No seal. Went in today and found oil seeping out the front between the snout and adapter.

I decided to give the damper a good cleaning. The damper looks like a two piece, rubber style. Meaning, there is a rubber strip between the inner and the outer pieces, BUT, there is always a but, the inner kinda looks like it could be a viscous. I don't know why it would be a combined type, never seen one.

The inner part of the damper looks pressed and sealed with rivets on the mounting plane. Between all of the bolt holes, there is a rivet. Oil was oozing out of the seam and around the rivet heads. I decided to give it a good cleaning making sure to blow out the rivets and seam on the mount flange, put it in the sun....it was 97 here today, again....and after an hour, saw no more bleeding.

Re assembled things. I used Permatex Ultra Grey in the key way and around the crank/adapter area and ran the nut home with a 3/4 impact. No torque spec in the TM for the nut that holds the adapter on, it looks like a 1" 12 thread so I just ran the nut up far enough to make it so the lock plate aligned with the damper mount bolts and the rivets, but there is a torque for the shoulder bolts that hold the damper to the adapter, go figure. The bolts are also safety wired. Put the radiator back in, hoses were good, re tensioned the belts while the radiator was out, easier that way. Filled it with h2o and Perry and fired it. Came up to temp, no coolant leaks, ran it at 1500 RPM for 30 mins, sucked up 3 gallons of gas! Shut it down and looked for leaks. No coolant or oil leaks! Hopefully that is fixed.

Next week, on to the air leaks for the rear clutch system. I pulled the old valve out. It is just a very old, brass BW trailer brake hand valve. The cup piston is hard as a rock. There is a place out this way that can get kits for it, hopefully. I will check tomorrow.

Also on the plate is the carb swap. The Holley is junk. The Zenith is clean but a bit rusty and looks like it has never been used. I did get a kit from Treadwell Carburetors out of upstate NY. Those guys are the best! If anyone has a Zenith and needs parts, even accelerator pumps and power valves, they are the ones to go to. Tell Rose I said Hi! But it looks good and hopefully I can just pull it apart, save the gaskets and re use them. I'll also give it a coat of paint to make things look good. @msgjd found a good one in his stock for me!

No pics, everyone has seen the front of a 5T together, nothing special
 

msgjd

Well-known member
1,064
3,266
113
Location
upstate ny
Also on the plate is the carb swap. The Holley is junk. The Zenith is clean but a bit rusty and looks like it has never been used. I did get a kit from Treadwell Carburetors out of upstate NY. Those guys are the best! If anyone has a Zenith and needs parts, even accelerator pumps and power valves, they are the ones to go to.
that source is good to know! ... I have a NOS zenith on a shelf in the M750 for almost 20 years now, waiting for me to have time to swap it onto the M51 , whose holley is still operational with the usual temperments they have .. The accelerator pump in it has gone bad this year, so time is getting closer to grab the zenith.. Unfortunately the zenith has rusted badly in the parts trailer and the butterflies seized.. I have sprayed it a time or two with blaster but it will have to come apart if it doesn't free up, i surely will need gaskets at the least
 

WillWagner

The Person You Were Warned About As A Child
Super Moderator
Steel Soldiers Supporter
8,530
2,737
113
Location
Monrovia, Ca.
Well, was yet another productive work week at the Museum, 2 days is a week, right?

Decided to tackle the Holley issues by removing it. I am here to tell you, the last ones to work on this were idiots! SO many things halfazzed, loose, cross threaded, over tightened, you name it, I have seen it on this thing. Since I had not checked the oil level in the air cleaner, decided it was time for that too. Removed the intake beet, came off easy enough, clamps needed loosening a bit more than they were to clear the humps on the piping. also noticed that when touching the intake stuff, the whole filter assy moved around. Found that the 4 inch long, flat head, countersunk screws were nowhere near tight. I replaced them with the proper size bolt with correct washers.

Pulled the bottom of the cleaner off, oil level was right at the level, but getting it out was another chore. There are air lines coming up from under the truck and from the firewall for the horn, power divider governor and some of the fording stuff. Welp, all of those lines were twisted, bent, tangled around each other and left a not large enough area to get the oil pan out of the truck without making a mess, I made a mess. all of the lines had zero points secured, the were just flopping around in the wind.

Onto removing the malfunctioning Holley. Disconnected the pretzled up throttle linkage, removed the anti dieseling cable, fuel supply pipe, governor air line and the fording stuff. The fording lines are 3/8 inverted flare, those things were TIGHT! took a 12 inch crescent on the fitting for back up and a 5/8 line wrench with a cheater on it to get them loose. After removal, I found out why. 6 one time use military style lock nuts later, all 1 hex turn at a time, and off the carb came. I was expecting it to be heavy, but it was very light!

Did a bit of straightening and un twisting of the spaghetti, I made a path to get the oil pan back onto the filter housing, sans mess.

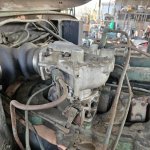
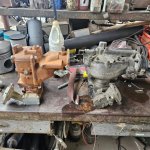
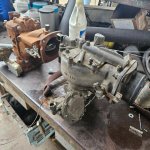
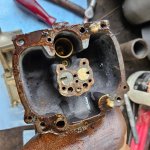
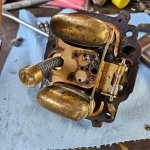
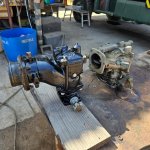
Onto the carburetor(s). Put them side by side on the bench. The plumbing is close but in need of rearranging when it goes on. Governor is facing forward on the Zenith, rearward on the Holley, no big thing. The Zenith looks kinda bad on the outside, but in the inlet and thru the butterflies, looks brand new. I decided to pull the top cover on the Zenith. The gasket had become one with the cast iron, I was fearing the worst. After a bit of a soak with PB and a little persuasion with a brass hammer, the gasket decided to give up. With the exception of the gasket, the inside looked new, not rebuilt, but brand new! The only issue I saw in there was that one side of the float mount was a bet out of whack and the float was not square in the chamber. I could have caused that when removing the cover, it was twisted in the direction I was tapping it with the hammer. No biggie, twisted it back into position and all was good. I made a decision to not go deeper into the carb. When this carburetor was purchased, I had the foresight to locate and buy a rebuild kit so we had a new top gasket. I really didn't want to open the kit, so a call to Treadwell was in order. I talked with Jim a bit and come to find out, these kits are drying up fast and becoming expensive. IIRC, we paid $75 buck for the kit we got, a genuine Zenith K2102 kit with all the gaskets as well as the carb to manifold gasket, power valve pieces, check valves, inlet screen, everything. They are now pushing $200. I wanted just a top cover gasket and bottom gasket. I was told good luck and he would check around, but no luck. @msgjd , if you want 29D parts, get them now!

It took a bit, but I finally got all of the old/new gasket off of the pieces parts. Gave the inner workings of the carb a BJ and put some PB on some of the moving parts. I made a tracing of the top cover gasket and used the new gasket on the carb, stuffed the tracing in the kit. I also attempted to remove the bottom gasket off of the Holley with a razor blade, but it was just to old and hard to save. I had to use the one from the kit. I then masked off the Zenith and gave it a coat of sg black paint to protect it.

The next day, the new fuel metering device was installed on the engine. Went on like it was supposed to be there. Second order of business was to un pretzel the linkage. Got it all straightened out and had soldier B depress the pedal, went to full throttle. NEXT! Decided to install the intake to keep stuff out of the engine. Next, onto the plumbing. Decide to tackle the governor part. The line is long, it comes out of the frame rail up by the air compressor, right side of the truck. There was no point on this line that was secured. It is copper, so it was easy to make it go where I wanted it to go, so, it was neatly pushed back down into the frame rail and secured to a wire loom and another hard line with a zip tie, routed up around the frame rail between the air compressor drive pulley and the compressor body then secured to one of the front bearing flange bolts with a P clip and neatly routed up to the governor. That was easy! Next, the fuel line. It is a steel, 3/8 inverted flare. The line had been.......worked on...... before, so it had some funky bends and twists in it. On the FP side, the line comes up from the pump, on the drivers side, crosses over to the carb between the valve covers. All I needed to do was re shape the bends, shortening the line by giving the bend a tighter radius, give the flare fitting a small tweak toward the rear of the engine, and things lined up nicely, the flare threaded into the fitting with no issues!

Onto the choke. We have a mess of NOS choke cables out in the train car. I was originally going to just swap the one in the truck for one of them, but I got lazy and didn't feel like rootin around under the dash to do it, so, I just gave the inner cable, that was all bent up on the end, a good massage and got it pretty close to straight. Gave the cable a lube with PB and worked it in and out. It freed up nicely. When the cable was hooked to the Holley you could pull the cable out to choke it, but had to go to the carb and push the lever to un choke it. The Holley choke was a straight out the back of the carb inlet type connection. The Zenith was canted upward. Turns out that the new clocking of the cable actually helps the actuation. the choke opens and closes effortlessly now!

Last step, the fording lines. There are 2 of these, both running to the distributor. Both lines are 3/8 inverted flare. The Holley had a 1/8 ntp male to 1/4 ntp female adapter and a 3/8 inverted flare street T attached to that, coming off of the outboard side of the inlet, 90 degrees from the top. The Zenith has the port at the top. Remember having to use large wrenches to remove these lines? Well, that is because the flare nuts had been cross threaded into the fitting on both lines. The lines the were then "glued" into place, cross threaded, of course, using what looked like Permatex #1.

This part was going to be an issue. I looked through the assortment of fittings we have, but no street T with 3/8 inverted flare. I did find some 1/8 npt to 3/8 flare straights, but when I mocked the plumbing up, I felt that it was way too long and would have a good chance of breaking. I decided to try and repair the cross threaded fitting. I was able to find a flare nut, so, using a 90 degree pick, I peeled the sealant out of the threads, kinda chased them with the pick, wire brushed them and then installed and tightened the flare nut. It worked! After cleaning the lines on the truck and making the flare nuts spin freely on the lines, the nut just basically fell into the fittings with little effort and tightened up! I then worked on the plumbing to that fitting. I came up with a 1/8 ntp to 1/4 ntp elbow, installed that into the carb and only needed a 1 inck long nipple to connect that the the flare fitting.

Time to test it out. Took about 10 seconds of cranking, the bowl was empty, and the 6602 roared to life. Had a miss, but started with a dry carb faster than with the Holley it had been running with. A quick check for leaks, none found, a quick check with a lazer temp gun and found #6 dead. 1-5 were 570 and 6 was 140. Shut it down, pulled the plug. Found it carboned worse than a diesel injector tip! No exact replacement plug in stock, it is a 2235 autolite, guess it is a hot plug, so I just cleaned it and re installed. 1/2 a revolution and the engine started right up, no blubberin, no cloud of black smoke, smooth as silk. Let things warm up, adjusted idle settings, accelerated it, WOW it has some good response now! I have a video of it but need to upload it to the Museum and my YT channel.

I let the truck sit to see if the carb would spring a leak, no leaks. Went to start it and no kidding, the Holley needed to crank 20-30 seconds, would fire, black smoke, blubber, lope and one would need to throttle it up to clean it out. This thing now fires in 1/2 a revolution, comes to a smooth idle, little smoke and doesn't smell like it is using a 1/2 gallon of gas to start! And I need to apologize, I did not get the Zenith from msjgd, I got this beauty from @Evil Dr. Porkchop! I am sorry for getting the two of you confused. @msgjd helped me out with hydraulics and pto/power divider stuff. This is what happens when a project takes too long!
carb3.jpgcarb4.jpgcarb5.jpgcarb6.jpgcarb7.jpgcarb.jpgcarb2.jpgcarb1.jpg
 
Last edited:

WillWagner

The Person You Were Warned About As A Child
Super Moderator
Steel Soldiers Supporter
8,530
2,737
113
Location
Monrovia, Ca.
I also decided to tackle the rear clutch actuation. A week ago, I took the valve off. It is just an old, all brass, BW tractor trailer hand valve. I took it apart and found the seal as hard as a rock. I ended up taking the valve to a local truck parts place that I have been dealing with for years. They, in turn, sent it out to one of their vendors 30 miles away in Ontairo, Ca. They called me and told me that the kit was 90 bucks and their labor was 40 to rebuild the valve. IMHO, not a bad, but ASMH is a very tight budgeted non profit. We decided to look for parts in the train car. Well, I did find 2 hand valves, an old Wagner and a newer TC2 type. Tested them both and they worked with no leaks, however, the air lines that come out from under the wrecker bed are rock hard. To install either of the two valves we found will require re plumbing of the lines, about a hundred dollars since new fittings will be needed due to the fittings are jIC -6. CAT and the military liked to use these and they are NLA

I called the parts place to see if the valve was returned yet, and they told me that the guy would do the thing for $75. We agreed. When I went to pick things up, it was a whole valve!

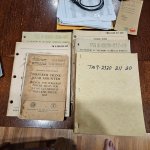
The line that feeds the rotopack is cracked at a kink where it comes out of the frame and is routed to the rotopack. I ended up just cutting, well, just bending it back and it finished cracking, installing a union and made a new clean sweep from the coupling up to the rotopack. We then tried to use the rear clutch station to put the truck into gear as one would using the crane or rear winch. The rotopaks extends, but will not depress the lever quite far enough to disengage the clutch. I have tried adjusting things, but can't get it to work. I can find no images of the linkage in the TMs, but I have just skimmed through them. I THINK that I might have installed the boomerang shaped arm backwards on the cross shaft. We do have a 543 out back, but IDK if that is the same as the M62. I will most likely go roll under that next week and check it out. In the meantime, I have some homework to do. I need to look through the books and see if there is a procedure to adjust this/ans image of it installed or a parts diagram.

And, I let the truck run for a bit after the carburetor retrofit, MWO whatever and re checked the oil leak at the damper. Nice and dry!
hand valve.jpgdamper.jpgTM homework.jpg
 

msgjd

Well-known member
1,064
3,266
113
Location
upstate ny
we paid $75 bucks for the kit we got, a genuine Zenith K2102 kit with all the gaskets as well as the carb to manifold gasket, power valve pieces, check valves, inlet screen, everything. They are now pushing $200. I wanted just a top cover gasket and bottom gasket. I was told good luck and he would check around, but no luck. @msgjd , if you want 29D parts, get them now! It took a bit, but I finally got all of the old/new gasket off of the pieces parts. This thing now fires in 1/2 a revolution, comes to a smooth idle, little smoke and doesn't smell like it is using a 1/2 gallon of gas to start!
yikes on the price ... good thing i make all my own gaskets !! .. And as far as better starting and less fuel, I have heard nothing but good things about the zenith replacement carb for R6602's .. One of these days i will get my new zenith put on the M51 .. (I've been saying that now for almost 20 years). :p
 

WillWagner

The Person You Were Warned About As A Child
Super Moderator
Steel Soldiers Supporter
8,530
2,737
113
Location
Monrovia, Ca.
FOUND IT! TM 9-2320-211-20-3-1. It shows the rotopack and procedure for adjustment. I do have the linkage assembled correctly, the rotopack linkage adjusted properly, but, the clutch linkage is all wrong! The thing has been assembled in the wrong position, imagine that! Next week, I will un adjust the rotopack part and move over to the clutch linkage, tear it down and assemble the stuff correctly.

I would REALLY like to meet the person/people that worked on this truck, EVERYTHING has been a struggle due to some people. 🤬
 

WillWagner

The Person You Were Warned About As A Child
Super Moderator
Steel Soldiers Supporter
8,530
2,737
113
Location
Monrovia, Ca.
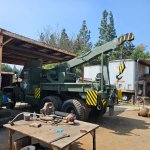
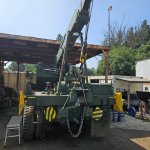
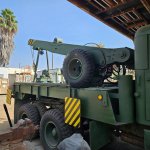
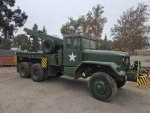
Well, it is with great sorrow, I need to tell all, the the wrecker project is........DONE! For the most part. The last two days I have re installed the hand valve for the rear station de clutching installed, the linkage for the rear station working, the air governor fixed and the brakes stopping....again.

I installed the new/rebuilt hand valve, with almost zero issues, EXCEPT, that the new one had a chrome handle. This truck is not fast, so it doesn't need shiny stuff. The handle is secured to the piston with a long set screw. No thing, pulled the screw out of the "new" valve, handle comes right off. Pulled the screw out of the old handle, and it was 1/2 as long. Upon further inspection, I noted that the lower half, with no threads, just the "pin" part that locates it into the piston, was not there, broken off. The handle would not come off. Turns out that the last half was broken off just proud of the hole it goes into therefore not allowing the handle to be removed. Nothing has been easy. Center punched the stub and used a LH drill bit. I got it to turn, but it would not come out whatever I did. FINALLY, after PB, brake clean, air, a hammer, tapping the thing upside down on a vice, it decided to drop out. 45 minutes out of my life I will never get back. Got the handle swapped, the valve on and all the lines secured.

Onto the linkage. After reviewing the TM, I found that 1, too much free play, 2, the clutch pedal linkage was installed into the wrong hole in the cross shaft arm. I then moved things around, re adjusted the free play and all seemed good. I put the unit into gear with the exception of the trans, engaged the rear clutch, and tried to put it in gear. Nope, can't find 'em, grind 'em. Took a bit of time with me under the turd and another bouncing between the cab and rear control station and I found the issue. Seems that when "soldier B" installed the rear station linkage, the clamping bolt wasn't tight allowing the cross shaft to rotate in the arm when the adjusting bolt contacted the arm to depress the clutch. Guess who was "soldier B"? Yup, yours truly! After putting the arm where it needed to be and actually tightened, we now had rear clutch control! I love my job so much, I do it twice!

BTW, the R6602 had yet another miss after sitting a week. #4 was the issue this time. Pulled the wire and plug, carboned as bad as #6 last week. Cleaned it and re installed, no miss.

Decided to check the air pressure as the gauge was a couple of needle widths under 90 PSI. With shop air to the tank, the gauge I put in it read 120 PSI, the dash, 120. I went to the air governor and pulled the cover. This has the old, flat BW type that has a tube in it. The top lock nut was busted....after I put a wrench on it. I swear, I didn't even turn the nut, it broke as soon as the wrench touched the nut! Anyway, I decided to check some of the inventory out back to see if there was an old style governor on one of them. Found one on a gutted cab, but, when I raised the hood, there was a small gaggle of some of the most different wasps I have ever seen just hangin' out on the choke cable sticking out of the firewall. Normally, our wasps are big green faced bastages with black stripes on their butt. These things were black with yellow stripes on their butt. Normally, the little stinging f ers turn and look at you and fan their wings and just look at you as if to say, "BRING IT!" These gusy didn't move. I thought they were dead, but needed to make sure. Closed the hood and lobbed a piece of debris I found on the ground. NOPE, alive and well! Time for me to move on! There is one more hulk out back that has no guts in it. It is an M35 that was used on China Beach and blown up. No motor, but it was an OA331 truck. Still has the starter shaft from drivers side to pas side and it had the OG governor. Since the truck was blown up, it looked smoked. When I got it back to the shop and took it apart, it looked better than the one I removed! Anyway, installed it, fired it and re checked the pressure. 120 on the dash and the rear station depressed the clutch better than it ever has!

I got to close the hood!

Onto the brakes. I had rebuilt the MC and bled it a while back and it had brakes up until a few weeks ago when I moved the truck back to clean the bay then pulled it back into the shop. 2 weeks later, no pedal. Looked in the MC, not dry, but no fluid. I added fluid, did the tap tap and slight depress on the pedal. Tons of air in the bleed after releasing. After 10 minutes of doing this and 1 refill later, the pedal was normal and firm. The only thing I can think of, because no leaks under it, is that with all of the running sitting still, there must have been some air somewhere in the system and it found it's way to the high spot. Dunno. I am usually pretty good on these systems.

Well, with all that done, seems like it might be GTG! I put a fresh can of gas on it, still running out of a jerry can, fired it and tried to move it. Didn't wanna move too easily, like the brakes were locked, but the pedal was good. The truck has been chocked. I knew I wasn't running up onto a block of wood. Moved easier in R than F. Then it dawned on me, e- brake. Yup, someone had set the e-brake. Most likely one of the volunteers that lubed the truck during the week. That's OK, safety 3rd. Released the brake and drove it out of the shops and did a few hot laps around the compound.

It is a cool old piece of equipment!

I have a video up on my YT, but I turned my phone 1/2 way through and the video is sideways, 1/2 way through! Craig took a video. One of the guys is coming down for a week and he will transfer it from his phone to the Museum TY and I will then add it to my channel if it turned out good.

To all that have helped me through this project, I thank you. I hope that some of what I have put up helps someone out with their M39 series project. I do have some TM's that need to go up on the site. I might do it or I will send them off and have Tim PDF them.

There are still some small things needed, seats for upper and lower, lights, stenciling, touch up paint, re spool the crane, service, un spool the front winch and re spool it correctly and some little things. The cable is the next thing so it can be used as intended.

Next project is a 10 gen set. Make it run and see if it puts out. Maybe make some revenue for Tankland.


I apologize for the video. I am not smart enough to fix it!

done.jpgdone1.jpg
 

WillWagner

The Person You Were Warned About As A Child
Super Moderator
Steel Soldiers Supporter
8,530
2,737
113
Location
Monrovia, Ca.
Nice job captain Ahab.
I like the green whale better then the white one.
Be careful with the Gen set.
It can bite you.
Nah, that's why YOU play with lightning and I play with pistons!

And, my friend, YOU are one that I need to thank for all of the help, encouragement and pushing my happy azz along when I got to a stopping point. I am forever in your debt. I owe ya some 3 bean salad or smoked mac n cheese!
 

WillWagner

The Person You Were Warned About As A Child
Super Moderator
Steel Soldiers Supporter
8,530
2,737
113
Location
Monrovia, Ca.
Man you guys have had a challenge with this truck but it's a beautiful wrecker, I love my M-62 including every gremlin it has lol
It is a pretty cool beast, however, it has been the cause of much pain, suffering and frustration. I also forgot to mention, after all the clutch hubbub, I tested out the rear controls. I set the throttle to wide open at the rear, disengaged the clutch and put the crane drive into gear. The governor works great! Dropped the RPM to around 1600. Can't wait to try it out!
 

msgjd

Well-known member
1,064
3,266
113
Location
upstate ny
Nothing has been easy. Center punched the stub and used a LH drill bit. I got it to turn, but it would not come out whatever I did. FINALLY, after PB, brake clean, air, a hammer, tapping the thing upside down on a vice, it decided to drop out. 45 minutes out of my life I will never get back.
Murphy makes all incredibly-mysterious nonsensical things possible ! .. Had a similar situation with a Roosa-Master injection pump on a big ol' Deere , but in reverse... I tipped the decapitated IP upside down to service the shaft seal and voila! , a little pin magically appeared on the bench ! .. The manual's cutaway illustration did not show the existence of this pin, which apparently belonged inside one of the tiny deep passages, a situation which led to a couple age-old questions that included words such as "wtf" and others .., I bet you spat just a few while working on the M62 .. :hammer: :-x

I could never put myself through your amount of suffering at my age, therefore my M62 is gonna keep most it's small and annoying "Deficiencies & Shortcomings" as long as i own it, except maybe new paint someday . .Yes, it does have a DA Form 2404 in the glovebox which seems to add line items almost as fast as other items are corrected

Wonderful job, Will !! ,, Cheers to you , BLK HMMWV, and others ! (y)(y)(y)(y)(y)
 
Last edited:
Top
AdBlock Detected

We get it, advertisements are annoying!

Sure, ad-blocking software does a great job at blocking ads, but it also blocks useful features of our website like our supporting vendors. Their ads help keep Steel Soldiers going. Please consider disabling your ad blockers for the site. Thanks!

I've Disabled AdBlock
No Thanks