• Steel Soldiers now has a few new forums, read more about it at: New Munitions Forums!

  • Microsoft MSN, Live, Hotmail, Outlook email users may not be receiving emails. We are working to resolve this issue. Please add support@steelsoldiers.com to your trusted contacts.

Trick, functional jake brake grenade shifter

US6x4

Well-known member
Steel Soldiers Supporter
1,233
2,242
113
Location
Wenatchee, WA
I just completed my most recent project which was to put a grenade shift knob on the shifter but with a twist. In preparation for jake brakes I wanted to be able to switch the brakes on and off from the shifter like modern big rigs so I went down a rabbit hole to put a micro switch inside the hollow grenade...
20190808_172158.jpg 20190808_172052.jpg 20190808_173532.jpg

The shifter turned out sweet but this project was fairly intense and may be a 14+ type of puzzle ;)

20190807_151518.jpg 20190807_151526.jpg 20190807_165949.jpg

I have many photos so tag along as I go through this step by step!
 

US6x4

Well-known member
Steel Soldiers Supporter
1,233
2,242
113
Location
Wenatchee, WA
To start with I got a 3-pack of inert grenades to fondle and find out which one felt the best in hand and had enough room for a micro switch. The pineapple grenade was the smallest one and the baseball grenade was a little too bulbous for me but the M26 lemon grenade was just right.
3pk-dummy-grenades-inert.jpg

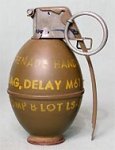
Here is an original lemon grenade
220px-M-61Grenade.jpg

Finding the right micro switch was a challenge that took some time too find the right size, shape, and function. Most switches I found were momentary-on switches which I didn't want and were of the limit switch type of operation. I wanted a single acting, single pole switch so that when I click it on it stays on and then I click it again to turn it off. I finally found a Carling 110-SP which is a very robust UL rated micro switch with a good tactile feel when it's operated.
20190521_200718.jpg
 

US6x4

Well-known member
Steel Soldiers Supporter
1,233
2,242
113
Location
Wenatchee, WA
The grenade had a 1/2" hole in it top and bottom with the top hole already threaded for the dummy fuse to screw in. Luckily the bottom hole was well centered so to have the best chance at fitting the switch inside I drilled and tapped to the largest size I could while leaving a slight shoulder for a thread adapter to bottom out on. I was able to drill it to 15/16" and then tap it to 1-14 threads on the radial arm drill. Since the thread adapter will be machined to whatever thread spec I want it didn't matter if I used 1-8, 1-12, or 1-14 threads however the 1-14 threads had the largest major diameter and every little bit helps. The three jaw chuck worked great at holding the grenade in place.
20190521_143534.jpg 20190521_144435.jpg
 

US6x4

Well-known member
Steel Soldiers Supporter
1,233
2,242
113
Location
Wenatchee, WA
First trial fit of the switch in the grenade with the fuse and spoon installed. I used a dremel to carve out a relief in the grenade and I chamfered the corner of the switch but I think one could get away with only doing one of these steps.
20190807_153227.jpg 20190807_153219.jpg 20190524_081947.jpg

The switch protrudes right at the center rib and needs the rib removed to make a flat for the jamb nut.
20190807_161318.jpg
 

US6x4

Well-known member
Steel Soldiers Supporter
1,233
2,242
113
Location
Wenatchee, WA
With all the holes drilled, tapped, and a few coats of OD green applied it's now time for painting the description onto the outside. Initially I wanted to replicate the original script that would have read
"GRENADE, HAND
FRAG, DELAY M26,
5-69 COMP B LOT LS-3"

But since this isn't truly a grenade I went with a description that suited the intended usage and also maintained a similar layout with 3 separate rows. Like my intercom project I used the 1Shot sign paint which worked well. Each line took 3 to 4 hours and every letter had to be crisped up because the paint tended to bleed out beyond the stencil due to the rough texture. A toothpick soaked in mineral spirits worked pretty well for pushing paint back in line.
20190712_194125.jpg 20190712_190141.jpg 20190712_192438.jpg 20190714_092723.jpg 20190713_090046.jpg 20190720_190003.jpgView attachment 772990

Compared to the real deal is looks pretty close.
 
Last edited:

US6x4

Well-known member
Steel Soldiers Supporter
1,233
2,242
113
Location
Wenatchee, WA
The next pieces needed to mount the grenade to the shift handle is the thread adapter and a jamb nut. I had the adapter machined from brass with 1-14 external threads and 5/8-11 internal threads and about an 1/8" shoulder.

The jamb nut started life as a typical hex flange nut and then I had the flange OD turned down to be just a hair wider than the brass shoulder and then had 3/16" of material removed from the nut to make the height the same as a jamb nut (3/8" tall). All of this is to mimic the pedestal base of the M26 grenade when it's mounted.

20190626_173911.jpg 20190626_173936.jpg 20190626_174010.jpg 6696s.jpg
 

US6x4

Well-known member
Steel Soldiers Supporter
1,233
2,242
113
Location
Wenatchee, WA
To completely finish the work on the grenade before final assembly I had to trim the ears off the spoon so that it would be free to pivot about the cotter pin when getting the squeeze. After this photo the grenade got 9 coats of matte clear enamel to build up some protection against a sweaty hand rowing through the gears.

20190717_190002.jpg

The next part will be creating a new shift lever with a hollow center...
 
Last edited:

US6x4

Well-known member
Steel Soldiers Supporter
1,233
2,242
113
Location
Wenatchee, WA
OK, so now we have a grenade with a micro switch which will provide a ground signal for a relay in order to open the relay and allow current from the battery to flow to the jake heads. So how do we route that pesky ground wire? I went overboard in an effort to avoid an external wire and zip ties/electrical tape/hose clamps because I don't want this to look ghetto. For those that haven't looked under their shift knobs the factory shift lever is solid and there is no easy way to drill it out so I made a new lever out of 1" shaft that was gun-drilled with a 1/4" hole through the center. To play around with this idea while still driving my 813 I ordered a spare shift lever and I think it came off of an M39 series truck because the bends were different than mine and the lever had a continuous taper from .870" to .625". My original lever had a stepped taper from .870" to .75" to .625" with tighter bends.

Here is the shaft I started with: 1" OD x 26.125" long
20190628_092329.jpg

I'm committed to this idea now! The M39 shift lever gets the lower portion cut off in the band saw. After sawing the handle off, the lower portion got faced, drilled and tapped to 5/16" N.F. and chamfered to make a v-notch for the weld.
20190627_090447.jpg 20190630_202313.jpg 20190731_113352.jpg

Next is the real fun part. The 1" shaft got contoured much like a rifle barrel would get contoured with the appropriate tapers and the correct transitions to match the factory shifter (My M809 shifter - not the M39 shifter). First up is the 5/8" OD section, then the 3/4" section, then the 7/8" section.
20190717_090222.jpg 20190719_140305.jpg 20190722_140606.jpg 20190723_140316.jpg 20190723_140316.jpg
The shaft was long and spindly and it was a challenge for the machinist to keep the chatter to a minimum. The CNC lathe was more sensitive to the chatter than the manual lathe, but he pulled it off and it turned out great! the last step was a weld chamfer at the base and 5/8"-11 N.C. threads for the grenade shift knob. I also tapped the bore of the shaft to 5/16" N.F. to match the shifter base so a long set screw could be used to align both pieces and allow the bent upper to be indexed in the cab to ensure the shift lever would miss the winch control lever and the fuel shutoff cable.

20190723_141450.jpg20190731_113406.jpg 20190801_090150.jpg 20190724_150236.jpg

With all of the shaft machining complete the next and scariest step is bending this beautifully machined straight shaft.
 
Last edited:

US6x4

Well-known member
Steel Soldiers Supporter
1,233
2,242
113
Location
Wenatchee, WA
To bend the contoured hollow shaft I used the same method I used when making a set of twin stick transfer case shifters for my brother's Ford Highboy - the only difference being his sticks were solid stainless and my shifter is hollow carbon steel.

20170227_140448.jpg 20170314_163252.jpg 20170315_120256.jpg 20170317_115923.jpg 20170317_182246.jpg

The bends on my 813 shifter measured in at 45° for the lower bend and 28° for the upper bend. To hit these right on I made up some bend gauges which are just metal strips bent at the correct angle with a handle on it to gauge the progression of the bend while the metal is glowing red.
20190730_111559.jpg

I filled the hollow bore with sand to prevent the bore from collapsing during the bending process and stuck a 1/4" rod in the end to both trap the sand in the hollow and to have a handle to grip that wouldn't burn my hand. Next I chucked up the shaft in a vise and set the flat of the base to a 20° cant from vertical (about 11:00 position) as was measured off the original shifter so that I could push straight down on the shaft when the metal started to move and have the bend in the right orientation. I used the gauge to tell me when I had bent the shaft enough. It took a lot of heat and the rosebud tip was missing so this took about 15 minutes with a welding tip...
20190730_111523.jpg 20190730_111543.jpg

After this bend gently cooled the shaft got turned upside down with the flat of the base completely vertical and ready for the 28° bend. This bend heated up really fast but also flaked off some surface material - no biggie.
20190730_112153.jpg 20190730_112209.jpg 20190730_112516.jpg 20190730_112823.jpg

Now the shaft is bent and looks like the original shaft except it is hollow !!!
20190731_113442.jpg 20190731_184826.jpg
 

silverstate55

Unemployable
2,075
872
113
Location
UT
Holy cow, whoever thought that a shift lever could be a work of art???

Outstanding, thanks for sharing & posting!!! Can't wait to see the rest!

:goodjob:
 

US6x4

Well-known member
Steel Soldiers Supporter
1,233
2,242
113
Location
Wenatchee, WA
Holy cow, whoever thought that a shift lever could be a work of art???

Outstanding, thanks for sharing & posting!!! Can't wait to see the rest!

:goodjob:

Thanks for the compliment! Yes, there is a lot more than meets the eye when first seeing the shift lever - looks like just another stock part on the outside. I'll be uploading more pics today of the final shaft after welding plus a few more fab steps.
 

US6x4

Well-known member
Steel Soldiers Supporter
1,233
2,242
113
Location
Wenatchee, WA
With the shaft bent up and screwed to the base but not yet welded I installed the shifter onto the transmission and ran through the gears with special attention on reverse (fuel cut off clearance) and 1st (winch handle clearance).
20190731_161041.jpg 20190731_161205.jpg

With the shifter in 1st gear I rotated the top shaft until I had a decent gap between the winch handle and then I scribed 3 lines at the v-notch across both the upper and lower part so It could get it welded up in the right orientation.
I don't have any photos of the shaft getting welded but it seemed like a non-event and one pass filled up the 3/8" wide v-notch easily. Here is a pic of the weld after grinding it smooth on the belt sander, then finessing it on the bear-tex wheel, then finishing it on a stainless wire wheel.
20190801_150003.jpg
 

US6x4

Well-known member
Steel Soldiers Supporter
1,233
2,242
113
Location
Wenatchee, WA
The last fab step to do before painting is to drill a hole in the side of the stick for the wire to exit through and then tap the hole for the bolt that will hold on the ground strap (more of this will be in the assembly pics). The concave piece allows the bolt head to have full contact with the ground strap ring terminal. This piece is made simply by drilling a hole the same diameter as the shaft base (7/8") and then slicing off the piece you want in a bandsaw.
20190802_112559.jpg20190703_091254.jpg20190802_112607.jpg
 

US6x4

Well-known member
Steel Soldiers Supporter
1,233
2,242
113
Location
Wenatchee, WA
It has been fun watching your project! Thanks for sharing.
You're welcome. How things are made or manufactured has always interested me more than the final product so unless I'm working on a patent idea I'm always up for sharing projects & ideas.
 
Last edited:

US6x4

Well-known member
Steel Soldiers Supporter
1,233
2,242
113
Location
Wenatchee, WA
Time to start assembling pieces together! Here are some pics of the micro switch and how I ground the switch to the body of the grenade. The piece with the hole in it was made in a similar fashion to the concave part for the ground strap. I sliced off the edge of a piece of pipe whose OD matched the ID of the grenade so that the ring terminal is sandwiched between flat parts for a better connection. The switch is a 1/2" OD but I used a much slimmer 3/8" ring terminal and split it to fit.
20190601_091617.jpg 20190601_094234.jpg 20190601_094749.jpg

This looks simple but this all has to be attached AFTER the switch is inside the grenade which will be like building a ship in a bottle.
 

US6x4

Well-known member
Steel Soldiers Supporter
1,233
2,242
113
Location
Wenatchee, WA
Now it's time for all of this to go inside the grenade:
20190807_151526.jpg

First up is the switch, then the wire, then dome shaped spacer. Since the screws were brass and non-magnetic I used tape to hold them to the screw driver.
20190807_153203.jpg 20190807_164713.jpg

The hardest part was finagling the ground wire onto the switch (the ring end) and if you have big gorilla hands forget it. You need kid hands and a lot of patience for this stage. The main wire also got screwed on before the switch is in place and that wire I left exiting out the top of the grenade.
20190807_170531.jpg 20190807_171819.jpg 20190807_165949.jpg
 
Top
AdBlock Detected

We get it, advertisements are annoying!

Sure, ad-blocking software does a great job at blocking ads, but it also blocks useful features of our website like our supporting vendors. Their ads help keep Steel Soldiers going. Please consider disabling your ad blockers for the site. Thanks!

I've Disabled AdBlock
No Thanks