• Steel Soldiers now has a few new forums, read more about it at: New Munitions Forums!

  • Microsoft MSN, Live, Hotmail, Outlook email users may not be receiving emails. We are working to resolve this issue. Please add support@steelsoldiers.com to your trusted contacts.

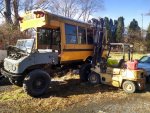
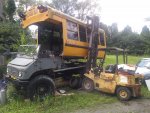
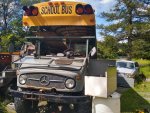
Two new toys unimog 404

joeblack5

Active member
256
244
43
Location
State College PA
Amazing, a year later and so little progress in this field

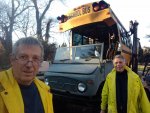
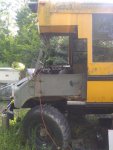
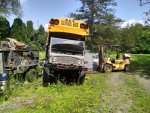
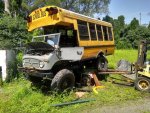
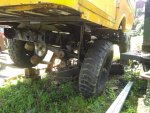
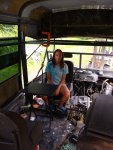
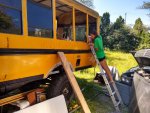
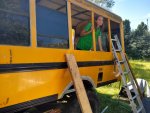
Over thanksgiving my brother came over from the Netherlands. It was nice to work together as family and the extra hands ,eyes and most important motivation and enthusiasm did the trick.
My brother is on the right , I am on the le.., eh other side.

So a bit further.
 

Attachments

Mullaney

Well-known member
Steel Soldiers Supporter
Supporting Vendor
7,778
19,910
113
Location
Charlotte NC
Amazing, a year later and so little progress in this field

Over thanksgiving my brother came over from the Netherlands. It was nice to work together as family and the extra hands ,eyes and most important motivation and enthusiasm did the trick.
My brother is on the right , I am on the le.., eh other side.

So a bit further.
.
It really amazing what a body can do with a little help.
Working out in the yard by yourself - wears a body out!

Glad to see that you made some good progress over the holidays!
 

joeblack5

Active member
256
244
43
Location
State College PA
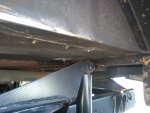
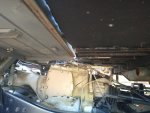
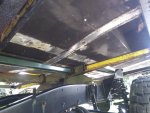
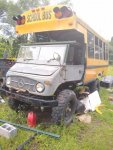
It has been a while, some progress has been made.. the pivoting subframe that holds the busbody has been welded and mounted.. the aluminum busbody is cleaned from the rusted crossmembers and is now placed directly on the pivoting subframe..
Some test have been done with the 404 frame twisting..
Interior of the bus is now the next part.IMG_20230722_134041388.jpgIMG_20230722_160143976.jpgIMG_20230726_170728429.jpgIMG_20230728_114530660_HDR.jpgIMG_20230728_114751865_HDR.jpgIMG_20230728_115206330.jpg
 

joeblack5

Active member
256
244
43
Location
State College PA
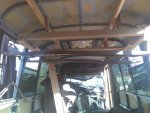
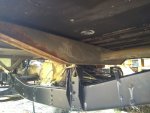
We removed the wooden frame against the ceiling that was used to lift the bus body with the forklift.
Then we made a frame of unistrut to build of to the the 404 cab. We also used unistrut for the bed frame above the front seats.
Together this increased the stiffness of the bus body.

Next step will be plywood on the bed and experiment with optimum height


Here a pic from the inside where the unistrut is installed. The driver seat is inverted and sits on top of a milk crate to see how much space above the head is available.

I have a scissor air adjustable truck seat and need to find out of that can handle the height difference.

IMG_20230810_162855761.jpg
If this arrangement works then it can become a very spacious arrangement

Johan
 

joeblack5

Active member
256
244
43
Location
State College PA
Another small step. But good for moral..
Not sure what time do next. Close the front... Or first get a better feel how to make the front seats go up and down and swivel.

IMG_20230812_151628790.jpg
I got a couple of front seats out of a "modern" mercedes from the junkyard. They have electric up down and slide. If I extend the arms that bring the seat up I could get more range out if it. But bouncing around in a unimog in terrain might not be very good for the mechanism . Maybe some more thought is required. In the original 404 there is very little space between the cab floor and the seat top. How to get a swivel and a 12" extension in that space.
IMG_20230812_151846181.jpg

I have also an air seat out of a big truck. It has a parallelogram construction and an air bellow to raise and lower but that construction in itself is already 6" tall.

Johan
 

joeblack5

Active member
256
244
43
Location
State College PA
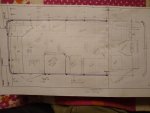
First attempt at a floor plan. The 404 cab section is not to exact scale. Only the driver front wheel is in the drawing.
The two part rear side door will be modified I to one smaller door of 700 to 800 mm wide. About 200mm will interfere with the wheel well.

Entrance and walk thru shower are combined. Toilet in rear driver side.

Bed above cab 60" wide , 24 " on additional hinge. The whole bed tilts up from hinge above front wind shield to facilitate more space when stationary and not in bed.

Distance between bed and ceiling 30"
Each square in drawing is 100x100 MM.
Johan
 

Attachments

joeblack5

Active member
256
244
43
Location
State College PA
Unfortunately not much to show for.
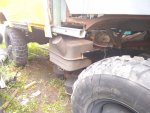
Cut the bottom fiberglass above the windshield straight.. welded up a bracket that connects the cab/ bed unistrut frame to the A frame post.. tested how much the fuel tank had to be lowered to get access to the fuel cap now that it is mounted under the busbody. Now I can make new brackets. The bottom of the tank is still an inch above
the bottom of the frame rail. I will mount a second tank (not interconnected) but with a filler cap next to it to have better control about fuel quality and leaking tanks and so on.IMG_20230823_130327545.jpgIMG_20230823_130310848.jpg
 
Last edited:

joeblack5

Active member
256
244
43
Location
State College PA
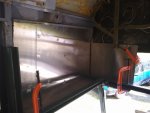
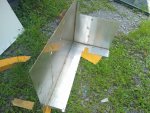
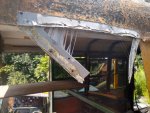
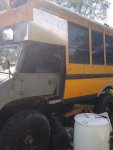
A couple of intense grinding days. This is the most complicated side. First removal of the old aluminum, rivets and glue was a pain. This construction glue is not kids white elmers glue. What a pain. I wanted it to be tucked under the roof so that it is inherently leak free. The ssteel is a corner section I cut out of a psu surplus draft hood that I bought for $25.. it probably would have been easier to weld it but I am not good enough welder for such an " in the eye weld"

Aluminum would have been lighter but this what I had and plenty for the other side as well. Always had a thing for deloreans ,haha, nice contrast with a 404.

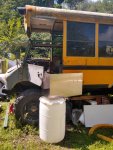
It worked out, must have climbed that barrel 50 times to measure and fit.. the trick part is the angle change from the front to where it attached to bus body.. I think it worked out pretty good. The center section becomes a bedroom window. Lexan..
 

Attachments

joeblack5

Active member
256
244
43
Location
State College PA
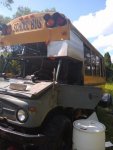
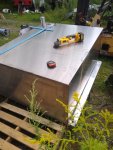
IMG_20230829_131308476.jpgThanks folks, just started the other side.. these are old hoods from the University. Bought them for the stainless material , lucky I did .. also cut a stainless sheet for covering the last three windows on the driver side. It is cover sheet from a commercial.kitchen. pretty thin. Curious how much oil canning it will get. As you can tell this is all shade tree work and " low cost".. sofar I have 2.5k in the 404, 3k in the diesel conversion and 2k in the busbody.. hope to get this on the first camping trip below 10k.

Johan
 

joeblack5

Active member
256
244
43
Location
State College PA
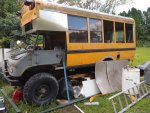
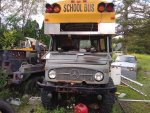
A little more progress. Getting ready for covering up the last three windows on the driver side. Undoing some of the glue work of the roofing sheet so that the side covering can slide under it. Although sikaflex can be very strong I rather trust overlapping so that a water leak is impossible. The buscompany mounted the driver clearance light higher then the passenger side....purpose or sloppy?? Less visible is that the passenger side is also 1" further to the front. Maybe that had something to do with the entrance door construction?? I am not going to fix that. The glue used for bonding the fiberglass to the aluminum is stronger then the fiberglass. It would add a lot of work and result in more damage.
the rectangular hole will be used for 1/4" of lexan to let light into the bedroom and make it feel less claustrofobic. I will probably expand a little upwards into the fiberglass depending how easy the curvature of the fiberglass conforms to the flexibility of the lexan.
Johan
 

Attachments

marchplumber

Well-known member
Steel Soldiers Supporter
3,836
2,935
113
Location
Peoria, Illinois
A little more progress. Getting ready for covering up the last three windows on the driver side. Undoing some of the glue work of the roofing sheet so that the side covering can slide under it. Although sikaflex can be very strong I rather trust overlapping so that a water leak is impossible. The buscompany mounted the driver clearance light higher then the passenger side....purpose or sloppy?? Less visible is that the passenger side is also 1" further to the front. Maybe that had something to do with the entrance door construction?? I am not going to fix that. The glue used for bonding the fiberglass to the aluminum is stronger then the fiberglass. It would add a lot of work and result in more damage.
the rectangular hole will be used for 1/4" of lexan to let light into the bedroom and make it feel less claustrofobic. I will probably expand a little upwards into the fiberglass depending how easy the curvature of the fiberglass conforms to the flexibility of the lexan.
Johan
Looks like she'll have about the same or less aerodynamics as an F-4................and probably a bit slower.........BUT, DAMN nice work!! Whats the plans for the stop and caution lights on the upper canopy?
 

marchplumber

Well-known member
Steel Soldiers Supporter
3,836
2,935
113
Location
Peoria, Illinois
But at the end of the day, the F4 flew! People who bad mouth the F4, go to the bad place when they die. KEEP that in mind!
F-4 was a capable and fearsome foe.................doesn't change the fact that like Mullaney stated, glide factor of about zilch...............good story about an F-4 and a B-52.....................premise, bomber could do something fighter could not...............many back and forth till finally bomber said, "Well, i did it! Fighter responded, what did you do, I didn't see anything,,,,,,,,,,,,,,,,,,bomber, "I shut off two of my engines!"...........................F-4 lost the bet! hahahaha
 

Mullaney

Well-known member
Steel Soldiers Supporter
Supporting Vendor
7,778
19,910
113
Location
Charlotte NC
But at the end of the day, the F4 flew! People who bad mouth the F4, go to the bad place when they die. KEEP that in mind!
.
No bad mouth. That is just how that plane functioned.
But light it up and she would definitely Spit And Get!

If I had a choice, and unlimited money - I would own one.

.
 

joeblack5

Active member
256
244
43
Location
State College PA
Haha I keep that glide factor in mind when I see the hairpin in the road and have lost my single circuit brake hydraulics...

But we did improve the air resistance coefficient .. 3 windows out and a ss steel sheet in, nicely tucked under the roof sheet.. a two person job. It was not that easy.. I will wait for a full sun day on that side before I add more screws. I like that sheet to have Max expanded so that it pulls thight with out oil can effects under normal temps. I have to find a glue that bonds stainless and 2 " thick styrofoam over the full surface together. The other side has only one window to do.

Johan
 

Attachments

Mullaney

Well-known member
Steel Soldiers Supporter
Supporting Vendor
7,778
19,910
113
Location
Charlotte NC
Haha I keep that glide factor in mind when I see the hairpin in the road and have lost my single circuit brake hydraulics...

But we did improve the air resistance coefficient .. 3 windows out and a ss steel sheet in, nicely tucked under the roof sheet.. a two person job. It was not that easy.. I will wait for a full sun day on that side before I add more screws. I like that sheet to have Max expanded so that it pulls thight with out oil can effects under normal temps. I have to find a glue that bonds stainless and 2 " thick styrofoam over the full surface together. The other side has only one window to do.

Johan
.
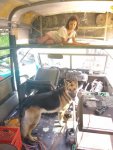
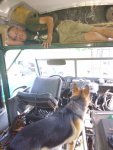
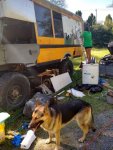
And the SuperDog is observing.
Also thinking DANG it is HOT out here!

.
 
Top
AdBlock Detected

We get it, advertisements are annoying!

Sure, ad-blocking software does a great job at blocking ads, but it also blocks useful features of our website like our supporting vendors. Their ads help keep Steel Soldiers going. Please consider disabling your ad blockers for the site. Thanks!

I've Disabled AdBlock
No Thanks