• Steel Soldiers now has a few new forums, read more about it at: New Munitions Forums!

  • Microsoft MSN, Live, Hotmail, Outlook email users may not be receiving emails. We are working to resolve this issue. Please add support@steelsoldiers.com to your trusted contacts.

Valence's 1972 M35A2

Valence

Well-known member
Steel Soldiers Supporter
2,112
555
113
Location
Davis County, UT
March 10th, 2018
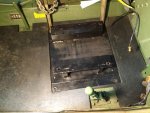
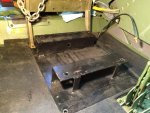
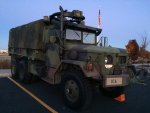
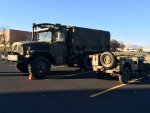
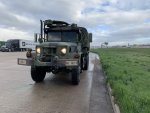
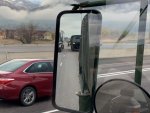
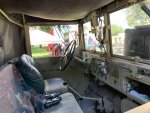
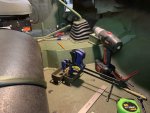
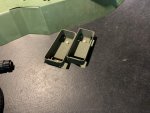
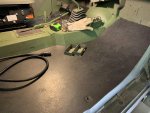
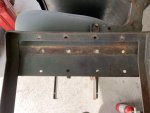
I cut out the floor mat below the driver's seat so it'd sit 3/4" lower. The change was very noticable, and a good improvement to my view out the windshield.

2018-03-10 16.20.28.jpg 2018-03-10 17.06.11.jpg 2018-03-10 17.06.22.jpg

-----

April 08, 2018
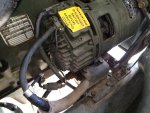
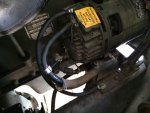
I noticed that the ground wire for the alternator sure was pulled tight and had a hard bend at the top connection with wires showing too. I added some heat shrink to it but it nagged on me that the wire was ultimately too short (~14" long). I opted to just replace it with a new 18 inch 4 AWG ground, with a new bolt and cleaned up frame and star washers. It is MUCH BETTER now.

2018-04-08 18.31.33.jpg 2018-04-08 19.08.03.jpg

-----

Back to the present, 06/02/2018
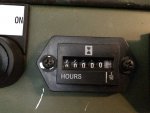
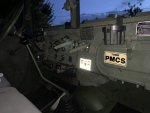
I'm not sure about this dang hour meter for the supplemental electrical air compressors. Still not to 0.2 hours run time. Maybe it can't handle the rough/bouncy ride (I mean, look at the left numbers). Granted, the air compressors run only for seconds at a time (maybe 20 seconds at first start, 5-10 seconds if doing low-speed parking lot manuvering. I'm keeping my eye on it.

2018-06-02 10.41.33.jpg
 
Last edited:

Valence

Well-known member
Steel Soldiers Supporter
2,112
555
113
Location
Davis County, UT
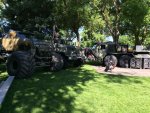
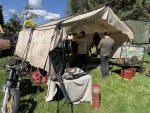
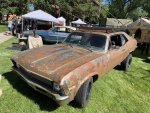
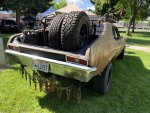
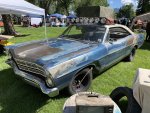
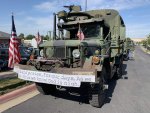
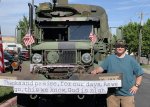
It may come as a surprise to some, but I actually don't care much for car shows. I might be interested if it lasted, at most, two hours. However, there's a "Sounds of Freedom" car show that's not far from me that I like to support, which I attended yesterday. Though this year was better than the last time I went as I was more "front and center" and had way better shade.

2018-06-09 09.14.25.jpg

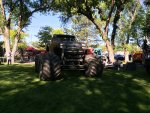
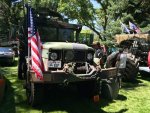
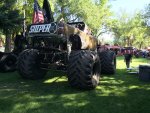
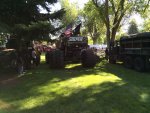
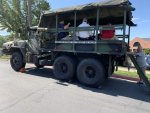
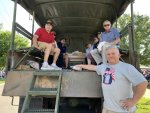
Your rig doesn't get much attention when it's next to a monster truck as that's all people are looking at, though people got to sit in mine.
2018-06-09 09.28.33.jpg 2018-06-09 09.28.40 HDR.jpg 2018-06-09 12.37.49 HDR.jpg 2018-06-09 09.29.04 HDR.jpg 2018-06-09 09.34.04.jpg 2018-06-09 09.39.32 HDR.jpg

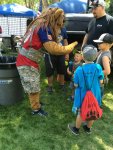
The Mascot Miracles Foundation was a hit with families.
2018-06-09 11.53.34.jpg 2018-06-09 11.15.22 HDR.jpg

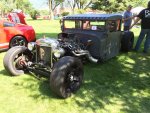
Modified Deuce/M809 cab spotted ;)
2018-06-09 16.20.40 HDR.jpg


Ending odometer: 3612.4 miles (+5.4 miles)
Ending hour meter: 361.8 hours (+0.4 hours)
 
Last edited:

Valence

Well-known member
Steel Soldiers Supporter
2,112
555
113
Location
Davis County, UT
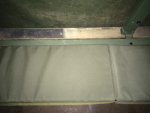
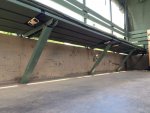
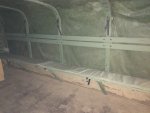
I now have troop seat bench pads, and they are still military surplus and a pretty dang good fit and the perfect color! I will need to make tie down straps, but that should be easy with some buckles and 1" nylon straps.

Dimensions: 74.5" long x 13" deep x 1" thick
  • So they're a little long (2 * 74.5 = 149") as the troop seats are only about 143" long, or 6" excess seat pad material. Unless I decide to bother shortening 2 of the pads, I will just tuck the excess at the front of the bed.
  • The depth is almost perfect as the troop seat bottom is about 13-3/4" deep, and you really can't even sit on the very back of the seat anyway.
  • Even though they're only 1" thick, the pad is firm and doesn't compress to nothingness.
I think anyone who sits in the back will appreciate these! So far I'm very happy with them.

I purchased them from my all-time favorite surplus store that I have been going to since I was a child. I still always visit in person when I'm in the area.
http://www.armysurpluswarehouse.com/us-gi-issue-seat-cushion.html
  • Web page description:
    • SEAT CUSHION FSN # 2510-01-109-5028 2600308 * U.S. GOVERNMENT ISSUE * WIDTH 13 INCHES * LENGTH 74.5 INCHES * THICKNESS 1 INCH * COVER MATERIAL - NYLON MIL-C-20696, TYPE 2, CLASS 3 * PADDING MATERIAL - PLASTIC, MK-P-15280 * COLOR - OLIVE DRAB * NEW THIS SEAT CUSHION IS ORIGINALLY MADE FOR THE ASSAULT AMPHIBIOUS VEHICLE - COMMAND OR PERSONNEL. IT WOULD BE A GREAT CUSHION TO USE ON A BENCH OR PICNIC TABLE OR WHEREVER YOU WANT SOME ADDED COMFORT. IF YOU HAVE A MILITARY VEHICLE THIS MIGHT BE AN EXCELLENT CUSHION FOR YOUR BENCHES IN THE BACK. THIS HAS 6 TIE DOWN SPOTS ON THE BACK OF THE CUSHION.

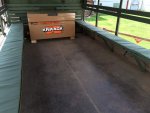
Apologies, it's a bit dark in the bed and pictures always suffer for it.

View attachment 694137 View attachment 694138 View attachment 694146 View attachment 694147
View attachment 694139 View attachment 694142 View attachment 694140 View attachment 694141 View attachment 694143 View attachment 694145

Edit:
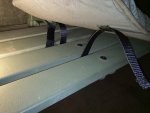
The backside loops (there are 3 pairs), fit 1" nylon webbing perfectly.

View attachment 694856
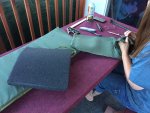
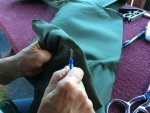
Well, it was put off for a while, but the troop seat pads were finally shortened to fit. My dear mother helped me a bunch since she has all the technical sewing skills. We trimmed the pad to length (only measured the passenger side and then mirrored it for the driver's side). The strap loops on the bottom of the pads were moved to ~7" from the new end. This required unstitching nearly 1/2 of the front of the pad to get enough material out of the way to use the sewing machine.
2018-06-15 20.37.05.jpg 2018-06-15 20.37.30.jpg

Then we sewed the front closed again. We used the sewing machine's "zipper" foot to get a close stitch to the pad then the regular foot on the cover/trim strip.
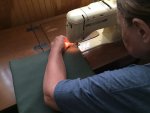
2018-06-16 18.10.19.jpg

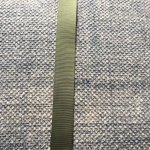
The original end had a complicated interior sewing so we "cheated" and sewed the short end just like the front, using a thin piece of green 1" nylon strap I had mistakenly purchased (noted below).
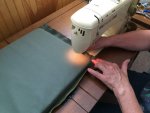
2018-06-16 18.51.13.jpg

We used an iron to give the thin nylon trim a good center crease to aid in sewing.
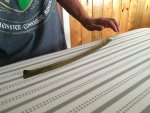
2018-06-16 18.59.05.jpg 2018-06-16 18.59.36.jpg

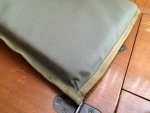
Then we sewed the nylon on the new end. It looked great, and as you can see, matched the factory design and color near perfectly.
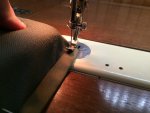
2018-06-16 19.04.25.jpg 2018-06-16 19.16.15.jpg

Purchased:
  • #483 camo green 1" nylon webbing. $4.32
    • As noted earlier, this purchase was a mistake. I didn't realize how THIN it was. I originally intended for this to be used with the buckles, but luckily it was really inexpensive and has come in handy for other projects, even this one too!
    • Bay Seller defense-acquisitions

s-l1601.jpg


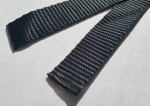
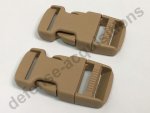
  • 12 sets of side release, dual adjustable, sand colored buckles. ~$10
s-l1600.jpg


20160708_095614.jpg.png

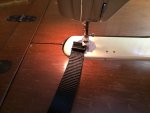
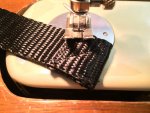
Each pad has 3 sets of loops on the back, and there's 4 pads so I needed twelve individual straps to hold the pads to the troop seats. I sewed the 12 nylon straps, unsupervised even! (I've got so much to learn about how to sew...but I'm very happy to own my Grandmother's Bernina 730 sewing machine that she bought in 1975). The finished length for 10 of the straps was ~24" (~1" folded twice on either end, so cut length ~28"). The two rear-most straps (left and right sides by the tailgate) were about 34" finished length (due to the lack of middle boards at the end to affix the pad to).
2018-06-15 23.38.40.jpg 2018-06-15 23.44.35 HDR.jpg 2018-06-16 16.49.02.jpg

For all but the the rear most loops, this is how I weaved the straps through the troop seats and then buckled the straps below. This prevents the pads from sliding when sat on and keeps them at the very front of the bench, which is where you need them! I do realize this will likely put most of the strain on the loop closest to the bed side, but it is what it is for the most straight forward solution and the pads really do stay in place this way.
2018-06-16 14.51.35.jpg2018-06-17 07.46.22.jpg 2018-06-17 07.47.04.jpg

9.jpg 10.jpg

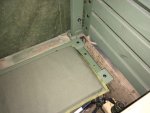
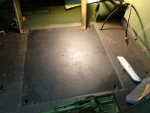
HOWEVER, There's one problem to this though that drives me nuts and is fairly upsetting that I didn't notice until everything was cut and sewn. Three of the pads actually were 77" long, and one freak'n pad was 72" long, thus, making one side 5" shorter than the other. aua
I mean, everything went well, and turned out great, except this part because I didn't measure BOTH sides, I just mirrored the work/measurements for the other. Why would identical looking pads not all be the same size? :x For crying out loud.....

(Yes, with my big, dumb Knaack box there, no one will really sit that far toward the front, but STILL. It's the principle of the matter.)
2018-06-17 07.45.49.jpg
 
Last edited:

Valence

Well-known member
Steel Soldiers Supporter
2,112
555
113
Location
Davis County, UT
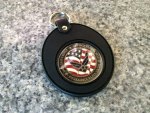
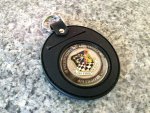
To not duplicate threads, the story from this year can be found in post #11, and lets just say there was a Commander's coin involved. Two in fact.
https://www.steelsoldiers.com/showt...d-and-Nation&p=2032203&viewfull=1#post2032203
View attachment 690469 View attachment 690470
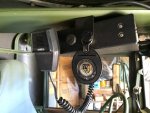
Since I was given TWO of these coveted coins, and they mean a lot to me, I thought I would be quite remiss if I didn't actually carry one in my deuce and a half (especially by this year's Independence Day parade). I purchased an overly-expensive 1.75" key ring coin holder and hung it from the one of the CB set screws. (If the wind from an open passenger-side window bothers it too much, I'll move it to left side of the CB, or elsewhere...). Since my deuce gets to rest in the garage, the sun won't get a lot of time to fade the coin or rot the silicone holder.

I intentionally faced the "Presented by the Commander" side toward the passenger, and the core values toward my myself as a reminder.

2018-06-16 16.49.30.jpg 2018-06-16 16.49.36.jpg 2018-06-16 17.14.55.jpg
 
Last edited:

Valence

Well-known member
Steel Soldiers Supporter
2,112
555
113
Location
Davis County, UT
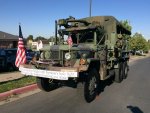
I participated in my 8th year of my town's Independence Day parade:

https://www.steelsoldiers.com/showt...d-and-Nation&p=2146901&viewfull=1#post2146901

2.jpg

The parade was to start at 10:00 (blessedly an hour earlier than all previous years). It leads with the Color Guard and my truck directly follows them. Right at 10, my truck was running, all the veterans were loaded and bed all buttoned up with my brother and I buckled in the cab. Then comes a literal last minute straggler who wanted in the truck, a vet who's rode with me a number of years. I probably should have said no, but I didn't. We jumped out and ran to the back to get him loaded. Needless to say, I didn't want to think about the parade starting if we weren't even in the truck.

After he was in, I panicked dashed back to the cab and got in right as the Color Guard started marching. This threw everything off for me. It was a couple hundred feet later when my brother asked "Is your park brake still on?". It was. I run the parade in 2nd gear, low-range and it easily over-powers the park brake, but not in high-range. Smoke was rolling out between the cab and bed. I'm not sure how much damage was caused, but I don't see anything upon my initial inspection, but it might need to be re-adjusted.

On the way home from the parade, the brakes were acting a bit funny. The rear drums were "howling" more than usual and when you let off the brake pedal the truck still continued to slow down like you were still gently applying the brakes but would clear up until the next stop. It wasn't the same as last time when my airpack failed and the brakes got tighter and tighter until you couldn't move. I theorized a broken brake shoe return spring? But it didn't seem to be constant, just slow to release. Last week I realized it's probably a dry diaphragm in the airpack. Even though it was still a new part when I installed it in 2016, it was most certainly 10-20+ years old.

So I pulled this air line in the back of my short-style airpack and squirted in air-tool oil. I used my shop air compressor and filled the air tanks and worked the brakes a few dozen times. A test drive around the block is still pending though.

airpack.jpg


Ending odometer: 3617.5 miles (+5.1 miles)
Ending hour meter: 362.3 hours (+0.5 hours)
 
Last edited:

Valence

Well-known member
Steel Soldiers Supporter
2,112
555
113
Location
Davis County, UT
I see that I have been lax at keeping this up to date. I have also not driven my truck as much as I should, so here's a short recap of the, nearly, last year.

Yes, adding the air-tool oil to the air pack really DID seem to help my brakes. They went back to what I believe is completely normal. I may want to do this yearly to my air pack and air-assist steering components (the air-ram cylinder on the tie rod and the drag-link)


September 15th, 2018
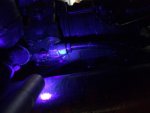
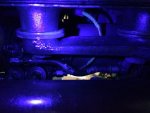
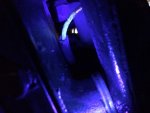
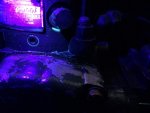
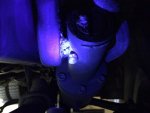
A short run around with not enough fuel dye in the tank, trying to find my fuel leak.

I didn't find anything conclusive at all (I should have done this with less fuel in the tank, or 3 or 4 times the dye...).

2018-09-15 18.27.16.jpg 2018-09-15 18.28.16.jpg 2018-09-15 18.29.11.jpg 2018-09-15 18.30.26.jpg 2018-09-20 17.50.42.jpg 2018-09-20 17.51.34.jpg

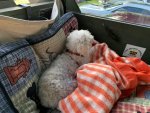
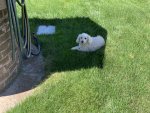
Some grease is UV reactive. Huh. And white, curious doggo is is not.
2018-09-15 18.40.21.jpg 2018-09-15 18.31.02.jpg

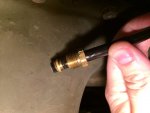
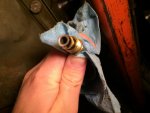
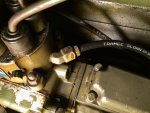
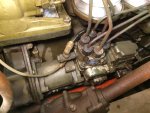
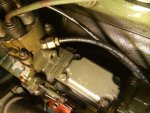
From the first pic, a noticeable amount of fuel had collected on the upper line on the injection pump, so I took it off to see if the ferrule or inner sleeve were cracked, but they looked fine to me.
2018-09-15 19.11.12.jpg 2018-09-15 19.11.35.jpg 2018-09-15 19.28.04.jpg 2018-09-15 19.28.21.jpg 2018-09-15 19.29.00.jpg

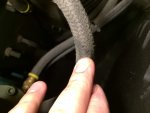
Though I did find an air hose rubbing on the air-assist drag-link. I tightened it a bit more to flex the hose a different direction.
2018-09-15 19.31.58.jpg 2018-09-15 19.32.07.jpg
Ending odometer: 3620.6 miles (+3.1 miles)
Ending hour meter: 362.8 hours (+0.5 hours)

Another car show at work on September 20th, 2018
2018-09-20 07.11.02.jpg 2018-09-20 07.11.38 HDR.jpg 2018-09-20 07.11.55 HDR.jpg 2018-09-20 13.05.52.jpg 2018-09-20 13.06.07 HDR.jpg
(I guess I forgot to record mileage here)
 
Last edited:

Valence

Well-known member
Steel Soldiers Supporter
2,112
555
113
Location
Davis County, UT
October 12th, 2018
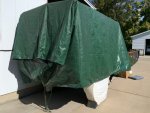
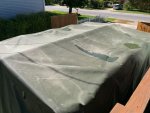
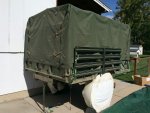
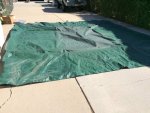
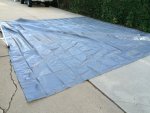
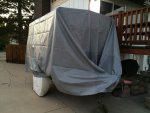
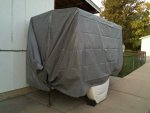
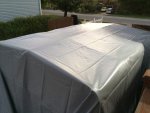
New outdoor cover for the M105 trailer. This last poly tarp lasted just over 4 years. It actually hadn't started to rip yet, but it wasn't water tight.
2018-10-12 13.59.14.jpg 2018-10-12 13.59.21.jpg 2018-10-12 13.59.41 HDR.jpg 2018-10-12 13.59.52.jpg 2018-10-12 14.02.53.jpg 2018-10-12 14.02.03.jpg 2018-10-12 14.02.11.jpg

I also finally took off the military cover and stored it in the shed so it wouldn't suffer any molding or abrasion wear with the new, very heavy and very pricey vinyl tarp to replace the deteriorated poly tarp. I debated heavily with myself in doing this because I could have replaced the military tarp about twice for the price! Though in the end I like that snow and rain aren’t rusting the trailer AND completely covering the body like this does wonders at keeping the wasps from building nests all over and inside the thing in the summer. I guess they don't like the tarp moving around or something. I usually only have to kill one or two nests underneath it, not a dozen or more in all the crooks and crannies.
2018-10-12 18.14.08.jpg 2018-10-12 19.06.14.jpg 2018-10-12 19.06.27.jpg 2018-10-12 19.06.54.jpg
(That tarp is heavy, and quite the job to get it up there. I need indoor storage lol)

November 12th, 2018
I was invited back to work for another Veteran's Day flag raising ceremony. I sure like that coworker's jeep too. Who wouldn't? ;)
2018-11-12 06.52.05.jpg 2018-11-12 08.20.03 HDR.jpg

Since last recording on 09/15/2018:
Ending odometer: 3693.5 miles (+72.9 miles)
Ending hour meter: 364.9 hours (+2.1 hours)


April 13, 2019
A successful MV meetup at Smith and Edwards in West Jordan, UT! (Thread has many more pics)
https://www.steelsoldiers.com/showt...-MV-meetup-and-swapmeet&p=2217159#post2217159
2019-04-13 08.13.59.jpg 2019-04-13 08.31.51.jpg 2019-04-13 08.31.51_zoom.jpg 2019-04-13 10.25.06.jpg

Ending odometer: 3759.9 miles (+66.4 miles)
Ending hour meter: 367.0 hours (+2.1 hours)
 
Last edited:

Valence

Well-known member
Steel Soldiers Supporter
2,112
555
113
Location
Davis County, UT
I'm in Utah as well and would love to come and see your truck and learn as I just got my own. look me up, Neal Westwood, Highland
Heyya Neal, that’s cool! Always good to find more folks locally. I’d love to show you around my truck. Isn’t that the favorite past time of any MV owner, to talk about their truck? ;) I’ll shoot you a Private Message (PM).

Today I’m re-re-refixing a leaking rear axle seal. Might also replace a leaking differential input seal too.
 
Last edited:

montaillou

Well-known member
Steel Soldiers Supporter
807
832
93
Location
W.WA
Isn’t that the favorite past time of any MV owner, to talk about their truck? ;)
I read earlier in your thread that you don't go to car shows. Might I suggest you try a general car show. I do 2-3 a year and I first thought no one would care about my old truck around all those classic cars, but instead I spend the day talking about the truck. Mine is often the only vehicle there that people can climb in/on as well and people like taking pics of their kids or themselves sitting in it. One memory that sticks with me is of this guy, probably his early 30's, sat in my truck and said, very seriously, "this is the best thing here".
 

Another Ahab

Well-known member
18,007
4,579
113
Location
Alexandria, VA
I read earlier in your thread that you don't go to car shows. Might I suggest you try a general car show. One memory that sticks with me is of this guy, probably his early 30's, sat in my truck and said, very seriously, "this is the best thing here".
That, right there, is why we are all here hanging out at Steel Soldiers. That says it all.


:driver::doghead:
 

Valence

Well-known member
Steel Soldiers Supporter
2,112
555
113
Location
Davis County, UT
I read earlier in your thread that you don't go to car shows. Might I suggest you try a general car show. I do 2-3 a year and I first thought no one would care about my old truck around all those classic cars, but instead I spend the day talking about the truck. Mine is often the only vehicle there that people can climb in/on as well and people like taking pics of their kids or themselves sitting in it. One memory that sticks with me is of this guy, probably his early 30's, sat in my truck and said, very seriously, "this is the best thing here".
That's a good suggestion. I do go to a handful car shows each year, but I do prefer to look at other MVs so why I'm now trying to organize 2 yearly local MV get-togethers, such as linked to earlier.
 

Valence

Well-known member
Steel Soldiers Supporter
2,112
555
113
Location
Davis County, UT
I'm still trying to catch up on things I did with/to my deuce:

June 06th, 2019:
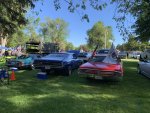
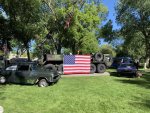
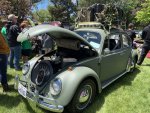
Sounds of Freedom Car Show, Layton, Utah
(Yes, I took my miniature side-kick ;)
2019-06-08 08.03.10.jpg 2019-06-08 08.03.02.jpg 2019-06-08 07.58.17.jpg 2019-06-08 09.06.10.jpg

One veteran talked to me for a while and was convinced he served with my deuce in the Utah National Guard. Unfortunately I didn't write any of this down so I've forgotten most of it and his name. I just have this photo of his artillery patches (because my truck last served in 1st Corps Artillery).
2019-06-08 10.50.32.jpg

A few of the other interesting things I saw and Gunzy's HEMTT:
2019-06-08 09.18.51.jpg 2019-06-08 08.03.36.jpg 2019-06-08 13.19.28.jpg

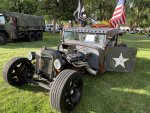
Some really creative folks out there:
2019-06-08 13.17.34.jpg 2019-06-08 13.36.18.jpg

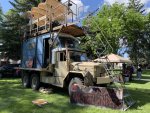
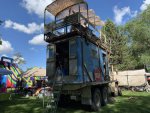
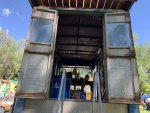
And then there was this group, "Utah Wastelanders":
2019-06-08 10.18.13.jpg 2019-06-08 10.18.35.jpg 2019-06-08 10.18.47.jpg 2019-06-08 10.18.54.jpg 2019-06-08 10.19.04.jpg 2019-06-08 10.09.15.jpg 2019-06-08 10.06.48.jpg 2019-06-08 10.10.24.jpg 2019-06-08 10.12.58.jpg 2019-06-08 10.13.42.jpg

A few more photos here:
https://www.steelsoldiers.com/showt...-quot-thread&p=2235291&viewfull=1#post2235291


Ending odometer: 3765.4 miles (+5.5 miles)
Ending hour meter: 367.5 hours (+0.5 hours)
 
Last edited:

Valence

Well-known member
Steel Soldiers Supporter
2,112
555
113
Location
Davis County, UT
I spent all of July 3rd, 2019 working on misc items on the deuce.

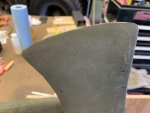
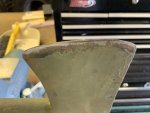
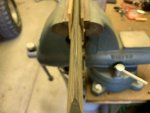
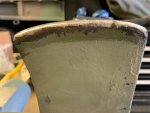
I finally put a real edge on the axe that lives in the pioneer tool rack.

The extreme dullness before:
2019-07-03 11.23.19_cropped.jpg 2019-07-03 11.23.27.jpg

After sharpening with a hand bastard file:
2019-07-03 12.03.54.jpg 2019-07-03 12.04.10.jpg

Boiled Linseed Oil to seal the bare steel from corrosion.
2019-07-03 12.50.48.jpg

I figured out how to strap even more down on the Pioneer Tool Rack. I wanted the large bar for the geared wrench (for changing tires if an air compressor is not available), and the 42" crow bar I use to help maneuver tires on/off the hub out of the cab of the truck, but not all the way into the big toolbox in the bed.
2019-07-03 15.01.01.jpg 2019-07-03 15.01.19.jpg 2019-07-03 14.34.25.jpg

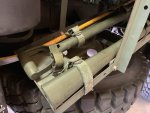
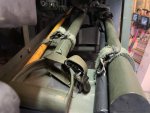
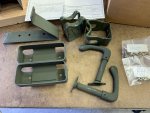
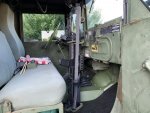
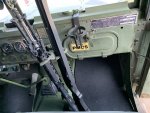
After owning the kit for a couple years, I finally installed the dual rifle mounts in the cab. I messed up in my measurements and cut a little too big of a hole in the floor mat. Not a big deal I suppose. I will have to move my Ibis Tek lightbar control box somewhere else as the rifle mount required the exact same location on the dash. For the record, rifles with a quad picatinny rail do not fit well in the rifle mounts. They are a little too thick (so was the big rubber butt pad for the base). The Winchester Defender 1300 shotgun fit great though. Be warned, the rifles do encroach on the leg/knee space of the poor passenger.
2019-07-03 12.24.48.jpg 2019-07-03 16.07.57.jpg 2019-07-03 18.06.40.jpg 2019-07-03 18.06.46.jpg 2019-07-03 21.36.25.jpg 2019-07-04 07.12.23.jpg 2019-07-04 07.12.41.jpg

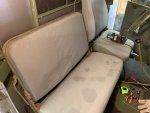
And while I had the bench seat out, I scrubbed and washed and then installed instead the passenger seat I had purchased from Red, which was from the M816 wrecker I had sold him. The seat cushion and frame were in way better shape than what my deuce had (the original had bent up folding arms). I plan on having this frame sand blasted and painted and replacing the seat upholstery and foam myself.

I did swap the left-side frame legs as that is where my steering wheel chain was welded to. I hadn't realized that there were two sets of holes on the left side of the bench seat for adjusting the height.
2019-07-03 16.43.32.jpg 2019-07-03 19.15.34.jpg
Note: Most of the, what appears as stains, on the lower cushion is actually water. The foam wasn't 100% fully dry, even though it was outside in the 90F+ degree sun all day.
 
Last edited:

Valence

Well-known member
Steel Soldiers Supporter
2,112
555
113
Location
Davis County, UT
For my, I believe, 9th year in a row, I participated in my city's Independence Day parade. Well documented here:
https://www.steelsoldiers.com/showt...d-and-Nation&p=2235303&viewfull=1#post2235303

2019-07-04 09.47.45.jpg 2019-07-04 09.49.15.jpg 2019-07-04 09.49.50.jpg 2019-07-04 09.55.36.jpg

Ending odometer: 3770.5 miles (+5.1 miles)
Ending hour meter: 368.1 hours (+0.6 hours)


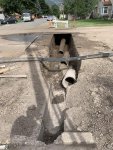
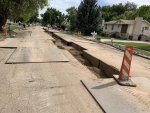
I haven't taken the ol' deuce anywhere since then. The gas company (Dominion Energy) has had my road torn up the past two months to install a new, large feeder line and due to the weight of my truck they wanted a couple days notice when I planned to drive it (so they could ensure the trench was properly shored up.) Though the plates have mostly disappeared this past week as they're somewhat nearing completion. I hope. (Then comes the road repair and restoration companies)
2019-08-06 16.46.46.jpg 2019-08-06 16.47.32.jpg


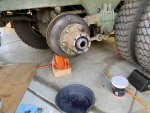
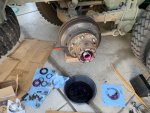
Also the various leaks contributed to my excuses not to drive. So today, September 2nd, 2019, I re-re-re-serviced the driver's center axle seals. I think this is the 3rd time I have done so since I owned the truck. One of these times I'll get it right so it lasts longer. I've forgotten how heavy my G177 tires and wheels are. I cleaned off the gear oil and grease mixture, cleaned the brake pads, repacked the bearings, new key-way cork with some RTV silicone for good measure, new outer seal, and readjusted the brakes. Not much for exciting or even informative photos, as these were the only stages my hands were clean enough to handle my camera. ;)

2019-09-02 11.08.09.jpg 2019-09-02 12.04.07.jpg

My ever faithful watch hound who kept track of me while I worked today.
2019-09-02 12.05.11.jpg
 
Last edited:

Valence

Well-known member
Steel Soldiers Supporter
2,112
555
113
Location
Davis County, UT
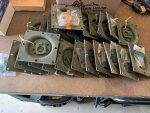
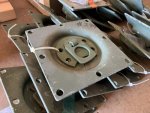
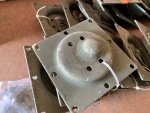
I also purchased 23 NOS recessed bed tie-downs from my all-time favorite surplus store, Army Surplus Warehouse. I stumbled upon these in two separate locations in the store, and I couldn't leave without them. (yes, I need 1 more to have an even number, but that's all they had). Some of the tie down points have $7.99 written on them but one reason I like the Army Surplus Warehouse is that they're willing to give better deals on bulk purchases. I got them for $6.00 each with their only template included.

I'm not sure if they're better or worse than the weld on variety (which is the only type I had seen before these), but at least I won't feel like I need to repaint the whole bed after adding them. I will admit, drilling out that large center hole and then smoothing and cleaning up the edge will be quite a lot of time and work. Also, these type will be more susceptible to allowing rain water in. I may run a bead of RTV silicon just inside the outer mounting bolts.

I would like to add them to my deuce and M105. Maybe I'll start with the M105 first. But we'll see how many years it takes for me to get to this. :roll:

2019-08-31 17.31.33-1.jpg 2019-08-31 17.31.37.jpg 2019-08-31 17.31.41.jpg 2019-08-31 17.32.07.jpg 2019-08-31 17.31.58.jpg

Anyone with a drop-side bed able to give me measurements as to where these approximately go? Such as, height from the floor of the bed, or how far left/right from the troop seat pillars, etc. :-D
 
Last edited:

montaillou

Well-known member
Steel Soldiers Supporter
807
832
93
Location
W.WA
...and due to the weight of my truck they wanted a couple days notice when I planned to drive it (so they could ensure the trench was properly shored up.)
This reminds me when the city repoured the sidewalk in front of my house, they asked me not to drive the truck over it for a month, and they also told me they poured it extra thick for my house.

For your tie downs, maybe this can help: http://imfmotorpool.com/010913.PDF
 

cattlerepairman

Well-known member
Steel Soldiers Supporter
3,265
3,395
113
Location
NORTH (Canada)
Anyone with a drop-side bed able to give me measurements as to where these approximately go? Such as, height from the floor of the bed, or how far left/right from the troop seat pillars, etc. :-D
Here is the instructions: https://www.jatonkam35s.com/M105TMS/TB9-2300-280-30.PDF

Basically, they go into the left and right bottom corners of all the "fields" in the bed sides. You need to relocate the reflectors and cargo cover tie-downs. There should be a blank metal template (just the metal square with the 3.5 in hole) included in your kit to help place them. It is very straightforward once you look at it.
 
Top
AdBlock Detected

We get it, advertisements are annoying!

Sure, ad-blocking software does a great job at blocking ads, but it also blocks useful features of our website like our supporting vendors. Their ads help keep Steel Soldiers going. Please consider disabling your ad blockers for the site. Thanks!

I've Disabled AdBlock
No Thanks