• Steel Soldiers now has a few new forums, read more about it at: New Munitions Forums!

  • Microsoft MSN, Live, Hotmail, Outlook email users may not be receiving emails. We are working to resolve this issue. Please add support@steelsoldiers.com to your trusted contacts.

Valence's M66 Gun Ring

Valence

Well-known member
Steel Soldiers Supporter
2,112
555
113
Location
Davis County, UT
Valance.
I'm interested in a pad assembly if we can save a buck.
JC
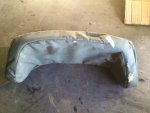
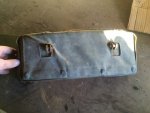
As in my old/current one? That is certainly a possibility as I only own 1 gun ring and would sell mine, but not until I've received the replacement, it is in good order and that I no longer need anything from this one.

(Note: old pictures from last year before the plate was restored)
2015-11-11 16.03.47.jpg 2015-11-11 16.03.58.jpg

My old back rest has had its metal backing plate fully restored (blasted and powder coated), but the cover does have a larger hole on one side, other wear, and corroded buttons. I was originally hoping to get about the same for mine as that new one that popped up on eBay is being sold for. That's why that new one is such a _great_ deal! Previous only other options was poor/rusty condition used ones from beltfed34 for $30 or new ones for $120!

I'll have to check to see if it'd fit in a large flat rate... send me a message and see if we can work out a fair price.
 
Last edited:

Valence

Well-known member
Steel Soldiers Supporter
2,112
555
113
Location
Davis County, UT
I do the same, but I put the magnets in heavy duty zip lock bags. When done, hold over wherever you want to put the chips, reach in the bag, pull out the magnet, and all the chips just fall off.
I hate trying to get all the fine steel off. Especially off of rare earth magnets.
I like the bag idea! I have some of those rare earth magnets but honestly, they're so powerful they scare me a bit as they're always trying to hurt me (squish, pinch, tear from their tremendous force). I mostly just use the telescoping pickup tools as pictured and a pair of gloves to pull off the shavings. A little bit of metal powder is always left over and I can get most of that with my bare hands.
 

Valence

Well-known member
Steel Soldiers Supporter
2,112
555
113
Location
Davis County, UT
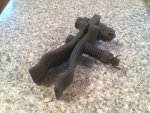
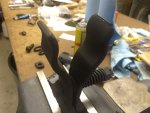
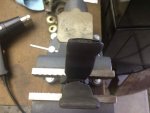
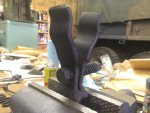
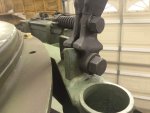
This information is hard to find, and since (at the time of this writing) I am looking for a barrel clamp assembly to put on the passenger front gun ring leg, I thought it should be documented where it won't be lost (when my want ad is deleted):

In these pictures:
NSN: 1005-00-560-6435
P/N: 12011769
CLAMP, BARREL ASSY
1 each 50036
FRASER (?) 19461

Another document I found online listed the Part Number as 5606435, and looking the NSN up on PartTarget.com, it agrees.

image.jpeg image.jpeg image.jpeg
 
Last edited:

Scar59

Active member
Steel Soldiers Supporter
2,811
41
38
Location
Mt. Eden, KY
That's the clamp you need, buy it, then dip the clamping section in liquid rubber, keeps the metal from marring/ scratching the gun barrel.
 

Valence

Well-known member
Steel Soldiers Supporter
2,112
555
113
Location
Davis County, UT
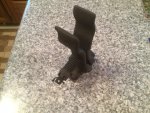
So I broke down and paid the $150 for the barrel spring clamp from BMGParts.com since apparently they are very uncommon and I did not find them anywhere else. That was well over double what I was hoping to spend for one, but at least this one is complete and in excellent shape! The pictures I acquired above took all my internet searching skills. There's surely more pictures out there but I don't know what names or differing NSN or Part Numbers might have been used.

So if you ever come across one, even rusty, know it's worth some cash, but try not to gouge too much, eh? :wink:

As can be seen, this one had been parkerized and is a bit different than the shiny one I pictured earlier. It's also one solid piece and feels like cast iron. Probably an older style if I had to guess.
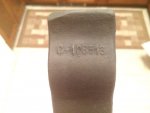
The number in the 4th photo below reads: C-1C6513
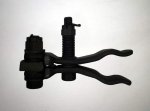
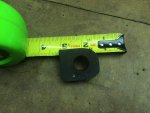
2016-07-13 09.37.42.jpg 2016-07-25 20.29.17.jpg 2016-07-25 20.32.54.jpg 2016-07-25 20.33.34.jpg

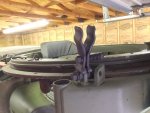
Since I had never seen nor fiddled with one in person, it threw me for a bit of a loop, until I realized that the tab between the bottom of the clamps with the big bolt was actually just a cut off flange from the top of the passenger gun ring leg, and thus should be removed.
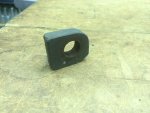
2016-08-02 20.35.47.jpg 2016-08-02 20.36.23.jpg

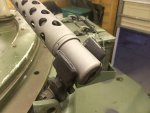
To protect the barrel of the gun, I found that 1" heat shrink fit tightly, but did fit. A little silicone spray helped coax the heat shrink on.
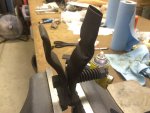
2016-08-02 20.07.03.jpg 2016-08-02 20.09.31.jpg 2016-08-02 20.09.47.jpg 2016-08-02 20.14.30.jpg

Then on the passenger front gun ring leg, it was interesting to discover how it fit, and the exact shape of the tabs on the top of the leg would not allow the clamp to sit vertical or flop back towards the gun ring, which is perfect as I could tell it would help align the clamp with the barrel of the gun.
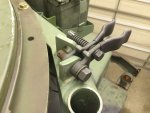
2016-08-02 20.18.14.jpg 2016-08-02 20.18.23.jpg 2016-08-02 20.16.33 HDR.jpg

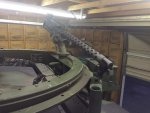
I had two options on how I wanted to mount the clamp. The gun ring could be rotated to the side, and then turn the gun and clamp the barrel pointing forward:
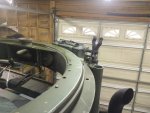
2016-08-02 20.18.06.jpg

Or leave the gun front and center but rotated and pointing sideways - which was the obvious winner.
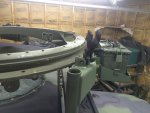
2016-08-02 20.18.45.jpg

I had to remove a stop bolt from the cradle to get the gun to pivot far enough downward, and unfortunately it was rusty and broke so I'll need to drill it out and re-chase the threads. Also less desirable, to allow the clamps room to move enough to get onto the gun barrel, the bottom mounting castle nut is left lose and just pinned in place. This leaves the spring clamp fairly loose so it lays down, which means its metal tabs will rattle and bounce on the gun ring leg, removing the paint. At least I know it'll stay down and clear of my garage door opening. I may see if I can glue a piece of rubber or two in place.
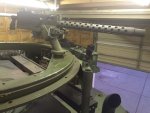
2016-08-02 20.40.38.jpg 2016-08-02 20.55.46.jpg 2016-08-02 20.55.51.jpg 2016-08-02 21.12.33 HDR2.jpg

As can be seen in the second to last picture above, the heat shrink actually didn't hold up very well and just from a couple test fits already started to rip/wear through. It's a tight fit on the barrel. Though the heat shrink wasn't very expensive. Maybe I'll try two layers next time, or this clear vinyl hose that I also bought, but I think the hose is a bit too thick.
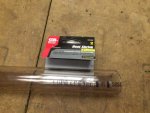
2016-08-02 20.35.22.jpg
 
Last edited:

clinto

Moderator, wonderful human being & practicing Deuc
Staff member
Administrator
Super Moderator
Steel Soldiers Supporter
Supporting Vendor
12,596
1,132
113
Location
Athens, Ga.
Valence, this thread is one of the best I've ever read on SS. Well done.

What size and style rivets are the cab braces supposed to take? I have one I have to install in order to get shoulder belts in my truck. I have a brace by itself, no rivets or instructions.

When there's much to do, I tend to jump around a bit depending on my available time (especially on week nights). This part caught me by surprise because I don't recall anyone ever mentioning doing this when installing their cab reinforcement plate. Step 'F' in the installation instructions calls to remove the 4, rear, stock cab support screws and cage nuts. The cage nuts are tack welded in place and required cutting off.
.
I've never seen the instructions for the cab brace. Can you upload them here, somewhere else or email them to me?

Did you ever figure out why they have you remove those factory captured nuts? The only thing that makes sense to me is that if the nut were to spin or strip, you'd have no way to service it with a brace in place, whereas a stripped nut could be gotten out somehow and replaced with another.

I see the 325-RN tool that you and others recommended, which nutserts did you use (size, part #, etc.)? I am debating bolting versus riveting for the same reasons you did.
 

Valence

Well-known member
Steel Soldiers Supporter
2,112
555
113
Location
Davis County, UT
Valence, this thread is one of the best I've ever read on SS. Well done.
Why thank you Mr. clinto! That is high praise indeed and I am quite humbled for you to say so. It was quite the adventure for sure, that I was just learning my way through. I don't regret it, but I'm a little burned out on projects ;)


What size and style rivets are the cab braces supposed to take? I have one I have to install in order to get shoulder belts in my truck. I have a brace by itself, no rivets or instructions.

I've never seen the instructions for the cab brace. Can you upload them here, somewhere else or email them to me?
In this kit they are P/N 12315644-2 (SSPV)
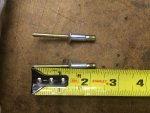
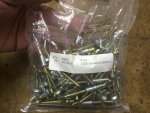
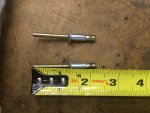
The rivets are steel. They're 1/4" in diameter and ~2-3/16" in length (before installation, obviously). If they have a certain type/name, I do not know as I'm not very familiar with rivet families.
image.jpg image.jpg

The installation instructions that came with my kit are identical to this one that has been uploaded to Steel Soldiers:
http://www.steelsoldiers.com/showth...inforcement-Kit-5705616-for-M44-M809-type-cab


Did you ever figure out why they have you remove those factory captured nuts? The only thing that makes sense to me is that if the nut were to spin or strip, you'd have no way to service it with a brace in place, whereas a stripped nut could be gotten out somehow and replaced with another.
I hadn't considered that, but it certainly sounds like a possibility. Though, my opinion is that it was done so for improved strength, both in tension and sheer, when increasing from (I assume) a Grade 2 bolt to a Grade 5 bolt. Since all the weight is mounted directly to the cab.


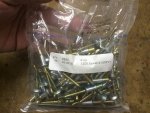
I see the 325-RN tool that you and others recommended, which nutserts did you use (size, part #, etc.)? I am debating bolting versus riveting for the same reasons you did.
I didn't look up any specific part number, I just browsed eBay until I found the ones I wanted in both price and quantity. I purchased:
  • 100 quantity (as stated, I used about ~70 of them)
  • 1/4"x20 (coarse thread)
  • Zinc plated (I wanted them "yellow" like my Grade 8 bolts)
  • Ribbed body
  • Ribbed head
image.jpg
 
Last edited:

Valence

Well-known member
Steel Soldiers Supporter
2,112
555
113
Location
Davis County, UT
It might be pertinent to this thread if folks want to see a bunch of pictures of my truck off-roading with this gun ring set up. It was dry, hard ground with some surface sand and many loose rocks. It was just about perfect, except that some of the trails were a little narrow for 6x6's.

I didn't have any problems with my gun ring or cab. The cab and ring all were perfectly solid. There were no groans, creeks, or twisting/flex that I ever noticed. I believe this is all thanks to the cab reinforcement measures. Yes, it is definitely more weight on the front end.

http://www.steelsoldiers.com/showthread.php?161052-Utah-offroad-trip-to-5-mile-pass
 

Another Ahab

Well-known member
17,999
4,556
113
Location
Alexandria, VA
View attachment 652329 View attachment 652330

http://www.stanleyengineeredfastening.com/brands/pop/rivets/types

I did a bit of digging, and according to this website, I would think these pop rivets, specifically, appear to have the following characteristics:
  • Blind
  • Domed head
  • Interlock or Structural (previously called Ultra-Grip) (The tapered shaft appears the same as in this link)
I didn't realize that Stanley makes the rivets, and that the name Pop-Rivet is their product trademark. Thanks for that lesson, Brother Valence! [thumbzup]

I do not believe that Pop-Rivets feature a tapered shaft:

- the shaft diameter is constant, and the anchoring effect comes from pulling the knobbed head of the shaft into a sleeve, causing that sleeve to expand.
 

rustystud

Well-known member
9,279
2,984
113
Location
Woodinville, Washington
A really good rivet to use in this application is the "Marson" SSB8-6SKL . They are 1/4" dia. with a grip range of .080"-.375" and are all stainless steel. I would also recommend to anyone doing the cab support bracket that they rent or buy an air-powered rivet gun. Their is over 100 rivets that need installing and that can get really tiring with the manual pop-rivet tool.
 

Jakelc15

Active member
718
37
28
Location
Hanover Pa
I've got a couple questions about the cab reinforcement plate. Do you lose any drivers seat space other than the seat belt? Can you still access the leg u bolts after installing?
 

Another Ahab

Well-known member
17,999
4,556
113
Location
Alexandria, VA
A really good rivet to use in this application is the "Marson" SSB8-6SKL . They are 1/4" dia. with a grip range of .080"-.375" and are all stainless steel. I would also recommend to anyone doing the cab support bracket that they rent or buy an air-powered rivet gun. Their is over 100 rivets that need installing and that can get really tiring with the manual pop-rivet tool.
rustystud speaks truth (duh!); pneumatic is the way to go when you're going that many at that size.

Just 5-10 in a row with the manual gun is enough to put anybody's hands in a cramp you won't believe.


hand.jpg
 
Last edited:

Valence

Well-known member
Steel Soldiers Supporter
2,112
555
113
Location
Davis County, UT
I've got a couple questions about the cab reinforcement plate. Do you lose any drivers seat space other than the seat belt? Can you still access the leg u bolts after installing?
Yes, you most certainly can still access the rear leg u-bolts after the plate is in, as seen in Post #107.

There was no other interference with the seat, other than the seat belt rubbing rather hard on the plate. You can still access the seat belt mounts on the back of the cab too, it's only a little more troublesome. Interestingly enough, I replaced the stock springer seat with a HEMTT air-ride seat. I used the stock seat belts, with the HEMTT's seat belt straps to the rear of the cab. It fits better than the stock springer seat does! And no seat belt rubbing either! (It did need a seat base adapter fabricated though).

See this post and the link in the post:
http://www.steelsoldiers.com/showth...ce-this-week&p=1922270&viewfull=1#post1922270
 
Last edited:

Valence

Well-known member
Steel Soldiers Supporter
2,112
555
113
Location
Davis County, UT
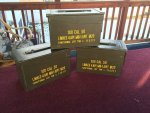
Just this past weekend, I lucked out at a gun show. I was able to find three .50 "Linked" stenciled ammo cans with all matching paint, lettering and lot numbers! These will look a lot better in the mounted ammo can trays than my "5.56" stenciled cans! I considered getting more than just these three, on the off chance I decided to add more trays to the gun ring legs, but I restrained myself as one can add too much to a truck and just end up looking like a mess.

2017-02-04 16.50.22 HDR.jpg
 
Last edited:
Top
AdBlock Detected

We get it, advertisements are annoying!

Sure, ad-blocking software does a great job at blocking ads, but it also blocks useful features of our website like our supporting vendors. Their ads help keep Steel Soldiers going. Please consider disabling your ad blockers for the site. Thanks!

I've Disabled AdBlock
No Thanks