• Steel Soldiers now has a few new forums, read more about it at: New Munitions Forums!

  • Microsoft MSN, Live, Hotmail, Outlook email users may not be receiving emails. We are working to resolve this issue. Please add support@steelsoldiers.com to your trusted contacts.

Valence's M66 Gun Ring

cattlerepairman

Well-known member
Steel Soldiers Supporter
3,247
3,325
113
Location
NORTH (Canada)
I hope the powder coating came out the way you wanted. I am with you on the frustration when outsourced work that you have to pay for does not happen as planned! At least you know that you have sufficient paint thickness on the hard top! :)
 

Valence

Well-known member
Steel Soldiers Supporter
2,112
555
113
Location
Davis County, UT
So what happened? The air pack piston stuck?
Not to derail this Gun Ring thread, but it's the situation where the brake pedal gets more and more stiff until the brakes start dragging and eventually prevent the truck from moving. I believe it's air pressure that builds up in the air pack and isn't properly purging. It may just be a clogged port in the master cylinder. But a new master cylinder and a whole air-pack rebuild kit (at the time of this writing) are ~$150 for critical parts of my single circuit brake system (which means, every part is critical - lol).

More info here:
http://www.steelsoldiers.com/showthread.php?73202-Help-Brakes-Stuck-on!
Because scboolitcaster asked earlier, here's a link to a bunch of pictures of the rebuild:
Post #5422
http://www.steelsoldiers.com/showth...ce-this-week&p=1882856&viewfull=1#post1882856

And Post #5424
http://www.steelsoldiers.com/showth...ce-this-week&p=1882859&viewfull=1#post1882859
 

Valence

Well-known member
Steel Soldiers Supporter
2,112
555
113
Location
Davis County, UT
I hope the powder coating came out the way you wanted. I am with you on the frustration when outsourced work that you have to pay for does not happen as planned! At least you know that you have sufficient paint thickness on the hard top! :)
Thank you cattlerepairman, your well wishing means much to me.

I have confirmed with the Powder Coater that all will be ready as scheduled for a Friday morning pickup. I fear the cost, but I also think it'll be the better of the outsourced money spent.
 

Valence

Well-known member
Steel Soldiers Supporter
2,112
555
113
Location
Davis County, UT
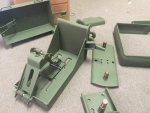
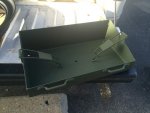
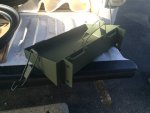
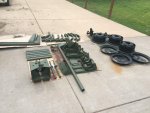
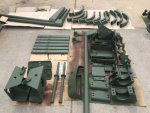
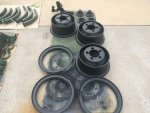
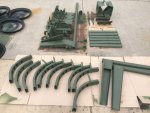
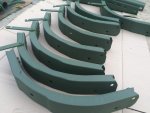
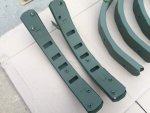
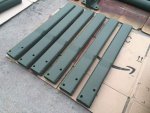
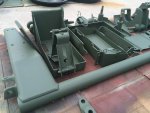
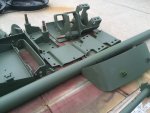
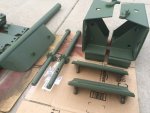
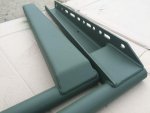
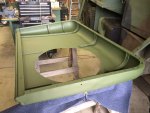
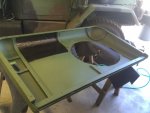
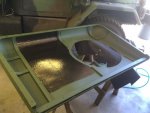
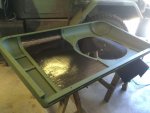
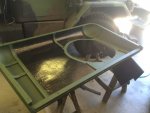
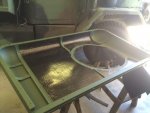
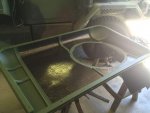
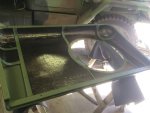
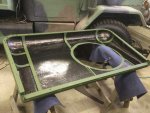
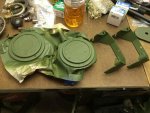
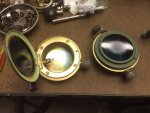
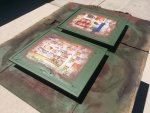
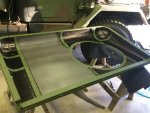
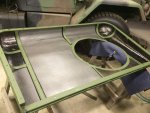
I picked up my massive pile of parts from the Powder Works on Friday, and I was right, they look spectacular and he got everything right! This is the culmination of about 10 months of projects all ready for final assembly. At least one of these projects have been overcome by events but the parts were already acquired and sandblasted so they might as well be powder coated.


  • Wheels for a pioneer tool trailer
  • Deuce (splined) front hubs x4
  • Gun ring legs, brackets, back rest, and ammo can trays
  • Dual Bumper shackles and mounts
  • Spare tire hoists for a trailer
  • Foldable bumper step
  • Corner bows and stubby side posts
  • Lunet lock

All the green parts here took only 4 lbs of powder coat, and I purchased 55 lbs (it was either $120 for 5lbs for $366 for 55 lbs. 10 times as much powder coat for only 3 times the cost). And you know how it goes, if I had only bought 5 lbs, he would have needed 6 lbs.
2016-06-10 08.57.14.jpg 2016-06-10 08.57.30.jpg

2016-06-10 07.57.34.jpg 2016-06-10 07.58.37-1.jpg 2016-06-10 07.58.53-1.jpg 2016-06-10 16.42.06.jpg 2016-06-10 16.42.12.jpg 2016-06-10 16.42.18.jpg 2016-06-10 16.42.31.jpg 2016-06-10 17.07.34.jpg 2016-06-10 17.08.16.jpg 2016-06-10 17.16.58.jpg 2016-06-10 17.17.11.jpg 2016-06-10 17.17.23.jpg 2016-06-10 17.17.19.jpg 2016-06-10 17.18.35.jpg
 
Last edited:

Valence

Well-known member
Steel Soldiers Supporter
2,112
555
113
Location
Davis County, UT
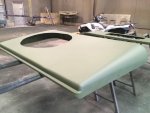
I was able to, finally, get my hard top yesterday. Fortunately we were able to agree on a fair labor price and double fortunately it looks great!

The portion of the gallon Rapco enamel paint used was thinned in a 4:1 ratio with Xylene. Very little of the gallon was actually used.

I tested it, and the hard top paint matches exactly with the paint from the spray cans. Touch up will be a breeze!

Yes, it's not as chalky as the original CARC, but it's also no longer rusty. Also, no, I did not remove any of the minor dents in the top.

image.jpg image.jpg image.jpg
 

Valence

Well-known member
Steel Soldiers Supporter
2,112
555
113
Location
Davis County, UT
Wow. That looks great!
But now you're gonna have to powder coat the whole truck to make it look as good as the lid. rofl
HAH! I hear ya there!

However, the hard top was sprayed with Rapco enamel paint, and wasn't powder coated. The powder coat parts look just a little pale compared to the Rapco. I still think they'll all look fantastic together.
 

Valence

Well-known member
Steel Soldiers Supporter
2,112
555
113
Location
Davis County, UT
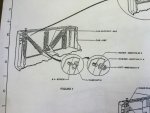
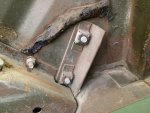
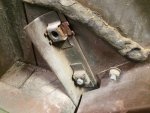
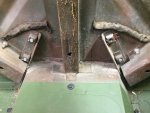
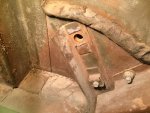
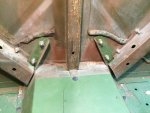
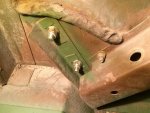
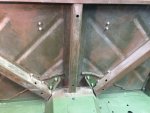
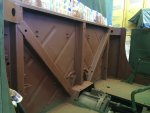
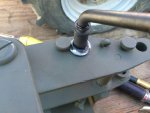
When there's much to do, I tend to jump around a bit depending on my available time (especially on week nights). This part caught me by surprise because I don't recall anyone ever mentioning doing this when installing their cab reinforcement plate. Step 'F' in the installation instructions calls to remove the 4, rear, stock cab support screws and cage nuts. The cage nuts are tack welded in place and required cutting off.
2016-06-15 17.27.16.jpg 2016-06-15 17.27.25.jpg 2016-06-15 17.27.38.jpg 2016-06-15 17.53.20.jpg

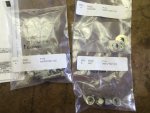
The new bolts were the same diameter (3/8", fine thread) but a little longer and Grade 5. I'm not sure the grade of the stock bolt, but I will assume grade 2.
2016-06-15 18.16.17.jpg 2016-06-15 18.16.39.jpg

I first pried the tabs open to remove the square nut, then I used my Dremel and cut the top then bottom tab leaving the tack welded part of the of the cage nut assembly attached. I used a punch and hammer and flattened the tab down, and applied a little bit of paint to the bare metal (I plan on cleaning and painting all of the rear of the inside of the cab).
2016-06-15 19.28.28.jpg 2016-06-15 19.28.37.jpg 2016-06-15 19.46.18.jpg

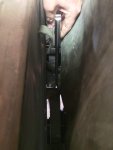
My forearm was too thick to fit between the cab and the bed lip, fortunately a breaker bar came to the rescue to hold the bolt in place as I tightened the nut. The kit only came with 4 washers so I added grade 8 washers under the bolt heads.
2016-06-15 19.58.52 HDR.jpg 2016-06-15 21.17.23.jpg 2016-06-15 20.25.57.jpg

For the record, when removing the old bolt, the upper passenger bolt was quite the stretch to reach (with just the tips of two fingers) from the side with the fuel tank there. Yes, I did follow what the instructions that said to removed and replace each cage nut individually, instead of trying to remove all 4 and then the cab moves on you...
 
Last edited:

Valence

Well-known member
Steel Soldiers Supporter
2,112
555
113
Location
Davis County, UT
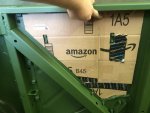
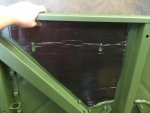
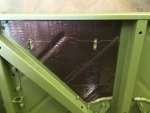
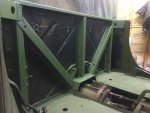
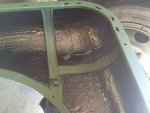
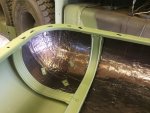
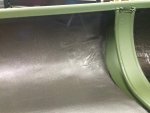
Over my three day weekend I was able to scrape off the glue from the old insulation, vacuum, wash with soapy water then primer and paint. I opted for the primer coat on the whole back because the corner reinforcements that were welded to the top edge of the cab (pictured earlier) needed primer, and there was some small spots of bare metal due to the razor blade scraping.
2016-06-17 12.32.31.jpg 2016-06-17 16.40.35.jpg

I was considering not putting on the sound deadener until the cab was fully restored just like the hard top, but, honestly, I need to divert funds and do not plan to do any more restoring than this for the time being - also it's hard to get back to this level of a clean surface for the sticky backed deadener to adhere to. So I went ahead and created templates and cut and adhered sound deadener to the back of the cab. I purchased 2 of (for 72 sq. feet):
Noico Black 80 Mil 36 SqFt, butyl automotive deadener
https://www.amazon.com/dp/B01BKKZ1AM/

2016-06-18 16.04.26.jpg 2016-06-18 16.12.00.jpg 2016-06-18 16.26.47.jpg 2016-06-18 20.39.17.jpg

Then sound deadener on the top. I did get a bit lazy and only created templates for the corners. I had one screw up aground the turret cut out. Of the 9 sheets (36 sq. feet) of sound deadner, I used 2 for the cab back and 6 for the top with 1 and various scraps to spare. Since I ordered 2 packs of 9 sheets I believe I'll have plenty for the vertical section of the hard top and transmission/transfer case tunnels.
2016-06-19 11.28.10.jpg 2016-06-19 11.45.52.jpg 2016-06-19 12.03.43.jpg 2016-06-19 13.21.27.jpg 2016-06-19 14.52.13.jpg 2016-06-19 15.27.46 HDR.jpg 2016-06-19 18.46.13.jpg 2016-06-19 19.43.26.jpg

It was as much work as it looks, especially the top corners with the hole cut-outs (that I did in 4 separate pieces - which are for some blackout lights that'll be my overhead interior lights):
2016-06-19 17.03.29.jpg 2016-06-19 18.27.05.jpg 2016-06-17 20.18.53.jpg 2016-06-18 14.11.32.jpg 2016-06-18 14.11.46.jpg

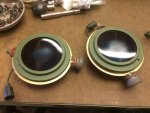
I also used my pneumatic orbital sander and sanded (as best I could), primered, and painted the rear sliding glass windows. Honestly, they sort of need to be just remade new, but they should serve fine for now. Without the rust, it should slide a lot smoother in the new window channel.
2016-06-18 13.11.35.jpg
 
Last edited:

Valence

Well-known member
Steel Soldiers Supporter
2,112
555
113
Location
Davis County, UT
Nice attention to detail. It will be parade ready soon.
Thank you! I'm not as skilled a some, but try to make up for it in effort and time. I hope it'll be ready! I've reached the critical point where I just need to work at it. Every-day. 14 days counting tonight.

Ambitious TODO list:
  • Bleed brakes & test air-pack rebuild & NOS master cylinder
  • Get windshield wipers from red who thieved mine for his wrecker during a rain storm (lol)
  • Sound deadener on vertical portion of hard top
  • Sound deadener on transfer case tunnel and transmission tunnels x2
  • Insulation on cab back (good news with the insulation, I already have templates for everything - some in the form of the paper backing I saved from the installed pieces)
  • Insulation on top
  • Reinstall gun turret ring fiberglass cover with aluminum backing ring on top
  • Paint camo pattern on exterior of top
  • Insulation on vertical top back
  • Paint camo pattern on exterior of vertical top back
  • Insulation on transfer case tunnel and transmission tunnels x2 (double layer of insulation if there's clearance enough)
  • Reflective tape over insulation on transfer case tunnel and transmission tunnels x2
  • Install strap isolators and side window gaskets to vertical top back
  • Install new window channels and rear sliding windows in vertical top back (may run them down to the local window tint place if there's time)
  • Install strap isolators and side window gaskets to top
  • Re-install top front gasket
  • Drill 100 holes in reinforcement plate, and 100 holes in cab (ugh)
    • Drill the 100 holes in cab larger and install 100 nutserts
  • Install vertical top back on cab
  • Install rear gun ring legs
  • Install front right gun ring leg
  • Install gun ring
  • Install cab top
  • Bolt light bar back on
  • Cut, drill, paint 90 degree brackets for ammo can trays x6 (two per tray).
  • Bolt on 3 ammo can trays
  • Drill and bolt on new front bumper flag holders (not pictured)
  • Prep for parade day (I haven't yet picked what to put on the front this year. Hmmmm):
 
Last edited:

jbayer

Member
675
7
18
Location
St. Aug., FL/ McGrady, NC
Looks good Valence,

Makes me want to do the inside of my cab too while I have the seats out for the dual spring seat mod.

So for the tunnel covers:


  • "Insulation on transfer case tunnel and transmission tunnels x2 (double layer of insulation if there's clearance enough)"

Are you planning on the sound deadener on the exterior side or the interior side of the tunnel covers. The clearance issue made me think the exterior side.


Valence

Well-known member
Steel Soldiers Supporter
2,112
555
113
Location
Davis County, UT
Looks good Valence,

Makes me want to do the inside of my cab too while I have the seats out for the dual spring seat mod.

So for the tunnel covers:


  • "Insulation on transfer case tunnel and transmission tunnels x2 (double layer of insulation if there's clearance enough)"

Are you planning on the sound deadener on the exterior side or the interior side of the tunnel covers. The clearance issue made me think the exterior side.
Thanks!

Yes, my intent is for the exterior side (towards the drivetrain). I don't do any water fording and the water it will see is rarely from rain/road splash. The insulation I'm using does not absorb water and is good up to 212 degrees F.:

Noico Liner 157 Mil 37.5 Sqft Car Heat Insulation Pad (1/6" thick)
https://www.amazon.com/dp/B00URV8MFC/


I'll then cover the insulation in foil tape:

3M Foil Tape 3381 Silver, 1.88 in x 50 yd 2.7 mil
https://www.amazon.com/3M-Foil-Tape-3381-Silver/dp/B01GQQ6FOG/

It's going to be a challenge to clean up the underside of the tunnels to ensure good adhesion. I'm going to use Purple Power and soap and water. Brake cleaner if I have to, but I don't want to mess with the paint on the underside (which is the stock OD and is fine)
 
Last edited:

jbayer

Member
675
7
18
Location
St. Aug., FL/ McGrady, NC
Oh, okay, that's what I was thinking. And your using different stuff on the outside. Is the plan for two layers of the closed cell foam on the tunnels, or one layer of the Butyl, and then the closed cell on top of that?
 

Valence

Well-known member
Steel Soldiers Supporter
2,112
555
113
Location
Davis County, UT
Oh, okay, that's what I was thinking. And your using different stuff on the outside. Is the plan for two layers of the closed cell foam on the tunnels, or one layer of the Butyl, and then the closed cell on top of that?
Sorry for the lack of clarity. My intent is to use the same thing on the outside as I'm putting on the inside with only two differences:
  1. Double layer of insulation (who knows, the inside may get this too if I like it enough!) (no, I don't see any problem with seeing the gray insulation on the interior. I think it'll look a lot like it did stock to be honest, a lighter gray though)
  2. Foil tape over the insulation

So the order of application:
  • Tunnel exterior -> Butyl (sound deadener) -> Closed cell foam (insulation) layer 1 -> Insulation layer 2 (maybe) -> Foil tape
 
Last edited:

Valence

Well-known member
Steel Soldiers Supporter
2,112
555
113
Location
Davis County, UT
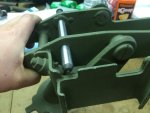
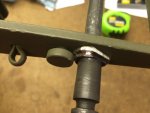
Also over the weekend, The Iron Works had finished the small modifications to the USGI pins for my cheaper Israeli M1919 cradle. The front, larger pin was machined down from 9/16" (0.5625") to 0.53" so it'd fit through the 1919 (mine appears to have some sort of sleeve/insert in the front mounting hole making it slightly smaller in diameter than expected), and the left side of the cradled was drilled to match.

Then, both front and rear pins had a washer added and modified to work with the larger spaced locking tabs.

Now they just need to be re-parkerized.

image.jpg image.jpg image.jpg
 
Last edited:

Valence

Well-known member
Steel Soldiers Supporter
2,112
555
113
Location
Davis County, UT
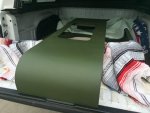
The insulation is certainly a different beast to work with when compared to the sound deadener. It comes in a large roll that is just slightly wider than the sheets of butyl and is a bit odd that the adhesive backing doesn't quite run to either edge (there's 1/4" - 3/8" foam without adhesive on either edge). I don't think that last part will matter too much as the foam is, of course, very light with an amazingly sticky adhesive. So amazing that you get one, just one, chance to set it right. If not, you'll have to rip up the foam in pieces and start over (good luck). This makes it for quite the challenge (neigh impossible even) to put under objects, such as the cross support bars on the hard top (which I completely avoided doing anyway). Its backing peels off much easier though, so I can set a corner just so and more easily peel off the backing as I set it slowly in place.

Reminder, the foam insulation I used:
Noico Liner 157 Mil 37.5 Sqft Car Heat Insulation Pad (1/6" thick)
https://www.amazon.com/dp/B00URV8MFC/

Fortunately, the foam is a bit forgiving an can be compressed, stretched, and even a bit twisted and still press down flat. I had one such incident and with the use of the butyl roller I think I was able to compensate fairly well.
image.jpg

(I'd upload more photos, but it seems to be taking an unreasonable amount of time (about 5 mins per picture).

image.jpg image.jpg
 
Last edited:
Top
AdBlock Detected

We get it, advertisements are annoying!

Sure, ad-blocking software does a great job at blocking ads, but it also blocks useful features of our website like our supporting vendors. Their ads help keep Steel Soldiers going. Please consider disabling your ad blockers for the site. Thanks!

I've Disabled AdBlock
No Thanks