• Steel Soldiers now has a few new forums, read more about it at: New Munitions Forums!

  • Microsoft MSN, Live, Hotmail, Outlook email users may not be receiving emails. We are working to resolve this issue. Please add support@steelsoldiers.com to your trusted contacts.

Was looking for a shop in or near Milwaukee to work on M1008; then did it all myself!

dougco1

Well-known member
Steel Soldiers Supporter
867
647
93
Location
Cooperstown NY
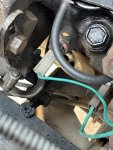
Good thing I asked you about that before installing it. I noticed all the hype about it is from around 10 years ago and wasn’t sure if it was still recommended. I’d rather not cut my wiring but I wouldn’t mind if it meant the truck would benefit from it. Should I pop in a new GM unit just for good measure?

As far as the power steering bracket goes, I believe it is all in tact except for that tab on the top left. It was being held on by the nut and I still have the piece.

View attachment 839482
No need to cut your wiring. GM had an issue with a batch of some bad relays years ago and have since fixed the issue. Just keep your batteries charged and your truck maintained for quick starting like originally designed and you'll be fine. Pop in a new GM unit just for good measure?
 

cucvrus

Well-known member
11,473
10,431
113
Location
Jonestown Pennsylvania
I actually think people have installed an A/C relay and not the heavier starter relay. But true as can be if you maintain a health CUCV with healthy batteries you will never encounter the issue. And if you do. Be knowledgeable upfront that all you must do is unplug the relay. The only CUCV I have and use is an 1987 M1028 and I let others use it. I unbolted the relay and just let it tucked up or hanging down. I tell and have told everyone that borrows it that they can just pull the relay should the starter stay engaged. It never has and I also give them the B/O light switch speech. The power of learning is amazing. Thank you and Have a Great Day.
 

cucvrus

Well-known member
11,473
10,431
113
Location
Jonestown Pennsylvania
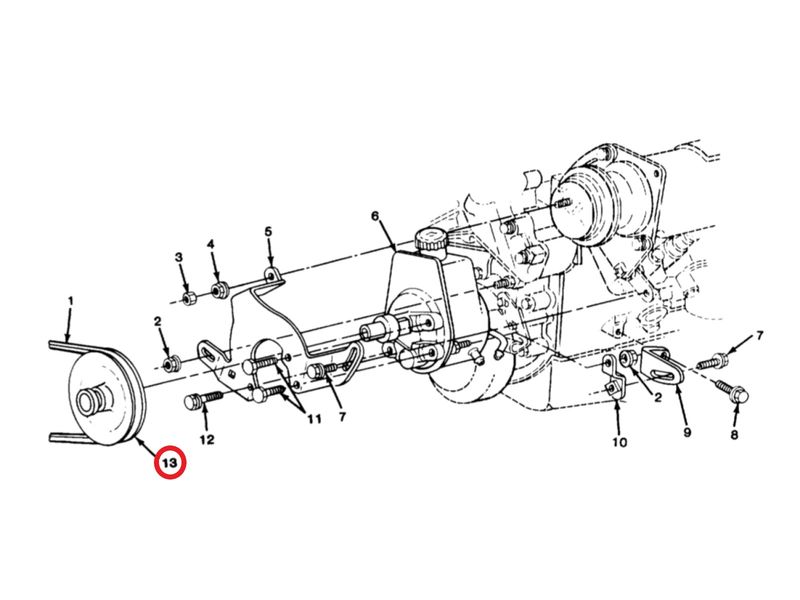
A large flat washer cut and welded on that bracket will fix that bracket. Do you have the lower bracket from the lower part of the power steering pump to the block just above the oil pan? Check that out and report back.
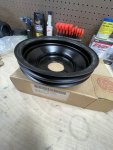
pulley power steering pump double M1010 K30 with AC, 245,00 €

Ignore RED 13. I am interested if 10, 2 ,9 ,8, and 7 are in place.
I wanted to give you a little tip on the bracket that seems to have worked for me over the past 25 years. At position/part 2 I place a 3/8" flat washer on the stud that sticks out so that the flanged nut is able to tighten on a smooth surface and not press the bracket into the head of the stud. I found it will allow easier adjustment because the groove is smoother and not chewed and indented with hex head scars. I also started using M10 1.5 Nylock flange nuts on all the adjustment nuts. They are able to retain the tightness. I mean after all these things can rattle a rock to sand in a few years,. One drawback is that the Nylock nut is a once and done thing. No issue a whole box only cost a few dollars. Just a tip. Use it or not. I found it works for me. Flange nuts/bolts regardless are the best for most of the engine CUCV applications. Good Luck.
 

retro_life

Well-known member
243
629
93
Location
Los Angeles, California
I wanted to give you a little tip on the bracket that seems to have worked for me over the past 25 years. At position/part 2 I place a 3/8" flat washer on the stud that sticks out so that the flanged nut is able to tighten on a smooth surface and not press the bracket into the head of the stud. I found it will allow easier adjustment because the groove is smoother and not chewed and indented with hex head scars. I also started using M10 1.5 Nylock flange nuts on all the adjustment nuts. They are able to retain the tightness. I mean after all these things can rattle a rock to sand in a few years,. One drawback is that the Nylock nut is a once and done thing. No issue a whole box only cost a few dollars. Just a tip. Use it or not. I found it works for me. Flange nuts/bolts regardless are the best for most of the engine CUCV applications. Good Luck.
If only I could send the bracket over to someone who knows how to properly fix them… 😉
Would you be interested in fixing it? I don’t trust any of these local hack welding shops to do it right.
I got a puller en route to take the sucker off.

Lower bracket is there.
5CBDDBF0-029D-4EB8-BACB-3B9FD2341F32.jpeg

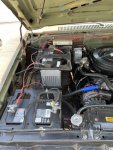
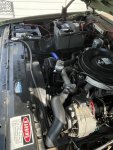
I got some interstate group 31 installed last night too. It’s not even funny how heavy these things are!
65DA37F6-5C8B-42C1-BFD9-620407EB3A96.jpeg
351A5098-AF68-4E67-B249-A995A6A292EE.jpeg
 
Last edited:

cucvrus

Well-known member
11,473
10,431
113
Location
Jonestown Pennsylvania
Just an observation on the battery hold downs. If it were mine I would move the threaded rods into the inner support nuts in the tray. that would prevent them from sliding about and the positive terminals making contact with the negative hold downs and metal parts. just an observation and recommendation. Your truck and you can do as you wish. the trays and hold downs were designed to hold the stock group 31 Delco 1111 batteries and also accommodate and secure the 6TL batteries. Looks good under there. I am envious of the entire original truck. Don't do any unneeded hacks to it. I drove an M1028A1 coast to coast 2 times in stock form. And also an M1009 from CA to PA once. Both were great a bit tiring to drive but nonetheless very reliable and efficient. Have a Great Day. The M1028 A1 is owned by a member here. It had 174K on it when I sold it and I drive it 70+ all the time. Stock. Did it scream. Hail Yea. I heard crickets and katydids every time I drove it on the interstate.
 

retro_life

Well-known member
243
629
93
Location
Los Angeles, California
Just an observation on the battery hold downs. If it were mine I would move the threaded rods into the inner support nuts in the tray. that would prevent them from sliding about and the positive terminals making contact with the negative hold downs and metal parts. just an observation and recommendation. Your truck and you can do as you wish. the trays and hold downs were designed to hold the stock group 31 Delco 1111 batteries and also accommodate and secure the 6TL batteries. Looks good under there. I am envious of the entire original truck. Don't do any unneeded hacks to it. I drove an M1028A1 coast to coast 2 times in stock form. And also an M1009 from CA to PA once. Both were great a bit tiring to drive but nonetheless very reliable and efficient. Have a Great Day. The M1028 A1 is owned by a member here. It had 174K on it when I sold it and I drive it 70+ all the time. Stock. Did it scream. Hail Yea. I heard crickets and katydids every time I drove it on the interstate.
Ah man, I wish I would’ve done that before I put the batteries in.. they’re so damn heavy that I don’t really wanna pull them out again lol.
The batteries were a little too big for the hold downs and I had to bend back the tabs on one side to get it to sit down on the battery and it still isn’t perfect. The batteries are solid though and I don’t think they would slide around unless there was a a really big impact.

The batteries had 3/8 studs and I had to use some female post adapters to use the stock battery cables. I was worried it was going to make the terminal connections too tall and short against the hood, so I added those rubber covers. There seems to be just enough clearance. I was thinking about swapping the connectors on the wires to mount onto the studs but I don’t really think I need to do all that.
 

cucvrus

Well-known member
11,473
10,431
113
Location
Jonestown Pennsylvania
You don't need to remove the batteries. Just slide them from side to side. Come on man. You are a great student and learning so quickly. Easy gets the job done as a hobby. Tired makes it work and hateful. Just run a 1/4 20 thread chaser down thru the inner caged nuts and do it. I know you can. Relax and breath deep.
 

retro_life

Well-known member
243
629
93
Location
Los Angeles, California
You don't need to remove the batteries. Just slide them from side to side. Come on man. You are a great student and learning so quickly. Easy gets the job done as a hobby. Tired makes it work and hateful. Just run a 1/4 20 thread chaser down thru the inner caged nuts and do it. I know you can. Relax and breath deep.
Yeah I didn’t realize I could just thread the rods in until after you said it. I’m gonna head over to the store now and get some more 1/4-20 rod and add them in.

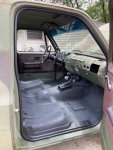
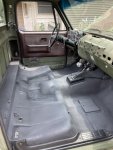
Yesterday I worked on lining the cab floor with raptor liner bed liner spray. And I just installed new door seals right now. I have all the seals for the door too, but that vent window looks like a real PITA and I’ll tackle that when I get back home.

D093ECD4-BD78-463F-87A3-D64402CD68BF.jpeg
4DB22BD3-A409-4753-964D-05A3149721B7.jpeg
 

retro_life

Well-known member
243
629
93
Location
Los Angeles, California
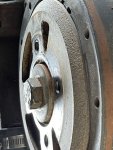
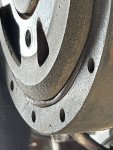
I’m prepping to do the harmonic balancer job and I just removed the crank pulley to get a better look. I’m glad I decided to do this because the rubber doesn’t look good!
70C980D6-35A1-4E26-AF81-FDB37269620E.jpegDC3B33E2-6F95-4D2D-876D-66E03310F52A.jpeg

I’m going with an OEM unit. I was going to go with the fluidampr, but it’s really damn expensive and also out of stock at the moment. I figure if the OEM is good enough for AMG then it’s good enough for me! I also picked up a NOS crank pulley from Saturn surplus on eBay.
406265CF-737E-4869-BE2D-A35FD2895D06.jpeg

Im waiting on everything to come in but I’m getting ready in the mean time.

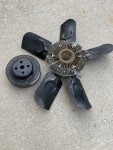
I overlooked removing the fan from the water pump pulley before I started taking everything apart and I’m wondering if there’s a trick to doing it without the belts on? I’m sure I can do the job with the fan and shroud in place, but it will probably make changing the front oil seal really tough with the shroud in the way.

let me know! Thanks!
 

retro_life

Well-known member
243
629
93
Location
Los Angeles, California
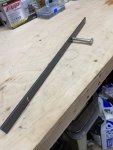
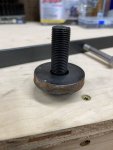
I went to the store and got a 3/16”x1” flat bar and drilled a hole in it to hold the balancer to remove the crank bolt. One bolt through the flat bar and one in the balancer to lock the bar in place once I got it to make contact with the sway bar. I was worried about messing up the sway bar by applying the pressure to it, but in the end it didn’t even leave a mark on it. Everything going smooth so far. Puller is arriving tomorrow.
AF7050A2-1FC1-42E3-81AD-531299B59FFA.jpegD2038DBD-AD8A-49FC-82B1-DDE78A6BF9A7.jpeg
 

Mullaney

Well-known member
Steel Soldiers Supporter
Supporting Vendor
7,711
19,750
113
Location
Charlotte NC
I went to the store and got a 3/16”x1” flat bar and drilled a hole in it to hold the balancer to remove the crank bolt. One bolt through the flat bar and one in the balancer to lock the bar in place once I got it to make contact with the sway bar. I was worried about messing up the sway bar by applying the pressure to it, but in the end it didn’t even leave a mark on it. Everything going smooth so far. Puller is arriving tomorrow.
View attachment 839818View attachment 839819
.
Nice way to make the crankshaft "hold still" while you removed the balancer bolt!
It will be really nice when you install the new part, giving you a way to torque that bolt to proper specs...
 

retro_life

Well-known member
243
629
93
Location
Los Angeles, California
Your damper is shot. Good decision! Have someone hold the pulley while you remove the bolts. Take off the fan and shroud. Quick and easy job to take it apart. Do it right and get it done.
I don’t have anyone to help me right now, so what I ended up doing was using an old belt. I got some gloves on and held the belt all the way at the end with no slack and used it sorta like an oil filter wrench. It was a PITA but I got the sucker off! I will take the shroud out tomorrow morning.

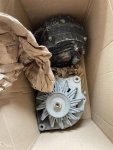
Does anyone have the part number for the water pump and power steering pulley handy? I was thinking about replacing those too. The water pump pulley is noticeably not straight while spinning it. Probably just the lips of the pulley but I’d feel better replacing them. I’m crazy 😜
5579D868-E4F2-483E-A375-29980EFB82C5.jpeg
 

Rutjes

Well-known member
Steel Soldiers Supporter
359
272
63
Location
Amersfoort, The Netherlands
Double check the thread on the balancer puller you ordered. It's M16x1,5 (fine thread). You definitely don't want to strip those threads in the crank... Did you get an installer as well?

I'm sure Rick can get you the pulley. That reminds me, I still have to PM him about the one I asked him to set aside for me. If it's the only one he has left, you can have it instead.
 
Last edited:

retro_life

Well-known member
243
629
93
Location
Los Angeles, California
Double check the thread on the balancer puller you ordered. It's M16x1,5 (fine thread). You definitely don't want to strip those threads in the crank... Did you get an installer as well?

I'm sure Rick can get you the pulley. That reminds me, I still have to PM him about the one I asked him to set aside for me. If it's the only one he has left, you can have it instead.
I was under the impression that it’s just a blunt tip that presses against the crank, and not actually threading into it. While the puller plate lifts up against the M10x1.50 bolts in the crank pulley mounting holes. I definitely don’t wanna be threading the wrong bolts into my crank! Will triple check before even attempting anything.
 

retro_life

Well-known member
243
629
93
Location
Los Angeles, California
Rutjes is referring to the bolt you need to install the balancer. The puller to remove the balancer is the one with the blunt tip.
Oh ok I was confused because he said to check the thread on the balancer puller, and then afterwards asked if I also got an installer. Totally makes sense now, and I will triple check all of the pieces before doing anything.

Thanks!
 

Towman93

New member
1
0
1
Location
52403
Hey everyone. I have a M1008 that runs great except it's got a fuel leak and a few missing teeth on the flexplate (sometimes it will land on a dead spot and require the motor to be turned over by hand to get it started again.)

I originally picked the truck up from North Dakota about a year ago. The truck only had 45k miles and started right up out of the surplus yard. I drove it ~800 miles to my brothers house in Wisconsin. It's been sitting there ever since while I went back home to California.

I am currently back in Wisconsin with plans of getting these issues fixed and doing a road trip across the country back to California.

The leak appears to be coming from the IP so I plan on replacing it. Since I am in Wisconsin I paid a visit over to Badger Diesel in the morning and I ordered a rebuilt IP and also some new injectors. He said they should be ready by the end of the week.

I am fairly mechanically inclined, but the IP kinda scares me and I really don't wanna mess up my truck. I called around to a few local diesel shops I found on google and was either met with "We don't work on anything that old" or "we'll have to get back to you after we research what it all entails" So I am looking for either a shop that knows the 6.2 well, or even a fellow forum member that has done this job before that would be willing to help me out.

I also bought a new flexplate, but I figure a transmission shop can help me out with that.

I'd also really like to have the whole truck gone over and see whatever else I need to do to make sure I'm as safe as possible during my trek back home.

Hope this post doesn't come off annoying, I'm just really in a bind and want to try to get this done so I can go on this adventure while I have the time.

I'm not looking for cheap or free work either, and I supposed I can travel a ways, as the truck does run fine besides the fuel leak.

I really appreciate it! Thank you!
Try the Mv parts store
 

Rutjes

Well-known member
Steel Soldiers Supporter
359
272
63
Location
Amersfoort, The Netherlands
I kinda mixed things up in my post. Was in a hurry to leave for work.

But check the thread on the installer. Most come with standard thread, but you need fine thread M16. Don't use the original bolt to install the balancer. It will not engage with enough thread and you risk stripping the thread inside the crank.
 
Top