• Steel Soldiers now has a few new forums, read more about it at: New Munitions Forums!

  • Microsoft MSN, Live, Hotmail, Outlook email users may not be receiving emails. We are working to resolve this issue. Please add support@steelsoldiers.com to your trusted contacts.

Was looking for a shop in or near Milwaukee to work on M1008; then did it all myself!

cucvrus

Well-known member
11,474
10,441
113
Location
Jonestown Pennsylvania
The dowel I am referring to is the one that goes in the shaft of the shift down VCV.

I started to notice a few of the pumps I get back from rebuilding have the dowel pin missing for the VCV module. Do NOT remove that dowel pin from the drive flange. Looks like you nailed this job. Good Deal. Glad it worked out for you. The magnet was a great idea. Continue on you are doing excellent.
 

retro_life

Well-known member
243
629
93
Location
Los Angeles, California
Eventually... but I would have to try that to confirm. If you are lucky enough, that plunger was already MIA, after a previous IP transplant...(?)
It would still work without it, just not as designed.

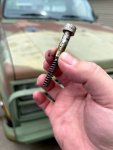
Here is a description from AM-General Co., of what that plunger & spring actually does:

View attachment 836274
GREAT NEWS! The plunger and spring were on the ground right in front of the bumper LOL. I guess I was so excited pulling the IP out that I didn't even notice it fall to the ground. Thank goodness--that was keeping me up last night.

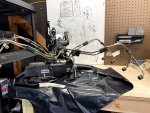
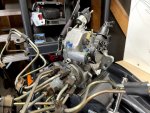
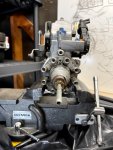
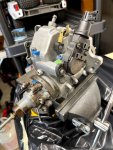
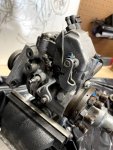
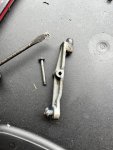
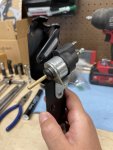
I got the IP and the fuel lines degreased so I'm not making a mess on my brothers work bench. To secure it on the vice I popped off one of the C-clips holding the shaft that holds the little arm that presses down on that plunger when the throttle is open. I've labeled all the fuel lines and I'm going to make a diagram for the connections to the IP before removal.

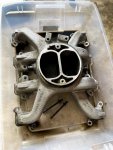
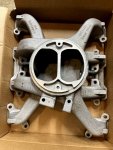
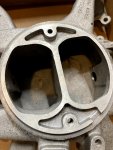
Also started giving my intake manifold a good degreasing.

My new pump is not ready yet, but that's fine because I'm not ready to install it anyway. I've got a lot of cleaning to do, and I may also change those coolant gaskets @cucvrus was advising me to change since I'm right there. I may need some pointers for that.

Thanks everyone for the help! Will report back as I go.
 

Attachments

Last edited:

gringeltaube

Staff Member
Super Moderator
Moderator
Steel Soldiers Supporter
6,996
2,572
113
Location
Montevideo/Uruguay
GREAT NEWS! The plunger and spring were on the ground right in front of the bumper LOL. I guess I was so excited pulling the IP out that I didn't even notice it fall to the ground. Thank goodness--that was keeping me up last night.
Glad to hear you found it! Some call it good luck - I prefer terms like "Divine Intervention".... ;)

Good job, so far. Keep it up!
 

retro_life

Well-known member
243
629
93
Location
Los Angeles, California
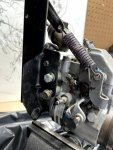
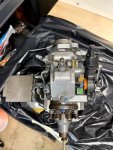
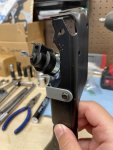
I went ahead and made a diagram of the orientation of the fuel lines to the IP and removed them. I also removed the throttle cable bracket and noticed that the two screws are different. One has a flanged head and the other has a washer. Is that how it's supposed to be or should I source some new matching bolts? Now that I'm putting all this effort into it I want it to be perfect :D

Thanks so much
 

Attachments

retro_life

Well-known member
243
629
93
Location
Los Angeles, California
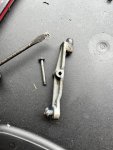
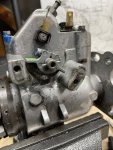
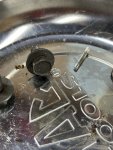
The dowel I am referring to is the one that goes in the shaft of the shift down VCV.

I started to notice a few of the pumps I get back from rebuilding have the dowel pin missing for the VCV module. Do NOT remove that dowel pin from the drive flange. Looks like you nailed this job. Good Deal. Glad it worked out for you. The magnet was a great idea. Continue on you are doing excellent.
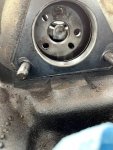
Is this what you are referring to?
 

Attachments

gringeltaube

Staff Member
Super Moderator
Moderator
Steel Soldiers Supporter
6,996
2,572
113
Location
Montevideo/Uruguay
I went ahead and made a diagram of the orientation of the fuel lines to the IP and removed them.
You may want to take a look at the attached PDF file... Find exactly that diagram (page 41)... and a lot more info (I mean everything!) about these pumps.
 

Attachments

retro_life

Well-known member
243
629
93
Location
Los Angeles, California
You may want to take a look at the attached PDF file... Find exactly that diagram (page 41)... and a lot more info (I mean everything!) about these pumps.
Nice, that will be my reading for tonight when I get home. I was able to put those numbers on the picture with my phone and it only took a minute so there was not much time lost LOL. I'm new to this but I'm just trying to be extra thorough :D
Thanks so much
 

retro_life

Well-known member
243
629
93
Location
Los Angeles, California
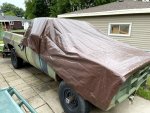
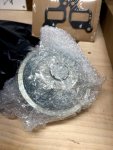
Well there's a storm coming, so I covered her up for the night. Some goodies came in today, too!
I know I probably didn't need that new vacuum diaphragm but I thought it would be a good idea to just swap it out with a brand new unit.
 

Attachments

Skinny

Well-known member
2,130
490
83
Location
Portsmouth, NH
Nice work!

4L80 is cake, even more so with a 208 tcase. Moving the crossmember, shift linkage, and tcase linkage is just redrilling and extending rods. No rocket science.

Controller is pretty simple. Hardest part is choking dowm the cost of a TPS sensor for the DB2 pump. This is way easier then a 6L80 swap.

I get it, the GCOV on the surface looks easier and probably is. Just remember you are losing out on a major piece of it which is the converter lockup. The TH400 although strong is very inefficient. Both require driveshaft refit although only one in that case.

Either way you go I'm sure you are going to enjoy having a more usable older truck. I love how my 84 Suburban cruise at 85mph without breaking a sweat. Just make sure you are happy with your $4k investment in overdrive purchasing. Don't take it as me being instigating because I have a differing opinion then others.

I'm glad you tackled your IP replacement. One less truck to be murdered by a repair shop!


Sent from my SM-T380 using Tapatalk
 

cucvrus

Well-known member
11,474
10,441
113
Location
Jonestown Pennsylvania
May I recommend that you change the rear coolant gaskets also. Since the heads are interchangeable right for left the coolant passages are also on the rear heads. One is just a blank cover plate and the other houses the glow plug temperature sending unit. Show a picture of which sending unit you have. They make an updates one with a better connection if you have the OEM one still attached. Also after you have the injection pump installed and are trying to bleed the air out. I would remove all 8 glow plugs. It helps spin the engine quickly and is less strain on the starter and batteries. Just a tip. After you see fuel dripping from the loose nozzle nuts you can reinstall the glow plugs and attempt a normal start. Good Luck. I think you need to replace the vacuum pump gasket and the air filter gasket at the base of the air filter to intake housing. Fel Pro makes these gaskets also. But if you are in a pinch a little Permatex will do the vacuum pump and you can fly without the housing gasket. Just a thought. Do it right the first time and spend time and money where needed. Looking forward to the next report. Thank you.
 

cucvrus

Well-known member
11,474
10,441
113
Location
Jonestown Pennsylvania
And I forgot to answer. The small pin I am referring to is the pin that activates the plastic vacuum control valve. It has 2 hose connections on it and controls the transmission shift. That little hatched pin has been missing on a few pumps. Retain that pin just in case. Good Luck.
 

cucvrus

Well-known member
11,474
10,441
113
Location
Jonestown Pennsylvania
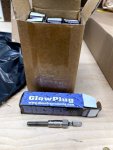
And the glow plugs you pictured will require you to replace the female spade connectors on the wiring harness or making a small adapter with 3/16" male spades to 1/4" female spades. I would make the adapter. I always use and have for over 27 years the AC Delco 13G glow plugs. Never looked back. They worked tried and true. Good Luck.
 

retro_life

Well-known member
243
629
93
Location
Los Angeles, California
May I recommend that you change the rear coolant gaskets also. Since the heads are interchangeable right for left the coolant passages are also on the rear heads. One is just a blank cover plate and the other houses the glow plug temperature sending unit. Show a picture of which sending unit you have. They make an updates one with a better connection if you have the OEM one still attached. Also after you have the injection pump installed and are trying to bleed the air out. I would remove all 8 glow plugs. It helps spin the engine quickly and is less strain on the starter and batteries. Just a tip. After you see fuel dripping from the loose nozzle nuts you can reinstall the glow plugs and attempt a normal start. Good Luck. I think you need to replace the vacuum pump gasket and the air filter gasket at the base of the air filter to intake housing. Fel Pro makes these gaskets also. But if you are in a pinch a little Permatex will do the vacuum pump and you can fly without the housing gasket. Just a thought. Do it right the first time and spend time and money where needed. Looking forward to the next report. Thank you.
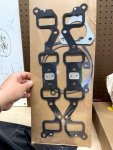
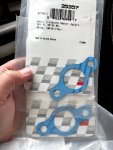
I will do all these things for sure. Are the rear coolant passages a different gasket than the 35357? If so, would you happen to know what the part number for those are? And also the vacuum gasket? I did get some new intake gaskets in my gasket kit I already have, I posted a picture of it above. Not sure if any of the gaskets you're referring to are in that pack.

And I forgot to answer. The small pin I am referring to is the pin that activates the plastic vacuum control valve. It has 2 hose connections on it and controls the transmission shift. That little hatched pin has been missing on a few pumps. Retain that pin just in case. Good Luck.
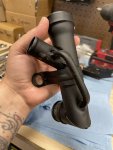
OK, I was not sure where I was even supposed to be looking to find this dowel. I will go try to look for it right now when I go to the garage. Do I have to remove that black plastic part with the two barbs on it to get access to it?

And the glow plugs you pictured will require you to replace the female spade connectors on the wiring harness or making a small adapter with 3/16" male spades to 1/4" female spades. I would make the adapter. I always use and have for over 27 years the AC Delco 13G glow plugs. Never looked back. They worked tried and true. Good Luck.
These glow plugs are supposed to have the smaller spade connector for CUCV, but if I have to make some adapter that's not a problem.

Thanks for all your help through this. I'm a one man show with this whole job so any help or tips really go a long way. I stayed up late last night degreasing more parts in the garage. You could eat out of the intake manifold now LOL.

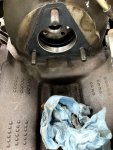
Right now I'm going to spend some time degreasing the engine where the IP and manifold covers. That way it will already be cleaned up when I go to start installing.

Please let me know about the gaskets so I can go run to get those, too.
 

Attachments

Last edited:

cucvrus

Well-known member
11,474
10,441
113
Location
Jonestown Pennsylvania
I will do all these things for sure. Are the rear coolant passages a different gasket than the 35357? If so, would you happen to know what the part number for those are? And also the vacuum gasket? I did get some new intake gaskets in my gasket kit I already have, I posted a picture of it above. Not sure if any of the gaskets you're referring to are in that pack.
Answer. Yes you need a total of 4 and they are all the same gaskets with the part number I listed and you showed me.

OK, I was not sure where I was even supposed to be looking to find this dowel. I will go try to look for it right now when I go to the garage. Do I have to remove that black plastic part with the two barbs on it to get access to it?
Answer. Yes the cross pin dowel is on the throttle shaft. You need a 3/8" socket or wrench to remove that VCV. Retain that valve and you can see the marks where it was adjusted and attached. Place it loaded back in that position when you reattach it to the rebuilt injection pump.

Lets get busy getting the water gaskets swapped out and go forward from there. You are doing a fantastic job. Report back anytime. I look forward to it. Stay positive and you will get positive results. No hack jobs allowed.
 

retro_life

Well-known member
243
629
93
Location
Los Angeles, California
Answer. Yes you need a total of 4 and they are all the same gaskets with the part number I listed and you showed me.


Answer. Yes the cross pin dowel is on the throttle shaft. You need a 3/8" socket or wrench to remove that VCV. Retain that valve and you can see the marks where it was adjusted and attached. Place it loaded back in that position when you reattach it to the rebuilt injection pump.

Lets get busy getting the water gaskets swapped out and go forward from there. You are doing a fantastic job. Report back anytime. I look forward to it. Stay positive and you will get positive results. No hack jobs allowed.
Got it!

I’ll go pick up two more of those gaskets in a bit and drain the coolant.

Can you please give me a run down on the procedure to drain the radiator?
I don’t wanna mess anything up.

Thanks!
 

Attachments

Last edited:

cucvrus

Well-known member
11,474
10,441
113
Location
Jonestown Pennsylvania
The petcock is at an awkward position. I would et a piece of 3/8" rubber hose and attach it to the petcock. Put a little grease in the end and slip it over the petcock drain pipe. That drain is on the drivers side bottom of radiator. I use a box wrench and loosen the petcock. After it is thoroughly drained and you discover a mutilated petcock. Use a 9/16" line wrench and remove that petcock and replace it. Or after it drains remove the petcock and clean it. But when you have all the coolant drained peer in the radiator and take a look at the cores. Do the have sludge and corrosion. Maybe a coolant cleaning is needed before refilling. Anti freeze can become very acidic. Good Luck.
 

retro_life

Well-known member
243
629
93
Location
Los Angeles, California
The petcock is at an awkward position. I would et a piece of 3/8" rubber hose and attach it to the petcock. Put a little grease in the end and slip it over the petcock drain pipe. That drain is on the drivers side bottom of radiator. I use a box wrench and loosen the petcock. After it is thoroughly drained and you discover a mutilated petcock. Use a 9/16" line wrench and remove that petcock and replace it. Or after it drains remove the petcock and clean it. But when you have all the coolant drained peer in the radiator and take a look at the cores. Do the have sludge and corrosion. Maybe a coolant cleaning is needed before refilling. Anti freeze can become very acidic. Good Luck.
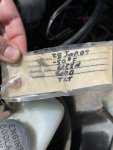
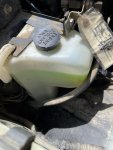
im taking a look at it right now, and I know I can do it but looks like a pita. The coolant was inspected in 2009 and is tagged that it was in good shape. What do you think?
Is it possible to change the gaskets without draining the system?
 

Attachments

retro_life

Well-known member
243
629
93
Location
Los Angeles, California
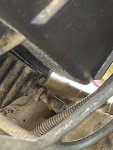
This the drain bolt right there? I’m trying to locate everything you’re talking about. If the petcock gets mutilated is it a standard part I can find at Napa? I’ll feel better about doing this once I see everything that’s going on and understand the process. Sorry for being annoying I’m just kinda learning as I go with all this.
 

Attachments

vanaisa

Well-known member
267
356
63
Location
Tallinn, Estonia
12 year old coolant must be changed. It is not french wine. But when you drain coolant from radiator, there still left lots of it in engine.
But great reading, great job!
 

retro_life

Well-known member
243
629
93
Location
Los Angeles, California
12 year old coolant must be changed. It is not french wine. But when you drain coolant from radiator, there still left lots of it in engine.
But great reading, great job!
Yeah I realized that after I thought about it. I just had a minor freak out doing all this stuff I’ve never done before lol. I’m looking in the TM manuals for a procedure with detailed diagrams on draining the coolant but I haven’t found it yet. I just don’t wanna mess anything up and create more problems since everything has been going fairly smooth so far.
 
Top
AdBlock Detected

We get it, advertisements are annoying!

Sure, ad-blocking software does a great job at blocking ads, but it also blocks useful features of our website like our supporting vendors. Their ads help keep Steel Soldiers going. Please consider disabling your ad blockers for the site. Thanks!

I've Disabled AdBlock
No Thanks