tburk49760
Member
- 398
- 10
- 18
- Location
- spokane washington
Yes! Awesome work! More about the crawl thru please!
Steel Soldiers now has a few new forums, read more about it at: New Munitions Forums!

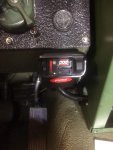
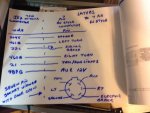 I am down for now had back surgery so can't twist or bend so I lengthened my two trailer receptacles in house today cause I added 20" to frame length and with spare and air filter removed I can have a 16 foot camper when going over wiring I notice that the seven pin connector can be replaced with a standard 7 pin civi connecter like the one that goes on goose necks and RV s . The only thing that not correct is the reverse power and electric brake part you can hook up the electric brake wire but you will need a heavy reostat to be able to adjust the electric brakes will post that later! Also all the outputs on this connector is 12 volts dc!
 When I can walk again I will do some detail pictures off crawl through and give measurements the crawl through is nothing special its approx 26x 26 that's about as big as you can go there will be two separate doors one on cab and one on camper both open inward toward roof with gas shocks, there will be an inflatable boot between the cab and camper which is approx 5 inches apart that way the cab can ride on cab shocks and still bounce up and down but still keep a semi seal when crawling through. The cab will have a louver on it that goe from one inch in front near glass to the Height of camper in rear and will also go slightly over camper to stop direct rain onto crawl space doors sort of like I wind lover you see on 18 wheelers. it will also open on top and a ladder will fastened to side of cab for access for this can used for light weight storage and or secondary air conditioner if needed.Yes! Awesome work! More about the crawl thru please!
Take time and recover well. Did they go thru the front or back to reach things?View attachment 664711I am down for now had back surgery so can't twist or bend so I lengthened my two trailer receptacles in house today cause I added 20" to frame length and with spare and air filter removed I can have a 16 foot camper when going over wiring I notice that the seven pin connector can be replaced with a standard 7 pin civi connecter like the one that goes on goose necks and RV s . The only thing that not correct is the reverse power and electric brake part you can hook up the electric brake wire but you will need a heavy reostat to be able to adjust the electric brakes will post that later! Also all the outputs on this connector is 12 volts dc!
marty


I went with the 7 spade because its the most common used its on rvs and goose neck trailers I had to lengthen wires any way that's why I went with the common connector. Not sure what you meant by front or back!Take time and recover well. Did they go thru the front or back to reach things?
as to the 12v 7 vehicle connector... thought that was standard large 7 pin plug? here one diagram on 7pin or should I say seven spade?
View attachment 664717
Here is 7 round pin on vehicle
View attachment 664718
These guys have a lot of adapters if you don't want to rewire. https://www.etrailer.com/dept-pg-Wiring-sf-Wiring_Adapters.aspx
Some spinal surgeries the procedure is done thru the front of the body by snaking around organs in the gut to reach the spine while are done by cutting thru the back muscles for direct access. Then again suspect some are done arthroscopically.... Not sure what you meant by front or back!
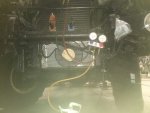
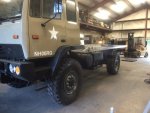
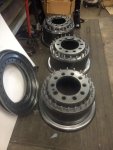
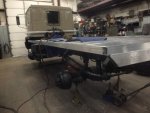
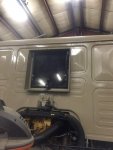
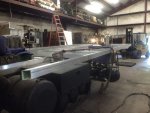
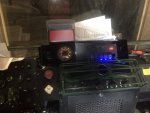
I actually thought about that idea,very much for a while and found that yes you can put the door behind one of the seats and have more area to (walkthru/crawl) the door would be to large to open behind the seat properly I also thought of making the door two piece where it would fold onto itself, but then that got to complicated! I wanted the door when open to be hinged on top that way when its open its flush with roof and out of the way.Was thinking of crawl thru space the other day... while it is traditional to go thru the center..... why not make it thru the area behind the driver or passenger seat? Sure then you have to crawl over the hump to get to next spot in our particular trucks design but that would not be as difficult as crawling thru a small door maybe?
Your project looks good. Glad to hear you're recovering well and getting back to life again.
Now that you are up and about, do you mind providing more info and pictures?How did you add 20"? Can you show the joint you created?
Also, I second the more detail on crawl through.
Thanks
Sent from my iPhone using Tapatalk
Awesome work so far. I am enjoying watching the build.
Now that you are up and about, do you mind providing more info and pictures?
Sent from my iPhone using Tapatalk
here is an idea for a small door. It is on a larger 14.5 foot ambulance box. Box was on a Freightliner. One this size might be able to open.I actually thought about that idea,very much for a while and found that yes you can put the door behind one of the seats and have more area to (walkthru/crawl) the door would be to large to open behind the seat properly...
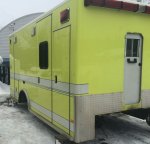
I decided to go in middle because there will be a small bed/cot that goes across behind seats to lay on if you don't want to go in camper for kid if needed, still haven't figured out that seat belt yet, also the off center door would have to be 16 inches or less wide because that's the measurement from the back wall to the back of the seat unless you remove seat or make it slide way forward. I went with 26 inches because that's what my shoulder to shoulder measure is.here is an idea for a small door. It is on a larger 14.5 foot ambulance box. Box was on a Freightliner. One this size might be able to open. View attachment 670848
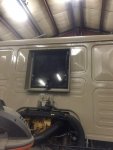
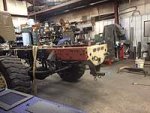
Thanks for clarifying.On the frame extension you basically remove all the screws that hold the hitch assembly in place I did this by using a plasma cutter and a metal cutting disc on a minny grinder the bolts don't come off you have to cut them off, I had some frame material left over from the front end of a m923 that is almost the same exact size as the lmtv so I beveled all parts welded with low hydrogen rod, and also bolted a 1/2 by 6 flat bar inside of channel also 2 feet past the splice on both sides, its is also impossible to drill the frame rail on the LMTV have to buy a special hardened 5/8 carbide drill bit and reuse holes if possible about 20 bolts 5/8 grade 8. As for the crawl through it to is 26x 26 inches I cut the hole as seen in the pictures welded 1/8 flat bar to cab inside and out tapering the top and bottom flanges down slightly so water couldn't enter I made the door out of 1/8 aluminum with a 1 inch sub wall and foam filled it. The latch is the same as on my M4K forklift which you see on many tractors loaders etc, got it off of Ebay, you have to be able to open from inside and outside for when you are coming from cab to camper and vise versa. I dont have any picture of the frame extension in progress just finished.View attachment 670844
View attachment 670846
Yeah thinking the option of a bed there too. Doesn't passenger seat tilt forward? Would give plenty room for the door to open that way? Maybe Cab door have half folded up inward toward roof as you're doing now but lower half slide toward ground.... or.. bottom half also inward but lay down to floor? What about barn door that slides to the side that is mounted on back side of the cab? hmmm no guess that won't work.... never mindI decided to go in middle because there will be a small bed/cot that goes across behind seats to lay on if you don't want to go in camper for kid if needed, still haven't figured out that seat belt yet, also the off center door would have to be 16 inches or less wide because that's the measurement from the back wall to the back of the seat unless you remove seat or make it slide way forward. I went with 26 inches because that's what my shoulder to shoulder measure is.
We get it, advertisements are annoying!
Sure, ad-blocking software does a great job at blocking ads, but it also blocks useful features of our website like our supporting vendors. Their ads help keep Steel Soldiers going. Please consider disabling your ad blockers for the site. Thanks!
