• Steel Soldiers now has a few new forums, read more about it at: New Munitions Forums!

  • Microsoft MSN, Live, Hotmail, Outlook email users may not be receiving emails. We are working to resolve this issue. Please add support@steelsoldiers.com to your trusted contacts.

What did you do to your deuce this week?

pitpawten

Active member
259
199
43
Location
Centreville, Maryland
Picked up a spare windshield with frame to replace my broken one, picked up an M35A3 aluminum tank, a couple of round mirrors, a battery box (had 2x4s before), a hood retainer and some front bumper shackles to go on the bottom of the bumper.

Also drove it in the rain and realized the windshield seals are COMPLETELY gone :)
 
Last edited:

fpchief

Well-known member
1,041
220
63
Location
South Alabama
Cumulative up to today in getting ready for paint. Interior done! Exterior is all sanded and taped. If pollen is not blowing too bad tomorrow, I plan on teaching myself the art of and spraying the deuce.

After having most of the interior ripped out for the transmission job, I said what the ****, I will just paint it now.
 

The Stig

Member
69
2
6
Location
North GA.
Thanks to everyones research and information posted I changed out my Fuel return and supply lines. Sure I could have just gone by the TM, but everyones input was invaluable.

IMG_2036.jpg
 

Chairbornrangerx

New member
25
1
0
Location
Michigan
In an effort to help out the rough starting, and since I'm the newest owner of this 67 I am doing all the filters/fluids so I know the stuff is fresh. Then I can turn my focus on to performance and tuning. This was the primary fuel filter contents... There was also an inch or two of goodness in the bottom of the first secondary fuel filter. Still starts hard, needs to crank a bit with the peddle to the floor before she wants to kick over. I think my next step is to clean the IP.

primary fuel filter.jpg
 

pitpawten

Active member
259
199
43
Location
Centreville, Maryland
Today I cleaned out the A3 aluminum tank that I picked up. I first drained about 5 gallons of off road diesel that was still in there from the previous owner (only spilled 1/2 of it : ) and then took out the supply tube (not sure what it's called but the A3 tank does not have a in tank pump) and sending unit.


I then reached in all the way to my shoulder and wiped the entire inside of the tank down with paper towels rinsing every once in a while with a little extra diesel. It was a bit tight especially reaching on the other side of the baffle but I've got long arms and was able to get the inside of the tank pretty darn clean I think. Probably has something to do with it being a newer tank and being aluminum but looks like it worked out pretty well.


I also ordered the last 4 inch locking fuel cap that I could find from MyothersanM1 in the classifieds. I sprayed it up flat black to match that part of the tank and it works really well


Going to order up the proper gaskets for the fuel sending unit as well as the in tank pump and move those from my A2 tank which should bolt right up to the A3 tank. From what I read I probably need to get a couple of longer bolts so that my A2 straps will go all the way around the A3 tank but that oughta do it.

One thing I will add I'm really glad that I didn't put anything in the tank like sand or gravel because just feeling how big of a pain it was to wipe out all of the existing grit, would not have wanted to fill it up with any more. Would have exponentially increased the amount of wiping/flushing. Could be different in a steel tank but for this tank the hand wipe was definitely the best option.
 

The Stig

Member
69
2
6
Location
North GA.
I did a lot of digging on that, I wanted to go clear just so I could keep up with any air in the lines and after some research I ended up going with a clear nylon tubing from McMaster. It got a A rating for compatibility with Diesel.

High-Strength Clear Nylon Tubing .190" Id 1/4" Od, .030" Wall Thickness Bend Radius 2 3/4" Max PSI at 75ft 410 Temp range of -40 to 212 F.
part number 8359K14

High-Strength Clear Nylon Tubing .295" Id 3/8" Od, .040" Wall Thickness Bend Radius 3 3/4" Max PSI at 75ft 400 Temp range of -40 to 212 F
part number 8359K16

Chemical compatibility chart.

http://www.mcmaster.com/#9355tac/=11nni82
 

goodwithwood35

Active member
Steel Soldiers Supporter
327
51
28
Location
Bakersfield, CA
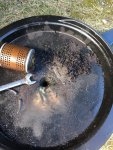
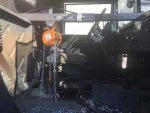
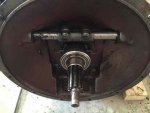
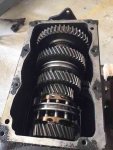
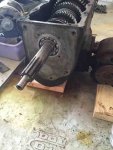
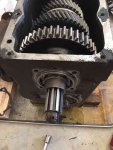
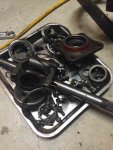
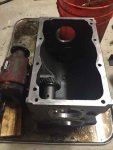
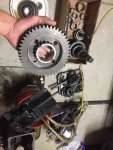
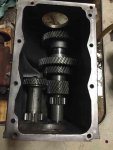
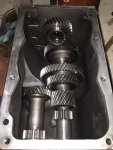
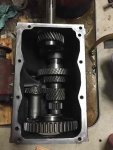
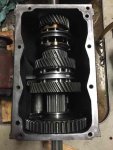
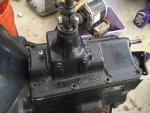
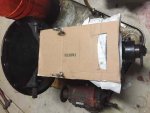
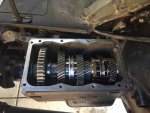
Well, I'm now a proud owner of a 0.69 geared transmission! Finished the job mid last week and have been driving and playing with the fuel adjustment. Main goal for the project was to lower my RPMs but still achieve 60-65 MPH. Just enough to pass a rig on the highway, not to hot rod around all that much. So far running about 900-950 cruising at 65 on flat land unloaded, 2200 RPM. Here are some pics of the build:

Upgrading to Airshift TC

ImageUploadedByTapatalk1458698143.017871.jpg

Disassembling the clutch components

ImageUploadedByTapatalk1458698331.577220.jpg

Main shaft before I pulled it

ImageUploadedByTapatalk1458698384.970474.jpg

Pulled the clutch bell housing off the case

ImageUploadedByTapatalk1458698480.120417.jpg

Rear of the trans taken apart

ImageUploadedByTapatalk1458698561.077444.jpg

Pile of parts-external case components

ImageUploadedByTapatalk1458698622.658903.jpg

Shafts removed and case cleaned up

ImageUploadedByTapatalk1458698701.948528.jpg

New second gear with oil passages, now ready to begin the build

ImageUploadedByTapatalk1458698800.315063.jpg

Countershaft completed and installed

ImageUploadedByTapatalk1458698851.740920.jpg

Input shaft installed

ImageUploadedByTapatalk1458698949.139954.jpg

1st/reverse gear set in the case

ImageUploadedByTapatalk1458698985.908575.jpg

Completed main shaft installed in the case

ImageUploadedByTapatalk1458699038.702015.jpg

Top cover back on temporarily to test the shifting out

ImageUploadedByTapatalk1458699106.869358.jpg

Installed lift hooks and a cardboard protector to prevent junk from falling into the case during installImageUploadedByTapatalk1458699157.578379.jpg

Back in the truck, add oil right through the top of the caseImageUploadedByTapatalk1458699231.531839.jpg

Painted cab and cleaned up the gauges while it was all taken apartImageUploadedByTapatalk1458699287.960803.jpg

Had to adjust the clutch some after revisiting the TM.

Pretty much all went by the book and reading Tom Bauer's site. Excellent instructions!
 

rustystud

Well-known member
9,266
2,962
113
Location
Woodinville, Washington
The clear tubing looks pretty cool. Though you really didn't need to worry about air in the lines as those are the return lines. It will not tell you if your injection lines have air in them.
 
Last edited:
Top
AdBlock Detected

We get it, advertisements are annoying!

Sure, ad-blocking software does a great job at blocking ads, but it also blocks useful features of our website like our supporting vendors. Their ads help keep Steel Soldiers going. Please consider disabling your ad blockers for the site. Thanks!

I've Disabled AdBlock
No Thanks