• Steel Soldiers now has a few new forums, read more about it at: New Munitions Forums!

  • Microsoft MSN, Live, Hotmail, Outlook email users may not be receiving emails. We are working to resolve this issue. Please add support@steelsoldiers.com to your trusted contacts.

What did you do to your deuce this week?

tobyS

Well-known member
4,832
833
113
Location
IN
Just made the spring pack of the m105 spring for the rear of the M35A3 4x4, less stiff. I took the spring pack apart and removed four leafs, leaving 7. I have air bags coming that will mount on top of the spring directly above the axle CL and shocks will go inside the frame to the axle (not sure on 2 or 4). Had to get 3/8" x 4" socket heads to replace the bolts in the pack. Taking the spring pack apart is not near as hard as I expected, with a good C-clamp. I kept all the leafs with the alignment clamps riveted on.

Only one more part to make for the perch from 1/2" plate and then will order the 3/4" U-bolts. The perch has about a 3 degree taper to bring the pinion angle to about 2 degrees. Perch will be about 4" high. I estimate I removed about 25% of the spring and hope empty I will have enough movement for the shocks to work. Will post some pictures when all parts of these springs and axle perch are finished.
 
Last edited:

Mrmag1

Head of Stuff N' Things
Steel Soldiers Supporter
602
13
18
Location
Hereford Arizona
IMG_20190309_103223.jpg
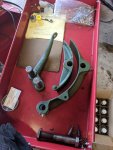
I took my old rusted nasty parking brake shoes and cleaned them up and re painted them for rust protection. Just waiting to put the new liners on them and put it back together.
 

DB556

Active member
200
129
43
Location
Ambridge, Pa
Looked at it longingly as I drove past going to work, hoping for a day I can get the spin on filters on, and bleed the brakes so I can get it inspected and driving....
 

Floridianson

Well-known member
Steel Soldiers Supporter
7,409
2,501
113
Location
Interlachen Fl.
Last edited:

Fatalid

Member
Steel Soldiers Supporter
123
11
18
Location
Mesa, AZ
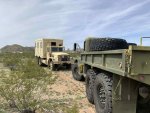
Introduced the two trucks to each other... And then promptly removed the fuel tank from the 109. I'm going to go dual tanks on the 35.

IMG_0882.jpg
 

Kwaligura

Member
Steel Soldiers Supporter
98
1
8
Location
Adena, Ohio
Replaced the water pump, both drive belts. Drivers door would not open from the outside. I figured the tang was bent just like everyone else said but the end of the handle square rod was rounded off. Built it up with weld then ground it square again. Put the latch assembly back in. Put the window back in. Went for a drive. Then remembered that the plates were on the other one. I'm going out to change them now.
 
Last edited:

77 AMG

Active member
403
62
28
Location
Owingsville, KY
Painted the front bumper yellow, so that when it heads home, even Darryl Freaking Issacs, "The Hammer", (TV ambulance chaser) can't win the case if some jack-n-apes decides to pull out in front of me, and then says, "I didn't SEE the truck!" Dark colored truck, YELLOW bumper, at head level of most cars out there..... Black unit markings will be applied at a later time.
 

davidb56

Well-known member
1,020
1,237
113
Location
Bonners Ferry Idaho
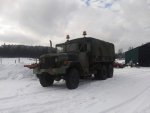
drove it home from the trucking company that picked it up. the guy I bought it from threw in all kinds of stuff including the compressor belt replacement tools and belt, filters, O-rings, 4 complete manuals, LED spot lights, LED tail lights, cold weather cover for the front. 20190313_164525.jpg
 

rustystud

Well-known member
9,259
2,943
113
Location
Woodinville, Washington
Yep would seem be the best way but in the thread it talks about it. .https://www.steelsoldiers.com/showt...-axle-flanges&highlight=brass+bushing+for+hub
Well it read the whole thread and still believe like so many others do that is needs a bushing there. There is only one bushing in that housing to hold that shaft, so the end of the shaft will droop down and rub on that spinning wheel hub. You could machine out enough material to prevent this but then the housing might split in two from all the material removed !
Also never put two hardened surfaces together !!!! Not unless there are ball bearings separating them. You always put a softer material against a harder one. That way you can always replace the softer one (bushing) when it wears out, and not have to replace both the shaft and the hardened bushing.
Good read though. Thanks "Floridianson" for sharing.
 

Sparkyz911

Active member
65
61
33
Location
Central IL USA
Headlight upgrade

Last week it was the cargo bed lights. This week it was headlights. Had a car nut/Jeeper friend cleaning out his garage. He found these knock off JW speaker 8700 LED lights (multi-volt 12-28vdc) and handed them off to me. Haven't had a chance to see the beam pattern at night yet.


640x480 20190315_113608.jpg
 

Mrmag1

Head of Stuff N' Things
Steel Soldiers Supporter
602
13
18
Location
Hereford Arizona
IMG_20190315_113354.jpg
IMG_20190315_113337_1.jpg

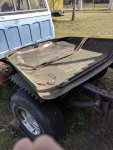
I don't like my hood hinges bleeding rust so I took off the hood and took apart the hinges and cleaned/ painted everything.
 

davidb56

Well-known member
1,020
1,237
113
Location
Bonners Ferry Idaho
drilled exhaust manifold and tapped it at 1/8 inch NPT, installed EGT thermocouples, wired it up. The pod they sent doesn't hold the gauge properly, so they are sending another type. replaced the compressor belt and both alternator belts. removed the flame heater and plugged the manifold, installed the block heater in the water pump housing (400wt) replaced the lower radiator hose. tomorrow I'll inspect the thermostat and maybe replace it.
 
Last edited:

davidb56

Well-known member
1,020
1,237
113
Location
Bonners Ferry Idaho
tested thermostat, put it back. bypassed FDC. had a heck of a time getting parts as our Napa doesn't carry much of anything. I ended up pulling the 45 out of the HH and installing a 45 air brake fitting with the sleeve built into the fitting, instead of a separate piece like the one I removed, then on the filter end I did the same but with a 90 that I got from Carquest.Two trips equals 80 miles...... put in 3 feet of line so it would be out of the way during filter changes. opened the bleeder, turned on the power for a few seconds, shut the bleeder and fired it up. EGT was around 325-360 no load. I didn't have time to test drive it yet.
 
Top
AdBlock Detected

We get it, advertisements are annoying!

Sure, ad-blocking software does a great job at blocking ads, but it also blocks useful features of our website like our supporting vendors. Their ads help keep Steel Soldiers going. Please consider disabling your ad blockers for the site. Thanks!

I've Disabled AdBlock
No Thanks