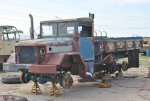
Okay, at this point in time, I have more tools and material laying around than I do money. I know I'm the ONLY ONE that has ever happened to, right?

And I have some time, so I fixed my soft top today. Blasted leading edge stitching came loose, and that plastic J-Channel is a joke. Got tired of searching for a suitable replacement, something pliable and durable. NADA. Looked at modern soft top Jeeps and their methods. That's the ticket.
So let's get busy!


1. Cut a piece of black military grade waterproof fabric 3.5" wide x 60" long.
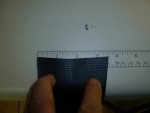
Got the fabric from
www.ahh.biz (had it laying around from another project). BTW- if you are so inclined, these guys have some really nice material to redo nearly anything you want, especially SEATS. Their military grade fabrics/vinyl's are second to none. Got the idea from looking at the fabric used in those tents you see used in weddings, special events, etc. You can order a bunch of swatches for product inspection before you buy. I make my own K9 training tools that require these fabrics and they are very UV proof, waterproof, and SUPER durable. I'm a human dog treat (K9 decoy), and if the stuff I make is durable enough to survive a full on K9 attack, anything you do with your Deuce will too.
BTW- ahh.biz... I have no affiliation with them, just a customer of their products.
Since the original soft tops were canvas and had a rope sewn in the edge, why not replicate that with a new twist?
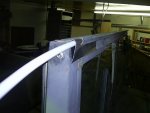
<-- Example of the idea.
2. I folded the black tarp material in half, sewed it with 16 oz nylon black thread along the linear edge.
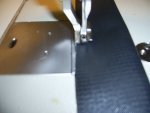
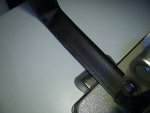
3. Placed a 3/8" x 60" piece of wood dowel inside the fold, sewed another line along the leading edge using the dowel as a guide for the sewing machine's foot to create a loop in the fabric. A 3/8" wood rod gives you wiggle room when you insert the 5/16" plastic/fiberglass rod later on.
Note* I suppose one could do this job with a stout household sewing machine, but later on when you're attaching the lip to the top, you'd better be prepared to have assistance with the feed of the top because it is bulky to work with. At minimum, have a nice table to assist with holding this beast of a top horizontal while you're sewing. Be aware Mama may cut off your _____ if you mess her machine up.
4. Next, sewed several more lines along the piece of fabric to give it additional strength.
5. Removed the 3/8' wood rod.
6. Sewed the fabricated piece along the edge of the soft top, muscled it around, piece of cake.
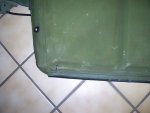
7. Went to Lowe's lumber yard and purchased a 10ft roll of 5/16" flexible nylon water tubing (plumbing section).
8. Tossed the soft top on the hood, turned the top upside down, fed (stuffed) the fabricated edge into the into the C-channel, placed a cardboard apple box under the soft top to assist with holding the darned thing up (No soldier B hanging around!) so I could keep the lip of the fabric at a 90 degree angle vertical inside the C-channel- while I pushed the tubing into the C-channel.
When you try to insert the top, you'll see what I am talking about. It's a bitch to try and insert that edge from any other position other than 90 degrees. For those so inclined, another way to do this is to go to your local motorcycle shop (or Ebay) and buy one of those ATV flags that has the 5/16" rod (NOT 1/4"). Strip the flag, cut to size (measure the length of your C-channel). One note, I would drill a crossways hole in the end of the fiberglass rod so that you can insert a wire loop in it for grabbing onto the rod for removal purposes. Or not, it's up to you.
USE PATIENCE! This can be the proverbial one legged man in an ass kicking contest!
9. Insertion of the nylon tube- this can be the tricky part: to allow for an easier installation, cut the 5/16" plastic /nylon (flexible) water pipe at a 45 deg angle on the leading edge; it helps with feeding!
Start feeding the tube/rod inside the fabricated loop attachment SLOWLY along the C channel on the DRIVER'S side, pushing the loop fabric up into the channel while pushing on the pipe. It can get stiff and stubborn, just keep pushing the loop into the channel and work the tubing. The windshield will use about 5' of the tubing. It's nylon which means it's resistant to vibration, rust, water, etc.
I figured out that if you start on the driver's side, pushing on the nylon tubing- you can have an easier go of it if you insert a 1/4" wood dowel on the passenger side first (or 1/4" steel rod) about 12" deep into the C-channel to hold the soft top's edge in the channel (where the H E C K is soldier B??). This really helps when you're doing this by yourself. 1/4" rod will hold enough of the r/h edge to get the top mounted, but 1/4" is no where large enough in circumference to use as a permanent solution.
IMPORTANT**** the 5/16" stuff is the real secret to getting this crap to fit correctly in that windshield C-channel. Given the thickness of the military tarp fabric, and the 5/16" pipe, it was just snug enough and wouldn't pull out of the C-channel. Don't try 1/4" tubing/rod as the permanent fix, it will just pull out. You gotta use 5/16"!!!
 I can clearly see that in a pinch, say you were trying to recover a soft top rig, a guy could bring a roll of decent hook and loop fabric, mount it on the top edge of the windshield, then duct tape (http://www.tarpsplus.com/tarp-tape.html) the edge from side to side to keep that top down. Hey, duct tape (200 mph tape as they called it) worked on patching cannon and small projectile holes in jets in Desert Storm, why not try it here?
Some of you may ask why I didn't use edge trim (welt) commonly used for boat upholstery and the answer is easy: I wanted to be able to simply pull the tubing out when I get ready to remove the top without having to slide the entire top to the side when removing it from the C-channel. It's actually easier to remove the pipe and the top edge just drops out, than sliding the filled loop all the way across that C-channel risking damage to the loop.
The leading edge is repaired! It's sturdy and will get me by until I can buy a new soft top.
I sprayed some rattle can OD on the soft top to begin eliminating that stupid 80's camo color, but ran out of paint, wasn't much left in the can by the time I got around to the top. Gotta get more! Solid OD Deep Forest Green is the way Mother Nature intended a Deuce to look like. What? you think you're going to actually hide a Deuce with camo? Seriously?

(Now I realize some of you thin skinned types will take issue with my opinion of CARC camo, but guess what? It's my truck, my experience, and I don't give a rat's ass if your feelings are hurt

).
Just make sure you clean the bird dookey, and any grease and dirt from the surface. Wash it with mild Dawn dish soap, it always worked fairly well for cleaning oily OC pepper spray from your eyes while in training, and it's cheap! Another is warm water and some powdered TSP soap and a GI brush. It's got plenty of power to scrub that stuff off. It's what restaurants use to clean grease off their floors.
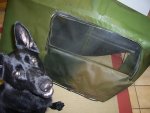
Pic of potential ****bird 'Soldier B'.
Worthless for helping, no opposing thumbs! She won't stop rubbing her snotty nose on my plastic window!

Now I've got to straighten the soft top frame; darned thing is slightly tweaked?

Door glass on driver's side has a gap toward the rear of the cab, I have to measure the tubing to make sure it's equal on each side before I get busy fitting the apparatus.
Or it's crappy alignment of my windshield from the side clamps, we'll see. Time for some MK-5 eyeballin' of the problem. I knew I would have to do this when I bought the truck, time to act!
While this repair is time consuming, it works and is doable with a little patience and ingenuity. If you can't afford to replace the top, this will get you by nicely until the wallet gets fat again.





 (Now I realize some of you thin skinned types will take issue with my opinion of CARC camo, but guess what? It's my truck, my experience, and I don't give a rat's ass if your feelings are hurt

