• Steel Soldiers now has a few new forums, read more about it at: New Munitions Forums!

  • Microsoft MSN, Live, Hotmail, Outlook email users may not be receiving emails. We are working to resolve this issue. Please add support@steelsoldiers.com to your trusted contacts.

What did you do to your deuce this week?

whatadeuce

Active member
Steel Soldiers Supporter
959
38
28
Location
Loxahatchee, Florida
sprung a leak in my M35A2 radiator, its spewing straight out forward, if I cut out some of the fins in that area, perhaps Ill see the hole and solder it. will I succeed?
 

Jeepsinker

Well-known member
5,399
456
83
Location
Dry Creek, Louisiana
Did you use one of the Newstar inner clamps? I found the loops on them that the screw goes through to be a little too large so when you turn the wheel the knuckle pushes it off. I did one on mine three times before I figured that out. You should reuse your old clamp and use a new screw, or buy some N.O.S clamps.
 

welldigger

Active member
2,602
15
38
Location
Benton LA
If you orient the clamp head correctly it shouldn't come off. I put the inner clamp head directly on top of the axle. I have yet to have one pop off. I also replace the screw with a stainless one and add washers on each end to keep the screw head and nut from pulling through the clamp holes.
 

rwminck

New member
71
0
0
Location
Florence SC.
More Progress

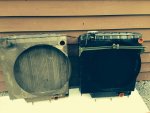
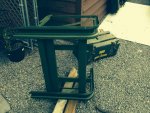
More progress: Battery box mount sand blasted, primed and painted, new radiator is in and no leaks after 30 minutes of running. Odd thing is I bought a NOS from a vendor on the site and it is a bit different than my stock. The bottom studs are about 1" closer to the passenger side than my stock unit. It fits, but I am not real excited about the gaps difference between left and right, but at least is not rusted on the bottom brace..


rad1.jpgbattery.jpg
 
Last edited:

todds112

Member
672
5
18
Location
Teton Valley, ID
Did you use one of the Newstar inner clamps? I found the loops on them that the screw goes through to be a little too large so when you turn the wheel the knuckle pushes it off. I did one on mine three times before I figured that out. You should reuse your old clamp and use a new screw, or buy some N.O.S clamps.
Yup, Newstar junk. I should have reused the old one. If it pops off again it's going in the trash. I did put it right on top at 12 o'clock. Luckily the outer part held its shape and stayed on the outer lip. It was much easier to put back on the second time. I added a lock nut on the bolt too.
 

cattlerepairman

Well-known member
Steel Soldiers Supporter
3,250
3,340
113
Location
NORTH (Canada)
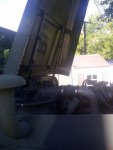
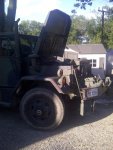
Installed the hood lift - so much easier now to quickly pop the hood for maintenance and also less danger of getting it slamme down by a gust of wind.
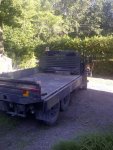
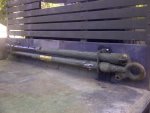
Installed brackets for the medium tow bar on the front cargo bed wall. Out of the way and easily accessible. I figured, the tow bar likes sitting in the dry, warm garage, but a lot of good that would do me if I needed a tow!


IMG-20140907-00532.jpgIMG-20140907-00533.jpgIMG-20140907-00530.jpgIMG-20140907-00531.jpg
 

cx65083

Member
187
4
18
Location
wisconsin rapids, wi
Installed the hood lift - so much easier now to quickly pop the hood for maintenance and also less danger of getting it slamme down by a gust of wind.
Installed brackets for the medium tow bar on the front cargo bed wall. Out of the way and easily accessible. I figured, the tow bar likes sitting in the dry, warm garage, but a lot of good that would do me if I needed a tow!


View attachment 514780View attachment 514781View attachment 514778View attachment 514779
What hood lift's are you using? I'd like to add them to my "get for my deuce eventually" list!
 

cobra5

Active member
219
194
43
Location
Stevensville, Montana
Used mine in the ALS ice bucket challenge. I called it the deuce bucket challenge. Took 3 tarps and duck tape to make a liner and than filled the bed with water and ice. Had myself and three kids sit at the rear of the truck and dropped the tail gate. It may have not been the exact way to do the challenge but it got the point across.
 

wilfreeman

Active member
1,082
7
38
Location
Richburg, SC
Used mine in the ALS ice bucket challenge. I called it the deuce bucket challenge. Took 3 tarps and duck tape to make a liner and than filled the bed with water and ice. Had myself and three kids sit at the rear of the truck and dropped the tail gate. It may have not been the exact way to do the challenge but it got the point across.
Surely you have video! It's not an ice bucket challenge unless you have video.
 

brianp454

Member
572
11
18
Location
Portland, OR
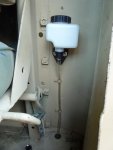
I recently rebuilt all axles, installed new wheel cylinders, a new master cylinder, a take out air pack (new short version I partially disassembled and found to be completely clean inside), and a remote fluid reservoir (from Summit). The last step was the remote reservoir. Up until then I was driving around with the bug sprayer pressure bleeder ran into the top of the master cylinder.

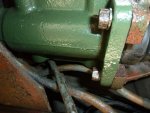
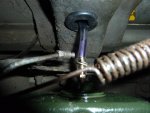
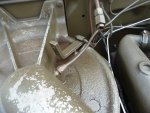
Issue #1 – I’ve noticed what appears to be DOT 5 dripping out of the vent tube that stubs out over the air box. See pic. Anyone have experience with this? Was it due to leaving the pressure bleeder hooked up while driving?

Issue #2 – I’ve noticed a drop of DOT 5 on the bottom of the master cylinder even the morning after pressure washing. I pulled the boot off a couple weeks ago and it was dry, so I think the leak is from the NPT to ¼ inch hose barb fitting on the top of the master cylinder. It could also be coming from my brake light switch, that coincidentally stops working recently. I’ll pull the master cylinder, install the new switch, and give it a good check out.

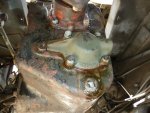
Issue #3 – The transmission has had a steady, slow drip for as long as I’ve had the truck. It seems to be coming from the back lower plate. The gasket seems to be boogered a bit. I have a mind to try and pull the plate and RTV the flange. I’ve never taken one of these apart and would appreciate a bit of advice. I’ll try digging thorough the TM also. I’m hoping the plate comes off to allow a new gasket and the bearing is retained by the transmission housing so I don’t need to get into the guts at all. Any advice?

I’m about to get rid of those #$%^ axle, transmission, and transfer case vents and run a common line up to the cab. I’ve tried cleaning the things think they stick and contribute to my leaks issues.140908 M35A2 Transmission Fluid Leak.jpg140908 M35A2 Brake Fluid on Top of Air Box.jpg140908 M35A2 Brake Master Cylinder Leak.jpg140829 M35A2 Remote Brake Fluid Reservior 1.jpg140829 M35A2 Remote Brake Fluid Reservior 2.jpg
 

Dipstick

Well-known member
1,101
1,267
113
Location
Effort PA
I have the same issues with oil leaks on my transmission and transfer case. I already replaced the seals and gaskets on the upper shafts of both, but I neglected to use any type of RTV on the gaskets and bolts. Big mistake. I'm going to have to pull the short shaft and do it all over again.

I like your brake reservoir setup a lot. A super clean install. I might have to do that myself!
 

Dipstick

Well-known member
1,101
1,267
113
Location
Effort PA
I installed a zipper boot on the driver's side. I had already done the passenger side. The original zipper boot was not clamped to the knuckle which allowed water and road salt in. It had crystallized under the boot by the lower kingpin bushing. Getting the inside clamp on was not too bad, but after hours of trying to get the out lip of the boot to stay in place so I could clamp it, I gave up.
I texted my son "Soldier B" and he came by after work. We had it on and clamped in ten minutes. Thank God for Soldier B.
 

FloridaAKM

Well-known member
2,699
392
83
Location
Gainesville, Florida
I bought new rifle holder kits so that when the weather cools off & quits raining; there can be some new military rifle holders added to the cabs interior. When the coyotes start howling, I can go get some target practice in. Beats putting them in the rear window on a a standard horizontal window bracket.
 

BBQROD

New member
255
-13
0
Location
Gray Georgia
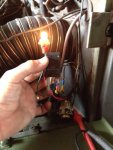
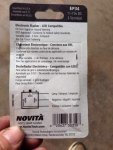
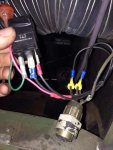
I was out and about and I noticed I had no blinkers. Hmmm? So I checked a few things and found out it was a bad flasher. So I popped in to a few local parts store and got the same reply 3 times nope can't help ya.

So I went down the electronic isle and grabbed a electronic 12v flasher (3 prong) and a dash light socket with bulb and a couple of wire taps. You hook everything up as directed but when you hook up the ground you put the light in line. This helps absorb the extra 12 volts that the flasher doesn't need. Presto got blinker!ImageUploadedByTapatalk1410714068.033637.jpgImageUploadedByTapatalk1410714094.148814.jpgImageUploadedByTapatalk1410714135.300201.jpg
I left the OE plug in place so I can put it back factory later.
 
Last edited:
Top